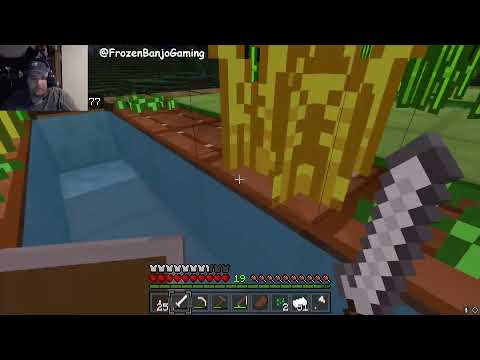
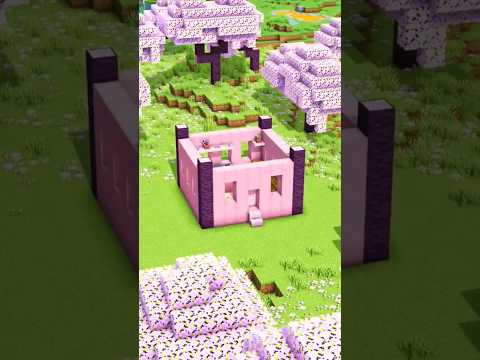
Hello hello hello everyone and welcome back to another Minecraft video my name is shells and today we are going to be talking about the hardest thing for you to build in the entire Cathedral that’s right today we’re going to be talking about the Chevy okay that’s not what you’re expecting Um but the Chavez is what encompasses the apps the ambulatory and all of the Chapels that radiate out from the ambulatory before we begin here I should probably tell you about the standard layout of a cathedral so that way you know what I’m talking about here basically the cathedral is laid out in The shape of a crucifix or a cross when viewed from above but the cross is oriented so that way it faces east to west with the entrance and bell towers on the western side of the building and the top of the cross on the Eastern side they are positioned this way because it Is said that during the second coming Christ will approach from the East so when a person enters the cathedral they are facing towards the direction of Christ then we’ve got the Nave here where all of the pews are this is where people sit there are aisles on either Side for people to walk around view the stained glass windows and find their seats all of this eventually meets up at the center Crossing Point here on either side of the crossing are the transepts with additional entrances on either side then we have the choir which is where The clergy sits and finally we get to the part that we’re going to be talking about today which is the Chauvet Chauvet derives from the French word meaning the head and refers to the fact that on the cross this is the part where the head goes the Chauvet refers to the entire Section that caps off the end of the cathedral and is made up of the apps the ambulatory which is just an extension of the aisles going around the main apps and radiating chapels that come out from the ambulatory now keep in mind when you’re designing a cathedral That not all cathedrals have the full Ensemble that make up the Chauvet a cathedral could just have an apps or it could have an apps and an ambulatory without the Chapels or it could have all three and especially if you are looking to simplify your Cathedral the ambulatory In particular is the hardest thing to build here so you might want to give it a Miss if you don’t think you’re up to the task but I’m going to go ahead and show you how to build all three parts so in our build here we’re going to go Ahead and start out uh where we’re going to pretend that this right here is our choir um this is of course the Crossing with the main dome in the center um but we’re going to go ahead and build our apps and our ambulatory from here if you haven’t already seen my Rib Vault video where I went ahead and talked about how to build circles uh you might want to watch that again because we’re going to be building a lot of circles here and you’re going to want to know how to build them have you done That all right great so we can go ahead and get started here so the first thing we’re going to be doing is building a half circle going around to there The next thing we’re going to be doing is laying out where our pillars are going to go we need to make four pillars along this ring here and four pillars along this ring here what we’re going to do to find those pillars is we’re going to radiate out from this Center Point here My general rule of thumb for making lines is that they should be following repeating patterns so in this case I’m going to go for a one two three one two three one two three pattern all the way out and we’re going to do that until it intersects over here and this is going To be where one of our pillars is going to go so we’ll mark it out with a plus sign and then we’re actually going to continue that pattern all the way out to the Outer Circle to get where that other pillar is going to go one two three one Two three one two three one two three one two three one two three so this is the center point for our other pillar then the next pillar what we’re going to be making I’m going to be following a pattern of one two one one two one So we’re going to say well one one two one one two one one two one one two and like with the other one where it intersects with this line is where our Center Point for our pillar is going to go one two one one two one one two one one Two one one two one one two one right here is our next pill and you can see that that pretty well divides up the sections like a pizza and that’s what you’re going for and we’re going to just take this exact same thing and repeat it over on this Side now from here on we’re going to be working primarily on making latori so if you aren’t planning on making an ambulatory now is the time to skip ahead in the video till to the point where after the ambulatory is already finished and we’re moved on to actually building the apps At this point we’re going to go ahead and start building our X’s to Mark out the where our ribs are going to go similar to the X’s that you would find in these ribs over here now as much as I love to keep the line says nice patterns As these one two three and one one two patterns go it can be sometimes tricky to find what those patterns are to make things like for instance if you were trying to make a line from here to there it would be kind of tricky to figure out Exactly what that line is going to be thankfully there is a tool in world edit that does this for you if you select one side and the other side and then you do this command of line and then whatever block you want then it draws a line straight line as Well as straight as it can be from that point to that point if you don’t have access to world edit you can do the same thing using Ms paint just draw out your pattern for your basic outline and use the line tool making sure that your line is the smallest width possible So now you may think that it’s as easy as that where you just you know select one corner to the other corner and make an X but if you do that if I were to place the center where I think the center of this ought to go I would say I Would probably go somewhere around here if you just draw an X going from one pillar to the next you’ll actually find that the center line instead of being around here is way closer to this line over here and it will actually make your lines look really super wonky when You’re trying to make them especially since if you’re trying to line up over here where you’re following a center line going down here then suddenly the center line jumps to being over here instead um and it doesn’t always look the cleanest I think it’s frustrating and There is a better way to do this so what we’re going to do instead is we’re actually going to find the center points where they ought to go first so the way that we do this we’re going to count out how many blocks there are in this section here one two three four Five six seven 9 10 11 12 13 14 15 16. um so what that means is that we’re going to you know half of 16 is 8. that does mean that we have it’s an even number that means we have two Center points so but we’ll work with it one two Three four five six seven eight so the center point is actually both of these blocks here and likewise we’re going to find our Center Point for all of these so now that we have our Center points we can actually start to draw plus signs between them those two numbers for here You just kind of have to pick one that you think works best this one is obvious to me that the center line is going to be this one that’s jutting out more this way so I’m going to select that one and I think I’m going to use the I I think I’m actually going to go ahead and select this one which is one out from there and use that as my Center Line instead now what we need to do is find the point where those lines intersect and it looks like they actually intersect between all four of these blocks That’s our Center Point this is probably the most frustrating part of making the ambulatory is things don’t always line up quite nicely and it makes it really really hard to actually build you kind of have to do the best you can toss out Perfection and pick something For in this case I really only need one Center Point and it’s kind of frustrating to try to make a four point center point so I’m actually going to pretend that these ones don’t exist and I’m going to say that this is my Center Point right here Similarly we’re going to find the center points for all of these so now that we’ve got all of our plus signs in place we’re actually going to then take our pillars go from the center of the pillar to our Center Line so Boop and what you end up with is still An X we’re still making an X but it’s more of a curved X where each of these lines is curved rather than being a straight line and honestly I think that this is the better method it may look a little bit wonky now but uh it will look Better in the end you’ll have a better end result because of this and since this is all symmetrical we can just go ahead and take this half that we’ve done and copy and paste it over there we’re going to go ahead and raise up these pillars so that way they are Even with the bottom of this Arch here So now what we’re going to do is we’re going to go ahead and try to take these arches and we’re going to move across all of these points here you’re not going to be able to get perfectly shaped arches doing this wet method you’d kind Of have to do the best you can the main important point is that it starts at the same bottom Point here and ends at the same height on top so in order to achieve that for these smaller arches since obviously there’s not as much width to cover as it is over Here you’re actually going to need to have a much steeper line to make it from the bottom all the way up to the top we’re going to be following these lines here on the ground with the two points here being our Top Line in the center of our Arch And we’re actually going to do the same thing here and across these lines as well here and we’re going to be doing that all the way around and I am going to point out that because these lines had to be a lot steeper because the width was a lot Shorter this is actually going to be the opposite problem where your line is going to be a lot flatter in order to make it across the entire width Foreign Foreign So now that we’ve got our actual arches the main sections of our arches done we need to start making our wonky X shapes to make the ribs and so what we’re going to do first is we’re going to transfer that plus shape up so that way it’s Along the going along the tops of our arches here I will note as you’re building this that you’ll notice that this line here is a lot shorter than say this line here so again the shorter your line is the most steeper your slope is going to be for your arch so this is Going to have a lot more of just the one twos and this is going to have a lot more of the one two threes Thank you Foreign foreign For your arches X will look something like this again this doesn’t have to be perfect obviously this line is a little bit wonky it doesn’t make a perfect arch when you look at it in the diagonals that would make the arch and you know that’s okay nobody’s going to Care Nobody’s going to notice now the hard part is going to be actually filling this in this is the part where you have to throw all ideas of perfection out the window this is not going to look nice it’s not going to even look great but you’re just going to Have to try to fill it into the best of your ability for most of those lives you just kind of stay simple try to do something like this if you’re really struggling if you know that you need to make a line from here to here you can use the trick where you take World edit and you say all right I don’t know how to make this line so you make the line using your line tool here and then you can fill in between oops so this is the kind of stuff you’re going to have to be able to do to fill all of this in Again it’s not gonna look pretty the main thing I will note is that you want to be able to build on top of these ribs rather than next to whenever possible because you want to still be able to see them from down below and you can do things like you can look At this line be like ah that might actually look better as a little diagonal going like that and you can tweak and adjust but in the end no amount of tweaking and adjusting will make this look perfect you kind of have to wing it do whatever feels right and good luck Something else I’m going to talk about is these sections in the very front here we’re actually going to be coding this entirely with a layer of the dark prismarine on top of these going all the way until it meets up at the top so if You wanted to fill that in first just so that way you don’t accidentally put any of your weathered copper blocks there instead um that would be okay also your pillar is going to be going all the way up so you can go ahead and bring your pillars Up as well with whatever block choices you want for that foreign Foreign Foreign Foreign So now we have ourselves a finished ambulatory now if you manage to get to this point you can go ahead and do a little happy dance pat yourself on the back and congratulate yourself on the job well done because honestly this is the hardest part of this that you’re Going to have to make so if you made this then I’m really proud of you you did a good job the next part is going to be making the apps here so for those of you who didn’t want to do the ambulatory and are skipping ahead in the video this Is where you’re going to jump back in so that way you can watch how to make the apps so to make the apps we’re first going to go ahead and start by taking these pillars and raising them up until they reach the base of the arch and yes I Used beastness in my gradient what of it all right now that our pillars have been raised up we can go ahead and start by making our arches these arches are going to be exactly the same as what we did down here but we’re just doing them raised up top And since my gradient has gotten me to the point where it’s stripped oak wood instead of bone blocks that’s what we’re going to use instead otherwise it’s going to be exactly the same as there and we’re going to do that all the way around all right that’s that done now I will note that if you really wanted to you could make sure that these windows come up to the same height as these windows over here if you’re wanting them to be the same height I don’t find that it really matters too much and it’s entirely up to you so from here there’s Two ways in which you can build the ceiling for your apps there’s the lazy way and there’s the actual way I’m going to go ahead and show you how to do the lazy way first just because it is an option and if you don’t want to make the Hard version of the apps then this is what you would want to do so what we’re going to be doing for the lazy way is to just basically make a dome over the top of this uh leading from here to here the now my method for Making domes is this I usually start out by laying out my curve that I want which is just going to be a circle from there to there approximately so there we have this Mi decent curve so the way you would make this Dome is it’s very similar to how You would make the funnel shape that I made in my rib Vault tutorial it’s similar to that but instead of a line doing uh going out like that you’re doing it the same way out here um it’s a little bit different here because I don’t have a perfect circle It’s not because this is on a point instead of a full circle but the premise is still the same you would make a circle leading from all the way from the top and going all the way around here and then you’d slowly work your way up I’m actually not going to do that with you today because that is not the proper way that you should be doing this apps it but it is an option if you would like to and something you’re probably thinking to yourself is hey shells can’t I use the sphere tool that world edit Has well you can obviously I did that for this roof over here but as you can see it looks pretty obviously like I just you know made use the sphere tool to make this um I find that the sphere tool has this weird circley effect that it might even Be the look that you’re going for but I just it looks a little bit weird to me and I find that when you’re building your own Dome you can have a lot more versatile shape where you can have change whatever the curve is shaped like Here well we’re going to go ahead and do is instead of just building a line there and making a random Dome we’re going to be building lines coming from each of the tips of these arches now in order to do that we need to actually draw more Lines on our ground so that we know we know what we’re following so we need to find our Center points from here again and draw a line leading to this I’m going to make this a temporary line because I don’t want this to show up in the final result Um I think that makes a better line and we’re just going to say here here Line gold similarly here to here and of course the one down the middle is pretty straightforward we don’t even need that line drawn for us so we’re going to go ahead and follow those same lines from down below we’re going to put them up above here And to draw our lines we’re going to be trying to make it as circular as possible we’re going to be following similar ideas to making a circle we’re gonna go one two one one two one two three one two one one two and we can go one two three one two three four And that’s basically meeting up right there so that makes a decent enough curve we’re going to go ahead and stick with that and we’re going to go ahead and do the same thing here make our curve foreign so you kind of have to mess with it it’s Okay if they’re not even you can see that this one has a slightly larger curve than this one does and that’s okay because something that you’re going to be doing afterwards is you’re also going to be drawing a line leading from the pillar up to the very top Now because the pillar has more room to grow you actually you have to start with a larger number so like five to make it even with these and you have to climb up as you’re going to eventually reach the top and I’m going to go ahead and make this line And then we’re going to make these lines coming from here up to the top Foreign So something you’ll probably notice is that these inside ones are a lot a more inset than the outside ones that’s actually what you’re wanting see instead of making a straight line across like a big circle it’s actually going to be making an accordion fold look where it goes in out thin out And back in and this is the look that you’re trying to achieve so the next thing that you’re going to want to do is fill in these gaps similar to when you’re filling in the gaps down below for the ambulatory this is not going to be perfect any kind of do the Best you can so long as you make sure that all of these ribs are visible any and all mistakes you make will not be visible and it’ll be fine if you find that you are struggling to fill in some of these gaps by hand something that you can do is you can Actually use world edit to sort of help you the way that you would do this is you would start from the bottom you can kind of fill in these basic ones but you would take basically one one side that you’re wanting to draw the line to the other side Or from here to here and you would select those two and use the line command to then fill that Gap when you’re doing this make sure that you have a g mask set to air gmask stands for global mask and what that means is that if you have that set then It will only affect the air so then it if you are drawing your lines you won’t accidentally delete any of these that you’re working with say you have a something like from here to here which you wouldn’t because that’s not the lines you’re drawing between but Even if you were you can notice that it does not delete any of those which is a good thing this is especially useful for lines like this where you’re like going from this to here and you’re like I don’t know how the heck to do that so Just quickly grab it and draw a line Foreign So now we’ve got the vast majority of the apps done now obviously you can tell that lighting’s going to be an issue I like to sneak in glow like it because it is a lighting’s best friend so I’m going to go ahead and just grab some glow lichen and sneak it onto some Of my ribs here so that way they stand out a little bit more and obviously you’re going to want to also put in some extra lights on this floor because it’s really really dark so the next part that we’re going to go ahead and talk about is the Chapels this Is a section where it’s basically little mini absence coming off of each of these little rounded sections the goal for these little chapels was they just wanted a space big enough to be able to fit the altar the priest and the person coming in to worship So they don’t need to be very big and the way that we’re going to actually be doing this is to just basically create a dome that is the exact same size as this you may notice however that making a dome off of a diagonal is going to be a Lot more difficult than making a dome off of here but I’m going to be doing a little bit of a cheaty thing um so that way I don’t have as much work to do I’m going to be building with ridiculously bright colors of wool and I’m going to be following this exact Same Arch here though I’m going to make it all in one line all right so now that we have that we’re actually going to copy that same line going down this way and I’m actually going to complete this Dome all the way around and make a full Circle with it so what I’m going to do to build this Dome is I’m going to follow the same thing that I did for making that funnel shape where I’m going to be making a whole bunch of different circles going all the way around so I’m Going to make a circle here a circle here Circle here Circle here and I’m going to follow that all the way down and go all the way around to make this Thank you okay so now you’re probably wondering all right why did you make this big ugly circle thing well the reason being is that we’re actually going to take this and copy and paste it into each and every one of them they’re about the same size each of these Openings is about the same size even though they’re on diagonals so it’ll actually fill in those gaps fairly nicely so all we have to do is go from this we’re going to say position one move to the other side I’m gonna find where it meets up with the ground I’m actually going to copy it one block up because I don’t really want it on the ground so this is position two and we’re going to copy it from the very point at the top copy we’re going to make sure that our global mask G mask is set to air so it doesn’t Delete any of this already pre-existing stuff and we can go to the very top here we can say paste minus air and it fills it in you can see it didn’t quite fill it all the way to the where the wall is that’s all right you just fill it in later And stand on the approximate where you want your middle to be which is right about here and this is why you have it as an obnoxious colors of wool so that way you can easily break away what you don’t want and leave what needs to still be there You can just basically delete anything that’s on the inside of this Arch right here and leave this stuff here so this is what it looks like once you’ve removed all of the excess uh wool and what have you um so that way you can see that it Didn’t quite line up in all of these gaps but all you have to do is kind of replace that and you can basically just say well I kind of don’t like this one right here we’re going to move this in a little well I’ll keep that on there You know you can basically adjust as needed to make it actually fill the space a little bit properly in this case I’m just going to draw a nice line over here to make it line up as best as I can so then all you need to do is be able to Take you know one side front to the other um and you would replace this with your wall color and this with your ceiling color so in this case my wall color is going to be the dark prismarine and my ceiling color is the waxed weathered Copper make sure you take off the G mask when you’re doing this I noticed that if you try to have the G mask on so we had our G mask as air and we try to like make a selection and replace that then it says nothing happened even Though it should have happened and that’s because the global mask has been forcing you to only affect blocks that are air so what you have to do then is take off the G mask all you do is just say G mask and that all I have to do is Just say G mask and Boop it’s disabled and of course once you have half of it done all you need to do is select from one end and all the way to this back corner here position two go back to the center and you say copy flip paste And there you have it you now have your apps your ambulatory and the Chapels that go around the edges um at this point the main thing that you have to do is make your facade for the outside do whatever you want for your stained glass windows put in a roof etc etc If you are planning on putting in flying buttresses or buttresses which I would recommend you do I just didn’t totally not because I’m lazy or anything but if you do end up doing that um to place your buttresses you just have to follow your same lines going out That you did to find your pillars continue them outwards to find where you’re flying buttresses are going to go and make the buttresses along that same line otherwise the big headache that you’re going to have to face is trying to make these windows diagonal the thing about these apps Windows is that they Are supposed to be your big Tada the main area that you’re going to be sitting which is the Nave um you’re going to always be looking at the apps so you want to make that sure that these windows are like your big windows but it can be a little bit Challenging to do when they’re you know instead of having a nice flat line where your glass is going to go your glass is going to be shaped kind of like this and it doesn’t always make for the nicest thing um usually what you end up doing is you’ll build your outside facade find Where you want your stained glass window to go on the outside of your facade and um fudge it something that you’re gonna have to do you’ll notice that any lines that are diagonal are going to be closer together than lines that are separated say you know if you were to build The glass here and then put a gap here and then put the glass there it actually compresses more on the diagonals than it does going outwards so you kind of have to make your three layers for your fog effect and then put another layer the only other thing I Should mention here is something I totally forgot to talk about in my first video um is you’ll notice that I have this section here where there’s these pillars they can be pillars or they can be arches the point is that this is actually the Gap where your roof is Going to go so your roof is normally going to be you know making a direct line what you would do with that is you would make it so that way your roof goes from here all the way down to here otherwise I think that’s going to go ahead and do it for today I hope that you’ve enjoyed this video I hope that you learned something and I hope that you can be able to use this concept and design it in your own Cathedrals it does look awesome I gotta say so go ahead and give it a try On a random note it seems I took so long making this video that my subscriber count has jumped up to nearly 500 subscribers so uh I just wanted to give you a huge thank you to all of you who watch my videos I never thought that so many people would enjoy my content Enough to subscribe and I’m truly honored thank you so much for all of your support and I hope to be able to put out more content for you to enjoy but that’ll do it so I’ll go ahead and see you in the next video thank you bye Video Information
This video, titled ‘Minecraft Tutorial: Gothic Architecture part 4 – Apse’, was uploaded by shells124 on 2022-09-17 13:00:18. It has garnered 9990 views and 400 likes. The duration of the video is 00:40:51 or 2451 seconds.
A continuation of my tutorial for building a Gothic cathedral in Minecraft talking about the basic layout of a cathedral as well as how to build a chevet which includes the apse, the ambulatory, and the chapels.
0:00 Cathedral layout and floorplan 5:56 Ambulatory 20:29 Apse 30:30 Chapels
World Edit Schematic: https://dl.dropboxusercontent.com/s/062jisioizz30j1/JadeCathedral.schem?dl=0
World Download: https://dl.dropboxusercontent.com/s/229i4t5j82vmrcq/Gothic%20Architecture%20Tutorial.zip?dl=0