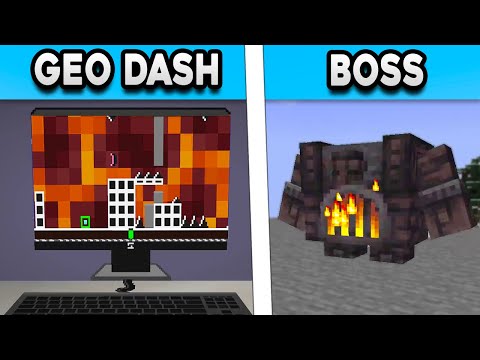
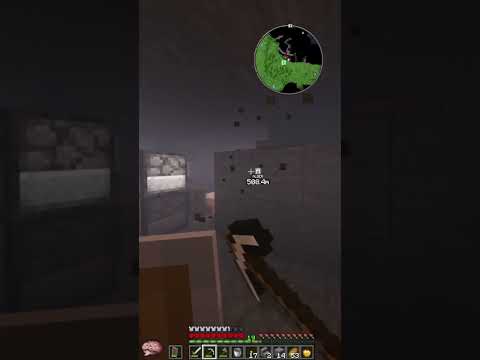
Can you beat Super Mario 64’s third area if Minecraft blocks fill the world? How does Wet Dry World, Snowman’s Land, Tiny Huge Island, and Tall Tall Mountain change with hundreds of thousands of blocks? Oh, it’s actually… a very slow, And grueling process. We’re mining all of this by hand and tackling each level to see what stars are obtainable. I hope you enjoy this Mario 64 Minecraft adventure. So this is my third time around the block with this challenge, pun intended. But this isn’t The only third we’re celebrating today, no… Raid Shadow Legends, the RPG for mobile and desktop has just turned 3 years old! RAID hasn’t really slowed down since it was launched. They’ve been pumping out new champions, the doom tower – which is this 120 floor dungeon full of bosses, And the Hydra – quite possibly the most brutal clan boss yet. All of these things added new strategies and challenges to overcome in the game. So whether you’re just playing casually or diving in for a few hours, there’s always something interesting to do. I think what I’ve Always enjoyed about RAID is just the sheer amount of characters that you can organize on your team. There’s so many ways to pair the champions up and it really allows you to experiment and come up with some crazy new combinations. And speaking of new – for their 3rd anniversary RAID is giving Out lots of free gifts, adding new champions and artifacts, and giving each player a look back with a personalized video of their own journey and how they’ve grown in the game. And with new events and tournaments, there’s a ton of other prizes up for grabs. So, want to join the fray? Use my link or scan my QR code on screen and new players will get a starter pack worth $40. Three free champions – Misericord, Tigersoul and Romero, and 30 different XP brews. All new and existing players get gifts worth $25 if you enter the promo code 3YEARSRAID in-game. And of course, A big thanks to RAID for sponsoring this video and supporting my channel over the years. Okay. It’s time to smash some blocks. So previously, clearing out the floors down below we were able to get 35 total stars…. Which Honestly is not very promising because we’ve already gone through 9 of the 15 total levels. So doing some quick math we may have a problem here. But regardless, we push on. Bowser 2 is defeated and we have our key. Heading to the upper floors, it’s a bit of A chore to make it through all the blocks on our way up. Especially near doors that transition us to other parts of the castle. We take our second key upstairs but I keep getting instantly killed By the blocks in front of the door. They load in right as I go to put the key in, so I have to basically punch and kick while also loading them to eventually clear the doorway. We then Unlock the door, make our way through the chaotic staircase, and go straight for Wet Dry World. Of course, Wet Dry World is not something I’m excited about. It’s a water level which spells trouble for our Minecraft mode. But… Wet Dry World is also oddly kind of convenient? I mean that because the level itself is basically a square with walls on all sides. This makes navigating easier because things are located on a grid that isn’t difficult to follow due to the visible, boxed in walls. We always load the level in with the lowest water because we Can’t break blocks underwater, but upon starting we just need to tunnel straight to our left. We start reasonably high in the level since the blocks caught our fall when we spawn in, so going for the Shocking Arrow Lifts star is super straightforward. I tunnel straight across And I’m essentially looking for the top of the cannon pillar. Once I find the cannon entrance, I just dig down to the block beneath it and break open the star. Next up we’re doing things a bit Out of order… I hypothesized that Express Elevator Hurry Up was going to be awful… And guess what? It was. We need to basically carve out the elevator’s inside and exterior in certain areas so we can move properly. The elevator itself will move through blocks, which means we’d either get pushed Off it while it moves down or crushed as it moves up. This star honestly took me a while because I had to make enough space so I could chase the elevator downward fast enough while still giving myself enough time to get on top. It’s only difficult because you have to think about what Blocks to break so you can still climb back up to try again if you fail. With my staircase in place I eventually get the timing that I need and I get my second star here after about about 24 minutes. Top O’ The Town might very well be my fastest star yet. The blocks force you to spawn very close to it in terms of height, so you only need to break a handful of blocks and the star is right there. Secrets in the Shallows and Sky is a different story though. It’s like a red coin challenge but with less obtainables. I decide to go for the secret on top of the cage first by building a staircase upwards. After I grab that one, I know I can tunnel outwards across the wooden bridge To locate the secret near the sign. Clearing blocks allows me to see the level geometry I need and I get my second secret. The third secret is right below the second, so I just need to head Straight out and tunnel down. I run into some trouble with a Heave Ho but luckily it doesn’t glitch out and kill me. I push the large block for my third secret and retreat down to the water for the last two. I always found it odd that these two secrets were basically tied together. One for locating and pushing the large block, and then the other for normally using the large block to make it up to the yellow one. All five secrets are found and the star spawns. I then retreat Across the level looking for familiar geometry and I eventually find the bridge and follow it to the star. Four stars down and now our problems have arrived. So… the remainder of this level’s stars take place in the underwater town. The problem is we can’t make it through water due to the blocks. Like always, I tried going out of bounds to try to skip the water box but I got instantly killed each time. So that means we only get 4 stars total here, bringing our count up to 39. Next up is Snowman’s Land… And the mirror in the lobby is looking a bit funky with blocks. Our reflection is clipping through them, so that’s not odd or anything. I was super worried at first that I couldn’t make it into the level because the wall was not letting me through. But, if we Time a kick right we can break the blocks behind the wall that basically line up almost perfectly with the normal wall collision. Heading into the level, well, we’re heading to Snowman’s Big Head. This star is practically right in front of us. Mario’s starting position isn’t far from it and we Just have to tunnel up and to the right slightly. When we make it to the surface we can see only one part of the level… The top of the snowman head with the tree sticking out. We can check this hill For the grey siding of the exposed rock that isn’t covered in snow because that’s where the star is. Once we locate that side we can just drill down and around to find the star. I go outwards a bit Because I don’t want to get stuck sliding in place forever against the slick snow, but it isn’t long until I get my prize. Chill with the Bully is, uh, interesting? The bully is located like 45 degrees To the right of Mario’s default level spawn position. I use the snow hill and the edge of the overhang with the tree to get my bearings, and then I see the bully peeking through the blocks. But then… I just lose sight of him? I’m worried because the bully might be capable of walking on blocks which means he could leave the platform and wander horizontally outward anywhere in the level – at least in theory, but I don’t know if that’s true.. But he ends up falling between The microscopic space between the blocks and dies. Mario wins by doing absolutely nothing. So I just shrug and grab the star. In the Deep Freeze is another simple star. We immediately tunnel to the left upon spawning and then climb on top of the big ice block. We drill down inside Its smallest hole and grab the star. Now Whirl From the Freezing Pond kind of gave me trouble? I was being dumb and decided to go around the level to get it instead of going topside. Well silly old me got lost several times and the star ended up taking way longer Than I would have liked. I eventually just got frustrated and went topside. Using both the tree at the top of the snowman’s head and the star location, I aligned myself to those two objects to understand what direction I was facing. I then head out 45 degrees to my left and drill Down until I find the stone hill. It isn’t long until I uncover the box then for my 43rd star. So at this point I’m not really thinking and I begin digging my way to the igloo. I clip into The back of the igloo and get inside, but then reality catches up with me. So while going through the basement area before I wasn’t able to get to the vanish cap stage since the moat couldn’t be drained. So that means I can’t grab the star here. And since I’m holding off on doing red coin stars as a last resort, we’re pretty much done with this stage. So I pop out of the level and head to the next one on our list: Tall Tall Mountain. But before I jump in I unearth Toad from his tomb and grab ourselves another star. Nice. What’s great about Tall Tall Mountain is that everything basically stems off the giant mountain except for a few objects. So that means when we’re digging, if we locate a face of the mountain, we can just either circle it or climb up against it to always preserve where we are. That way we won’t Get turned around. Since three stars here revolve around the waterfall it is a great focal point to climb around. So for Scale the Mountain, we just fumble around until we find the waterfall and then follow it to the top. It basically leads us straight to the star. Mystery of the Monkey Cage Is up next, which is essentially the same star we just did. I wanted to be extra careful though so I located the monkey cage first and cleared off the blocks around it. I was kind of hoping we Could just clip through the cage and grab the star but that’s not a thing. After uncovering the cage and following the waterfall upwards I locate the monkey we need to unlock it. But I’m a bit worried Because the monkey can’t walk through most blocks. I have to clear the way for him and sometimes he gets stuck spinning because he can’t touch the ground or reach his next checkpoint in terms of directions. It’s kind of odd. My biggest fear was that he would jump for the cage and get stuck, Thus getting softlocked and preventing me from getting the star. However, the monkey just kind of flew through the blocks and the cage was broken. I then drill straight down and collect the star. Next up we’re going to go for Blast to the Lonely Mushroom. I begin tunneling out from the start of The level and I make sure that I hug the edge of the mountain. I carve my way to the first mushroom and that positioning sets me up to keep drilling forward until I can locate the second. Luckily by Peeking through the walls I can see the sky below me, and thus I can use this to spot the stem of the next mushroom. Honestly, it’s kind of weird standing under these things. It just feels strange Because I’ve never been able to look up and see the bottoms of them before. I spend a moment just staring up at the giant shroom and then I collect the star. For Mysterious Mountainside I turn around immediately upon spawning and make my way to the cliff with the 1-up. We’re Going to skip the slide entirely because slides filled with blocks are a nightmare and I’d rather preserve what sanity I have left. Besides, with the ability to make block staircases, we can kinda go wherever we want. I hitch a ride on the wind just because I’m curious to see how it Works with blocks and we blast upwards through the ceiling. I then drop down below the ledge and carve out the alcove that holds the star nabbing our 4th for the level. All that’s left is Breathtaking View from the Bridge, and for that we climb up the waterfall again and then jump kick To open up the cave with the star. This brings our total up to 49 stars… which is worrisome. Next we’re off to Tiny Huge Island! We carve our way into the large painting for Pluck the Piranha Flower. We don’t actually have to go too far for this one, so I immediately start digging a tunnel outward over the water. What’s kind of creepy is I can see the giant fish trying to jump up And eat me through the blocks, so I definitely don’t want to go down too low. Eventually I run into the dirt wall I was looking for and I climb up top. I quickly realize that fighting these Piranha plants at ground level is a bad idea. Their fire can move through blocks and I can’t avoid it easily due to being in a small space. So I put my 10000 IQ thinking cap on and realize I’m going to attack from the sky instead. Piranha Plants are just over 2 blocks tall, And while standing above them I can see their heads pop up to attack. They can’t hit me but I can time my ground pound so that I kill them as they spring up. This method keeps me safe and I Just have to wander around until I eventually locate all the plants. The star is mine soon after. Jumping back into the big painting we’re going for The Tip Top of the Huge Island. This star is rather quick since we just have to locate the center of the island and climb alongside its Walls. Once I find the upper grass area I can just follow it along and then break open the block for the star. But now it’s time for some trouble. Rematch with Koopa the Quick is next, And if you remember my first race with him in block land, you’ll know that we have to do this carefully. So I make my way up to Koopa the Quick and carve out the immediate area around him. I then hypothesize that the simplest route for me since I can basically create a sky bridge is to carve a tunnel in the opposite direction he runs. I will snake around the backside of the island and Then drop down below on the flag. This keeps me from having to deal with the wind on the bridge, which quite frankly, would probably be an annoying obstacle with blocks. I eventually locate the edge of the island and this allows me to then drill down to find the flag. I spend some time Clearing out this area as well because this star isn’t just about us making our way here first. We have to ensure Koopa the Quick actually survives the race. If he falls off the cliff… then the star is a lost cause. So I want him to be able to land down here without trouble. I’m basically praying that he behaves the same way he does in Bob-omb Battlefield. If he does, he should climb up and through the blocks to the top layer and then drop down below when he gets Near the flag. I don’t know why he can do this, but it’s kinda insane. So I start the race and take off down my tunnel. I was nervous the dude wasn’t going to make it to the end but honestly I think I beat him by a fraction of a second. He came flying through the flag and almost fell off the stage, but somehow I still got the win. We grab our star and move onto the next. Okay… Five Itty Bitty Secrets. So I really underestimated how big the small island truly was in this challenge. When seeking out the five secrets I overshot my estimates by a ton. This led me to getting lost and ending up in places I didn’t want to be. I eventually got all the secrets though. I knew the star spawned to the right of the grass slope that led to the water pool on top of the mountain. So I hopped on down and dug out into the sky until I claimed another star. That puts us at 53 stars. We have Wiggler to tackle next and I’m really curious about the boss fight, but our star count is looking pretty bad. With only two more levels to go, that means we will have to revisit places during Area 4 to make sure we can get to Bowser. Red coin stars might have to happen… And I’m not looking forward to it. So Wiggler is a boss I was kind of worried about? They move pretty fast and I was concerned that they might clip out of bounds due to all the block geometry. I was also worried the Game would crash when I swapped from big to small, but luckily it didn’t. So I drained the water, swapped on over, and entered the fight. I could hear Wiggler moving around but couldn’t see them for the longest time. My strategy was similar to the one I used with the Piranha plants. I was going to position myself above the enemy so I could bonk their head without risking damage. The last thing I want is to get trampled over and over again if I get stuck on a block. Eventually Wiggler pops his head out into the opening and I am able to get all of my hits in. He shrivels up and falls into the blocks and I get our 54th star. With this Area 3 is clear… I’m concerned about my star count, But I suppose we’ll have to see how this run ends next time. Subscribe now if you’d like to watch that when it comes out. Thanks for watching everyone, and I’ll see you all soon. Cheers! Video Information
This video, titled ‘What if Minecraft Took Over Area 3 in Super Mario 64?’, was uploaded by SwankyBox on 2022-04-30 16:30:08. It has garnered 57060 views and 2664 likes. The duration of the video is 00:14:17 or 857 seconds.
Install Raid for Free ✅ Mobile and PC: https://clik.cc/H1rex and get a special starter pack 💥 Available only for the next 30 days 💥 Thanks to RAID for sponsoring this video!
What if Minecraft overtook Super Mario 64? Could we get enough stars in Area 3 to beat Bowser? Let’s find out in this bizarre Mario Minecraft challenge as we dig block by block through Wet Dry World, Snowman’s Land, Tall, Tall Mountain and Tiny Huge Island!
Subscribe for strange videos! ► http://www.youtube.com/user/SwankyBox?sub_confirmation=1
Follow me on Twitter! ► @SwankyBoxYT Check out SwankyZone! ► http://bit.ly/2p2bwMq
#mario #supermario64 #minecraft #supermario3dallstars #mario64 #swankybox #gamingmystery #outofbounds
Credits: Corkbox generation by Kaze Emanuar
Written and gameplay by SwankyBox Researched by Kaze Emanuar and SwankyBox
Music credits: Songs from various Super Mario OST’s:
“Title Screen” – Super Mario Maker 2 “Snowball Park” – Super Mario 3D World “Main Theme – Mario 64 Remix” – Super Smash Bros Ultimate