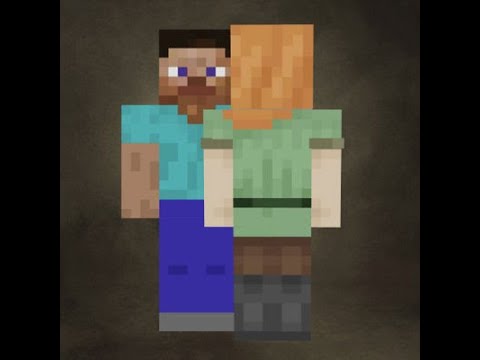
Hey what’s up youtube in this video i’ll be showing you how to make a skull at which statue this particular version of skull which is based on the scala which from the recent avengers film also if you’re interested in any other more avengers tutorials i will leave a link To my avengers playlist in the cards and the description below now that all of that’s taken care of if you want to make her here’s what you’re going to need you will need some never break also grab white stained glass and some cyan stained clay then grab yourself some brown stained clay Then move over and grab yourself some black wool dark gray wool light gray wool white wool and finally grab yourself some red wool and luckily for us those are the only colors that we’re going to be needing so once you have each one of those and once you’ve figured out where You want to make her i’ll be making it right here you’re going to want to kick off your statue with a row of eight black wool in a row on the floor that’s eight so one two three four five six seven eight and you know what before we get this Started i’m actually going to move the cyan stain clay closer to the black wall and all of the other grays and i’m also going to move the red wool slightly closer as well just to make this ever so slightly easier everything else is probably fine so once You’ve got that first row taken care of and once you’ve arranged your walls if you want to for the second and third rows you want to do this so from going left to right to one cyan glay two dark gray wool two black wool two dark gray wool one cyan clay and you Actually want to do that for two rows so once you’ve done that first one do the exact same thing to the row above it for the next row do an entire row of black wool for the next row going from left to right to 1 cyan clay 2 dark gray 2 black wool 2 dark gray 1 cyan clay for the next row do two black wool in the two cent spots of the row then cyan clay everywhere else for the next row going from left to right do one dark gray one cyan clay one dark grey two black wool One dark grey one cyan clay one dark gray for the next row do an entire row of a black wool for the next row do an entire row of white clay for the next row do four black wool in the four center spots of the row and then do white clay everywhere else For the next two rows do two dark gray wool in the two cent spots of the row then do black wool everywhere else just like that for the next row do one black wool one dark gray one black wall two dark gray one black wool one dark Gray one black wool and once you’ve got that row taken care of if you do yourself a favor and you do a row of free white clay coming out of the left and right hand side of that row it will just help us a little bit later on so the left and Right hand side do two rows of three white clay and i know it’s usually four but she’s a girl three once you’ve got that taken care of we can now continue building up the torso and we’re only going to be building up on top of these eight blocks here so Don’t worry about the white clay we’ll get to that later so for the next row of the torso you actually want to build the exact same row that you had before so if you just copy the previous row onto the next row that’s probably the easiest thing that you can do Then for the row after that do a full black wool in the four center spots of the row and then do a red wool everywhere else for the next row going from left to right do two red wool one black wall two dark gray one black wool two red wool For the next two rows do four dark gray in the four center spots of the row then do red wool everywhere else for the next row do four black wool in the four center spots of the row then do red wool everywhere else for the next row going from left to Right do two brown glaze one dark gray wool one red one light gray one dark gray two brown wool for the next row do two brown one light gray two dark gray one light gray two brown for the next row do two brown one light gray two white clay one light gray Two brown wool and for the final two rows of the torso do four white clay in the four center spots of the row and then do a brown clay everywhere else and what you want to end up with is something that should look a little bit Like this so this is what you want to have so far so once you’ve reached this point right here all we have to do now to complete the front of our statue is the arms so come all the way over to the right hand side of the statue first of All and building on top of these free white clay stack another row of three white clay like that for the next three rows going from left to right to one black wool then two dark gray and like i said that’s for three rows so once you’ve done one add two more For the next row do an entire row of white clay followed by an entire row of never break all you have to do now is completely fill the rest of the arm in with red wool and what you want to end up with is something that should look a little bit Like that nice and simple once you’ve got that first arm taken care of we can now move all the way over onto the second arm and do the exact same thing here so building up on top of the second arm do a row of white clay then for the next three rows to Two dark gray one black wool and like i said that’s for three rows so do the first add two more then do a row of white clay then a row of never break then fill the rest of the arm in with red wool and you’ll want to end up with Something that should look in total a little bit like this looking pretty nice once you’ve got both of those arms taken care of we can now move on to the rest of the statue because that is the front 100 done so once you’ve reached this point Right here you now want to move all the way around to the back of your statue come down to the bottoms of the feet take out your black wool and extend each end of the bottoms of the feet out of the back of the statue each by free like this You then want to connect each one of those third blocks in your row free together to form a u-shape we’re now going to build on top of these eight back blocks that we have right here and we’ll build up the entire back of the statue exactly how we built up the Entire front of the statue and it’s going to be as easy as that so for the back of the statue half of it we can actually copy from the front of the statue so the lower half of our scarlet witch from the legs all the way up to The bottom of the torso is actually identical on the back of the statue as it is the front so if you guys want to make this easy for yourselves all you have to do to complete the first half of the back is look directly forward at What we did on the front of the statue right there and just copy it directly onto the back and this is probably the easiest way to do it that’s exactly what i’m doing now you only want to stop when you reach the bottoms of the hands area or the Bottom of the torso whichever is easier for you to identify but i’ll point it out anyway so i’m just currently copying everything that we have on the front of the statue there’s no reason for me to use any form of plans when it is directly in front of my eyes so What you want to do is come all the way up to that point right there you guys should be able to identify that easy enough so this is what you want to have for the back of the statue so far as you guys can see i have just copied the Front of the statue there is nothing more to it once you’ve reached this point right here we can now continue on so this is where it differs ever so slightly so for the next row going from left to right do one black wool one dark grey one black wool two dark gray One black wall one dark grey one black wall for the next row do one black wool one dark gray four black wool one dark grey one black wool for the next row do an entire row of red wool for the next row do two brown clay in The two cent spots of the row then do red wool everywhere else for the next two rows place a single red on the ends of your row and then do a brown clay everywhere else so just like that then all you have to do to complete the Back of your statue is just make the entire rest of the back brown clay and it is as easy as that so just add layers and layers and layers of brown clay onto the back of your statue until it is equal height with the torso and what You’ll end up with is something that should look a little bit like this looking pretty nice once you’ve got that taken care of all we have to do now are the backs of the arms good news with the backs of the arms as well the backs of the arms are Identical to the front of the arms it’s not always the case but in this case luckily for us they are so to complete the backs of the arms just copy the fronts of the arms onto the equivalent places on the back of the statue just as i’m doing now so just copy the Positioning of the front of the arms onto the back of the statue and just copy every single block on the front side and you will be fine that’s exactly what i’m doing now it’s really really easy there’s no reason to make this complicated by trying to explain it Again it’s it’s just a lot easier if you look directly forward at what you’ve already done and you do that and what you’ll end up with once you’ve finished that bit is something that should look a little bit like this very nice once you’ve got the back side Of your statue 100 complete all we have to do now are the sides of the statue so let’s move over to this side first of all and i’ve got some really good news for you with the size of the statue as well for the sides of the statue all you Have to do is look at the color that you have on the left hand side the back of the statue and the right hand side the front of the statue match that color into into these two middle blocks and that is all you have to do nothing complicated about this Whatsoever just match the color that you have on the left and the right hand side of you and then just throw that into the two middle spaces same thing applies with the side of the arm the bottom of the arm and the top of the arm as well There’s there’s nothing to say about it really to be honest with you guys just look at what you have on the left and right hand side of you and copy it here that includes coming into the torso by two with your red wool you usually come In by three but that’s because arms are usually four blocks wide rather than three because she’s a girl all you have to do is come in by two with your red wall and what you want to end up with is something that should look a little bit Like this we’re just playing match the color that’s all we’re doing once you’ve got that first side of the statue taken care of we can now move all the way over onto the opposite side and we’ve just got to do the exact same thing on this side as well nothing differs from the Second side of the statue so just copy exactly what you did on the opposite side of the statue or better yet just apply the exact same strategy and just use whatever blocks you have on the left and right hand side of you and i’m sure that you will run into no trouble Whatsoever so that is the second side of the statue 100 fully complete up once you guys have taken care of both sides of the statue all we have to do now is skull witch’s head so once you’ve got all of that taken care of you now Want to move all the way around to the front of your statue and move all the way up to the top of the torso you’re going to want to kick off the head by doing a row of eight brown clay on top of the eight blocks of the torso like this Now placing in front of this row of eight brown clay you want to do this two times so do a brown clay on the left and right hand sides of that row and then do white clay everywhere else and you want to do that two times so once you’ve done That once you just want to do the exact same thing a second time coming out in front like this now we can build up on top of this most outward row you know what guys i’ve actually just realized that we’re missing a color i know i can’t believe It so if you want to dump a color i know that we will never be using red again so if you dump red and you grab yourself some black stained glaze we can now move on with the rest of the face so i’m just gonna move that closer to the other Colors and white can get moved a little closer as well so once you’ve grabbed yourself some black stained clay for the next row going from left to right do one brown wall one white wool one black stained glass two white clay one black stained clay one white wool one brown clay And for the next row you actually just want to copy that so for the next row do the exact same thing so we’re just copying that row onto the next row then for the next row going from left to right do one brown clay then two black wool two white clay Two black wool one brown clay for the next row place a single brown clay on the ends of your row then do white clay everywhere else and now to finish off the face just do three solid rows of brown clay so that’ll be two and that will be freeze stacked directly on top Like that i was going to save this until later but since we’re here we may as well add what detail needs to be added to the face so once you’ve reached this point right here you now want to take out your brown clay and you want to add this you know What i’m not even going to try and describe this uh this shape i’m just kind of going to add it and i’m sure that you guys will be able to copy it from this so um part of her hair just hangs in front of her face a little bit covers up A slight bit of a forehead and you just want to do a shape with your brown clay that should look exactly like that nothing to it whatsoever nice and simple once you’ve added that all we have to do now is the rest of the head so come all The way around to the back of the head where we have this first original row of eight brown clay just extend that all the way over the back of the statue by two rows just as i’m doing now so just keep extending it back until it’s over The back of the statue by two rows just like that once you’ve done that you then want to take each back corner here you want to raise up each one of those back corners until they are equal height with the head connect them all the way over to The head and then connect them together as well so we’re just forming a nice big empty cube shape which is now nice and easy to fill in with our brown clay which is exactly what we’re going to be doing so once you’ve turned the head Into a big giant cube a big giant empty cube but that all you have to do is just completely fill it in with brown clay it is as simple as this so just doing that for myself and once we’ve done this actually we will have finished our statue it’ll be Over we’ll have 100 fully completed the statue which is absolutely fantastic it didn’t take us too long nice easy very good looking statue let’s take a look at this shall we so once you’ve completely filled in the head once you’ve got everything else taken care of you want To end up with something that should look a little bit like this god damn this is a good looking statue i like this a lot let’s take a nice little 360 degree view so once you have fully 100 completely taken care of everything once you have completely added everything that Needs to be added you may realize that you might want to you might want to extend that hair out a little bit on the front and the back of the statue you might want to make this thing ever so slightly 3d maybe that’s a feeling that you’re having or maybe That’s just one of my feelings but i’m going to do that i i completely forgot that i might actually want to make the hair look a little bit more 3d make it look ever so slightly better in my eyes you guys don’t have to do this if you Don’t want to so i’m also going to extend out the hair on the front of the statue as well this is very much optional you don’t have to do this if you don’t want to but i always like doing this with the hair especially when it’s quite obvious that it’s kind of Like hanging over the back of the head or rather coming down the back or coming in front or something like that i i kind of just like to extend it out by one and i think it just kind of it adds a little depth to the statue it adds a little bit upset As a little bit of perspective difficult to get that word out on this tuesday morning it’s oh it’s 20 to 11 don’t worry guys i haven’t slept yet but anyway if you want to add those little bits to your statue if you just want to Add the brown clay in the front and the back of the statue i i think it just makes it look a little bit nicer it just adds to the statue it just adds a little something something sense the only thing that this statue lacks is a little bit Of how shall i say a little bit of an extra a little bit of originality you know there’s she’s not wearing any big 3d sword on her back or she’s not carrying a big giant fireball purple blob thingy in her hands so it just it just makes her stick out a Little bit more not that she needs that much help because she is a very very nice looking statue so hopefully you guys liked this a lot as much as i do i really do love this skin this is absolutely fantastic one of my favorite female skins that i’ve done uh hopefully You guys managed to make this and remember to check out my avengers playlist in the card system i’m sure that you guys know what that is by now and to check out the playlist in the description just in case you don’t know what the cards are as well so thanks for Watching guys and i will see you in the next video you skin/”>Video Information
This video, titled ‘Minecraft Tutorial: How To Make A Scarlet Witch Statue (Avengers: Age of Ultron)’, was uploaded by TSMC – Minecraft on 2015-05-21 23:30:00. It has garnered 39861 views and 671 likes. The duration of the video is 00:20:32 or 1232 seconds.
Skin designed by MrDerpyJones/Charmont
Avengers Playlist: https://www.youtube.com/playlist?list=PLVfyBBWTXosBz2MkC6pKDi57Qpsq4eqLY
Interested in a youtube partnership? CLICK HERE : http://awe.sm/jEUXm
INTRO CREATED BY http://www.youtube.com/user/lyonsj05
I felt like making it so i made it.
Royalty free music by: http://www.audiomicro.com/royalty-free-music
Sounds Effects by: http://www.audiomicro.com/sound-effects
Want to Support the channel? 🙂 – https://www.youtube.com/channel/UCIui-Mt1PmcJYpoBATftj7g/join
Check out my merch 🙂 – http://tee.pub/lic/uCgw3hVWL6c Check out My Instagram! instagram.com/tsmcyt/