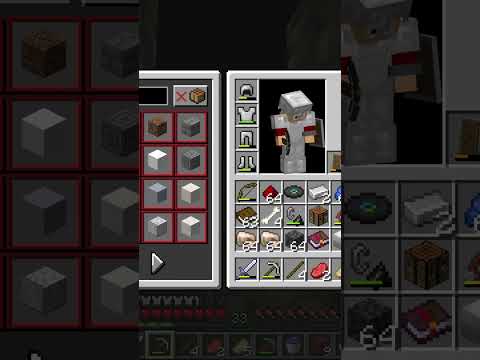
Today I woke up and decided, Yep, I’m going to dunk on Minecraft villagers by building better houses than them. Admittedly, it doesn’t take much, even though other Minecraft villages do kind of look okay. But come on, guys. So what is this triangle crap? You can do better. So today we will be rebuilding our Minecraft Plains village with a house for each kind of a profession Villager. Outside of maybe Nitwit because he doesn’t have a profession. But I don’t know. Maybe that’s something you actually want to see. Get this video to 200 likes and I’ll make a video making a Nitwit house. Also, this video is broken down into the chapters, so if you want to check out any of these particular designs, specifically, get to the house you want to check out. And if you do built in your old world or build your own variants of the villagers, tweet it at me, @ZloyXP with that out of the way, Let’s begin. Now, in the interest of fairness, I decided that we’re going to start Every house in this set with this one ugly as heck default house that the Villagers nevertheless still build in their villages. Yes, this is a simple five by five. But don’t underestimate it. With just a few additions. It’s going to look really, really snazzy. I wanted to start easy, So I decided to start with this Fletcher guy. Now, it’s not entirely clear what the Fletcher actually does in the village, given that nobody really there uses any arrows. So I decided to go from the opposite end. I decided that his house absolutely needs a balcony From whence he will be able to snipe at people. That’s why we are attaching this little overhang to the attic, supported by some fence posts. And under it, they actually can put a second feature of this house, which will be the chicken farm. Fletcher Straight Four Feathers. So it makes sense that he would want a source of them around his home. What makes a little less sense is that I decided to put a Pillager on top of his house. I mean, we need somebody who will be actually using the arrows to Fletcher makes. Might as well put him here. Next up, we have the Butcher house. And quite appropriately, I kind of chickened out myself and decided to not go into the more bloody parts of his profession. Instead, we’ll be just selling the meat, not really making it out in the open. So one of the walls immediately becomes the furnace wall Where he has his smoker and the same wall becomes his barbecue stand. Take note of the single log of mangrove laying horizontally with a button on it. That log is playing the role of a giant drumstick with the birch button on its side kind of looking like, you know, the bones sticking out. I think it’s really nifty. Another trick we’re using here is we’re dousing out the campfire and putting some meat on them, nevertheless. That way, it kind of just looks like he’s displaying the merchandise. Or maybe he’s drying it for the jerky. from there, we just expand the roof from a side. But we won’t be putting any actual live cows there, because clearly they’ve been already eaten. Instead, I just decided to put a porch there. It just helps to have some sunroof, you know. While we’re on this on this animal kick, let’s talk Shepherd. And I’m quite proud of the shepherd design. What we’re doing here is we’re feeding a banner into the loom to create the illusion that we’re feeding some wool into the machine. And then on the other side of the loom, we’re putting down a wool carpet of the same color and then a wool block in front of that, Creating an illusion that we have a sheet of cloth coming out of the loom. We also are doing something interesting with the roof here. We’re intentionally making it off-center so that we have space for an overhang where again, we’re going to make a little pen for our sheep. Then, to help counteract the very obvious fact that the house is off-center, we’re going to put in some flower boxes for the sheep to lowkey nibble from. Personally, I always use azalea leaves for this because they just look really, really nice flowered. And just so the sheep don’t eat all of the foliage, Let’s put some hay bales in their pen as well. Overall, quite a lovely house we got there. And with admittedly low effort. Next up, let’s get to the guy who we are going to absolutely blame on all these houses being built, the Stonemason. We’re actually using quite a bit of unorthodox materials In all the future builds in this village, such as red bricks, stone bricks, different colored clay. So we need to show that this village has a robust stonemasonry division. I feel it helps a lot to build a red brick oven, instead of one of the walls of his house. Yes, it looks unreasonably large, but the idea is that he also is using that oven to bake all of his bricks. By the same logic, we’re stockpiling the bunch of bricks and stone slabs to make it look like he’s working on a large order of them. Also, I’m placing a piston above the stone cutter that will supposedly push the blocks into the sawblade. A cool thing we’ll be doing with the overhang on this build is also reversing the order of the upside-down stairs under the overhang creating this almost icicle looking shape. And it just looks different enough to seem interesting. From there, I’m also using the mud brick wall blocks instead of full blocks to create an extra depth between the support pillar made of oak and the furnace. The mild indent actually adds a lot to just the way the house looks. All in all, it helps to have several unique brick variants on the Stonemason house. You’d see here he would have access to those rare materials. Next up is the Cleric’s house, and Clerics in Minecraft villages are defined by their ability to make potion. I always like to think that they are the ones responsible from healing the zombie villagers into regular villagers. So they have the access to the brewing stands. That’s why we will be giving him a little netherwort garden, and what’s supposed to be an apple tree in the backyard, For golden apples to cure the zombies. This is also my favorite household of the bunch because here I get to just stack the two of the default houses on top of each other to create a more wizard tower-y look. Can’t forget to give them a stairway leading up to a second story entrance. And of course, our wizard hat roof, made out of concentric squares, more or less, with a two blocks step. And if you can bear the height, I think it’s the perfect house to put up a rain collector pipe made out of andesite wall because it’s kind of the right thickness. It just makes sense that he would want rainwater for his potions. After all, you wouldn’t want to drink from the same lake as the stonemason is making his mud bricks in. But speaking of cauldrons, we need to talk about the Leatherworker. By far my least favorite Villager, But not my least favorite house, because here we get to use a quite clever trick to make it look like the leather worker is drying off or tanning some of his leather produced material. Here we’ll use quite a clever trick with a lead we secretly swap one of the log blocks For a composter, and cram a chicken inside it. That chicken we put on a lead, and the lead, tie to a fencepost. Now we have this string kind of strung about for no particular reason, and that’s when we start putting down some armor stands That will make it look like the Leatherworker is drying some of his leather clothing over a drying line. Just got to make sure that you put the line itself on the right height from the first try. Also, I decided to repaint the leather workers house to a regular terracotta For the sake of making his house be the same color as his product. And from there it’s just a matter of a regular triangle roof and open for the cows to a side. But I’m intentionally making the side roof here flat So that we can store some hay bales on top of it and out of the way. Just don’t tell the cows what the outfits are made of and we’ll be fine. Back to the default house and now we’ll be talking the Weaponsmith. It’s a well known fact that and upside down endrod it with a candle on top of it kind of looks like a sword. So of course we’ll put in one of those on the side. We’re once again converting the front of the building into the shop. So we’ll swap some of the terracotta for the stripped spruce, put down some hooks and some item frames to hang the weaponry from. And don’t forget an anvil, because, well, he is a blacksmith after all. I like to put trapdoor roofs over any of the shops like that With the idea that they protect the merchant from the sun. From here, we’re actually just going to build a second one of the default houses to the side of our workshop and the default book like triangle roof over the entire situation. And then we go one of the three blacksmiths that we will need to complete. I like to think that the banner on his workshop is a gift from the builder on top of the Fletcher’s roof. I don’t know why Now, the blacksmiths are only going to get more complicated from here. My absolute favorite Villager in the game is a Toolsmith And we’ll be talking about him right now. For one, I’m immediately repainting his entire house from white terracotta to plain terracotta. I feel the blacksmith houses need to be a little bit darker immediately because otherwise they’re going to get covered in soot anyway. So why keep them white? We put down the Toolsmith table and surrounded of two anvils, which I think looks pretty cool, and we’re actually going to give him his own custom forge. Regular Minecraft villages generate with lava in the forges, So we’ll be using lava here as well. It’s just we need to be extra careful to place it in a way where it’s not going to burn down the rest of the house. Naturally, I’m using stone to design to forge and stone brick wall blocks to create a little bit of an exhaust to a side of the forge. Also helps to put some iron bars around this, just to make it look a little bit more forge-y. The roof I’m putting on this house is going to be the sloped roof that actually Minecraft itself uses for the snowy Villager houses? I don’t care. I think it looks good. So we’ll be using that. And despite this guy having the hot forge right nearby, we will be giving him his own furnace and his own chimney. But that leads us to the most complicated blacksmithery of this entire set. The Armorsmith. I don’t know why I felt like the Armorsmith Needs a much more intricate workshop, but I did it. Okay. I just decided that I did. After all, Armorsmiths use blast furnaces, not the regular ones. So it kind of made sense that his one furnace is going to be just giant sized compared to everyone else’s. We’re putting down some cauldrons and the hooks on top of them, the hooks here playing the role of basically faucets. Some people use downwards levers. I personally think the hook look better. I don’t know. Once again, we’re putting a roof over the workshop and we’re placing down A few iron raw ore blocks and some carved pumpkins. The idea being that this is also the guy responsible for making all the golems for the village. The second story is more or less just a copy of the first one, but the stripped oak logs for the walls, And then we’re capping it off with a sloped roof as well. But, we’re also replacing the planks around the forge with the dark oak ones, to create the illusion that the chimney and the smoke from the chimney covered this area in soot. Also the left side of the house Ended up a little bit too empty. So that’s where I decided to store a giant pile of coal blocks. You got to fuel your industry somehow, right? Quite tired of the more horizontal houses, I decided to get to the Cartographer house. His building, I want to be really tall, So I’m just straight up stacking three of the default houses on top of each other. Try and stop me. Between the third and the second story, I’m expanding the floor to serve as more of a balcony. That balcony is where the cartographer is going to be making all of his maps. We want to put him onto an elevated position so that he can actually observe the area around himself. To help with that, I even developed this kind of cool telescope design, made out of a glass block, surrounded in spruce trapdoors, with a granite stair and a copper rod sticking out of it. I think it’s a nice detail to make it look like this guy knowing the area will be more believable. From there, we just add the kind of a default “wizard tower” roof to the entire segment. I can’t remember if I left him a way to get down from that balcony, mind you. Huh. Here’s hoping a handsome prince shows up. After this gimmicky build. I actually was left at a little bit of an impasse. I wanted to make a library, and I really like Minecraft libraries, but unfortunately, libraries are essentially a very indoor kind of Activity, so making the entire building look special was just not an option. So this will be basically the only house here that we’re actually putting some effort into interiors on. First and foremost, we’re smashing two default houses together side to side and putting in a cobblestone furnace At the back to keep all of our villagers dry. I’m using a very common trick to put down a sideways loom next to a bookshelf to make it look like an empty bookshelf. And also the first level of the bookshelves I’m replacing with beehives. They could be actually occupied by actual bees later, but I would rather they sit here looking like drawers instead. Then I’m filling into one wall that we haven’t filled in yet and putting in some windows with oak trapdoors serving as shutters. I’m actually very amused by these shutters being functional. In a game where we have to take a lot of compromises and use blocks in a way you wouldn’t expect, I just kind of think that this is very cute. And finally, it’s time for perhaps the most gimmicky build of the entire village. This is the Fisherman’s house. And given the fact he’s a Fisherman, we’re giving him his own frickin’ pond. I’m not going to dig out too much of a lake, but I am going to knock out a one-deep puddle around his place. It also helps to bevele the area of this mud and muddy mangrove roots To really go for that swampy feel. Put in some lily pads, put in some leaves just to create the illusion of more robust life. And we’re swapping all of the terracotta on his house for red brick and some grey terracotta. This way it will look like Some of the paint of his house just got entirely too wet and fell off. I’m also hiding the chicken underground, putting it on a lead, and attaching it to a fencepost. This will kind of look like a deployed fishing rod. I would also give him a chestboat for the outer fishing expedition, But I’m pretty sure he would immediately get stuck in it and then eaten by zombies at night. So we’re not risking it. And now sound off in the comments on who didn’t notice that at no point did I build a Farmer house. Yeah, I don’t know how, But I’ve forgotten one of the most iconic villagers, the Farmer. So here we go. Let’s build a Farmer’s house. And you know what is going to be? Everybody always wants the Farmer’s house to be the windmill. So I’m just going to build a windmill. So we back up three of the default houses on top of each other, trim the edges on the top and we need to attach a propeller up front. And a lot of people use a birch trapdoors for these propellers, for these windmill wind bits. And that is a really, really good choice in my opinion. However, here I decided to be a little bit original and use the grid pattern already present on the glass panels in the core game and interspersing it with some iron bar blocks And gray panels just to make it look a little bit more interesting. Of course, we also need an actual wheatfield somewhere nearby, and a few blocks of hay just laying around. But in case you’re wondering, “But Sloy, does this actually look good, just in your shaders? Or? Here’s a shot without the shaders? Yeah. In my opinion, the white glass actually does work out pretty good here indefinitely. And there you have it. We got our own giant village with custom houses for every kind of a profession. Every kind of Villager we’ve now provided some housing for. But wait a minute. I hear you ask. Sloy, aren’t witches also villagers? And you know what? Yeah, you’re right. If you want those? Yeah, sure. 200 likes on this video and I’ll get you a Nitwit, Pillager, and a Witch house as well. Just for funsies. In the meantime, let me know if You want me to build something else and develop some sort of order design down in the comments. And don’t forget to subscribe so that you do not miss those videos coming out. To be continued. Have a good one. Bye bye. Video Information
This video, titled ‘I Redesigned ALL the Minecraft Villager houses!’, was uploaded by ZloyXP on 2023-05-26 13:00:17. It has garnered 3950 views and 665 likes. The duration of the video is 00:15:33 or 933 seconds.
Are you bored of normal, plain, ugly Minecraft Villager houses? Today we’ll remodel a whole village with unique houses for each job!
0:00 Intro 0:48 5×5 Base 1:07 Fletcher House 1:50 Butcher House 2:49 Shepherd House 3:52 Stonemason House 5:12 Cleric Tower 6:13 Leatherworker House 7:25 Weaponsmith House 8:20 Toolsmith House & Forge 9:36 Armorsmith Workshop 10:49 Cartographer Tower 11:44 Librarian… Library? 12:51 Fisherman House & Pond2 13:55 Farmer Windmill 14:55 Beyond Just Villagers
Let’s Build your Villagers a place to call home and use their career blocks in style and comfort. We’ll start with the default, 5×5 Plains Village style terracotta and oak house, and transform the whole village to make it feel more alive. These small villager houses won’t take up much more space than the default houses, meaning you can add them to your existing Minecraft villages without having to terraform around the village or move villagers to another area!
As a bonus these special villager houses are each customized to one of the villager careers, meaning you can use them as an open air villager trading hall or just a custom town with a medieval vibe perfect for Minecraft. Each house has a lot of personality to make it feel alive and authentic, so your Minecraft village can look like a town with actual people going about their daily lives. There are houses, shops, towers, libraries, and forges to give each Villager something to do all day!
You’ll learn awesome build hacks and tips to make special props, such as a large copper telescope, meat drying racks made of extinguished campfires, and a clothesline using a lead and a hidden chicken, to bring your Minecraft village to life without worrying about making huge houses that take a lot of space and materials. You’ll only need basic early game materials you can gather easily to make these early game homes for your villagers or even use them as a starter base for yourself! Each guide is only about a minute, so you can quickly learn new ideas to build the coolest custom town in Minecraft.
⁛⁙⁛⁙⁛⁙⁛⁙⁛⁙⁛⁙⁛⁙⁛⁙⁛
💀 Watch me on Twitch: https://www.twitch.tv/zloyxp 💀 Watch me play Horror games: https://www.youtube.com/channel/UCDodi7A7zsoYMZ-_NErUzlw 💀 Hang out in my Discord: https://discord.gg/7FXqGMpA2V 💀 Donate on Patreon: https://www.patreon.com/ZloYxpAVI/
⁛⁙⁛⁙⁛⁙⁛⁙⁛⁙⁛⁙⁛⁙⁛⁙⁛
Music sourced from Argofox or Bensound unless otherwise noted. You can also find me editing the Hermitcraft Recap: https://www.youtube.com/c/FoolCraftRecap
Help get this video to 200 likes so that I can make a sequel with the Nitwit villager and all our Illager friends! Haha, we’re friends, right guys? Guys? Quick, hit the like button so I can get them some houses before their aim gets any better!
#Minecraft #MinecraftBuildHacks #MinecraftTutorial