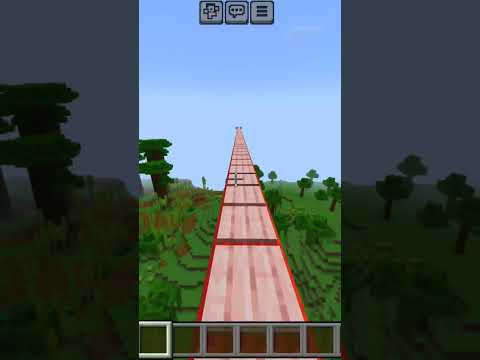
Hey guys mr. crayfish and welcome back to redstone tutorials in this tutorial today I’m going to be teaching you how to build an oddity armored station so what this will do is it will automatically apply armor to so you don’t have to go into your inventory and Put it on this will automatically do it for you so all you simply have to do is go into this square here I’m just going to go into f5 just so you can see the effect we’re going to go ahead press this button we go down and then we get Armor applied to us so I got gold armor on awesome now I’m not going to take 100% credit for this idea another youtuber by the name of rainy beast posted on his Facebook a video of an auto armor changer and I thought challenge accepted and I built my own Version and it’s very similar to his but I actually built this before seeing his design and I tried to make it as small as I could and I managed to get it down to 4 by 4 by 7 so make sure you go check out his channel because he does some Great content I’ll make sure I put a link in the description for him so make sure you go check him out but yeah let’s get into this and I’ll show you how to build it so what you are going to need is a Treadstone dust 6 redstone torches 6 redstone repeaters 1 red stinking parrot or one button 2 sticky pistons for dispensers one hopper and 40 blocks of your choice now for aesthetic purposes just grab out to Oakwood 7 stone brick stairs and 1 stone brick slab now almost forgot but you’re also going to need one dropper the first Thing that we’re going to do is dig a 4 by 4 by 5 Depot now don’t mind this little mound I’ve got here I just had to build this so I could actually dig a 5 deep hole because right now I can dig down 3 blocks and I’ll hit bedrock see I’ve just made this to higher so dig a 4 by 4 by 5 deep holes 8 1 2 3 4 1 2 3 4 and stick this way back in line with the start to get a center now dig down for more layers so 1 2 3 4 two three four Then you should end up with something that looks like this so again it’s four by four by five deep now take note of the front side this side here is the front so when go back down into the hole and what we’re going to do is we’re Going to place a line of blocks at the front here like that on the bottom layer at the ends place one I’m going forward and then a line of blocks at the back there then place a block on this right side and leave that one open here place Your two sticky pistons facing up in that hole and then put a block on top of it then on the left side of this piston place your dropper now make sure it is the dropper not the dispensers and place it down like that and then get your Hopper and hold crouch and then you want to right-click onto the dropper and it should place the funnel facing into it and then put a single item into the dropper see one dirt will do fine next get your redstone comparator and I’m going to place it facing away from this Hopper here and this will just detect when that block actually goes into it and then place a redstone repeater and then a book and behind it like that so the signal can go into it and place a piece of redstone dust next to the block Here and then we want to put a redstone repeater facing into that piston there behind the dropper place a block and then on this left face here place a redstone torch then place a redstone repeater facing away from the torch like that and it should be powered and then Put a block in front of it like so and then it should power up this redstone here and that redstone repeater now get one of your redstone torches and place that on top of this block here and then what we’re going to do is we’re going to Go over the outside of this with planks so I start putting one on top of that redstone there one on there come this way and then go around this way remember to hold shift when you’re going over the dropper and the hopper and then we can Place two in between there like so now place a block at this end and put a piece of redstone on top of it then we’re going to leave a split leave a space and place another block like that put a redstone repeater facing towards that redstone there and then you Want to put a block in between the red stone and the redstone repeater like that and then put one at the back here of the redstone repeater now put redstone on this back block here place another block on top of that one and then put a redstone torch on this face Of the look and it should power up that redstone there and then it will retract these Pistons back to its default state now place a block over this redstone at the back here two redstone on top like that a block on top of this redstone here and then a redstone torch on that Face and then it should extend these Pistons then on top of the block here put a piece of redstone dust like so and then you need to place another block on top of that and it should go on there the air place a button on that face and Then when I press it should bring the Pistons down and that should bring them back up like see that there what we just created was a double piston extender what we need to do now is actually dispense the armor onto the player so what you need to do is we’re going to Fill that block in there and we’re going to place two dispensers either side of this piston head in that block there see and make sure they’re facing in towards this see two there and then two on this side now place a block on top of this Front right torch there and then place a redstone repeater facing towards the back put a plank in front of it and then a redstone torch on this face of the block and then put another block on top of that redstone torch then to power these ones over there what we need to do Is place a piece of redstone dust on top of the original block that we placed place a block next to it and then a redstone repeater facing away then a block in front of the redstone repeater redstone down the bottom and then a redstone torch on this face of the block there then This redstone torch should be turned off because this redstone repeater is powering this block therefore turns of the torch now the last two blocks of your choice what we need to do is just place to a deep back here and as we just stop the play from actually because this Is where the pistons go down imagine if you went down to you could actually walk forward and then get into this area here so yeah just place these two like two blocks there then for the last bit get out your esthetic blocks and we’re going To place a slab on that block and then to the left and the right of the slab place to Steinberg stairs go make sure you hold shift when you place it above this one then we’re going to place one facing that way and it should make that Kind of corner block with the stair there do that on the other side and then we’re going to place it facing that way so one two three and then for your two Oakwood we’re simply just going to play some side ways either side of the plank now there’s two more little things that We’ve got to do simply just hit these two repeaters here at once and then what you want to do is you want to get out some armor of your choice so I’m simply just going to put gold armor in because I think it looks really cool so in this Top one I don’t think it matters which order you put it in but and this one here I’m just going to put one of their head pieces and in the bottom line I’m going to put the golden leggings then on the other side you might have to just Dig this up a little bit but it doesn’t really matter top one gold and chess play and then boots at the bottom one then fill that back up now you can see this redstone here but you can cover this up however you like doesn’t really matter what I might do is just put Planks over like so and then we can do that on the other side as well just to make it look symmetrical and then that looks a lot nicer now now we’re just going to quickly test it out now quickly just going to test it out so let’s walk Forward onto here hit the button boom there we go we’ve got our armor on and that’s awesome that is awesome I love that so that’s it for this tutorial today if you enjoyed it please remember to hit that like button also go check out brynee beasts channel he does a lot Of gaming content and I personally really enjoy it he’s been a big inspiration for me as well so make sure you go check out his channel subscribe to him if you have any ideas for reading tutorials let me know in the comments because I do read them And there that is it I’ll see you guys later bye bye Video Information
This video, titled ‘Minecraft 1.12: Redstone Tutorial – Auto Armour Station! (Confirms it work 1.8+)’, was uploaded by MrCrayfish on 2014-05-20 07:37:35. It has garnered 419980 views and 8075 likes. The duration of the video is 00:09:25 or 565 seconds.
Remember to “snap snap” that like button. It keeps me motivated to make these tutorials. Lets get 200 likes!
● BrenyBeast’s Channel https://www.youtube.com/user/BrenyBeast
Hey guys, welcome to another redstone tutorial. In this tutorial today, I show you have to build an auto armour station. This will automatically apply armour to your character. It also has a nice effect by dragging you down to put it on. If you enjoyed this tutorial, please leave a thumbs up, comment and subscribe!
● World Download (Not Updated): https://www.dropbox.com/s/zwax1rfxrlc6mcb/Redstone%20Tutorials.zip
★ Cray’s Social Media Links ★ ● Facebook: https://www.facebook.com/MrCrayfish ● Twitter: https://twitter.com/MrCraayfish ● Instagram: http://instagram.com/mrcraayfish ● MinecraftForums: http://www.minecraftforum.net/user/596140-mr-crayfish/ ● PlanetMinecraft: http://www.planetminecraft.com/member/mr_crayfish/
● Art by Reflex14 Twitter: https://twitter.com/Raflex14
● Music: Corncob by Kevin Macleod http://incompetech.com/music/royalty-free/?keywords=corncob