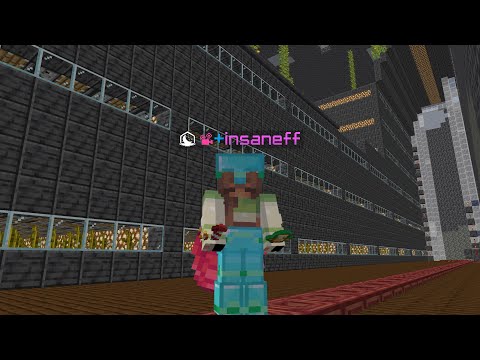
Hey guys welcome back and i left off and i had a problem there and it was a simple problem i wish i didn’t close and stop the video so i figured since i stopped it i just go on to part two already but all i had to do Was changed the data value here it was being utilized so i had 3001 i went to 3002 so actually as i stopped the video i looked and i noticed it right away so let’s pick up and we’ll pick up uh where i left off and kind of recap just in Case you guys have problems on the last video so in your public um pre-initialization event here this is your code um you know make sure you have a unique identifier like i didn’t you know i forgot to change that everything in here you know should be up Right and then when we go down below uh the client proxy uh code which is here which would you know go in your client proxy if you have one set up and all this should be good and you know just have to import these two I’m not sure if we did that in the last video i had some problems editing the video and about to record so i’m not sure if i did any changes but that’s you should be set up and ready to go so let’s test this out i’ll run the client And yeah you know your proxy file is listed down here what to do there so once you get a client proxy set up add that code over okay so let’s test this out and i already loaded it up so we should have it ready um yes we do so if we look I hate clicking on this i do this all the time i scroll down and if i don’t go to the side i always hit survival inventory my little pet peeves having that right there under there just automatically clicks to it anyways here’s our first model And i got it right there and as you can see it’s a rendering in hand off of block one and when i place it there’s our model so your model might be looking really funky right now it might not be rendering all the way and that’s perfectly fine Because we don’t have the actual texture for the model because we’re going to implement our own right now um so if your you know texture isn’t covering at all that’s because you know your texture isn’t the size to cover at all so you have to have a bigger texture Okay so in hand it’s rendering from block one as well as block one’s texture i am utilizing for the actual uh rendering of the block itself so in here once again you know you’re having rendering problems don’t just make a texture call it whatever you want block one And then copy it over into items as well called the same thing i believe one is grabbing it from here we both might be utilizing it from the same place but either way we’re going to make our own textures right now so we’re going to figure all that out so don’t Worry if your block isn’t uh rendering properly right now as long as you know when you’re placing it on all that’s good we can move on to the next uh spot so let’s go ahead and type in a technique on the internet and actually it’s technique i spell my packaging wrong so technique And here it is technique dot zeus dot me so we’re gonna have to get the program so we can make our own models so go ahead and download a tech name right here download it and install it i am going to launch a technique right now and somebody need uh Some type of mod here so when you launch it let me close off this site so when you launch it because it was just save on resources there was a flash or java or something there okay so when you load up technique you’re going to get a texture width and A texture height now this is dependent on your model size just like what we just went through so for example you know a 16 by 16 texture isn’t going to cover you know a big model for example so i’m going to make mine 64 by 128 because i’m going to make Something that’s similar to that what we’ve just seen but i’m just going to make something really simple for this tutorial’s sake call it ttt just you know whatever call it whatever you want and create it so if you’re going to make something uh you know 64 by 64 Depending on you know how big you’re gonna make it you know don’t go crazy making your first model you know just get the hang of this so let’s create this 64 by 128 i’m gonna use hit create and i’ll walk you guys through a little bit this is a very simple program not Much to go through so uh not much to learn here if i hold down right click that’ll pan around if i hold down middle mouse button that will actually move me around now so those are you know your two controls that’s all you really have to do So we can get started and we can create our first cube that’s all we have to create is cubes there’s no polygons or anything else so create the cube select it and automatically create it um we could adjust the dimensions here so i’m going to do this quickly you can create Your own 16 pixels is a block in minecraft by i’m going to make mine 16 by 64 which is like you know four blocks or three blocks um by 16 again so i’m gonna have it like uh one block it’s gonna represent like one block by you know three or four blocks high This piece of wood here isn’t part of your model excuse me it’s a visualization of where your model is placed so for example if i rendered out this model right now that wouldn’t be a good thing um you know where your positioning of your model is On this pillar also matters as well so if you position it off to the side when you go to actually place your blow it’s gonna position it off to the side as well so everything has to be lined up perfectly to this block so i’m going to go ahead and line this up To the block so that my model positions properly and minus 40. you can play around so you don’t move you can use the arrows move it down move it up so you know if you kind of scroll down here and look you can see so if i render my model out right now For example my block will be sitting above in the air when i placed it in minecraft so that wouldn’t be good i want it to sit right on the floor and i want it to be centered around the actual model so keep that in mind as you’re building yours Okay and that is good for this um let’s look into texturing a little bit here at the top right this is representing our textures and if uh if i created another block here i’ll just do this for tutorial stick this isn’t going to actually be in my model Let me just move this over a little bit and let me make it a little bit bigger just so you can see watch the top right screen here i’m going to make it bigger and you’ll see the texture gets bigger so this is actually overlapping this so this isn’t good so we gotta You know if you’re modeling you’ve got a whole bunch of cubes and you know you’re making something you know you’re gonna wanna make sure your textures aren’t overlapping so go over here to texture offset and bring this down for example and you know once it’s off there we go So now it won’t be overlapping your textures won’t be overlapping so as you can see you know they represent colors and sides uh it doesn’t really work perfectly all the time and there’s kind of bugs in the program but uh so for example left would represent the left side a front would Represent a front but i’m going to give you a better visualization of this i’m just going to go ahead and delete this because i don’t need this in my model let’s look at this let’s go to file we’ll export it as texture map so we’re going to get the texture map by doing This and i’m just going to name it that’s fine ttt i’ll replace it and then i’ll actually load it back in why didn’t it grab it okay don’t grab it i’ll load it open it there we go so you could see now how everything is representing on my blog here Pretty easy to understand right so um if we for example went into uh loaded this up into a paint program here let’s go with open with paint.net for example and we’ll wait a million years for paint.net to open okay as you can see our textures are here so you know you can color You know the left side whatever you want to do your your front whatever you want to do you’re right you’re back and you know you’d have to you know do erasing and do some painting here and coloring and stuff i’m not going to get into you know designing colors this is Fine for me fine for this tutorial you know you guys can do that um you know play around you’ll figure it out it’s you know pretty pretty much common sense once you see it in here and play with the colors and stuff make sure you get the idea You don’t need to save that so that’s fine so we got we got i exported this texture i’m going to use this texture um you know you might want to make your own within paint.net and then export that that’s cool then you could you know load it back Into your model i keep on hitting different tabs see what it looks like on your model first once you’re happy with all that what we’re going to want to do and you know you’ve got your model and your texture all set up you might be having texture problems for Example you might have made something and you know it’s missing half of your texture on here and you’re like what the hell is going on well that’s because you didn’t set your texture you know texture worth and texture height properly to the size of your model so You know go ahead and reset that so once you’re all happy you got everything set up file will export this as java and this is fine i’ll just export it to the desktop and we don’t need this anymore and close this off grab we’ll grab our file we created here And we’ll put this into our source we already have a path in there um resources assets textures and all paste one into models because we’ll change the path into models or to model but for right now it’s utilizing this this path right here so just in case i forget to change it it’ll Grab it from here okay so we got our path in there all right we got our texture in we don’t have the model in yet so now we’re going to get the model in and we’ll grab the code that we just created which was called right here ttt.java or whatever you named yours So open that right click open with wordpad or whatever uh and then copy everything that’s in here this is the code for your model so copy all this you don’t need the top go back in locate your model which we don’t need you know all this But this is fine so locate your traffic light model class extends base model base that’s how you know you’ve got the right class just in case you name something differently and we’ll rewrite all this except for you know the imports we can leave the imports up there on the package Okay so we’re gonna have to do some things here no first of all we don’t need this import if you do have this import just change it to import uh your correct thing but you know just delete that rid of that okay uh one thing i should have done actually before i uh Pasted this in is because we cannot change the class name otherwise we’re gonna have issues so let’s traffic light model that’s what it was called right so we gotta actually put that back i forgot about this guys so traffic light model so we gotta stick with this class name That’s the only uh thing um you can change all this up but you know your class name has to have the same name as over here as well so let’s see we’re gonna have some things that we have to do in here it’s not as simple as copying and pasting Uh there’s just a little things that we have to do so if you just go all the way down to the bottom of your class your class is going to look a little different depending on your model and how you need it on the bottom here We are going to have to set up an entity so um you know if you actually look at the instructions on it oh where is it it’ll show you so here you know add an entity that has a common add entity here add an entity here and then add entity here So that’s exactly what we’re going to do and i think that’s all we need to do where’s my code so here entity and then i t spelled want wrong here and then we need one here and one it brings it up to here and i think we just need one here And i think that’s a so we have to add one two three four entities all together let’s control ss save this okay so now our model should work let’s check it out one client cross your fingers cross your fingers as you run the client hoping everything works perfectly guys okay Play selected world here all right and well let’s see we place it down and it is grabbing the wrong one because i forgot to actually change it so my model is in the game so that’s awesome your model is in the game too you probably forgot to change the texture Too because we didn’t even do that there it is so models in let’s change the texture of the model itself um i added here so we don’t need this clasp anymore i’m going to close this class off and uh let me take a look what’s in here added fix I’ll find this if it’s in here right here so resource location textures you know whatever you named it it’s in blocks you want to change the path and make it utilize model go ahead what did i name mine ttg and i’ll change my path to model because I have a folder called model in there so ttt but i actually have it right here model so my models in here you know separate from my blogs just to make things i guess a little bit more neater doesn’t matter so now it will grab the model our item and handle Will still be utilizing that other model because we have to actually make a texture you know for our model but let’s go ahead and run it or an icon i should say you know you have to actually make an icon that will represent your model Now there is you know ways that you can render that model in your hand as an eyeball but uh for this tutorial and everything i think this will be good so there we go you know model is in the game uh you could you know textured it Differently but there it is it is working there it is in all of the glory of red blue and no green i hope you guys you know did something a little better so you know go ahead you know make yourself an icon or whatever that would represent by your model Uh and you know like i said it works just like uh drip iron hook or you know all these other items here simply an icon that’s representing our model all right guys i think this wraps up this video make sure you uh hit the like button on all my uh tutorials because i Probably won’t end up making more unless you know you guys can let me like so Video Information
This video, titled ‘Minecraft Forge 1.6.4 Modding Tutorial Custom Models2 p8’, was uploaded by PersistentPixels on 2015-06-17 23:53:51. It has garnered 110 views and 4 likes. The duration of the video is 00:20:33 or 1233 seconds.
Minecraft Forge 1.6.4 Modding Tutorial Custom Models2 p8, how to mod minecraft forge 1.6.4, forge Custom Model tutorial, (Techne)