

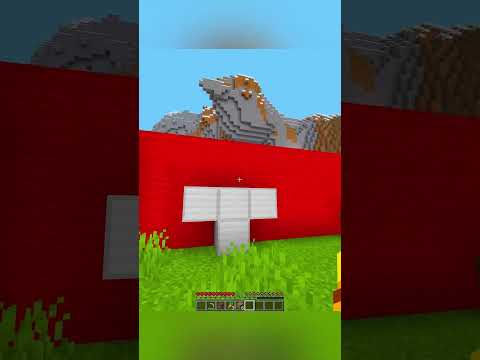
Hello everyone my name is pixarus and welcome back to the Minecraft Survival Guide I hope you’re all having a good day I am having a great one today is the day we are finally gonna do it we’re gonna build something around our storage room here and it’s gonna be quite the Epic build I’ve been planning this in creative mode and it’s taken me a while simply because of the sheer scale of this thing and trying to figure out how we’re gonna make a build this big actually look good I’m used to building on a bit of a smaller scale than this Believe it or not and this build style does not necessarily lend itself super well to expanding Beyond cozy starter houses but I think I think I’ve come up with something that’s kind of a combination of a manor house and a barn and a few other things it’s fitting The Rustic style of this local area pretty well and it might even have some places that we can house our villagers so they don’t have to live in these little wooden boxes outside here on the planes anymore but it’s going to require a lot of resource Gathering so one of the Things I’m going to recommend right up front is that we go and do some resource gathering before we start the build itself that way we don’t have to be interrupted mid flow of building to go somewhere else and grab a bunch of resources so one of the first places I’m Going to go is here to the desert because we need to gather a decent amount of sand but mostly some Sandstone now Sandstone can be crafted by grabbing full sand and crafting it together in a crafting interface but unfortunately you lose a lot of blocks by doing this Because you’re converting four blocks of sand into one block of sandstone and I honestly have never been happy with this crafting ratio when you consider that sand is not a renewable resource and you need it for a variety of other things like making glass and concrete powder And a few other bits and pieces so instead we’re gonna dig down through the layers of sand to get to this layer of sandstone and Sandstone is pretty much abundant in deserts in the same way that sand is for three or four layers underneath the the sand sometimes even More if the terrain has been built up you’ll find a significant layer of sandstone before you dig down and just hit a natural stone layer so where the terrain of this area allows we are going to be carving away the sandstone in order to grab some building materials For our house because I want to make a decent amount of the roof of this out of sandstone and you’ll see exactly how that fits into the build in a minute of course one of the things we have to be aware of when we’re Gathering massive Amounts of sandstone is that if we dig up into the ceiling too much the sand is going to fall in on us and you just want to make sure that you don’t end up in a situation where it falls on you and you get suffocated by it but fortunately With a pickaxe this efficient and I believe you can even do this with a regular diamond pickaxe that has efficiency for Sandstone can be mined instantly so it’s nice and easy to get hold of a bunch of it in large quantities it is considered kind of a Softer material than Stone so it has a slightly faster time to break returning from the desert with basically a full inventory of sandstone we’re gonna throw a a bunch of this into our super smelter so that we can turn it all into smooth Sandstone looks like we’re going to keep Nine Stacks plus a little extra of a regular sandstone and we’re gonna put the rest of the sandstone in the furnace to be smelted some of the remaining sand we’re going to put in a furnace over here and we’re going to make sure that that gets smelted down into glass we Shouldn’t need the rest of the sand but if we need a bit more glass later we’ll know where to go the other major thing we needed for this build was terracotta so I’ve gathered a bunch of that already we need a bunch of the different wood Types as well because I want this to look like quite a nice pretty build from the outside and so I’m going to include a bit of Mangrove wood even some of the Crimson stem from the nether which we’ll probably need to farm a little bit more of although it’s used fairly sparingly We’ll need a whole bunch of spruce wood probably some jungle as well and those are the easiest trees to farm because they can be grown in that two by two formation that produces a larger tree and there’s a bunch of other materials like deep slate that will need a lot of But thankfully we have a lot of that so I think we’re ready to start the build one of the first things I like to do when approaching a build in this scale and in this style is to Mark out the boundary of the build and in this case We’re making sure that we have enough room between where the Redstone and the storage area starts and the facade so we can make the facade potentially a couple of blocks thick give ourselves a bit of room for some detail and depth in the exterior so that we can layer material Between these wooden pillars which are actually going to form part of the front face of the build and around the outside we’re going to be framing things out with Spruce logs as well so we’re going to make sure that we come out three blocks leaving these three block panels That we can decorate with various things and then we’re going to make a 90 degree turn here and come along the side of the build once again leaving three blocks between us and the Redstone the front facade of the bill is actually going to be brought out by one more Block it’s Going to be extruded slightly from the face of the building just to give it a bit more depth and character so it’s not just a flat wall at the front of the building but the rest of it actually conveniently wrapped apps around to leave three blocks between the pillars And this next section of redstone so the maths actually works out in our favor here and we can come one two three blocks out once again we turn a 90 degree turn we start making the front facade of the build on this side and this build is actually going to have Rotational symmetry when planning this I realized that the whole area was basically a plus shape and that allowed us to create a build which was the same on all four sides but instead of just being a straight up Cube we’re going to exaggerate the plus shape with the Exterior of this build and simply rotate the build by 90 degrees every time we build a wall of it so I’ve only had to design one quarter of this building creative and I know what the entire thing is going to look like naturally we need to do a bit of excavation here Because while I do want a couple of the faces of this build to be buried in the hillside we at least need to make sure that from the inside it’s going to look roughly the same so I am going to dig out these areas here and where the for Front face of the build is going to go we’ll have it emerging from the dirt on this side and with a little extra effort I’ve now dug out a trench around the outside of this build so that I can fit in all of those Spruce log pillars which Is a lot of extra material that I’ve gathered so plenty of stone unfortunately we’re not really using Stone much in this build in fact the outer walls of this build are going to be relying on a couple of different wood gradients so we’re starting with one That begins with dark oak on the bottom and then a layer of spruce and then a layer of Oak and then a layer of birch and each of these are going to be stripped logs so we end up with this really nice gradual gradient that I’ve Used plenty of times in the past but normally while I use it for floors this time we’re using it for walls we’re going to build up the spruce logs as a frame around the outside of this we’re going to have a Cross Beam going across here then the spruce logs are going to Continue upwards and above that we’re going to have a different wood gradient this one is more of a warm wood gradient though we’re going to start at the bottom with with jungle logs since they’re probably the closest to the lighter wood of the Birch below then we transition into Acacia for that really Bright orange Mangrove for a slightly deeper red and then finally the beat color of crimson stem and once we’ve stripped all of those that’s going to be a pretty bright combination the trick is that we’re going to be framing these with some dark oak stairs which are Going to give kind of an arched feel to this and that’s really going to mean you don’t see as much of the brighter of these colors we might even include some trap doors down the center just to break up the texture of this a little bit give It a bit more character although maybe we’ll just do those on the top layers either way we’re going to grow some more Crimson fungi just so we can get a bit more Crimson stem and then we’re going to go around the outside with a couple of stacks of wood and create these three Block panels basically everywhere we have a three block wide space okay now we have a bunch of these wall panels built up and I haven’t detailed absolutely every one of them yet so I’m still trying to see where I can conserve wood but as we go around here you’ll Notice I’ve left a gap in the corner and that’s because my initial plans for this involt rotating the plus shape for a second story that was going to come out basically at 45 degree angles from the 90 degree angles we’ve already built and through the build process that kind of Evolved into really just having another fatter shape overlaid over the top of it so this section here is actually going to come out is going to be made out of Blackstone and deep slate and it’s just going to form a sort of corner tower on each of the four corners where these Walls intersect just to change up the shape a little bit add some variety and add a bit of different texture so we’re not going to work on those quite yet instead we’re going to work on this front wall here because once again this will form the template for the other Four entrances I guess you could call them although I’m not actually going to enter via two of them the one on that side and the one on that side this one over here here we might actually turn into a place we can have a nether portal directly into our storage system for That I’m going to drop off all of the different logs in here with the exception of some Spruce Wood which I guess will keep on us and some dark oak wood I think we’ll need to keep some of that as well and then we’re going to Grab a bunch of this terracotta I think I’ll bring maybe eight snacks with me to begin with because we’re going to dye a bunch of this green with the cactus that we’ve been farming up here at our cactus farm which as you can see has been producing a decent amount and earlier I Actually put a stack of it in a furnace in our blacksmith shop ready to be smelted down into cactus green so we got a couple of furnaces with that and we should be able to just craft all of this into green terracotta there we go eight stacks of green terracotta later we’re Also going to have some light green further up in the build but down here at ground level we’re going to be using the darker color and so the lighter color can be saved for further up where it feels like it might have caught the Sun A bit more once again we’re going to be building this one block recessed from of the outer pillars of the walls just to give it a little bit of depth that we’re going to come up three or four blocks I think four blocks up there and then We’re going to put in a layer of dark oak planks kind of on the same plane as the wood logs from the outside to make it look like the whole build is supported by a Timber framework we’re going to continue the green terracotta up from there we’re going to have Another four block panel and at the top of this we’re going to put two Spruce logs facing outwards to support the next layer of material we’re also going to add another Spruce log facing outward here to support some additional stuff to either side if we hop on down and start The next pillar on this side we’re going to be doing the same thing here and we’re going to lay a row of spruce logs over the top of that kind of like they’re holding up this big wooden Beam on top of either of these logs I’m going To place some Spruce planks and that’s where our next wall of green terracotta is going to begin dangling from between these two planks we’re going to place a lantern and we’re just going to cover up the back of that with with another green terracotta so that there’s no gaps in The build just above our row of dark oak planks I’m going to lay a set of spruce slabs they’re bottom half slabs so that nothing will spawn on there and the light up there is going to help as well but those should help the build feel a Little more connected before we go too much further I’m just going to mirror this on the opposite side with another identical wall of green terracotta the next thing I’m going to need is some mud bricks so I’m going to grab a couple of stacks of mud we’ll snatch the Dirt away For now we can always convert a bunch of that into more mud later and we need to combine this with some wheat we’ve turned all of the packed mud into mud bricks and then we can use the stone cutter to turn all of those mud bricks into mud brick walls hopping back up Here our next panel of green terracotta is going to have these mud brick walls inserted into it to form this kind of stripe that has once again a little bit of a recess to give it a bit more depth and I think mud bricks and green terracotta go really well together They’re both kind of earthy natural looking colors which I think go really well with the theme of this build and it being built into the hillside here so finally a few extra blocks of terracotta on top of that and this is where we can start shaping out the roof line of this Build but we need to work on how this is going to join to the other side so underneath these logs we’re going to have them supported by a spruce slab on either side and that’s going to come inwards like so to begin the sort of lattice of spruce slabs that’s going to Feel like it connects the two sides of this Archway to make it feel a little bit more like an archway we’re actually going to bring in some dark oak planks here which have a similar kind of color to the Spruce Wood the sort of warm Brown that we’re going to be popping in On either side here and arching in towards the middle like this we’ll come up another couple of blocks with the dark oak planks we’ll need to craft a few more of those and now we can actually start to expand the frame of this outwards and have these logs Support another set of beams across the top then we build our lattice of spruce slabs with this kind of alternating half block pattern in the middle stepping back a little bit that now looks like a bit more of a convinced entrance way and we can mirror this wall on the opposite Side and then we’ll start to add some details to the center the timber frame is going to come out by one more block and in the middle here we’re going to have a window surrounded with moss to really emphasize this natural theme we’re going with the Moss is going to be Interspersed with Spruce planks where the walls connect to the outer frame here and in the middle of these walls we’re actually going to set some panes of glass to form a window you’ll notice that the mud brick walls here actually line up with the mud brick walls on Either side creating this kind of broken up stripe of material across the front of our build to either side of our window frame here alongside these Spruce planks we’re going to have a couple more logs poking out to support the roof and we’re going to design the roof kind of Similar to the ones we’ve already got on our starter house and the blacksmith’s house where it’s supported by these Spruce logs and then this sort of timber frame out of spruce slabs and planks is going to take shape on the end underneath these jutting logs just to Help frame out the window even more we’re going to add three fences and a mud brick wall attaching it to the side of the house the glass panes in the central window here are going to be white to really highlight this as the center of the build and directly above That window we’re going to place one of our new verdant Frog Light blocks so that we can have some light in the build and we’re going to hide that behind a panel of trap doors which will help this build feel a little bit more visible and welcoming at night Now moving on from our green terracotta for a second we’ll need to bring that back when we do the other three entrances we’re going to grab a bunch of the materials that we will need for a gradient of materials in the roof yes this is the like three gradients along With our Neapolitan ice cream pattern here in the build we’re going to have a lot of different material we’re going to need some more jungle wood which we’re going to strip we’re going to bring the Sandstone with us and this is where we’re going to retrieve all of the Smooth Sandstone that was cooking here in our furnaces we’re going to bring some more of the spruce Logs with us as well because we’ll need those to start making the timber frame for the roof and that’s going to poke out a couple of blocks here similar to how it does on The roof frame for the blacksmith Harris and the starter house on top of this we’re going to come up two blocks and add a slab on top of that and this is going to form the start of a roof line going backwards around the corner here we’re going to have one more block Jutting out of the side and then in a similar way to how the roof line works on these houses we’re going to have a slab over the top of this log and a slab next to the the log with another Spruce Locker coming up for support every three Blocks we’ll do more of that once we’ve done a roof for this lower section before we do that though I’m going to lay out the main gradient of the roof which is going to start with stripped jungle logs to continue the ridge of our roof upwards we need two planks like so We’re gonna come over one block with a plank and a slab on top of that two planks coming up from that and we kind of Follow That pattern up ending with a slab here a plank or two there and maybe another slab on top like so and you’ll Notice this is in the middle because that’s directly above the Frog Light that we’ve already put down there and now the next set of materials we’re going to use is going to be Oak planks with a slab over the top of those and you’ll notice that like the other houses We have built this follows a one and a half block roof pitch so these blocks down here the logs are actually like half buried in this slab here so there’s one half blocks visible then I’ve chosen a material that has a slab of the same texture so these Oak planks have a slab Coming out of here our next layer is actually going to be made out of straight ripped oak logs and these get slightly lighter than the oak plank simply because they don’t have the darker Stripes of the plank texture and once again because of the slab in front We see one and a half blocks visible of this texture as well then we hop up here we’re going to switch to Birch planks once again layering some slabs over the top of those above that we switch into stripped birch logs which are going to have a slightly lighter texture once Again above that in a similar fashion but even lighter we have this Sandstone which once again we can cut into slabs and the final Ridge to the roof is going to be made out of smooth Sandstone probably the cleanest and lightest block that we’re going to use in this whole Palette so that right there is our roof gradient and it seems like an odd jumble of materials when you first put it up there but placed together I think those will look really nice and it creates a lighter Ridge across the center of the roof but this roof isn’t going to be Able to come all the way down to the very edges of the build in fact for stylistic purposes we actually want that to be a more Central upper roof structure where this lower roof is going to be darker and a little bit more plain it also requires fewer additional wood Types so I’m going to put some of these away so I have space in my inventory in fact what this is mostly going to require is Spruce Wood and deep slate tiles so we’re going to grab a bunch of those and we’ll be turning some of these Into slabs as well to begin with we’ll outline the edge of the roof here and it’s going to start to slope down as it reaches the outside of the build but we’re going to start with a row of planks with a row of slabs on top and keeping the same thickness of materials So effectively three slabs High we’re going to bring this down by half a block each block over So eventually once it reaches the corner of the roof it’s actually going to droop over the edge of these logs which is why I’d left out this corner here next to that a half Block higher we’re going to create this Ridge of deep slate tiles so we’re going to end up using some slabs just so it Peaks over the top of the spruce blocks in front of it it’s going to follow exactly the same path down and Trail Over the edge of the roof like so in fact we can actually knock out the entire framework here I wasn’t sure how much of this I kept from the creative build as I was working out the wall structure but yeah we can remove most of that each time we reach one of these Spruce pillars though we’re going to add another Ridge of these deep slate tile slabs but what we can do here is simply suspend the slabs in between each section of the deep slate tiles and then once we reach the end here we’re going to add another pillar made out of spruce Logs that’s going to have another log jutting out here and that will support the line of the roof from these Spruce slabs and between the pillars we’re actually going to return to our green terracotta our first panel of green terracotta here is going to be four Blocks wide that’s just how it ended up with the pillar alongside here but then between these two pillars we’re going to have a wall that is three blocks wide and that leaves us the perfect opportunity to put in a window we’ll have Oak trap doors along the top here And along the bottom there we’ll open all of those so that the window is a recessed and either side of that we can add some fences a fence gate in the center here here as a kind of window ornament and then we’ll frame out the top of this using some more Spruce slabs They’re going to have to go across the top like this with a point in the center and so we’re going to build up the rest of the spruce slabs behind that and that’s going to form a nice little bump in the roof line which will actually Break up some of the textures that we’ve got here and help them feel a little less repetitive alongside this section here we’re not going to have a window in this wall this one’s going to be completely blank and it’s actually going to turn a corner right here into the Next wall over we’re going to bring this wooden pillar up from where it naturally occurred as part of the frame of the building we’ll have it jut out one more so that it can support a little extra bit of roof line that’s just going to connect this one to the corner tower That we’re going to be putting in here and that means if we frame out a section of wall here with another three block wide Gap we can put in another window right here actually with the thicker part on the bottom that makes more sense and then we’ll add these six trapdoors In for a window as before we’ll throw a couple more deep slate tile blocks in to seal off this part of the build because the section that juts out here yeah it’s actually going to be made mostly out of deep slate tiles with a couple of Blackstone and mud blocks thrown in in Fact we might as well do that now so from ground level we’re just going to come out three blocks from this pillar and three blocks from this pillar so they meet on the corner we’ll do a couple of layers like that but then we’ll start to Pepper in a bit of black Stone brick we’ll start to muddle in some of the deep slate bricks as we go upwards here we’re going to have maybe a couple more on here and have a black stone brick or two creep into the texture here and here but this is really where the Deep slate brick will start to Take over a little bit more we’ll maybe have one more Blackstone brick on the corner there and then we’ll fill out the rest of this but then we’ll come back in and add a couple of mud blocks and you’ll actually be surprised at how similar the colors in the mud block Texture are too deep slate especially at a distance so that’s going to form the foundation of our Corner Tower and as we get back up to the roof we can continue this line of spruce slabs separating the lower textures of deep slate and mud and whatnot from the planer texture of this Green terracotta we’re gonna dress up the wind though in this green terracotta wall in exactly the same way as we did the one around here so we’ll add in the fences from up here this time add the slabs as a canopy over the top and that’s simply going to blend into the Continuing roof line of spruce slabs once we turn the corner we’re going to treat this roof exactly the same as we did this one so we’ll remove this upper layer of stairs and logs connect everything up with these deep slate tiles and Spruce slabs and that is now Looking a lot better built up that’s looking really cool actually I’m very happy seeing this come together in survival and in case you thought we’ve hidden the Crimson wood away entirely you can still see a little peek of it underneath there that beetroot color is concealed until you get right up close To the building so we’re going to finish off the roof line on this side over here as well then we’re going to complete the end of the facade here and build out the rest of the roof along this quarter and once we’ve done that all we really need To do is build the same thing with a 90 degree rotation so we need to build it on this side and then rotate it 90 degrees again to build on that side and on the final side over there at the front okay okay so back up here on our Facade we’re going to add a couple of blocks to support the roof line here we’re actually going to make sure that this has a bit of a dip behind here then this section in front can Arch to match and it kind of creates a little Arch Over this Alcove on each side and then we’re simply going to bring in the block textures that make up the roof line on each side so we’re going to start with some jungle logs strip there we’re going to have the oak planks going into the Middle I’m going to try not to fall off the scaffolding too much then we’re going to bring the stripped Oak log texture in towards the center as well then follow suit with the Verge planks the stripped Birch the sandstone and finally the smooth Sandstone making this pretty straightforward pattern up to the Top of course we’ll need to make sure that we mirror this on the opposite side and I’m going to start the line of the roof going that way as well but the central section should now look like this complete with a couple of end log textures where they have to wrap around Into the roof line on the other side this is where we’re going to add our panel of trapdoors so we’re going to add six more trapdoors around the outside of the Frog Light and like the timber frames that we built on the other houses this is where we’re going to have a Bunch of connected slabs and blocks which are going to give this roof a pattern of its own of course it doesn’t matter exactly how this is laid out I think the most important thing is that it’s symmetrical but in the end mine’s turned out looking like this and I think That’s pretty nice now we’re going to bring all of this the Jungle the oak the Birch the sandstone and the smooth Sandstone up to the rest of the roof and we’re going to continue the line following this roof Ridge around where these Spruce slabs are already laid out When we reach an inside corner like this we’re simply going to pick a direction for the logs to go we’re not going to overthink that part of it too much but when we reach an outside corner like this we are simply going to let the end textures show and carry on around the Corner this way and once the roof is all done we step back and not bad right honestly I’ve been working from screenshots of this build from the creative mode test world where I built it and even with that I was still actually really happy to turn around and See how good that looks so now we’re going to do a quick bit of roof ornamentation at the top here and this is simply going to be a repeating pattern of a slab and a stair always facing inwards towards the center of the build once we reach this point here Where it turns a corner we’re going to continue the same pattern facing this way remove this corner block since the pattern isn’t really going to make any sense if there’s a stair facing one way or the other and we’ll do the same thing over here once we built the timber frame On this side so it’s not looking too bad from this angle unfortunately from the other three angles there is barely a build here as we step inside the storage room it’s still feeling very open on three sides although this side is feeling pretty enormous actually like We’re gonna have to do a little bit of stuff to fill up this space but like I said we can move our Villages up to a second floor where they’re going to be nice and safe and be able to trade with us we can do a little bit of decoration On the inside of here and we’ve left ourselves ample room behind all of these storage filters to do a little extra decoration if it feels like it needs it but for the moment my priority is going to be copying this quarter of the build to the other three quarters so I’m going To go ahead and do that probably on a live stream since it’s just going to be a long repetitive task that will be exactly the same as everything you’ve just seen and once we return we will tackle what to do with the hole in the center of the roof And after another four or five hours worth of building this right here is the results and I am very very happy with this I honestly thought it was going to be difficult to beat the storage building that I made in season two I really love the style of that it was a More modern kind of more interesting take on the storage room but this despite its Reliance on symmetry I think feels super impressive and I’m really really happy about that walking into this feels sort of like walking into a temple even though the gradient is very linear I really like the way that came Together on the roof and the overall scale of the building really feels kind of impressive and I have made sure that all of the sides are correct and that all of the details are symmetrical I actually spent a little bit of time afterwards cleaning things up a little Bit and you know filling in occasional blocks or slabs that I had missed and making sure all of the details on the ends of these were exact from the inside it looks perfectly symmetrical except for a couple of logs on the inside here and there when the emphasis has not Quite been on the interior yet simply because I don’t know what I’m going to do with the Interior Design Elements I’ve just been focused on the exterior so far I’m also not sure what we’re going to do with Lighting in here either a lot of the lighting here is very Temporary I’ve just kind of spammed torches around because I knew that the roof would be enclosed and for the moment in the center of the roof what I’m planning on doing is building a sort of tiered Garden of different crops so we’re going to have wheat beetroot we’re Going to have torch flowers and pitcher plants up there I was originally planning on putting kind of like a penthouse building up there but having looked at it a couple of times in Creative it feels like it spoils the overall impression that the outside gets to just have like a tiny house perched On top of it so we’re gonna go with the tiered Garden instead and that’s going to be a little bit less visible from ground level which means it doesn’t spoil the silhouette of the building but still provides something for the center here and a practical purpose for that Space I know a lot of people might be tempted to put a big Skylight here and just cover the entire thing in glass but in my experience that never quite gives the impression that you wanted to give especially from the outside so I think that’s what we’re going to go with and For this tiered Garden I will need some lime dye which we don’t have a great deal of right now unfortunately in all the time I’ve spent building this the cactus farm has been running so I can cook a couple more stacks of cactus and that will give us plenty of green dye That we can combine with white dye from bone meal or from lily of the valley and we can get ourselves a lot of lime dye that way so the other thing we’re gonna do with this roof Garden is make it asymmetrical which is going to seem a little bit weird and counter-intuitive Considering the extreme symmetry that we’ve applied to the rest of this build but that’s kind of the reason for it I feel like at least one area of a build like this should kind of resist symmetry have a tower or a chimney or something like that to break up the symmetry of The build and in this case I think the Roof Garden is going to be a really nice way to do that mostly because it can be hidden from ground level so you’re not too concerned about the way it looks from the outside but when seen from Higher up from the top of the mountain or from we’re in the air when we’re flying around a little bit later you should be able to see this roof garden and appreciate the fact that it’s an asymmetrical part of this build we can still work some symmetry into the Individual components of the garden though so I’m designing this little garden plot here it’s going to have a few leaves and bushes around it’s going to have you know crops growing on all of this dirt and we’re going to hydrate it using a simple technique really we’re Going to stick a leaf Block in here and we’re going to apply some water to that and leaf blocks can hold an entire block of water inside of themselves without it leaking through the bottom like happens if you end up water logging say a top half slab for example and I think on This patch here we can grow some wheat seems like a sensible thing to have up here now single water source should be able to hydrate all of the Farmland around here but if it doesn’t having something planted here will still allow it to grow and if we want the full Effect already we can always apply some bone meal we can start to shape out the different raised beds by popping in some Spruce logs here and that one’s even going to conceal the Water Source but it won’t block the hydration to any of this Farmland we can start maybe a little Three by three bed over here at the top here we’re going to place another little circle of dirt with another Leaf block we can water log in the center and maybe here we’ll grow some beetroot we can have similar sections for carrots and potatoes and maybe some of these have Started to become overgrown with moss so we can swap a few Moss blocks in here and there and a short time later our little rooftop garden plot is complete I haven’t done anything too tall on this the central section really only reaches four blocks out from our roof line and I Managed to fit in a bunch more cool details like the fact that we’ve got some cherry blossom petals down here the pink petals we’ve got some cherry leaves in here as well a few areas where we could put in some Moss carpet and Azalea here and there some drip Leaf as well Some small drip leaf that we gathered from Lush caves previously got a little drip Leaf Garden around here with some wheat that isn’t hydrated but it should still grow over time anyway and these Gardens are not really meant for harvesting they’re really just meant to grow up here and be Aesthetics but There’s lots of color thrown in there we’ve got the yellow of the wheat the red beetroot the orange carrots we’ve got some pink coming in here from all of the Cherry stuff around here the potatoes are this kind of nice golden color lots of green keeps everything in These sort of organic feel and the natural colors that we’ve already got elsewhere in this build and it’s subtle enough that for now it’ll just stay up there and if we want to replace it with something different later it shouldn’t be too difficult to remove it honestly Doesn’t look too bad from the inside either I might have to cover that over with a more ornamental ceiling at some stage but I’m still not certain what I’m gonna do with the second floor inside of here and yes this video is coming out a little bit later but I do hope you’ve Enjoyed this episode of the Minecraft Survival Guide hopefully this has given you folks some inspiration for what you can do to expand a build Style into a much larger build and I’m so happy that we finally got to do some more building and we have a decent build around the Storage system now in future episodes we’re probably going to tackle the interior of this place but I might just Tinker with a couple of things between episodes and see what I can come up with in the meantime thank you so much for watching this episode of the Minecraft Survival Guide my name has been pixel riffs don’t forget to leave a like on this video If you enjoyed it subscribe if you want to see more and I’ll see you folks soon take care bye for now foreign Video Information
This video, titled ‘Building A Grand Storage Hall! ▫ Minecraft Survival Guide S3 ▫ Tutorial Let’s Play [Ep.45]’, was uploaded by Pixlriffs on 2023-09-21 10:00:42. It has garnered 33602 views and 3127 likes. The duration of the video is 00:32:07 or 1927 seconds.
The Minecraft Survival Guide Season 3 continues in Minecraft 1.20! In this episode, I finally dig in and build a grand hall around my automatic storage system.
Today’s episode is lighter on the tutorial aspect, but hopefully aspiring builders will appreciate an up-close look at building something on this scale, scaling up a build style we’ve already established, gradients in colour palettes, and using symmetry to save time planning larger builds.
After a quick detour to the desert to acquire sandstone, we put the output from our Cactus farm to good use and embark on a build that mixes earthy colours like green terracotta and mud bricks with the stripped wood palette and a lighter roof gradient! The whole thing is crowned by a tiered roof garden growing crops, dripleaf, and flowers.
Survival Guide Season 3 world seed: 787419271612053211
Music: Minecraft soundtrack by C418, Lena Raine, Kumi Tanioka, Aaron Cherof
Season 3 of the Minecraft Survival Guide will teach you how to master Survival Mode in Minecraft 1.20 and beyond!
Follow the Season 3 playlist here: https://www.youtube.com/watch?v=VfpHTJsn9I4&list=PLgENJ0iY3XBjmydGuzYTtDwfxuR6lN8KC&pp=gAQBiAQB
—-
Watch my streams live every Tuesday, Thursday, and Sunday around 3pm UK Time! http://twitch.tv/pixlriffs Follow Pix on Twitter for video updates, screenshots, and other fun stuff! http://www.twitter.com/pixlriffs
GNU Paranor001
#Minecraft #Survival #Tutorial #SurvivalGuide #Building


![Pixlriffs – Building A Grand Storage Hall! ▫ Minecraft Survival Guide S3 ▫ Tutorial Let’s Play [Ep.45]](https://newsminecraft.com/wp-content/uploads/news/minecraft-news-popular-36.jpg)