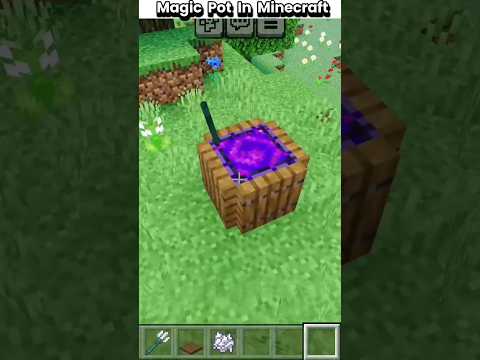
Hello everyone my name is pixel riffs and welcome back to the Minecraft Survival Guide I hope you guys are having a good day we’re starting out today’s episode in front of the blacksmith which I have decided in this kind of ongoing story of the world that I’m creating here this blacksmith is Going to be owned by a man named a Vulcan now Vulcan I’m pretty sure is the Roman god of something or other fire perhaps but yeah Vulcan is kind of the root of the word volcano is where that comes from and considering the chimney in the center of the blacksmith looks Like a volcano I kind of thought Vulcan was a good name for the guy who owns this place we might actually adopt that naming scheme for some of the other blacksmiths who are going to be around here but we will we will see how all of That works anyway not to worry for now in here we are actually smelting up a ton of glass right now and the reason for that is because of what we’re going to be doing in today’s episode we’re going to be creating a fog like effect in the ravine if I can actually leave The blacksmith behind us here we’re going to be creating a fog effect in the ravine which I’ve already started to experiment with over here this is something that has been around for a little while the first time I encountered it was on a post on the Minecraft reddit on our slash minecraft And I thought this was such a fantastic effect I really wanted to do it at some point but I didn’t have a project to do it with at that point since then you’ve probably seen it used by a bunch of other prominent minecraft YouTube folks so you may yet have encountered this in Escalating fives videos or a few other places like that the idea is that initially you can layer up a glass with air blocks in between and the glass transparency will actually kind of layer up to create an effect where after a few layers have been placed you can’t see Down through it as much and it creates this kind of layers of fog effect it’s not quite so evident when you do this with two or three layers of glass like this but when you do it with like five or six or seven layers it’s even like It’s impossible to see how far down the ravine goes so it can look like the ravine is just infinite and has this lovely layer of fog and mist drifting up from it and that’s always been my vision for the ravine here at founders Forge now the reason you can’t place glass Just on top of each other in a pillar is as you can see here if you look down through it this might just be an to find thing but I’m pretty sure this is also present in just vanilla unmodified minecraft it looks like you’re looking straight through to the Floor because of the way glass is rendered and there you can you can’t even see the borders of the glass blocks below this the way minecraft renders it when you look down through glass it can make it look like there is just nothing in between the glass block and the floor Whereas there’s actually another glass block underneath there so that’s why you need to leave a an additional air block layer if you want to use all the same color of glass however this connecting effect doesn’t happen if you’re using different colors of glass so what we’re Actually going to do is layer up layers of black and grey and that will double up on the fog effect in about half the space meaning that with a few different layers that you can create a fog effect very effectively and that’s something I’ve already started doing in the ravine Over here in this little kind of offshoot of the ravine on this side there it is yeah I have a few different layers put here already and if we go over to the other side here I can show you how many layers this is it’s only About four or five at the top of black and then gray and then black and then gray in there black and then there’s a two layers there that just have black with air gaps in between it and I’m gonna put a little bit of extra gray glass in there to solidify the effect Even more but after that you can put lighting and stuff underneath it and the ravine can look like it is glowing from within but from the top you won’t be able to see the lighting blocks they won’t even give off enough of a kind of ambient light it won’t really render the Light in a way that you can see it from the top so the entire ravine can kind of glow at night without it really lighting anything up or like albeit over light sources themselves being visible at least so I’m gonna go through this entire ravine today and I’m gonna do This I’ve actually done it on a live stream bind by the time this episode comes out but I figure I would at least show you the the kind of work in progress the the current state of the ravine but I’m going to do a little bit More of the swapping out of the walls for this cyan terracotta and then we’ll finish the ravine all the way up to the end and then we’re going to cover it in these layers of glass probably a little bit further down than this just so that the effect can really kind of shine Through and so we can build some stuff up at the top here like the people of founders Forge are mining down into these layers of fog and risking their lives to see what’s down there and what they can dredge up from the bottom of the ravine that’s the idea at least and That will require an awful lot of stained glass of both black and grey which is a good reason that we have an ink for hunt that is one of the things I wanted the ink farm for in the first place was being able to make massive Amounts of gray dye so I’m gonna get on with this project it is going to take a little while but it’s going to be worth it in the end and once we come back we’ll see what we can do about decorating the edges of this ravine a Little bit more go to a little bit of terraforming today and after a little bit of time has passed this is the result and it looks a little bit weird as the glass starts to render in but I think this looks frickin fantastic I’m really really happy with this now there Are a few things that we need to point out here the first of which is that this is about seven or eight maybe nine layers of glass I’m pretty sure it’s an odd number actually as you can see that’s created an effect where you really can’t see the bottom of the Ravine at all in fact the YouTube video compression might actually be making it a little bit more difficult to see down there but that’s that’s looking pretty solid now you can still see the walls of the ravine as it goes down which i think is great For this fog effect it kind of like grady AIT’s the walls down a little bit and underneath there I can’t tell if you might be able to see it or not there are actually sea lanterns in running in a row down there that allow you to light Up this place at night now I kind of want to move those to the walls a little bit because it is a little bit more obvious to see them there when you can see them as there’s sea lanterns kind of poking through the bottom there if you’re looking for them then it’s really Obvious you know where they are the magma blocks also look really great kind of fading out into the glass down there and I want to continue those along the side of this ravine because they really do add something special it’s a pop of color and a bright texture that Stands out against all the gray and black and really makes this look like something special but overall this is precisely the effect I wanted I’ve also gone around the outside now that we have a little bit of extra access to ink and I’ve managed to put in a whole bunch More black concrete powder to really give the place a feel that it’s going to kind of covered in ash and I want to do the same with some gray concrete powder as well so I’ll probably do a little bit more of that off-camera as well as adding in some more magma another thing I’ve done over here to this tree which I’m not entirely certain I like yet is coat the bottom half of it in a shoe quote-unquote by just replacing the last few logs in the tree with acacia logs because they have more or less exactly the same bark pattern as oak does just With a great end instead of a brown one now I don’t know for certain if that’s going to change a whole lot when the new textures come in again that’s something that might change a little bit but I like the fact that that kind of looks like there’s just ash clinging to the Bark of the tree we could maybe even change a couple of the other logs in there to keep them blended in with that particular idea but I think once you’ve added a few extra touches of magma and a few more details to the sides of this Ravine I’m not gonna go crazy like I did down here with the rest of this and to be honest I just finished out the ravine walls with the cyan terracotta around here and didn’t really do anything fancy with them at all just straight up replaced the stone with the terracotta But I think that’s a really nice kind of look it gives a very sort of unnatural feel to this entire thing which is sort of what I’m going for here but once we’ve done that I might actually start on getting some of the machinery built over the top of this because this is Supposed to be such a centerpiece of the area in my head and the kind of whole area around here was supposed to be built because this ravine exists because they can mine it out for precious resources and kind of harness whatever power is down here and it’s producing All this smoke they can harness that for energy I kind of want this place to be built up so that I know what I’m going to be building around it so I think once I’ve done a little bit more work on the ravine walls we’re gonna take care of Some of that today welcome back folks I’ve got a little bit more work done on the details here in the ravine we’ve got a few more magma veins popping out here and there some of which even breached the surface and kind of run over into the surrounding landscape which I’m Pretty pleased with I think I can probably still do a little bit more work here but I’m really excited to get started on the machinery that is going to be over and around this ravine and I’ve been drafting a little bit of stuff in my creative test world I’ll put a Screenshot on the screen for you now to show you guys what I’m working with I kind of there to be this machinery all around the place and rather than being actual redstone machinery because this ravine doesn’t really prove any kind of purpose it doesn’t actually provide all that Much for us it’s just here to look pretty the machinery we’re going to craft here is kind of fictional and isn’t really redstone driven in any way it actually uses a couple of redstone components but not for any kind of purpose other than looking like something is going on basically so we’re Gonna put together some stuff with the materials I’ve got here in the Shilka boxes and it’s going to be clamped down to either side of the ravine so I need to find a place I think about here is gonna be a good place to start where this side is roughly on even footing With that side in terms of the height here and we can probably go from there so what we want to do is build these a few blocks apart on each side I’m gonna start with one here so I think I’ll probably lay down a couple of logs just As a foundation doesn’t matter if we waste a couple underneath there and we’re going to probably put another one let’s see we need one two three four five gap and then we’ll put another one there like so let’s bring the Shilka box with us get the feet down here at the Base so it looks like it’s kind of firmly supported by the ground underneath it and maybe even swap that out for a decent stone brick so it doesn’t look like it’s resting on the dirt there there we go that one’s got a concrete powder underneath it so that Should be fine and we’ll do the same on this side as well plop down the feet there we go fantastic from here we’re going to be going all the way across the ravine and on the underside of these we’re actually going to be placing iron bars to look Like a track that this machine can run on I think that’s gonna be a neat little look for it I’m sort of modeling these off of the machines that you see around dockyards this site is one block further down than that site so I am going to Build these up a little bit more like so and like so right and then I’m gonna strip random sections of the log here as we go and it’s gonna look good this way because imagine that the machine is moving back and forth along here it’s probably going to be stripping the bark Off of the wood if this is a giant log crossing the ravine it’s gonna strip the bark off of it as it does so okay so we’re gonna put in the feet of the contraption kind of grabbing onto the iron bars on either side and I’ll have To hop there and here to place that one the other one is going to be five blocks along I’ve actually put that in the wrong place but that’s okay it’s just a marker for now we got one two three four five and then there I think is where It’s gonna go by reaching out from these blocks we can just about place one on the opposite side and that’s the feet going into position now for the redstone components I mentioned we’re going to be using pistons if I can place them facing inwards into this log which we may Actually have to remove this log to do stand on this central iron bar yeah there we go and have them facing inwards like that it’s always a bit of a problem placing pistons when you have something to place them against so you could always build out to either side as well As place these guys facing inwards like that and using pistons kind of grounds it in a Minecraft reality a little bit because you could imagine that the pistons are being used to effectively clamp the logs so that this thing doesn’t move from its current position and then they could be retracted Obviously they’re not extended right now but you can you can leave that part up to the imagination similarly we are going to have another piston facing downwards on each of those we’re gonna place stone brick stairs to round these out and then pop acacia fences on top of Them to make it look like those could be operated almost like Pistons kind of independently and enabled the whole machine to shuffle along these two beams that are spanning the gap in the ravine up the center of each of these we’re going to be placing some oak wood where It wraps around on all sites it isn’t super important for this bit but for the texture of the bit further up I kind of want to use wood so that you don’t have any end log textures kind of makes it look like a different material really And on the third block up in the center here I’m actually going to put a piston and the pistons here are going to be extended using levers and they’re actually going to be holding a block in between them and that’s more for the again the mechanism looking stuff of This device rather than actually having any practical purpose gonna put a lever on the block above there and activate that gonna put a lever on the block above there and activate that if I can reach there we go and then we’re gonna place an iron block in between and those Can kind of act like they are shuttles like this thing could kind of crab walk along these logs how to go and get another piston from my emergency redstone box so that we could complete this section but yeah well properly unfair will do another oka log on the Opposite side pistons in the middle bamm-bamm and another iron block which I have left in the chest oh I’m getting getting better at parkour by the minute here step back and take a look at this it looks like a weird bridge right now believe me things are about to get a Whole lot weirder for the next step we’re gonna make sure we’ve got plenty of cobblestone walls and oak wood logs on us like so because we’re going to add a kind of frame with the cobblestone on either side like this again adding to that piston feel and we’re going to Expand that up and make a kind of chassis for the machinery that’s going to go up here chassis probably isn’t the right word I’m sure the engineers in the comments are tearing their hair out but don’t worry this is a fantasy machine a framework is what we’re making a Framework of sorts extending these out on either side like hammerheads and then we’re going to build up on top of that using some more of the oak wood logs now how am I gonna get up there ender pearls would be preferable so let’s go and grab a couple of those well it’s already Taken me a couple of attempts and misses third time’s the charm there we go nailed it so up here we’re going to be building this up on either side to kind of cradle some wood logs that we’re going to be placing along here and the purpose of these logs is to Hold up this kind of stone brick frame in the middle and through the center of this we’re going to be dropping some fences and it’s going to look like there’s a drill on the end of it so the idea here is that the engineers of founders Forge are using this device to Kind of drill down into the bottom of the ravine and extract some sort of precious resources I’m actually going to be placing upward-facing droppers on each of the four corners of this little stone brick frame and that’s again not for any kind of functionality but just because from the outside that square Texture with this dark grey border looks really cool and looks great as part of a mechanism also by adding buttons to the top of the droppers depending on which way you place them of course because they do have two different orientations in which they can be placed it actually Covers up the top hole of a dropper like that and can make it look like it’s riveted in I’m also going to replace the central three stone brick blocks there with stairs so this can look like a track that a cog is going to sit in because as the engineers in the comments Will tell you cogs don’t really make much sense unless they have something to mesh with not that any of this really makes sense Bay but you if this whole exercise is teaching me anything it’s that I need to get better to have throwing ender pearls but right Now we’re up here I can break some of the spruce logs down into stairs that are going to be part of an enormous let’s make a crafting table and put it up here just so I don’t have to keep going back and forth because I feel like that’s actually wasting me more time Than it is saving I’m also gonna put nether brick stairs on each of these sections here just for a little bit of atmosphere a little bit of a different color block and also because I feel like nether brick and acacia stand out like this and make them feel like they are Interesting bits of the machinery we’re also gonna use a lot of nether brick fences in this and I think this one comes up around here I’m looking at my creative draft of this whole thing and this one comes up around here like so and the idea is that the COG is kind of Driving this central spindle and the drill section is going to be coming down here with another nether brick fence like so now either side of this enormous cog is going to be framed out in stone and we’re going to have this sort of set of note blocks here in the middle with Nether brick fences connecting them to make it look like a spindle of sorts it’s quite difficult making anything that looks realistically round or cog like at this sort of scale but we’re gonna try our best here I’m gonna start stacking up the crafting tables that I keep making for this project down here And making this the stack of shame or something like that but at least I’ve come back to the shelcha box and I’ve got enough materials that I think we can continue and luckily with this giant thing up there I actually have something to enderpearl into whoo so there we go The last little touch I want to add to this let’s see if we can duck under using our little electric dodging trick that we learned earlier in the week and place a single spruce log coming out from the center there to look like a central shaft that’s going to be driving This whole thing gonna connect up each side of this using spruce trapdoors as long as I can place them in the right direction that they will fold on the sides and that’s gonna make the whole thing look like it’s actually coated in spruce rather than just these Unconnected sections of it and I think this is most of the way done we just need to add the drill section down the middle and connect up some of those nether brick fences so that they look like they’re actually doing something Oh finally hello this is the last mob I Think we’ve actually needed to cover in this series and that right down there is an endermite these have a chance to spawn random in the event that you throw an enderpearl it’s a very slim chance to spawn and they’re actually related to silverfish they kind of have the same Model the same type of attack and they’re also pretty easy to kill the thing about ender mites is that they are used quite primarily in Enderman farms and we’re going to cover them in a future episode but ender mites will actually aggro Enderman just the presence of an endermite will get them Annoyed and they’ll come over to attack it so chances are if you spot an endermite and there’s an Enderman nearby it’s gonna get killed pretty quickly but ender mites are used as bait in Enderman farms and that’s kind of how you end up farming Enderman later on we’re going to Cover that in a future episode though for now let’s continue connecting up these nether brick fences one last section to connect there and then I think from the ravine floor we can build up into the drill section because that’s just gonna be coming down from the center there and now night is falling You can actually see the work I’ve done moving these sea lanterns to the sides of the ravine which still give it this fantastic like foggy glow at night but it means that you don’t have to look at the sea lanterns where they’re they’re really obviously placed down the middle All I’ve done is tuck them into the ravine walls at the site and I think the effect is still really cool whilst also making the center nice and dark and if anything it makes even more sense for the physics of this whole situation because the magma in the walls is Probably what’s causing the glow to begin with and as the nether brick fence gets past the bottom of the rails here we’re gonna have two cobblestone walls and then we’re going to just put a stone brick and a stone bricks tear on the end of that like so and that from the side Can at least look like something sharp that’s intended to pierce the bottom of the ravine like a jackhammer of sorts or alternatively it could be something that rotates and kind of drills down with a spiraling motion but that’s about as like detailed as we can go with that I Was thinking about putting a hopper on the end of one of these but it just didn’t look quite right maybe we’ll incorporate hoppers into another one of the machines around here because this is not going to be the only one in fact I want to build a second one of these Today just so it can have a twin down the other end of the ravine where they might want to drill in a similar kind of way and with a little bit of extra work and another cup of tea rig number two is in place this one I decided a kind of grabber style Or thing would look kind of fun on the bottom there instead of a drill but the effect is more or less the same and having two of these things actually really makes them look good I think one looked a little bit goofy just kind of by itself but there are these like twin Rig platforms on either side which are gonna be dragging stuff up from the bottom of this ravine I think that’s looking pretty good I think that’s the start of an a kind of a theme of machinery that we’re going to be building some more stuff around this ravine especially around here I want This to be kind of the work yard where all the people come to work and maybe even have some elevators that kind of lift them down into the fog of the ravine to bring up what they can mine from the walls of the outside but that Is gonna be it for this episode folks I hope you’ve enjoyed this look at this glass fog effect and some more creative stuff we’ve done with the machinery around here it’s getting dark and I need to go to bed so before I do don’t forget To leave a like on the episode if you enjoyed it subscribe to my channel if you want to see more and I’ll see you guys soon take care bye for now Video Information
This video, titled ‘Creating Fog Effects Using Glass! ▫ The Minecraft Survival Guide (Tutorial Lets Play) [Part 86]’, was uploaded by Pixlriffs on 2019-02-28 11:00:07. It has garnered 225513 views and 4748 likes. The duration of the video is 00:21:28 or 1288 seconds.
The Minecraft Survival Guide continues! This tutorial will show you how layers of stained glass can be used to create amazing fog effects. We also work on the technology of Founder’s Forge, and encounter the only hostile mob I haven’t seen yet!
The series will teach you how to master Survival Mode, and will also be my Single Player Let’s Play series!
Watch the full Minecraft Survival Guide playlist here: https://www.youtube.com/playlist?list=PLgENJ0iY3XBiJ0jZ53HT8v9Qa3cch7YEV
World Seed (Java Edition only): 7574084833700264939
—- Support me on Patreon for access to my private vanilla Minecraft server, plus other awesome rewards! https://www.patreon.com/Pixlriffs
Follow Pix on Twitter for video updates, screenshots, and other fun stuff! http://www.twitter.com/pixlriffs
#Minecraft #Tutorial #SurvivalGuide #Survival #Fog