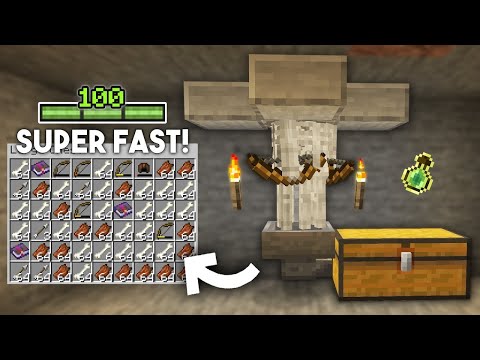
Hello everyone sally here and welcome back to another bedrock edition tutorial today i’ll be showing you how to build a pretty awesome multi-item storage system in your bedrock edition worlds multi-item sorters are one of the best types of storage system in all of minecraft they are extremely customizable modular upgradable and Seriously they’re just great all around the one that i’ll be showing you how to build in today’s video is super reliable completely silent fully automatic and again super duper customizable as well so this multi-item storage system can be expanded or shrank to fit your needs the Basic system that i will be showing you how to build comes with 54 double chests of storage which is way more storage than most anyone will need i don’t even know what to do with that many chests and i’m the one that designed the system But you can shrink this down to just be like a six double chest and you can even expand the system up to 90 double chest per module and of course you can build a multiple of these modules it is seriously way more storage than you’ll ever need trust me you probably don’t Even need 54 but with 54 double chests you can have 54 different types of categories and each one of these double chests can sort and store 54 different item types so like this chest right here is for all of our different food types we can set up this chest to store any Items that we want to and any layout that we want to and in any configuration that we want to so with this one system right here you can sort and store 2 900 unique items that is way more items than is even in minecraft so with one storage System you can easily store and automatically sort every single item in minecraft it’s crazy so let’s check out the system in a little bit more detail shall we we have the input chest over here this is where you’ll come in to dump all of your different items and Then over here on the right side we have the output chest so anything that can’t be sorted or if there just isn’t room for it in your system it’ll end up in this chest over here and no items will ever get stuck in the redstone or stuck In the hoppers behind the system now speaking of behind the system as you can see the redstone is actually pretty nice and clean i’ve been working on this for several days the video has been delayed a couple of times just due to me refining and tweaking the redstone so Let’s go ahead and demonstrate the system shall we we’re gonna toss in just a bunch of random items that we might have in our inventory a little bit of pork chops some diamonds some grass and some nether stars you’ll see that the redstone starts activating and if we Open up this chest here a couple of diamonds will start flowing into the chest as you can see our diamonds are going in and the nether stars are going to be going into this chest as well so this chest over here is going to be for All of our dirt and grass and we should see those items fill into this chest as you can see it’s actually a pretty quick little sorter now all of our food items are going to take a little bit longer to arrive at the destination because they Are four slices over but if we look in this chest we’ll see them filtering in right now as well which is pretty awesome so as soon as your system is done sorting items the redstone is going to turn off as you can see we have an indicator light and that means that the Redstone is no longer activating so if we toss in some items that we don’t have any room for such as some random in stone brick walls that is going to go through the entire system it’s going search every single slot of every single chest and this entire storage system and If there is absolutely no where to put that item then it’s gonna end up in the output chest over here so this isn’t a miracle system or anything it cannot sort the non-stackable items of course however you can still use the storage system to store those items so this Chester right here is being ignored by the redstone it’s really easy to make these chests get ignored and then you can just set up this chest to be however you want to you can come in here you can manually put in or take out your items And this is ideal for things like armor horse armor enchanted books bows weapons shulker boxes your boats and your shears and all kinds of things like that basically any non-stackable item you’ll want to set up an ignore chest for it keep in mind that if you run out of room Within one of your double chests you can always put stuff into shocker boxes and then put those shocker boxes into the chest as well so if we ran out of room for pie we can put some pie into a shocker and bam there you go you have additional storage it’s even more Customizable when you realize that you can put shocker boxes on the front of it instead of double chest or even a single chest for items that you might not have that much of and of course you can also put things like furnaces and bowls ander chest crafting tables stone cutters Brewing stands or whatever other utility blocks you want down here at the bottom of the storage system this makes it really convenient to grab a bunch of items that you want pop them into the crafting table or furnace rename them or open up your ender chest and see Whatever you got in there it is honestly so convenient and you can just have like a powerhouse of organization crafting and storage all within one really easy to access area as you can see all the very top of double chests are also easily within reach you don’t need to Look up that far you don’t need to jump to reach them and you can actually reach every single double chest from a central point right here as you can see we can reach the two far corners and of course all these lower edges and even the Output chest as well and one more thing that you might not think about is the fact that you can rename and color the names of the items in your item frames or use signs or whatever you want to on the front of your chest this will help You really identify what’s in your chest in case you’re storing a bunch of different items and of course if you ever want to color the item name all you need to do is put that into an anvil and put in the stacked ass symbol the letter Or number that you put after the stacked s will determine the color and the formatting so there really is a lot of ways to play around with this so to give you a little demonstration of how the redstone works and to hopefully make you understand the importance of laying out The contents of your chest let’s take a look at this little setup right here this is a super boiled down and basic version of what’s happening in the larger items order so essentially all of the hoppers that are behind your chest are trying to constantly push items into Your double chest but as you can see every single slot in this double chest is completely filled up with a pickle so no other items besides the pickles can be put into this double chest however if there is a slot with like a torch in it for example then of course torches can Also go into that slot if there are any empty slots in any of your chests then the next item that comes through the system is going to fill up that space no matter what it is so that can kind of break your organization and that is why Every single slot of your chest needs to be sorted and have at least one item in it so if we toss in the torches and the pickles into our little miniature storage system as you can see all the pickles are going to go into this chest Right here but of course the torches are not if we activate the redstone and flip-flop the locking of these hoppers then of course the lower hopper is going to be trying and pushing items into the lower chest because there’s no sticks in this hopper it’s not going to be putting Anything in there at all as you can see the torches are in there but if we take out one item then of course those torches are going to spill in there so of course that is a super boiled down and simplistic view of the storage System there is a lot of redstone a lot of timings and a lot of item elevators to make this thing work at scale but of course that means that we can have up to 54 unique items a per double chest that we can have a category chest with a Whole bunch of different items each we can do really whatever we want it is a super customizable system something that i feel is worth mentioning is the fact that we’re using a silent and one wide tileable item elevator with today’s multi-item storage system this is something that i just did a tutorial on Along with a bunch of other item elevators so if you want to learn more about item elevators or learn how to build this one specifically then of course check out that tutorial linked everywhere and one last thing before we jump into the tutorial if you’re new Here or if you just want to see more tutorials on the channel then of course consider subscribing it’s the best way to support the channel and the best way to make sure that you see more farms and contraptions when i release them thank you so much and let’s get into it and Let’s hop into the tutorial shall we for your convenience there’s going to be a full materials list for this build down in the description of the video that way you know everything you need to build with you’re going to need a 12 wide by 12 long area and this is going to be 13 blocks tall for the full system of course you can make this system a taller if you want more chests so keep that in mind and of course you can make the system as thinner and shorter if you feel like having less chest overall You’ll figure out how to build the system and customize it to whatever size you want by the end of this tutorial now keep in mind that your floor level is pretty much going to be about five blocks off the ground from there’s a build height all of this underneath here Is going to be redstone and hoppers and item elevators so your actual first double chest is going to be right about this layer and then your actual real floor level should probably be about there for the most convenient use case that way you can look down to see that Chest and that way you don’t need to look up too far to see the very top chest i don’t think that this build needs to be trunk aligned however it is pretty big there is a lot of redstone and there is a lot of very specific timings so i would recommend to just Play it safe and chunk align this build that way you don’t have any weird issues with chunk borders breaking your redstone if you need to know how to chunk a line check out the tutorial in the upper right right now so let’s start by building up the core of the storage System you want to go to the bottom left corner of your build area and go over by four blocks and buy one and now we’re going to build up by a five block pillar placing yourself a double chest right here going inwards by one and we’re Gonna have nine of these going across in total so this should reach the opposite side of your marked out build area and now we can go ahead and remove this pillar that’s right here and build up the other five double chests that go on Top of this one for a total of six we’re going to leave in this little l shape of chester for now make sure this is all lined up and where you want them because once you start putting items in these chests you really do not want to move Them now go to your left pillar of chest and we’re going to install a hopper behind each one of these you need to crouch and then place these on the backs of each one of your chest make sure all those are actually facing into the chest otherwise things are going to be broken You want to crouch and place another hopper below this one and this should be pointing directly downwards we now need to pillar outwards by four blocks like so remove this one place a redstone torch right there place an observer facing that block and now an upper slab Underneath it like so we can now just go ahead and remove that block so now that we have one of these in place and we need to extend it to the side by nine blocks and that should be lined up directly behind each one of your double Chests so do that for your slab line and place in all of your observers going across all of your blocks going across and all of your redstone torches as well this is what you should have built up and now we’re going to place in a line Of activator rails in front of each one of your observers it’s important that you use activator rails otherwise this will not work you also need to place activator rails on top of all of the observers now right here is where you might see a little bit of an issue if You’re building in the wrong directions your rails are going to slope up and down like this this is only going to affect you 50 of the time or possibly more if you’re just an unlucky person to get around this all you need to do is place in Extra rails to either side like so and then place in the rails where you want them you can then go ahead and remove this rail and that one place in an extender rail on these two sides and now you can get the next layer of rails up here at this layer without them Connecting or going diagonal so if you’re unlucky it’s going to be a little bit of extra rail placing it to the left or right side but it’s not too big of a deal now that we have two layers of rails in place we need to place in a saw Block on one end and then another upper slab and you might have guessed it we need to extend this going all the way across with nine activator rails on top of those we’re now going to place in a line of observers facing all of these activator rails in these areas and Another line of observers facing all those activator rails right there once you have the third layer of observers in place you want to place the saw blocks behind each one of those and of course don’t forget to put a redstone torch on the backside of each and every single One of these blocks so you essentially just continue this pattern all the way up until you reach the very top hopper it really isn’t anything special but you might need to fiddle with the rails a little bit and this is what you should have when you are done filling in all That as you can tell it’s exactly the same and it’s all really straightforward make sure that all of your observers are facing the rails if any of them are not facing the rails your system will be broken in certain areas now i would recommend it while the system is nice And open that we go ahead and replace some of these solid blocks behind your redstone torches with light emitting blocks such as sea lanterns or jack-o’-lanterns that way the high light level from these blocks overpowers the lower light level of the torches and you don’t get any light update lag there’s a Lot of redstone torches in this build turning on and off and you don’t want those things lagging out your world just putting in a few of these should do it if you want to now is a good time to go ahead and fill in all of your chests so Just place in a double chest in absolutely every single one of these areas and then of course all of these need a hopper facing into the backs of them like so and of course don’t forget the hopper facing downwards underneath them as well it’s starting to look like A proper storage system isn’t it and now it’s time to place in the locations of all the item elevators you essentially need one behind every single one of these slices so go to the back side of the system right here line yourself up with these slabs and then go over by a Block we’re going to place in an observer right here lined up with the far right of the system as you can see that is a one block over from those slabs so we’re gonna place another three skip a block and then add in another four and as you can see that lines up With the very edges of your system so that’s the places for eight item elevators we need a ninth one to the right side right here if you’re on the back technically that ninth elevator is on the far left side of the build however we’re gonna go ahead and place a Redstone torch right here saw a block above that redstone torch right there temporary block upper slab get yourself a activator rail off the top of that slab and then get yourself an observer facing downwards observer to the side solid block redstone torch redstone dust light emitting block and now we’re just Going to go ahead and fill in all of our droppers going upwards so you can basically just jump and place all of these these droppers will click as you are building the item elevators however after that they will never ever click in their lifetimes so basically make a Tower of droppers going all the way upwards until you reach the same layer as your observers right here and that is as tall as your elevator needs to be so this is what your first item elevator should look like as you can see the build process is really straight Forwards and you’re going to be ending off with a dropper facing upwards and two observers at the very top layer so now we need to build up more of these you want to start off by building up the dropper towers of course and then you’re going to place in the redstone torches The blocks above those your extra redstone torches get in your slab line and this is where it’s going to vary a little bit you need to alternate between the activator rails and powered rails that way these things are fully tileable and they don’t mess with one another and Now we need to build up all of the observers and the redstone torches before we place in the rest of the wall blocks right here so this is what your item elevators should look like at this point in time and keep in mind that you only need light blocks on the left and Right sides you don’t need them all the way through the middle so and now we need to fill in the redstone and repeaters for the rest of these of course we can’t place in redstone all next to each other because then that would not power your droppers so instead We’re going to place in a repeater there and a repeater there on each one of these levels and that will allow us to keep these things independent and they won’t be interacting or powering each other and there you go that is all you need to do for your first of five Elevators go ahead and do that entire process on these four over here and that is all nine of your item elevators completely installed they’re all exactly the same as one another besides for the alternating rails and repeaters now we need to go to the front sides of these Things and install a couple of hoppers you need a hopper on the front of it and then a double chest right there place in yourself an activator or powered rail place in a solid block right there go down a block and then place an observer facing that double chest like so you Need to do that for all nine of these elevators of course alternating powered and regular rail and as you can see that is a pretty simple and a straightforward little build process so now we’re gonna move up to the top of the system and install all the hopper lines it’s a Little bit of a spaghetti mess up here so bear with me anyway we’re going to start off by placing on a dropper on top of each one of these hoppers right here and then a double chest on the left facing one like that now go to the back Side of the system and we need to start weaving in all of these different hopper lines so the first one is really straightforward we’re gonna grab a hopper line and take it straight into that double chest like so above that dropper that is elevator one two slice One now we need to take elevator two it’s a slice two so a hopper right there and then a hopper going all the way like so slice three to slice three is a little bit more convoluted as you can see we gotta turn it around slice of Four to slice four is even more curvy and then slice of five to slice five is the curviest of them all from here on out it’s simply straightforward hopper lines so you just go straight from the elevator directly into the rest of them now the reason why these final four are Not curvy is because we’re gonna have curvy copper lines on the underside of the build so essentially what we’re trying to do here is spiral the items around taking them from slice to slice and one big clockwise spiral and it’s kind of uh a little bit convoluted Anyway here’s an overview of where all the hoppers should be facing take your screenshots now and triple check that all of your hoppers are indeed facing in the correct directions now for the lower hopper lines we need to place in seven sideways a double chest underneath each One of these hoppers right here so simply fill in each of these going across the entirety of the build until you get to the section right here we’re going to place in a sideways double chest right here and now we’re simply going to place in another double chest And reroute this hopper to go directly into it like so this is actually going to be the output chest for the entirety of the build and now we need to run a whole bunch of hopper lines the left side is really easy and simple you just go straight forwards with the two Hoppers on each one of these going from one double chest to the other and on the right side it’s a little bit more convoluted you simply need a hopper out the side right there and then two hoppers going underneath that one a hopper right there one to the side one Underneath that double chest hopper there behind it to the side and then the three hoppers into that chest like so now it’s time to install the redstone lines so we’re gonna take a redstone line and bring it all the way from the left side all the way to the right so Now we’re gonna grab a repeater right here on four ticks one right here on two ticks a piece of redstone dust right there block there and block is there grab yourself a repeater right here on four ticks a solid block and now you want four upper slabs in these areas and Four upper slabs right here as well placing yourself with three comparators going in this direction and three comparators in the opposite direction two pieces of redstone dust one piece of redstone dust right there and then a solid block place in a redstone torch right there a solid block and then four Slabs in these areas like so you can now remove that block place in three pieces of redstone dust a repeater right here on a four ticks and then a solid block and a redstone torch off of the side of it make sure you go ahead and place in a Solid block right here above that piece of redstone that way those two redstone lines never interact with one another we’re now going to go ahead and place a dropper directly above that block with a hopper facing it downwards and then two upper slabs to the side of it a Comparator right there and a repeater on one tick like so that is actually the main circuitry for the entirety of the build this is going to be the activation line when your elevators get powered and this is the main pulse extender to make sure that your redstone clock stays on For a certain amount of time and this is the monostable which will be powering all of your rail lines deactivating and activating those redstone torches and now it’s time to add our input chest so go to this double chest right here and place two hoppers going out the back Side of it a double chest next to it hopper facing downwards and then a hopper facing to the side and another double chest right here anything that you wanted to get sorted or stored should go directly into this chest not anywhere else into the system only into This chest we’re going to place in ourselves an upper slab right here and then a comparator a observer facing upwards right here with a piece of redstone dust above it we’re now going to place in a solid block right there and then two more solid blocks in these Areas place a solid block above that piece of redstone two pieces of redstone right there a couple of slabs and then a solid block like so you want a repeater right here on four ticks and one right here on two ticks this is going to activate the main system as soon as you Get items into your input chest just as a precaution i’m gonna add a slab and a button right here just to redirect that redstone line that way it doesn’t power that block and power the hopper on the other side of it i don’t think it’ll cause issues but better safe than sorry And now for the main redstone line you want to place an upper slab in front of that repeater and a piece of glass right there redstone dust on top of both of those and then basically just elevator this up all the way to the top of the Build as far up as you can go and then you’ll end up with a piece of glass with redstone on it right there we’re now gonna go back down to the bottom and place in ourselves four slabs into these areas a repeater right here on four ticks repeater on one tick then two Pieces of redstone and basically do that at both of these layers right here so repeaters on four one tick two pieces redstone repeaters on four one tick and two pieces of redstone once you get up to the top here you want a layer of five slabs in this orientation a solid block Right here two pieces of redstone dust a repeater on one tick repeater on three ticks and then simply a redstone line that goes all the way across the entirety of the build above all of those hoppers redstone above all of these hoppers skip these two and then place a Piece of redstone dust right there so that is what all of the redstone is should look like and that is pretty much everything done except for the last redstone line you want two slabs right here a solid block three pieces of redstone dust and then get yourself a Redstone torch right there this is going to limit how many items go into your storage system without this redstone dust and redstone line it’ll just get flooded with items and then they’ll get backed up and just end up in this double chest right here which is not where you Want them you want them in these double chests the final touch is to add in one item in this dropper it can be any item that you want to you just need one of them if you would like to add the optional indicator light to your system Which i highly recommend just go to the center column of chest and place in a redstone lamp right there in the floor we’re now going to go ahead and replace this block right here with a target block a redstone torch right there if i saw a block above it redstone torch Again saw a block above that and then a piece of redstone dust right there now whenever your main clock is on that will turn on your redstone lamp and one thing to keep in mind is if you’re going to be decorating the undersides of these chests to hide the redstone don’t place Any solid blocks right here otherwise that’ll power your hopper and break your system instead use something like a slab or something else that won’t conduct redstone power and now it is time to do a test run of your system so grab yourself a stack of items of your choice And toss those into the input chest and after a couple of seconds you should see all the rents down activate and your items it should go into the very top chest here and as you can see all of our gold is flowing into this chest i would recommend double checking the chest Below this to making sure that nothing leaks through and goes where it shouldn’t once you’ve confirmed that nothing is go ahead and fill in every single slot of the top chest and then we should see items to flow down into the second chest and they are indeed double Check for item leakage and that is pretty much all there is to it you can’t repeat that little test for as many of these double chests as you want to until you are satisfied that the system is working as is if the system is not working i would recommend double Checking all of your timings it is very important make sure you put an item in there make sure all of the redstone is intact and where it should be if you’re hearing any of your elevators click that is because you probably have a repeater on two ticks or a missing piece of Redstone or one of the observers is facing the wrong direction it’s just something really basic and easy to fix at the end of your test you should get exactly the amount of items out that you put into the system this system does not keep any of the items in the droppers or The hoppers every single thing will either be delivered into a chest or into the output chest and now it’s time for the hard part you need to figure out different categories for every single double chest on your wall i would recommend going with probably some form of category selection like this one Right here i kind of just threw this together i kind of had to make this work because i ran out of ideas for 54 double chests but again this thing is entirely customizable you can have as many or as little categories as you want to you can have any items within your categories That you want to and really it’s just a lot of fun to play with it’s probably going to take you a couple of hours to sort all this out though and i would recommend while you’re doing this to just gather every single item that you own across the entire world that you Play in that way you can just kind of have one main essential storage if you want to tell your system to ignore a chest such as a chest that you want set up for non-stackable items that is super easy simply remember which chest it is This one is a four up and two over we’re now going to go behind the system count to four up and then a two over and a break this hopper right here we’re simply going to replace that hopper by facing this redstone torch and place it Right there as you can see the hopper is now facing backwards so the system is going to ignore this chest entirely and you can do whatever you want in here or nothing at all one final recommendation for the layout is to put all the items That you’re going to be using a lot of and getting a lot of on the left side that way they all get sorted a lot quicker and to put your ignored chests and your rare items and the stuff that you don’t use that much on the right side if you enjoyed today’s tutorial Then of course consider leaving a like on the video it helps out the video and the channel an absolute ton if you’re new here then of course consider subscribing that way you don’t miss future ones on the channel and if you actually did build this in your world Then let me know how it goes and how it’s working for you with a comment down below i’m always interested to hear your guys’s feedback and otherwise i’ll see you guys down the comment section and in the next one and then there was silence Video Information
This video, titled ‘Minecraft Bedrock: Easy MULTI ITEM Storage System Tutorial! Fast, Silent, Simple. MCPE Xbox PC’, was uploaded by silentwisperer on 2021-10-12 22:00:03. It has garnered 365489 views and 9401 likes. The duration of the video is 00:27:58 or 1678 seconds.
Welcome to a new Minecraft Bedrock Edition tutorial! Today I show you how to build an easy MULTI ITEM storage system!! This one storage system can sort/store EVERY item in minecraft 😀 It’s 100% reliable, fully automatic, silent, lossless, quick, VERY customizable, and modular! Each double chest can automatically sort/store 54 unique items, and you can layout the chests however you want! 😋 If you enjoyed this tutorial, leave a like! This has been in the works for a long time! Maybe consider subscribing too 👀
What’s the next thing you want me to do? Let me know in the comments down below!
-Latest video! New Raid Farm Buffs, Rare Deepslate Ores Re-added & More! Minecraft Bedrock 1.18 Beta https://youtu.be/LGZu9Y5t7-k
Minecraft Bedrock: Easy Item Elevators! Simple & Silent! 5 Designs Tutorial! MCPE Xbox PC Switch https://youtu.be/nIKjgoJ6np4
Minecraft Bedrock Tutorials! Full playlist! http://bit.ly/2XQz5sE
0:00 Overview, Details, & Awesomeness! 5:46 How Does It Work? 8:15 Tutorial Start, System Core 13:46 Tutorial, Item Elevators 17:10 Tutorial, Hopper Layout 19:37 Tutorial, Redstone 24:33 Final Touches, Tips & Tricks!
Become a member of The Silence! Join our discord, check out twitch, or visit my twitter. No matter where you go, you will find an active and loving community =) Tweets: ► https://twitter.com/silentwisperer_ Community: ► https://discord.gg/silentwisperer Live streams: ► https://www.twitch.tv/silentwisperer Bonus Content: ► https://www.tiktok.com/@silentwisperer Second Channel: ► https://www.youtube.com/c/silentwo
Consider supporting the channel on Patreon or becoming a channel member! Get rewards such as whitelisting on our Minecraft Bedrock/java servers, spoilers & so much more! ► http://bit.ly/SilentPatreon
Music by Argofox: http://bit.ly/2vsxAF1
MATERIALS LIST: Expensive, but scalable to any size you like! 172 observers (2 stacks & 44) 149 chests (2 stack & 21) 146 hoppers (2 stacks & 18) 124 solid blocks (1 stacks & 60) 120 redstone torches (1 stack & 56) 99 droppers (1 stack & 35) 83 slabs (1 stack & 19) 79 redstone (1 stack & 15 73 activator rails (1 stack & 9) 31 repeaters 24 light blocks (dont use glowstone!) 8 comparators 8 glass 8 powered rail 1 button
54 item frames, or signs. 1 random item for the dropper
Optional (but recommended) indicator light 2 redstone torches 1 redstone lamp 1 redstone dust 1 target block 1 block
#Minecraft #BedrockEdition #Tutorial PieIsTheBest in the comments If you made it this far down 😉