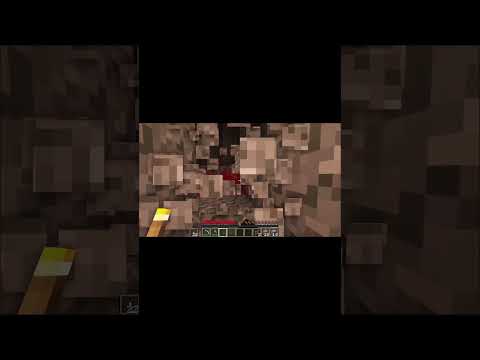
What’s happening beautiful people of the internet – boy ed from Texas and today we’re gonna be building a high-end gaming PC that’s gonna be able to play our TX titles easy easily fun little fact actually I’ve never played any game with ray-tracing and Mabel so I’m really Excited to build this and what better way to test out its ray-tracing performance than with the newly released minecraft with r-tx support but anyways these are the parts I’ll be using in the build let’s go over them real quickly the processor we’re going with is the Wizened 730 700 X this is currently the best value 8 core 16 thread processor currently available in the market it’s a great processor for not only gaming but screaming at multitasking as well the extra cores will help out a ton when you’re encoding h.264 while streaming and of course it’s gonna drastically Reduce exporting times compared to a quad-core CPU I’m not just building a gaming PC here by the way guys this is gonna be used as a part-time workstation as well so if I’m not gaming I’m gonna be doing a lot of work on it and since The budget is a lot higher I decided to go with a beefier motherboard the MSI x5 70 gaming Pro carbon actually has the features and specs that I’m looking for so this board is actually using a server grade PCB which offers up to three times the heat resistance compared to standard PCBs and it offers up to 30% better signal transfer the heat sink design is also a lot better on this board they’re thicker and have better coverage over the MOSFETs which will effectively help lower temps while overclocking and of course it will prolong the life of the Motherboard now 16 gigs of ram is more than plenty for gaming but since I’ll be using this as a workstation system as well I decided to go with a 32 gigabyte kit from courser and since we all know that rising systems run better on faster ram I went with a 3600 megahertz Weighted Ram with a seal timing of 16 like I mentioned in the budget bill like that recently you always want the highest frequency rated ram with the lowest seal timing for the best performance when it comes to rise and build so keep that in mind when you’re shopping In order to get those super high frame rates with r-tx on we got to go with a capable GPU which is why I decided to go with the RT X 2080 super Seahawk x from MSI I thought I would change it up and do something a bit different so this GPU Actually has a dedicated a i/o cooler attached to it and the idea behind this is to separate the cooling to offer better temps and potentially more overclocking Headroom now since we’re on the x5 70 platform we got to take advantage of PCI Gen 4 speeds for those Of you that don’t know pci gen 4 offers much faster read and write speeds over gen 3 so it just makes sense going with a Gen 4 capable m2 SSD drive like the coarser and P 600 and finally the case we’re gonna throw this in is the coarser IQ 460 5x mid tower chassis x’ it comes with three ll 120 RGB fans in the front with a fan hub in the back to control the lighting and two tempered glass panels now I do of course there’s new ql fans that i want to use instead of those Because these actually have the RGB wings on both sides so you can flip them any way you want use them as intake or exhaust and it won’t affect the RGB lighting and these aren’t the best choice when it comes to static pressure obviously the ML series do much better In cooling but the ql s do perform slightly better than the ll series but either way these are arguably one of the best looking RGB fans right now in the market but yeah these are pretty much all the parts I’ll be using for the build let’s cue the music put it Together and see what it can do All right so yeah the build is finally done and it actually turned out a little better than expected because I was kind of worried on how the GPU would look inside the case but it worked out I was able to put the cooler in the back using A push and pull configuration and I used a couple of velcro straps to tighten tubes together so it actually doesn’t look that bad one minor gripe I have with the case is the clearance issue with the top radiator mount unfortunately I was not able to fit my cursor AIO On the top because that just wasn’t enough clearance the fans would come in contact with my ram so for those looking to buy the 465 X make sure you are using low-profile Ram otherwise you won’t be able to fit a radiator up there and instead you’re gonna have to mount it in The front like how I did other than that I had no issues building inside the case in fact I think it’s a really good-looking case with the tempered glass front and side panels this was actually slightly tinted which I actually liked and of course I can’t Forget about the included fan hub in the back which was super convenient because it saved me time and having to install a note Pro I just hooked up all six of my fans on there and called it a day but yeah overall a very solid case airflow Is also really good you know I got three fans as intake and four exhaust I do have two on the top and then two in the rear as push and pull the temps are looking really good with the CPU idling around 39 degrees Celsius on average and The GPU temps idling around 33 degrees Celsius at peak performance while gaming we can see that the CPU averages around 45 degrees while the GPU peaking at 60 degrees at its highest point so really low temps from both the CPU and GPU while still remaining extremely silent The fans were actually kept on stock profile I didn’t have to set a fan curve because even while gaming the temps were low enough for the fans to stay on the lowest rpm setting high so now let’s jump into some gameplay with our TX on So immediately I noticed what a difference RTX makes in Minecraft it really transforms the game completely and as this insane layer of realism by introducing new elements to the game one of the biggest things you’ll notice is how much more light there is in the game it really feels like night and day Literally when you switch on RTX it feels like the whole world is more alive in a sense compared to how it looked without ray tracing and I can’t help but feel like it’s more enjoyable to play like it’s making me want to explore every part of this world he also Introduced new textures in the game each block will now have four different types of textures so that you can tell how rough and reflective it is for example I walked into one of the demo rooms and I immediately was able to tell the difference between the textures now this Brown reflective surface is supposed to be hard with flooring while the rest was carpet as you can tell there is no reflection on anywhere else on the ground introducing light also means that they’re gonna be shadows and I just love how it’s able to add a lot of depth in The game I mean look how r-tx transforms this boring lifeless waterfall we can see light now shadows reflections it just feels more alive of course with the added light feature this means colors are more vibrant and I didn’t really notice how much of a difference it Really was until I stepped into this one room where it showcased all the elements you know we got the lights up top the mirrors for reflection and the colors on the ground and if we turn our TX off well you get the idea now this all sounds super exciting and all but Unfortunately it does come with a cost on average I was getting around 174 FPS with our TX off and once enabling it I dropped all the way down to 45 however with the LSS on it almost doubled the average FPS to 85 making it playable the LSS is a new feature that improves frame rates while offering the user the same r-tx experience basically it’s able to do this by rendering out fewer pixels and using AI to sharpen higher resolution images with the OSS on you can expect to get much better performance out of your card without Sacrificing the art experience and in my case I couldn’t really tell the difference between the two I would have to really look at it closely side by side in order to point out the small differences so if you’re planning on playing Minecraft in real time ray-tracing I do recommend picking up the RT X 2070 super because you can average out at least 60 FPS playing with VL SS on sadly with the RT X 2060 KO you won’t be able to hit the 60 FPS threshold and I just wouldn’t be as enjoyable and buying an RT x 2080 super just doesn’t seem cost-effective if you’re only buying it to play Minecraft I think we can all agree how far real-time rate racing has come since it was announced back in August of 2018 and honestly I’m really excited to see how game developers use This technology for future games and I think with a little bit of optimization we can see improved performance as well but it’s pretty much it for the video I hope you guys enjoyed it if you did consider dropping a like I’ll drop a link to all the parts I used in the Buildin below if you guys want to check it out I love you beautiful faces as always thanks for watching and I’ll see you in the next one Video Information
This video, titled ‘Building an RTX Gaming PC for Minecraft – RTX ON’, was uploaded by TechSource on 2020-04-22 17:45:48. It has garnered 556645 views and 19448 likes. The duration of the video is 00:10:09 or 609 seconds.
Building gaming/streaming PC to play Minecraft with RTX ON! #Rtx #Minecraft #RTXON Video is sponsored by Nvidia and MSI ————————————————————————— ►Parts List◄ Ryzen 7 3700X: https://amzn.to/34TVqug MSI X570 Carbon: https://amzn.to/2KkSxJA MSI RTX 2080 Super Seahawk: https://amzn.to/2VMLoHl Corsair Dominator Plat RGB 32GB (3600Mhz): https://amzn.to/3boevXX Corsair 465X Crystal RGB: https://amzn.to/3cODW5t Corsair AX850 Platinum PSU: https://bit.ly/3bF5kTj Corsair MP600 2TB M.2 SSD: https://amzn.to/2RWTrQC Corsair QL120 RGB X6: https://amzn.to/2KmeCHt