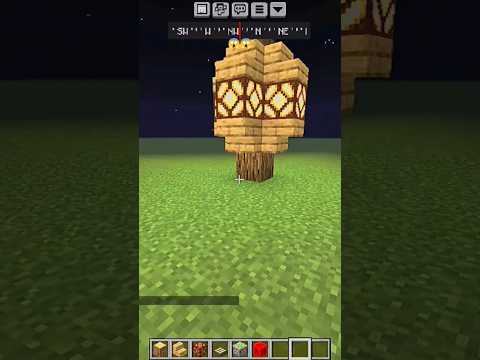
Hello and welcome to this tutorial for creating textures- I’m Nerrel. I’m not a professional but I’ve been making textures for a couple of years and a lot of people have asked to see that process. If you are one of those people or if you’re just generally interested In making textures then I hope that you find this worthwhile. The first thing to say if you’re considering a texture pack is to make sure you understand the commitment. Even if you work at a rate equivalent to a part time job, it could take Well over a year to do even a simple game. The internet is littered with abandoned projects, so make sure that you can devote the time and energy before you add to that pile. You should also be prepared to buy hardware. I think it’s a requirement to have some Sort of drawing tablet and unnecessary glove. I also found it very helpful to upgrade to a color-accurate monitor. At the very least, try to make sure your display is calibrated so that what you see is what’s actually there. In my experience you don’t need to buy top Of the line hardware to get good results and you’ll be able to use it for years to come on future projects. You may also consider getting a subscription to a texture library; for reasons I’ll get into later you don’t want to rely on photos any more than necessary, But for the times when you do use one you’ll want to have access to a wide selection of quality textures. Google images sucks for this. When it comes to software you don’t need to use a paid program like photoshop, but Before choosing a free program it’s worth spending time with all of the options. I mainly use GIMP because it’s intuitive and simple, but I’ll switch to Krita when I need better brushes. Having multiple programs gives you a lot more flexibility than sticking to just one. Once you have your hardware and software sorted out, you can begin what might be the most important step, which is to research your game. Games are usually made with an art director and concept artists establishing a vision for what things should look like. A team of artists with different styles and tastes then Come together to make a game with one coherent style, and that style is a major part of a game’s appeal. If you come in and change things without any regard for that, you’re liable to make the game look worse rather than better. Think of yourself as a member of the staff showing up extremely late for work. Find as much official artwork as you can and create a library of it for easy referencing. Modern games often include this material on the disc, but for older games you might find what you Need online or by purchasing an art book. Interviews can also provide a lot of valuable insight into the intended tone of the game. You’re inevitably going to change the look of the game by retexturing it, but as long as you at least try to stick to the original Style you’ll be ahead of half of the texture packs out there. Once you’re confident that you understand the game well enough you can begin the actual texture work. Modern games often require special tools for modding, but in emulators it couldn’t be Easier. Check the box for dumping and all of the textures currently in use will appear in a designated folder. Keep your texture dumps and project files organized with folders for every room. It’s best to have a plan for progress that limits you to once small area at a time, since the Amount of work can be overwhelming if you take on too much at once. The reward of completely finishing an area can also be an important motivator to keep you going. It’s usually easy to tell which texture is which, but if not a quick way to figure Out where a texture goes is to use the bucket fill tool to paint it a bright color, then see where it shows up in the game. You can also test how a texture is mapped by using Colored lines or numbers to see how the game tiles it. Most of the time it’s pretty straightforward, but there are occasional curveballs that don’t make any sense. It’s important to know how a texture works in-game before spending hours adding details to it that won’t show up the way you expected. You’ll need to decide on a target resolution for your pack so that the sizes can be consistent throughout the game. At this point, displays are trending towards 4k and it would be a good idea to set that as your target. If you work on a 720p screen and make textures that Look good there, a user with 3 times the vertical resolution might think the textures are low res to the point of needing another pack already. A quick test I use is to get as close to an object as I can in a windowed view, then experiment with different zooms in my editing program. In this case, 16x is about 1:1 with the game on a 1440p screen, which tells me that scale will look sharp even this close up. This is a metric that a lot of current games don’t live up to even at maximum settings, so this is probably a little more resolution than I need which makes me confident that the textures will also hold up decently at 4k. The last thing to decide is which approach to use. The ideal way is usually to draw by hand, followed by using a photo or stock texture, and worst of all trying to filter the original Texture in some way. A lot of official remasters have used this technique and it almost always looks like the original textures have just been ineffectively doctored. Things are changing now that AI upscaling is available, but it can be very hit or miss and in my experience Doesn’t work well with early 3D textures unless you’re doing prerendered backdrops. Otherwise, I wouldn’t recommend using AI with anything older than 128-bit systems. Let’s begin with drawing by hand… This lamp texture is only a quarter of the full object and the game mirrors the rest. I’m going to scale it to using no interpolation, which might be called nearest neighbor in other programs, to preserve the original pixels. You should stick to powers of two for your scale and in this case I’m choosing 32x. If you’re ever in between sizes, it’s Always better to go higher and scale down later if you need to. I’m also going to double the canvas size and mirror it so I can see it as it appears in the game. This isn’t necessary, but it’s more natural to draw without being constrained By a canvas edge. I’m going to begin by sampling what I consider the dominant color of the background and then create a new layer filled with that color. I’ll then sample the darkest and lightest colors and start applying them with a messy acrylic brush to Simulate corroded metal. I’ll keep sampling more colors to make sure all of the original palette is represented. I should note that I’m recording this after the fact since it would take too long to play it all out in real time, so if you’re painting along At home try to keep up. I’ll also switch to black and white and use GIMP’s value mode, which will darken or lighten according to the color selected. I like the way the value brush handles better than the dodge/burn tool and I use it on nearly every texture I do. I’m zooming out while doing this to make sure the rust will have enough contrast and consistency from a distance. If you only work zoomed in, the image can end up looking too flat. At this point I don’t really have a plan and I’m just painting until I start to see Rust and until the layer is filled in. I’ll then start the metal plate on a new layer- there are many, many reasons to keep details as separate as possible like this. It’s generally easier to edit with everything on individual layers and it makes short work Of variation textures that need a few details to be added or removed, like a winter and spring version of the same object. If you draw everything on one layer, you’re basically screwed. I’ll once again sample the dominant color I see for the plate. Then I’ll use the rectangle Select for the first shape with rounding on to prevent the corners from being too sharp. I’m interpreting the top to be an oval shape, so I’ll hold shift and add it with the rectangle tool again but this time set the rounding way up. I’ll then feather the selection By 2 pixels so the edges aren’t harsh and once again fill it with the dominant color I sampled. I’ll repeat the process of adding darker and lighter values until this layer also looks decently filled in. I’ll also shade the edge of the plate to suggest some 3D depth. I imagine this being a really heavy plate that’s not very malleable and that probably shouldn’t have sharp edges. At this point I’m going to do two things that you should never forget to do while working- I’m going to save, and then export the original quarter of the texture to see how it looks in the game. I can already see that it needs another pass with the value brush to look rougher. I’ll just use black this time. I’ll now add the lamp layer in by once again Using the rounded rectangle tool, feathering it, and filling with the darker color of the lamp. I’ll then paint the center with white to suggest the location of the bulb, followed by a pass with a messy brush to make the glass look old and foggy. I’m not entirely sure How to proceed from here, so I’ll use a reference photo or two as a guide. This is where Google images is actually really useful. I’ll find an image I like and keep it open in another window as I draw; I’m not really looking at it and literally recreating it, But just glancing to get ideas. Having an image visible like this can influence the way you draw even if you’re not paying much attention to it. I’ll add some faint lines in the same places as the original lamp and then shade the edges Of these segments with the value brush to suggest that each section is rounded and has depth as opposed to the whole surface being one even dome. The edge looks too clean so I’ll paint over it with some grunge and I’ll return to the Brass plate to make the border look less flat. I’m going to use the value brush again to add a thin highlight to make it seem like a rim is protruding upwards towards the lamp, with the inner rim catching a lot of light, and I’ll shade the plate around the rim As if it’s occluding a little light. I’ll then add a highlight to the edge where the plate bends, but instead of using the value brush I’m going to paint normally with a light bluish green color. The temple Is very dark and lit by a lot of blue light with blue water reflecting upwards, so I think there should be some blue for this edge to catch. I’ve been sneaking this kind of underlighting into any texture where it’s appropriate as a reference to the concept art, but here it makes sense anyway. I’ll keep painting with low opacity until the line seems to be placed correctly. Using a rougher brush for the highlight suggests a rougher material. A soft brush would make this edge look too clean, but I will shrink the size and lightly use one just to define The very edge better. I’ll also add a little blue to the side of the rim around the lamp as well. Now I’ll add the bolts by using the circle select tool and feathering by two again. I’ll darken the circumference with a soft value brush and then brighten the side facing the Lamp since it should be catching a lot of light. I’ll sample a color from the lamp to make sure that the lighting on the bolt is similar. I’ll then bring in the blue again to add a weaker ambient highlight the opposite side, and then shade the area around The bolt to suggest occlusion again. You can see how important the difference in color temperature is for the highlights on the bolt. I think it helps suggest that this really is a 3D object being lit by different sources. I’m interpreting these pixels as holes, so I’ll use a feathered selection again And darken the interior. I’ll then go around the rim and rough in a highlight at the edge where the metal bends. The bigger this rim is, the more gradual the downward slope of the metal will seem to be. I’m trying the blue on the edge facing outward and I’ll Use the yellow for the edge facing the lamp. Maybe the rim around the lamp should be blocking this light. I’ll now paint the light itself on another new layer with a soft brush. I’ll start with pure white at the brightest point, totally blowing out the details on the glass, and Then go around the lamp edge with a less opaque yellow. GIMP’s new layer mode results in a blotchy appearance with this kind of transparency so I’m going to switch back to legacy. The idea here is to add a glow that simulates bloom a little bit to make the light seem Like it’s actually emitting light into a humid room. At this point, I’ll export the texture again to test how it looks. It seems decent but I won’t know until I check the other instances of this texture in the temple, and right away there’s a problem with this mapping cutting the texture Off abruptly. The original texture seemed blurry enough that no one would notice. I could add a seam onto the plate to make it seem like it’s supposed to cut off there, but that would alter the design in an unappealing way. Instead, I’ll try to get even closer To the original. Comparing the screenshots now I see what resembles a fish in the rust, which probably isn’t a coincidence since fish designs appear everywhere in this area. I’ll draw this into the wall and add a lot more roughness while I’m at it. I’m also Seeing the brass plate as a different shape than the one I drew, so I’ll create a duplicate of it before making major changes to it. I’ll use the warp tool to quickly bend the plate into the shape I’m seeing in the original Texture now, and right away the decision to work on a duplicate pays off because the hole also got stretched in the process. I’ll use the clone tool to set the original layer as a source and then paint the correct hole back onto the duplicate. Right away this looks more interesting than the last version and it seems to match the original better. The rim around the lamp is getting lost in the bloom, so I’ll return to darken it in and to fix a few edges that weren’t shaded all the way. The mapping Still isn’t ideal, but it’s not as jarring as before and I can live with it. At this point I’m out of things to do but the texture isn’t really done until I’ve spent time playing through the area and getting a sense of how it fits in with the other textures. Hopefully, you think it looks better. The obvious appeal of using a photo is that you get a lot of free detail right away without having to do anything. But photos come with a lot of problems, the main one being that video games are abstracted representations of reality. Even the most realistic games Have some exaggerated elements that give them style. Putting something that’s literally photorealistic into a game can clash with the visuals and look extremely out of place. I also think that people are generally more interested in seeing art than a stock photo. There’s a creative process that makes hand drawn textures interesting in a way that photos aren’t. Photos are also limited by the lighting and angles they were taken from. An image like this has sunlight that appears to be directly overhead and will probably look very bad in other lighting conditions, let alone indoors. With hand drawn textures, you can completely control the lighting and details to match the scene. Photos can also require more resolution to look decent. In this case, I’m using one that’s 2048×2048, which is about as large as I can practically go for a pack like this Yet it’s still not enough. As soon as the details are blown up enough for pixels and artifacts to show, the texture breaks down because the real details no longer appear real. With a drawn texture at the same res the blown up effect isn’t as bad because The details were never real in the first place- every mark is just an abstract representation that tricks you into seeing detail. If you’re going to use an image it should be for something that would take a very long Time to draw and in a setting where a photo will make sense and not draw much attention to itself. In this case, I’m going to use one for the rock floor of the boss rooms. After upscaling the original texture I’m going to add the photo I’ve chosen and immediately Export it without any alterations. I’ll often go through several photo candidates like this and choose the one that looks best as a raw export. This texture doesn’t look too bad and the rocks seem to be about the right size. Next I’ll drag the layer around until I have the best arrangement of rocks I can find. I’ll zoom out and check against the original texture until I’m satisfied. I’ll now work on making the texture seamless by duplicating the layer and dragging the duplicate up by Exactly the canvas size, which in this case is 1024 pixels. I’ll now take a soft eraser and remove everything but the top edge of this layer while trying my best to seamlessly blend the rocks with the layer beneath in a way that makes sense. I’ll draw a selection Below and cut in order to make sure I’ve removed any leftover junk. The top seam is now fixed and I’ll merge this layer down, then duplicate the layer again. This time I’m going to drag the duplicate to the right by 1024 and repeat the process, this time Only leaving the right edge. I’ll once again merge this down. I want to get rid of the chip in this rock since it might stand out when the texture is tiled, so I’ll once again duplicate the layer and move it to find a rock that I haven’t Used in my canvas so far. I’ll then set the clone tool there and paint it over the chip on my seamless layer. I’ll now crop this layer to the canvas size and use the offset tool to shift it so that the edges are moved to the center. They need some more Work, but there are no bad seams visible. There are plenty of other ways of making a layer seamless; Gimp has a filter that will do it automatically, but it gives pretty terrible results for textures like this and results in a lot of duplicated detail. Next, I’m going to adjust the brightness, contrast and hue filters to get the image to more closely match the original. I’ll also start sampling colors from the original texture and paint them in with the color or hue brush modes. When I need to do the edges, I’ll use the offset tool to swap the seam positions around. In addition to that I’m going to shade the outer edges of the stones with the value brush to make them seem a little rounder, then do a pass with the color brush again. It looks better than last time, but There’s still a little room for improvement. One trick I use on photos is to apply a sort of high pass filter to soften the details a little. I’ll duplicate my current layer and set its mode to legacy, then duplicate That layer, leaving me with three copies. I’ll invert the top one and set its opacity to 50%. At this point, the invert and original should be equally blending and cancelling each other out. I’ll now move down to the copy layer below and apply a gaussian blur. The higher the blur is, the more dramatic the softening will be. I usually use around 20 to 30 pixels. I’ll now merge the duplicate layers together and set the resulting layer’s mode to overlay. The result in this case was pretty extreme, so I’ll reduce it by dragging The opacity slider down. I lost some contrast, so I’ll create a new layer from visible and keep the original as a backup, then up the contrast a little bit with the brightness/contrast filter. The colors still don’t match the original well enough so I’m going to do yet another pass. Yeah, shut up. This is one of the frustrating things about using a photo- you have to try to alter the details that are already there to match instead of just drawing them to match in the first place, which can sometimes be nearly as time consuming as drawing from scratch But infinitely less rewarding. In this case, it’s still much faster than drawing but it’s still a hassle. To boost the contrast further I’m going to go around with the value brush again and darken the seams again, and after that I’m going to sample the brightest color from the Original and use it to paint new highlights onto a new transparent layer. In this way I’m removing some of the contrast from the photo and replacing it with hand drawn contrast, and I can adjust the strength of the highlights with the layer opacity. Comparing against The original I can see that there still isn’t enough green, so I’ll go over everything with one final pass of color. There’s a little too much contrast now, so this time I’ll use the hue saturation filter to turn up the lightness and saturation at the same time. I want the rocks to look wetter so I’m going to add even more to the highlight layer and maybe even some reflections of light from nearby stones. A lot of this probably isn’t physically accurate but I think as long as it makes visual sense it’s alright to exaggerate. To finish the texture off, I’m going to touch up the sloppy seam left when I blended the rock layers at the very beginning, which I’m only now noticing looks terrible. I made a new layer from visible and am using the clone tool to bring some dirt from elsewhere In to separate the rocks that were blurring together, then using the value brush to shade the rocks along the new seam. At this point, the rocks match up with the originals pretty well and don’t stand out too badly as a photo, at least in my opinion, so once again we’re done for now. The results are usually best if you only partially use the visual information from the photo. In this case, I started with a photo but desaturated it and set the layer mode to overlay. This will apply the darks and lights to the layer beneath differently depending on the value Of that layer. I then sampled the dominant color of the original rocks and filled a layer below with it. Using the value brush mode, I painted in some of the details of the original texture onto that fill layer, like the horizontal bands. The idea is that the texture is a hybrid Between a drawing and a photo rather than just a photo alone. For another example, I drew the corroded metal walls of this temple by hand but found them to be too flat. I used a photo of corroded metal as an overlay to add some extra grit, But because it’s thoroughly blended into the drawing no one would ever recognize it as a photo. In general, the less of a photo you use, the better, and if the photo is going to be prominent in the texture then you should always blend some drawing in and try to fight It to look as little like a photo as possible. For the last demonstration I want to do a texture from a much different area. Ikana canyon is a lifeless wasteland that has been abandoned for centuries, so right from the Start my concern is that the textures show age and decay strongly enough. This wall is split into several textures, so I’m going to join the first two together and work on them as one to avoid a seam where they meet. This poses a small problem, since the 16x I decided on earlier for the upper portion is too small for the bottom portion; I’m going to have to scale them both by 32x. I’ll extend the vertical canvas to accommodate the lower wall texture. This is a lot easier To do if you haven’t already scaled the textures up. I’ll drop the lower portion exactly into place and then paste in a vaguely similar test photo and export each piece to see how they match up. There are no surprises and the resolution looks to be perfectly sharp. The first step will be creating the outer wall layer, which is crumbling away. Just like the lamp earlier, I’ll start with a few colors sampled from the original. The main difference this time is going to brushes used; I’m using rust type brushes that are More broken up than the acrylic brush, which I’ll still use for at least one pass here. I’m choosing a brush with slightly smaller particles for the highlights, and next I’ll use a stonework brush that I like to add some dark and light cracks. This is an important Point if you choose GIMP- the default brushes aren’t very good and you’ll definitely want to download new packs online. My drawings tend to come out soft so I’m going to use an unsharp mask at this early stage to make the detail more crisp. If you know your own weaknesses as an artist then You can try to counter them while you work. I’m going to export what I have so far for another test and it seems fine. Next is going to be the brick layer underneath. I’ll sample the darkest color visible in The grout and fill a new layer with it, then use the lighter brick color to rough in each brick. I’m making the layer transparent so that I can follow the original pattern. Once they’re roughed in, I’ll add highlights to the upper edges and then paint the undersides With the darkest color sampled from the original bricks. I’ll then use the value brush to shade and more clearly define the edges of each brick. I can use the test photo from earlier as a reference, but I’m not seeing anything I want to take from it. I’ll give The bricks a pass with the stonework brush as well, which I’m loading with even more of the colors from the original bricks. After this, I’ll define where the very edges of the bricks are with some thinner highlights. Next, I think I’m going to add… a happy little tree… and he’s gonna live right Here. The next step is going to be to cut away the upper layer to reveal these bricks. The best way to do this is to use a layer mask so that changes can easily be adjusted. I’m going to right click the layer and add a white layer Mask. If I paint black on this mask it will remove the layer without actually erasing it, so I can easily put back anything by just painting with white again. Using the mask, I’m going to paint along the edges of the original layer and remove material from roughly The same places. Next I’m going to shade the downward facing edges and lighten the upper edges to give it a little depth and I’ll paint shadow layer underneath to push the depth further. Next I’ll change the value and color of the upper layer to create the bands of paint. I’m doing a couple passes with the hue and saturation brush modes to match the original color. Now I’ll export it to see how it looks and it’s not very good. I overdid it on the depth, which is fine; it’s normal to have a back and forth with lots of adjustments. I’m going to paint some of the top layer back in by using white on the mask layer so that the wall doesn’t cut off so abruptly and then cut even more of the wall away. The goal is to make the distinction between wall and bricks less jarring. I need to get the window in place before getting any further with the other layers, so I’ll rough in and shade the bricks in the same way as the background layer. I’ll use a circular selection to drop in a black layer beneath. For the bars I’ll use the rectangle Select tool to fill each bar on a separate layer, then I’ll shade them with the value brush. I’ll use a variety of other brushes to make the wood look old and damaged. Finally, I’ll make a new layer for the shadow cast by the window bricks and export the textures to test again. The results are better, but the pattern still looks awkward. I’m going to partially undo the shading I added earlier to reduce the depth without making it look too flat. I’ll also continue removing more of the wall and adding some of it back in using the mask layer. The window will also get some more polish, including another bit of underlighting on the horizontal bar. As for the window itself, it isn’t entirely clear if the original texture is meant to suggest glass or not, but given how dilapidated the building is I don’t think glass should be intact. Instead, I’ll try to paint in a faint view of the opposite wall. I’ll use the clone tool to paint in the upper wall layer, then I’ll change its temperature to a cooler hue and darken it in. I want to try a gaussian blur On this layer to make it seem as if it’s at a different focal plane than the window; whether effects like this will work in the actual game is hit or miss. Finally, the shadow layer I drew for the upper wall is going to be replaced with a more precise One generated by a plugin. On a duplicate of the wall layer and I’m choosing to apply the mask permanently so the plugin can react to the masked area. Text outliner adds a black border around everything in the layer, so it will give me a shadow for every small piece Of debris at once. I’ll drag it downward by a few pixels so that it resembles a cast shadow and reduce the opacity until it looks right. This should help to prevent the upper wall from getting lost in the brick layer and add depth in a more natural looking way. I think it looks OK now and I’ve managed to reduce some of the worst seams. These are the basic methods I’ve used to create all the textures I’ve done so far. There may be better ways of doing some of this, but this is what works for me. The most Important things I’ve learned are to save absolutely everything and keep it all well organized, use separate layers as often as possible, Draw from scratch as often as possible and spend a lot of time thinking about the what the materials and lighting should be like- especially considering the game’s lore and Art style, and don’t worry if the texture looks like junk for most of the time that you work on it. Textures often only come together and look right in the final stages. It is important that you have a plan, though; not necessarily For the moment to moment marks, but for the way you divide the work up and how you approach each layer. One of the most important things you can do is post your work somewhere and open yourself up to criticism. If you care about your project you should consider it a favor when someone Tells you that your texture looks bad, and in my experience, it’s easy to find people who will. And the last thing I want to say is that while you should try to stay faithful to the original textures you shouldn’t consider them sacred; there may be opportunities to improve things By doing something new. But if you do deviate from the original you should be able to defend your choice and have a good explanation for doing so. And with that the demonstrations are done, let’s see how everyone did. This lamp is From Pingle. I think the colors could match the original more, also it’s getting a little imbalanced on the right side. This wall comes from doughreyn… I think the colors are off again, also this isn’t the right aspect ratio. You’ve got the critical details There, but I want to see a little more detail in this region. This wall from echi is very nice and detailed, but I’m not seeing the bricks underneath. And finally we have these rocks from Abe…. not what I was looking for, Abe. Thanks for watching. Video Information
This video, titled ‘Texture Creation Tutorial and Demonstration’, was uploaded by Nerrel on 2019-07-25 18:36:05. It has garnered 165432 views and 10489 likes. The duration of the video is 00:27:14 or 1634 seconds.
A beginner’s guide for texture pack creation based on my experience creating one Patreon support (music mp3s here): https://www.patreon.com/Nerrel Discord: https://discord.gg/g9kkJpQ Texture project info: http://www.emutalk.net/threads/56677-Majora-s-Mask-N64HD-Project?s=74bc139df7360fd61ff0bf8cb2a1cd6b
0:00 Introduction to texture work 1:29 Researching 2:21 Texture preparation 4:32 Texture 1- Temple lamp 12:02 Texture 2- Photo based rocks 18:52 Texture 3- Ikana house 24:32 Closing advice