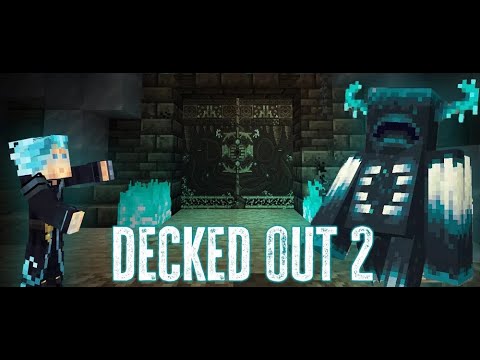
Everybody loves a good minecraft elevator too bad those donuts zipper elevators broken piston elevators unreliable slime block elevators ugly flying machines slow and expensive going from point a to b vertically has never been so tedious but i can do you one better elevators with only two floors fridge that’s beta bad redstone now Multi-floor elevators that’s that’s the good stuff now let’s check on youtube and see what other people have created oh my god what what what is this why are all of these so massive and complicated okay time to make literally the best multi-floor elevator that ever exists First we need a method of travel since all of these other options suck we’re gonna go with bubble columns since they go around oh my oh my god they go around 10 blocks per second and are probably the easiest method of making an elevator step two add multiple floors Easy step 3 add floor selection to every floor to make the elevator work like an actual goddamn elevator and finally step 4 compress that redstone until it’s so dense it becomes a black hole and after breaking the laws of physics and being better at redstone than literally Everyone else here is the best usable big boy liquid elevator or the bubble So basically this elevator is amazing look at all of these floors i’m on floor one well i wanna go to floor three and i go in and look at this i go up so fast and look at that floor three oh i want to go down the Floor two push the floor two button oh no it does this i go to floor two oh no help i’m stuck on a random floor called floor five i wanna go up to floor seven i push floor seven and we go up and i Want to go all the way back to floor one we just wait a bit actually we can just stand here if we want to and we go all the way down to floor one but crafty masterman how many floors can you can you have well uh You can have as many as you want i don’t care questions this elevator seems really awesome but it must be really complicated well guess what it’s four blocks wide look at it it’s so small now you may be wondering crafty masterman how the heck does this epic elevator work well as all Epic funny redstone youtubers would say it’s really quite simple craftymasterman you only see that cause you’re a really good reds no i’m not shut up this thing is actually super easy the entire elevator is just that circuit and that circuit this is the main elevator circuit if i flick this lever Oh my god look at that water appears what what happens when i step in the water i go up that’s that’s pretty cool right and then i turn it off and guess what the water disappears how the heck does this work well this is the entire redstone That’s it basically what we have is we have some corner stairs on the side and as you can see because they are corner stairs the water cannot pass through into the main elevator shaft and we’re keeping them as corner stairs using these other stairs that are being pushed by these pistons so When we turn the elevator on like this these stairs will retract and this will not be a corner stair anymore and this water source and the water source on the other side they combine and make a water source in the middle and that is how we turn the elevator on And to turn it off all we do wow look at that we just block up the water on both sides and we just delete the water by pushing blocks into it that that’s literally the entire elevator and you want to stack these on top of each other well just Stack them with observers look at that it’s so easy there is nothing hard about this and this is the floor selection circuit and the most complicated part about this is just this selector panel in the bottom which you could probably copy if you just pause the video right now And just put items in the dropper and then over here we have a wall now what’s cool about walls is they can actually send signals downwards if i close one of these trapdoors as you can see all of these walls can change shape and that can actually be detected with An observer and another cool thing is all of these walls change instantly so that makes this super duper fast so if i push this button boom comparator changes if i do this button boom comparator changes and if this was like 200 blocks in the air it would still Take the same amount of time no matter how high the wall is so if i have a button over here and i just put another trapdoor over here and push this button as you can see it takes the same amount of time as if it were up there it’s literally The exact same thing so now that you know how the elevator worked or maybe you skipped this part like a cringy human being now we can actually build it and you can put it in your survival world or creative world i don’t know let’s just build it so once You’ve found where your elevator is going to be we’re going to start with the first floor section so first you want to make an archway like this and you want to put two signs in here and this is going to be the entrance to your bubble elevator then behind it You’re just going to mark out i guess i just did it with wolf for the sake of the tutorial this is where your bubble column shoot i guess is going to be and where all of these quartz blocks are this is where your wall is going to be so let’s just Build up the wall three blocks high and we’ll just build it all the way over here just like that if i can actually place the blocks properly and now for this tutorial we’re gonna have five floors so i’m gonna place five buttons so one two three four five Leaving one block of space on the right side of the buttons and one block of space on the left side and just to mark out the floor this is just purely aesthetic i just made the floor number eight different colored buttons so this blackstone button is the first one we’re on floor one That’s just because it looks nicer and the space you need behind your wall is you’re gonna have a hole that is as wide as the amount of buttons you have so i have five buttons so it’s gonna be five blocks long it’s going to be four blocks wide towards the back And it’s going to be four blocks deep into the ground and then behind your elevator shoot over here so you have a soul sand with a water source so that’s keeping us bobbing up and down and you’re just gonna go three blocks behind your back most block so behind This back wall of your elevator shoe and this is where your pistons and stairs are gonna go for your bubble elevator so now what you wanna do is you wanna build your highest floor that’s gonna go on the very top of your building or wherever Your elevator is and as you can see i’ve built another little archway and i’ve also covered the front and glass and this is going to be useful for when we fill this with water which is what we’re going to do right now so going behind the wall on the Elevator you’re going to place a lot of stairs a lot of blocks and a lot of water so the first thing you’re going to do is you’re going to place stairs on the side like this going all the way to the top and when You get to the top you want to make your last stair flush with the top floor like this now what you’re going to do is you’re going to place blocks beside these stairs on the wall on both sides and make sure the top block is flush with the floor And you’re going to do that on the other side so this is what it should look like right now and we’re going to go all the way to the bottom and you’re gonna break this block and this block and then you’re gonna build another pillar of blocks over here and Now we’re gonna slowly fill water sources in every single one of these stairs so we’re just gonna start from the bottom and we’re gonna go all the way to the top so we’re gonna go here and we’re just gonna slowly fill every single stair so if you’ve done it properly you should See this water go all the way down and not spill everywhere and that’s because of our holes on the bottom and if we go to the front we should be carried all the way up because all of these should also be source blocks so there we Go we get carried to our top floor now what you’re going to do is you’re going to go to the back and this time you’re going to start on the top and you’re going to place sideways stairs going like this and as you can see the water just kind Of goes away and we are basically turning these stairs into corner stairs so you want to go from the top to the bottom not bottom to top or it’s going to spill everywhere so now after you’re all done you should get something that kind of looks like This it looks like a really weird zipper and then if you go on the front it should be completely seamless in the front and you should still go all the way up and that’s because we haven’t cleared these water sources yet so now we’re actually going to start with the Redstone so these are all the things you need for the redstone minus the stairs and the blocks and the water because you already use that so we’re just going to get our pistons target block observers repeaters and our wiring blocks so the first thing you’re going to do is you’re going to go To the back and you’re going to make two blocks like this and you’re going to put a redstone on the back and a 2 tick repeater going forward then you’re going to put two target blocks next to this redstone dust so it makes this t-shape over here And then you’re just literally going to repeat that all the way up so i just put an observer then you’re going to put your redstone dust and you’re just going to repeat this exact same thing all the way to the top until your target blocks become flush with the top floor Now once you’re done this as you can see the target blocks over here are flush with the top floor if they are not you might have to like raise or lower the floor like a block or two so that hopefully shouldn’t change your entire building plan so yeah we have all the Redstone now we have to place all the pistons so the first thing we’re gonna do is we’re gonna go in front of these two tick repeaters and we’re gonna put sticky pistons facing into the wall like this and again you’re gonna do this all the way to the top again so once you’re Done this is what it should look like right now and now you’re actually gonna power these pistons to get rid of that water that’s in there so what you’re gonna do is you’re gonna put an observer facing into this target block and then i guess you can go behind it And place a redstone dust and break it really fast if you’re in survival this might be a little harder but oh well who cares so you’re just gonna do that and all of these pistons should fire and all of the water should be removed and the walls should still all be Seamless because these stairs are still corner stairs so that is what should happen and now we’re going to place the last pistons which are going to be the ones that retract these stairs so we’re just going to go and put them over here now this should be the entire redstone For this elevator section completed so if you just update this observer you should actually see the entire elevator i guess turn on so let’s just update this observer and as you can see oh my god look at that the water goes all the way up And we can go here and we will get shot all the way to the top if we just head to the bottom and we just update the observer again the elevator turns off and as you can see there is no more water so i skipped ahead again and i’ve made this entire Wall that goes from the bottom to the top floor so i guess pause the video and take as much time as you need to fill in this entire wall but now we’re gonna add our multiple floors so the way the floors work in this elevator is that you want to make sure All of your floors are in line with a target block so i guess we can just count up like from here we can just go one two three four and let’s see if i want a floor over here can we check yes it is in line with a target block So we’re just going to slowly map out where our floors are going to be so i’m just going to build this out and i’m going to build another archway over here and then one two three four is there a target block here yes there is So that is my next floor so i’ll put that over here and i’ll replace all of this now i’m just making them equal distance so it looks nicer for the tutorial but remember you can make it variable height if you really want to you just have to make sure that your Floor is in line with one of these target blocks if you need your floor to be a block higher or like a block lower i guess what you could do is like come out a block put a stair over here and then just have it Go up one block but like it’s like a very small drawback it doesn’t really matter so that is one two three we need one more floor so we go one two three four we add our last floor over here in like the target block and we just built it out And we have our archway going like this so now you want to do is you want to get some signs and you’re going to put signs in front of all of your doorways so then the water doesn’t spill out so just put signs and the bottom one already has signs the Only one that does not need science is this top archway because the water only goes up to here doesn’t actually go up any higher so that’s good so now we’re just going to kind of build out the floors like this to the very end on every single one And then we’ll start doing the floor selection now we’re going to put our floor selection buttons on all the floors and i’m just going to use my little black stone floor marking system just so we can see what floor we’re on when we test this so there we go This is the fourth floor and this is the last floor just like that so if you’re doing the exact same pattern as i am your buttons should be going in a diagonal line or they can be all the same it doesn’t really matter so now we actually have to Separate the blue circuit because as it is right now you activate this observer at the bottom and all of it goes at once and that is not what we want so basically what you’re going to do is you’re going to grab some wiring blocks and some redstone dust and You’re going to go to each one of your floors you’re going to go back look at the target block and then look at the observer above it you’re gonna break this everything’s gonna start leaking but don’t worry if you don’t have any redstone anywhere shouldn’t break anything hopefully i Don’t know what you have in your base and you’re gonna put redstone dust here and that should all go back to normal and then we’re gonna go to the next floor go back to the target block break this observer put a block and then redstone dust and we’re gonna Do that until we get to the top floor so do that do that do that and for the final floor there’s a target but there’s no observer above it so we don’t need to replace anything so now as you can see we have the entire elevator broken up into little segments So we can actually do the multi-floor properly now you’re gonna get your observers and you’re gonna point observers into the target blocks where the redstone dust is like this we’re going to go to every single floor and just do that if i can actually place up there we go And we’re going to go to the last floor and do that and that should be it so we should have four observers for five floors so you should have one less observers here then you have floors because if you go to floor one it should just be the entire thing empty Because then you fall to the bottom so now we’re actually gonna do the floor selection circuit which is in this red shulker box so just pause the video and get all these things that you need and we’ll just be starting right away so first you’re gonna start by going behind Your button panel and you’re gonna go to the right most button so the one that represents the highest floor and you’re gonna put two blocks and put a wall over here and then put a trapdoor that goes against that wall so when you push this button the trapdoor opens in the direction of The wall like that and then you’re just going to put all walls behind these buttons and you’re going to put more trapdoors behind the walls like that then you’re going to put a block over here and then you’re going to put a block over here so then all the walls become Like this vertical half slab looking shape then you’re going to go under the walls and you’re going to put observers facing downwards on all of them so if you look here the face is over here and it’s detecting the walls and then you’re gonna put glass one block away from the observers And you’re gonna put redstone dust on all of this so now you’re gonna go to the other side on the side of the trapdoors and you’re gonna put front facing observers on all of them except this first one so do this all the way until you reach this first one Don’t place an observer and then you’re gonna put downwards observers coming from these front facing observers and then you’re gonna put a hopper in front of these downwards facing observers and then put more observers facing downwards that detect these hoppers so this is kind of finicky to place But there we go and then you’re gonna put blocks in front of these observers now i did forget but you do also need droppers and junk items so just make sure you get a junk item and droppers and then you’re going to put droppers facing upwards here and then Droppers facing downwards over here so it looks completely solid all the holes are kind of facing each other and then you’re just going to put junk items in these bottom droppers i’m just going to put whatever i have in my inventory i don’t really care if redstone dust sure why Not that’s going in and there we go and you’re going to put blocks over here and then you’re going to put comparators on top of these blocks and you’re going to put blocks on top like this with torches and then blocks on top of the torches With more torches like that then you can put blocks on top of the torches again and you’re gonna put blocks to the side and then you’re just going to wrap it around to here you’re going to break this observer for a moment and you’re going to put redstone dust on All of these blocks and then you’re just actually going to keep the observer removed we’ll put it back later now what you’re going to do is you’re going to build this wall setup going all the way to the top so i’m going to bring these blocks all the way to the Top and you’re going to bring the other blocks all the way to the top and you’re also going to bring the walls all the way to the top it’s a lot of repetitive placing i know so once you have your walls like this they should be in line with this top button panel And then this redstone line might be turned on so to turn it off you’re just going to push the first button and this redstone line should turn off so now we’re going to link all these buttons to this big wall and to do that it’s very easy all you Have to do is put trapdoors behind these buttons and again make sure they close in the direction of the wall like that so you’re going to do that on this floor let’s go to the next floor just go up here nope i said up here there we go Put your trap doors next floor and the last floor we just put the trapdoors at the very top that’s not the very top but that’s the very top and there we go we have all of our trapdoors and you can just plug up these holes if you’ve also made holes like i did And now what we’re gonna do is the floor selection with torches the torch towers going up so this is the part where you can probably get different colors of wool just so it’s easier to figure out where your floors are so i’m just gonna get some yellow some green and some blue First thing we’re going to do is if this takes a little bit of brain power so first we’re going to turn this off so push the first button this should be turned off so now what you’re going to do is you’re going to miss this first torch and you’re going To put three torches here and i’m just gonna color code these just like that i’m just gonna move this so it’s easier and then we’re just going to continue our torch tower all the way to the second observer so it’s over there so we’re almost there And there we go so as you can see the blocks are aligned with the observer so that means we can now get rid of the yellow and we can go on to the next floor so we have our green and blue floors left so we’re just gonna Keep carrying this upwards until we get to our next observer which is coming up so there we go and our green and blue so as you can see the blocks are lined up again now you can also depending on how your floors are space you can also have your torches Aligned with the observers but the redstone will actually be literally the exact same so there we go our green is now hooked up to this floor now all you have to do is hook up the blue to the top floor so let’s just quickly uh so There we go it should be here so as you can see all of these should be turned off so this should be turned off going into the block this should be turned off going into the block and this should be turned off going into the block If it’s not then you did something wrong in the torch tower or this line at the very bottom is turned on so now we’re on the very last step where we hook up these torches to these observers so basically all you need to do is go to where this end so where this Yellow part ends and you’re gonna put slabs to the side of these torches like this and you’re gonna put redstone on top and then you’re going to take those slabs all the way across the wall like this remove this observer and you can put a solid block over here Redstone dust and i need an observer again and need to place the observer back there so it doesn’t just spam and fire and do stuff then you’re going to go to the next part you’re going to put slabs to the side again like this going all the way across the Wall break this observer put a block here and then just do this and then you’re going to put an observer over here facing this target block and now the last floor we’re gonna put our slabs all the way across the wall break the observer put your block And then place your redstone and then put back your observer here now sometimes if you depending on how you space your floors this line might be a block higher so this block might actually be right behind that observer and if that is the case you just need to replace This block with a note block so then when the no block powers it powers the observer so let’s test this epic elevator i’m on floor one and let’s say i want to go to floor three push the floor three button a bunch of pistons make noises And we go up all the way to floor three as indicated by this blackstone button over here i wanna go down to floor 2 i push the floor 2 button and we can just safely jump and we go down to floor 2. and now i want to go all the Way up to floor 5 i just go here and and wait a little bit and we go all the way up to floor five the very top and lastly i want to go to floor one but then for some reason i got stuck on floor three along the way Well guess what you can still just go in and you go all the way down to floor one so that is the entire elevator all done i hope you enjoyed now if it’s still somehow broken for you and you need help you can join my discord server send Screenshots and say what’s broken and i can help you and that usually works so yeah i’m just going to end this video Video Information
This video, titled ‘The BEST Multi-Floor Elevator In Minecraft!’, was uploaded by CraftyMasterman on 2021-04-18 21:25:39. It has garnered 172527 views and 7285 likes. The duration of the video is 00:20:18 or 1218 seconds.
Discord: https://discord.gg/8xBYWjt
I made a Minecraft elevator and it is very cool cuz it’s a multi-floor elevator and there’s floor selection on every floor. This works in Minecraft java edition and not bedrock edition rip 🙁
What if I just shove the words DreamSMP in here as well lmao
Timestamps: Intro – 0:00 Showcase – 0:58 Explanation – 1:46 Tutorial – 4:06
filling a description with search terms looks like a bot typed it wtf
#minecraft #redstone #craftymasterman