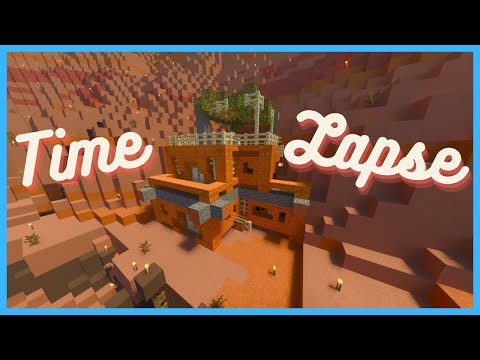
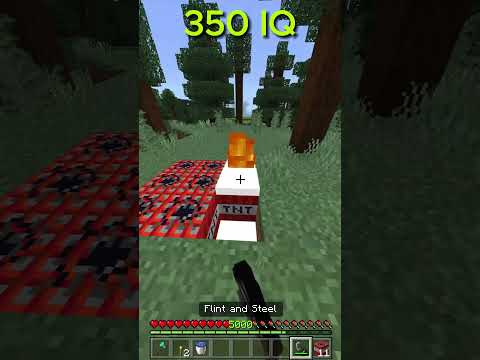
Hello everyone and welcome back to the breakdown today we’re I don’t even know episode 5 episode 4 I don’t know of our how to start a network server series today we’re gonna be setting up a lobby server now the server itself should already be set up check out the last Episode on setting a bungee cord at the eye at the top of your screen but in this episode I’m gonna going over plugins I’m gonna be going over what you need to get your lobby server set up everything you need to know about getting it up and running as far as even Building the lobby and everything we’re gonna be covering it all in this video before we get into this video though where are my Judas brought to you by apex minecraft hosting a great place to go host your 24 hour DDoS protected Network a minecraft server if you over To Apex they support bungee cord right out the gate and they’ll help you every step of the way getting your network set up so be sure to go check them out it’s the first link down below the breakdown done X Y Z slash apex network get an awesome 24 hour DDoS protected server From apex minecraft hosting so the first thing you need to do when setting up your lobby server is actually build the lobby itself now here’s the deal there are so many different kinds of lobbies out there you can go to a place like AMC market link down below and buy them There are tons of options for evening a lobby but here are some things that you need to know most lobbies are going to have portals to the different servers you have on your server you could do like what we did over at our network server played up break down craft comm And actually set up four portals because you plan on expanding to eventually have four different servers right out the gate and just add like multiple porters going to the same server you can do that if you want or you can just have one portal and basically they people spun in And there’s one portal and they go through that portal into your server if you’re just launching with one game-mode like I recommend doing and like what you probably have done now if that’s not the case then from that point you can kind of expand out as much as you want to go If you’re buying a lobby just make sure it has enough portals to fit all the different servers you have it all the different game modes if you’re not buying a lobby and you’re building it yourself just make sure you add in enough of the lobbies that you have one Thing I will say about a lobby I would recommend making it floating in the sky you can have mountains around you or something that are you’ve made but overall you want it to be floating in the sky in order to bunches and bunches of unnecessary chunks being loaded right so that is a Big thing about a lobby sending it up in the sky is what I would recommend doing and yeah that’s basically that when it comes to building it everybody’s is going to be different and you’ve actually been seeing on your screen as I’ve been talking about this different Lobby examples in Minecraft so use those as inspiration really and truly how your Lobby looks is going to pend on your style and what you like so yeah building a lobbyist kind of easiest part of this process most people can figure that part out but it doesn’t need to be done Before you can actually set your Lobby up from this point we need to talk about plugins now on your Augie server you’re gonna have to have a few different plugins and then there’s gonna be some plugins that you could have if you want we’re gonna be focusing on the ones that You have to have today including you know setting them up where to find files and things of that nature so first and foremost is your permissions plug-in now this is one that’s going to be different for you depending on your server as a whole and the permissions plug-in you’re Using I’m redoing a video later in this series on setting up lock perms so you can go check that out at the I up there I’ll link the playlist with all of these and once that videos out it will be in that playlist so go check that out if You want to know how to set up a lobby permissions with luck perms if you’re using packs or any other permissions this plug-in well then guess what you’re gonna have to kind of figure that out yourself but if you’ve done permissions on your survival server or any of your Server for that matter your lobby is pretty much the same the only thing is you don’t want to get people the ability to do things like set home and your lobby or set warps in your Lobby you just want to make it to where they can Kind of go sighs spawn and that’s about it really that’s the only thing they may be able to do is do that and go through portals and do slice server survival or such server factions right that’s all they need to do you have crate keys they Need to be able to open up that but that’s just an add-on that most people probably won’t have so yeah just basic basic permissions for your lobby do not over complicate it now for your server lobby you’re also going to need essentials eye portals which is going to Be your portal plugin to get from one server to another and you’re going to need world edit and world guard this is going to end up protecting your server so people don’t grief it right that’s basically what you’re gonna need so let’s go ahead and set up all of these Plugins when it comes to essentials as I said all you’re gonna really do here is change like your message of the day join message and things like that as you can see on your screen right now this is very easy to find just go and do your plugins folder and then go into Essentials and then find the file there where you can change all the messages it’s on the screen right now I think it’s the language file it’s all there and you can change everything and yeah basically I would go through here and customize all this to give your server a Unique feel when someone joins into the lobby so grace up there that’s what I would recommend doing and after you’ve done that essentials it’s done it’s really easy to set up essentials on a lobby server because you’re not doing kits or anything like that all you need Is basically /spawn and yeah that’s it whoa whoa hard jump cut there sorry about that I did not enjoy this well whatsoever but yeah so now we’re in game we are in minecraft here and I’m setting up a high portal for you guys and kind Of giving you a quick tutorial on it so as you can see here I’ve kind of created this portal the only notes I would make is that it’s a lot easier to use I portal if your portal like has a a wall up next to it as you can see if we come Over here to this portal it does have a wall that Square behind it if it doesn’t and it’s like an open portal that’s fine it’s gonna be a little more difficult to set up you would have to do like you know this line right here and then do That row up at the top and then do the big square at the bottom it makes things a little bit more difficult but all we want to do real quick is just do /i portal space one exactly like that and it’s gonna give us a blaze rod this is Actually the iportal wand here then you want to come down here in the bottom left corner and right click on it right like so and then go up to the top right corner and left click on that right like so that’s just like world Eddy you’re setting your first position and your Second position now what you want to do is go into chat here and type slash I portal space create and then you want to name this something whatever you want to name it it doesn’t matter but you will need your name later so I’m gonna go Ahead and just do this test portal 1 I’m just that way I know what that is then e1 is this time space and then type in Bungie exactly like that so basically what this means is this is an eye portal right so I portal we are creating a new Portal we’re giving that portal a name and we’ll need that name later so again make sure you know it and then we’re making this a Bungie portal then you want to go ahead and hit enter so boom a portal is created but if we go into this portal It’s not gonna work sorry this portal is currently not ready what okay well we need to configure it no big deal you just want a time /ai portal exactly like that and then put another space then you want to do set to a all one word set to All one works space and then you want to do the name of the portal right this was test portal weina but yours may be called something different and then you want to set it to whatever the name of your Bungie server is right in our case it’s survival yours might be faction Skyblock whatever it is you want to type that here in our case survival exactly like that then hit enter and boom test portal once target has been set we can go ahead step into here and now it will take us over into our survival world where this is a sugarcane farm when you Slash spawn here we’ll be able to see this is our survival world spawn looking pretty spiffy guys looking pretty spiffy so yeah that’s how you can set that up that is how you can get that rocking and rolling enjoy your new portal um yeah pretty simple stuff oh thanks future Nick for passing that over to me who’s recording all the FaceCam stuff before I recorded that clip you just saw but but but we still need to look at two more plugins world that in world guard both of which are must-haves on a lobby server the reason you need world edit by The way is because it’s required for world guard and once you install both of these really and truly you don’t need to do any comping their config files are perfect right out the gate for lobby servers you don’t need to change anything don’t overcomplicate it but World guard on your server is going to take some configuration we need to actually go ahead and set up your lobby on on the server right and protect everything so uh yeah let’s let’s go do that so once you’ve created your beautiful lobby as this one is me look At this emerald house and everything here it’s a big stone stone pad a floating in this guy this is the perfect lobby for your server basically once you have created it what we want to do is come to one corner right at your ear spawn and click on it with your left Mouse and then you want to come over to the other corner the opposite corner and right clicking on your mouse and then you want to do slash slash expand space verts basically that’s gonna expand it all the way to the sky in all the way to the bedrock and now That you have that all you’re going to want to do and this is very very complicated it’s just do slash region right region space create and then you want to name this region you will need to remember this name so name it something you can remember I’m just Gonna do test spawn to do right like that test spawn 2 and hit enter and there we go a new region has been named test spawn to see that now this is protected right if I D up myself which I’m going to do I do a jump cut to re-up Myself but if I D up myself here I won’t be able to break any of these blocks I’m in creative right but boom these blocks cannot be broken because I don’t have the permissions to do them only operators do and yeah that’s basically that right so let me go react myself Real quick and I’ll show you guys how to turn off things like PvP in addition to stop mobs from spawning in your spawn and things but at this point it’s protected right you just have will have mob spawning and people get PvP possibly and things like that so give me one Second quick jump cut to react myself alright so I am now we opted pretty simple stuff there but now that we’re back in the game here and I am riad all we need to do is turn off PvP and stop mobs from spawning I’m also gonna link All of the world guard flags down below in the description if you want to go down there and some of them may work for your specific server this one may not maybe you want PvP in your spawn but basically there’s tons of different options but it set a flag it’s pretty Simple just do slash regent right space flag then you want to type the name of your region in our case that’s test spawn 2 and then now you wanna type PvP space deny hit enter and boom now current Flags PvP denied right now people can’t be VP you wanted to change It to where they could you and just do flat your slice region space flag space name of your region space PvP and then you and name put oh wow right and now PvP is allowed in this area but I don’t want PvP in this one right so we want to Do denied now let’s say we’d all have mobs to spawn we’re gonna do the same thing slash region and then we want to do space black and then we’ll need to do the name of that region that’s gonna be test spawn 2 and then you want to type Mob – spawning and then again you want to type deny right so space deny so slash Regents face flag space the name of your region space mob – spawning space deny and then hit enter and boom mob spawning is now not allowed in this region there are Tons and tons maybe even over a hundred world guard flags then you can do so I would recommend checking them out in the description down below but that is how you can protect your spawn with world guard go ahead pass it back to Nick for the rest of the video and now that You’ve got world guard set up guess what your server Lobby is setup you’ve got it built you’ve got it small and protected you set your spawn I think everything’s done there yeah that’s everything now there are some fluff that you could add in you can add in holographic displays Of like tech showing up like we have if you wanted to you could also add in crate keys you can add in the server changing compass all right yeah sure you’ve seen that on many of the popular servers out there that’s the thing that you can add in its link down below and That’ll take a bit of configuration but overall nothing too crazy and overall you can add in any more or any less plugins that you want as long as you have again essential to world guard and then probably some sort of a portals plugin all those are recommended and I Would keep them but anything else is basically whatever you want it doesn’t matter your chat plug-ins here using multi jet you’re gonna want to put that on your Lobby so you can see when people join your Lobby and see when they talk in the lobby and things like that if You’re not using multi jet you won’t need that see how this works basically whatever you want to do there is is okay right I’ll link some other like potential plugins you can have on your Lobby server in the description down below but at this point your Lobby has been set up so congratulations If you enjoyed this video give it a thumbs up subscribe to the channel if you haven’t already for more awesome videos exactly like this on server admin stuff in Minecraft Let’s Plays and tech videos we’ve got it all here and you absolutely love it so be sure to LIKE And subscribe anyway guys my name is Nick this has been the breakdown and I am out guys peace Video Information
This video, titled ‘How To Make A Lobby For Your Minecraft Server Network – How To Make A Minecraft Server Network Ep. 5’, was uploaded by The Breakdown on 2018-09-25 03:00:00. It has garnered 149470 views and 2904 likes. The duration of the video is 00:12:48 or 768 seconds.
How can you setup your lobby on a network Minecraft server? Well, this video will show you everything that you need to know when getting your lobby setup. From how to set up portals on your server’s lobby to protecting your Minecraft server’s spawn, I cover it all in this video. Your server’s lobby will be ready to launch once you are done watching this video. I even show you the plugins you need on a Minecraft lobby server, and how to set those plugins up!
Host Your Network With Apex Minecraft Hosting – High-Quality DDOS Protected Server! https://TheBreakdown.xyz/ApexNetwork
Hire Someone To Build Your Lobby: https://TheBreakdown.xyz/MCMarket
MUST HAVE PLUGINS LuckPerms Permssions Plugins: https://TheBreakdown.xyz/LuckPerms EssentialsX: https://TheBreakdown.xyz/EssentialsX Essentials Spawn: https://TheBreakdown.xyz/EssentialsX iPortal: https://TheBreakdown.xyz/iPortal World Edit: https://TheBreakdown.xyz/WorldEditPlugin World Guard: https://TheBreakdown.xyz/WorldGuard
OTHER PLUGINS HolographicDisplays: https://TheBreakdown.xyz/HolographicDisplays Create Keys Plugin: https://TheBreakdown.xyz/CratesPlus Compass Server Switching: https://TheBreakdown.xyz/LobbyWatch ——————————————————– ★ Minecraft Server IP: Play.BreakdownCraft.com ► Store: http://Store.BreakdownCraft.com/ ★ Join BreakdownCraft on Discord!: https://BreakdownCraft.com/Discord ——————————————————– ► Subscribe!: https://TheBreakdown.xyz/YTSub ——————————————————– How To Setup BungeeCord!: https://youtu.be/rhv-W6_y5nI Choose Your Network’s Plugins!: https://youtu.be/LRvt6WQh1kU ——————————————————– **FOLLOW US ON SOCIAL MEDIA** Our Website: https://TheBreakdown.xyz Facebook: https://Facebook.com/BreakdownHowTo Twitter: https://Twitter.com/BreakdownHowTo Email: [email protected] ——————————————————– ★ Recommended Gear Get your C920 Webcam: https://TheBreakdown.xyz/c920 Get your Minecraft Server: https://TheBreakdown.xyz/MCServer Get your Blue Snowball: https://TheBreakdown.xyz/Snowball ——————————————————– Music From EpidemicSound: http://TheBreakdown.xyz/EpidemicSound
About this video: In this video, I show you exactly how to setup a lobby on your Minecraft network server. This is actually episode five of my series on how to start a network Minecraft server. This video goes over every aspect of getting a lobby server up and running from building the lobby to talking about which plugins you need to install to even getting those plugins setup.
As far as what plugins we setup in this video, I show you how to configure World Guard to protect your spawn, how to setup portals on your lobby server, and how to setup EssentailsX in a way that makes the plugin look more custom and like you built it yourself. These elements will allow you to get your lobby setup and the perfect greeting area for all of the players that join your server.
With that being said, if this video did help you pick the plugins for your lobby server and make a lobby server for your network Minecraft server, please give it a thumbs up and be sure to subscribe to the channel if you haven’t already. It really helps me out, and it means a ton to me. Thank you very, very much in advance!
Note: Some of the above links are affiliate links. I may receive a commission at no additional cost to you if you go to these sites and make a purchase.