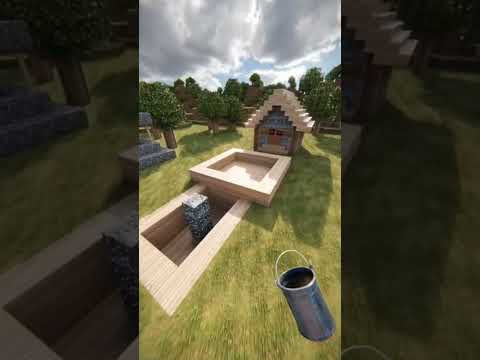
Hey what’s up youtube in this video i’ll be showing you how to make a command block statue oh and by the way just in case you have any more building relatedness i would highly recommend checking out the card system for a few reasons not only am i going to link a Few videos and playlists i think you guys might really want to check out but if you like this statue in particular check out my minecraft item tutorials playlist because it’ll have loads of stuff exactly like this that i think you guys might really want to make but Moving on if you want to make the command block here’s what you’re going to need start off by grabbing yourself some orange one and some light gray wool grab a white wall flip over to the clays and grab yourself some science in clay grab a light gray stain clay and finally Guys grab yourself some white stain clean now we will need a few more materials later on but we’re going to have to grab those later because we won’t have the room for them so once you have each one of those materials right here and once you’ve figured out where You want to make it i’ll be making it right here you’re going to want to kick off your command block with this sequence of blocks coming directly up from the ground do you want four orange wall that’s one two three four followed by one light gray stain clay And you know what guys we’re gonna move that closer to the orange wall because it’s gonna make our lives a little bit easier um you then continue to go up want to do seven orange wool that’s one two three four five six seven then do a Light gray clay then go up by four with the orange that’s one two three four then go right by three with the orange one two three do a light gray clay go right by seven with the orange that’s one two three four five six seven one light gray clay Four orange one two three four then go down by three with the orange that’s one two and three then do one light grey clay go down by seven with the orange that’s one two three four five six seven then do a light gray clay go down by four with the orange that’s One two three and four should plant you on the ground go left by that block that touches the ground by three one two three to a light gray clay continue going left by seven with the orange that’s one two three four five six seven do a light gray clay and then Go left until you connect back to where you first started and you should end up with something that should look a little bit like this and there we go that’s kind of like the outside of the first side of the command block once you have that Taken care of this is what you want to do next so we have to do this sequence of blocks to each one of the four corners and this is what you want to do so let’s start from this bottom left-hand corner and coming towards us we want to do A row of three orange wall that’s one two three then one light gray clay then do seven orange wool that’s one two three four five six seven one light gray clay then do four orange wall that’s one two three four then actually you know what go up on top This fourth orange will buy free with the orange that’s one two three then go up by one with the light gray clay then go up by seven with the orange that’s one two three four five six seven then do a light gray clay then go up by four with the orange That’s one two three four then coming back on yourself so going and connecting to that corner we want to do a free orange wall that’s one two three one light gray clay then a seven orange wall that’s one two three four five six six seven okay let’s start that row again a one Two three four five six seven one light gray clay then connect that clay back to that corner to give you this right here this is kind of just the second face of your command block what we’re now going to do is the same thing on the opposite side so we’re now going To start from this like back right hand corner here and we’re going to take this block and we’re going to do the same thing so from this block coming towards us do the sequence of blocks do three orange wool one two three one light gray clay seven orange wool one two three four Five six seven one light gray clay four orange one one two three four then go up by three one two three do a light gray clay then go up by seven with the orange that’s one two three four five six seven one light gray clay then go up by four with the orange That’s one two three four then going back on yourself connecting to that corner we want to go back by going left with your orange by three one two three one light gray clay then seven orange one two three four five six seven one light gray clay then connect back to Where you first started and that will just leave us with this kind of like open face of the command block here which is going to be the front face and we just have to connect the bottom and the tops together the way that we do that starting from this bottom left hand Corner here going right we want to do three orange wall that’s one two three then one light grey clay then seven orange wool one two three four five six seven one light gray clay free orange wool do that to the bottom do that to the top So the top left hand corner here we want to do going right three orange wool one two three one light gray clay then seven orange wool that’s one two three four five six seven one light gray clay and then three orange wool should connect you all the way over to that top Right hand side and we now have a nice big giant cube shape here which is going to make things a lot easier for a couple of reasons so once you’ve reached this point right here guys this is what you want to do next and we’re kind of going To be making the entire cube at the same time usually we just focus on one side at a time but we’re actually going to be focusing on all of the four sides the bottom sides first the top will do all by itself but we’re going to Be focusing on all four of the bottom sides at the same time so pick any side doesn’t really matter which one as long as it’s not the top and come down to this bottom left hand light gray stain clay well from this bottom left hand like gray stain clay you want to do Three up left diagonal so from this we want to do one two three you’ll notice that it connects to the one that we have on the left hand side then from this one that we have on the left hand side you want to do three upper right diagonals so that’ll look like one Two three then go on top of that third up diagonal by one with the orange then do a light gray stained clay then do three upper left diagonals that’s one oh two two will connect you to the one that we have on the side then from the one that we have on the Side you want to do three upper right diagonals and we will be able to do free this time that’s one two three you will notice that that connects you to the one that we have up here at the top from the one that we have up Here at the top we want to do four bottom right diagonals so that’s one two three four then from that fourth bottom right diagonal do three upper right diagonals that’s one two three then from this block that we have embedded in the orange what we want to Do a free bottom right diagonal so that’ll be one two three then from this one that we have embedded in the wall here we want to from this do three bottom left diagonals that’s one two three then go down from that third bottom left diagonal by one with the orange place a Light gray wheel underneath it then do a light gray clay and then do two bottom right diagonals that’s one two then from the light gray that we have in the wall we want to do three bottom left diagonals that’s one two three like so we then from this block that we just Connected to on the floor want to do two up left diagonal so that’ll be one and two then go up on top of the second up left diagonal block by one with your sign same clay go left by two of the clay continue going left by two of the light gray wall Then take out your light gray saint clay go down by one to a bottom left diagonal and you’ll find that you have something which should look a little bit like this and you know what once you’ve reached this point right here this is what you want to do next You see where we have this light gray wall here well from this left hand light gray wall this one that we placed last you want to go left by one the light gray one with the white then go up on top of this with your White by hang on guys let me work this out by eight so that’s one two three four five six seven eight you then want to go right by eight that’s one two three four five six seven eight you then want to go down by three with The light gray well that’s one two three you then want to continue going down with your cyan same clay by five that’s one two three four and five then you want to go left one to give you this then take out your white wall and do this all the way inside this square Shape that we’ve just made you want to do a slightly smaller white wall square inside of this square shape that you’ve just made so we just want to have a white wool square what we then want to do is we want to turn this thing into a grid shape so Inside of the square shape that we formed a slightly smaller square shape we kind of just want to criss-cross like this and we just want to form what essentially looks like a waffle shape like that that is what you want to have on not only this side but We’re now going to do the same thing on each one of the other three sides for the base we also have to do the same for the top but it’s a different perspective so we’re going to go through that later but that is what we want to have guys We’re going to get this taken care of then we’re going to do some filling in so once you’ve reached this point right here do the same thing on all of the other sides so i’m going to go through this with you guys quite a few more times i’m going to go We’re doing it together it’s what i’m telling you so we’re on the next side doesn’t matter which one and we’re starting from this very same first light gray stained clay from this light gray sink layer you want to do free up left diagonals that’s one two three then from the Light gray clay in the wall you want to do three upright diagonals that’s one two three go up by one with the orange one the light grey clay then do two up left diagonals one two from the light gray clay in the wall do three upright diagonals one two three Clay in the wall do four bottom right diagonals one two three four then from that fourth bottom right diagonal do three upper right diagonals one two three from the clay in the wall you want to do a free bottom right diagonals one two three then from the claim the wall do three Bottom left diagonals one two three then go down by one with the orange then one with the light gray then do two bottom right diagonals one and two from the light gray clone the wall you want to then do three bottom left diagonals one two three Then from the clay in the wall you want to do two up left diagonals that’ll be one two place a cyan stain clay on top of that go left by two go left by two of the light gray wall then place a light gray will a light gray clay underneath that second light Grey wall then do a bottom left diagonal leaving you with this x shape once again once you have your x shape you then want to take out your light gray and from this second light gray that we placed here we want to go left born with light gray one with the white Go up by eight with white that’s one two three four five six seven eight we then want to go right by eight one two three four five six seven eight we then want to go down by three the light gray one two three we then want to go down by five With the sign staying clear that’s one two three four five go left by one take out your white wall do a slightly smaller white wall square inside of that square shape that you’ve just made which is what we’re doing right now and then turn it into a nice big giant waffle Shape you just want to do a crisscross connect four grid or i suppose connect three grid in this case inside of the shape that we’ve made and there we go we now have the exact same thing that we have on the front once you have that Taken care of on this side let’s do the same thing on the other two sides as well so we’re on the other two sides and we’re going to do this a little bit faster so starting from the same place on the back we want to do just in case You can’t remember free up left diagonals that’s one two three followed by three upright diagonals one two three orange on top clay on top of that two up left diagonals one two three upright diagonals one two three four bottom right diagonals one two three four three upright diagonals one two three Then three bottom right diagonals one two three then three bottom left diagonals one two three done by one with the orange do a light gray clay then do two bottom right diagonals that is one two then do a free bottom left diagonals that’s one two three then do two up left diagonals one Two place a seine stained glass on top go left of it by two go left by two of the light gray wall do a light gray stained clay underneath it do a bottom left diagonal with the light gray clay take out the light gray wall going left Of the second light gray wall that we just went down from go left by one then do a white one go up by eight that’s one two three four five six seven eight go right by eight one two three four five six seven eight then go down by Through the light gray that’s one two three five with the side and one two three four and five left by one the cyan take out the white wall do white will going all the way around the inside of what you have just made so do white will Going all the way around the inside we then want to split it up into the connect free grid so we just want to connect all of these together and kind of like a nice little hash sign command block once you’ve got that taken care of you now want to come all the way Over to the last side now and we’re going to be doing this even faster if we can and we want to do the same thing doesn’t it look cool from this view by the way doesn’t it look like it looks really really futuristically circuity electricity i don’t know what i’m trying To say but i do like this view of the command cube it really does look quite nice anyway starting from the same place as we did on the other three sides we want to do two up left out three up left diagonals that’s one two three then we want to do three upright Diagonals that’s one two three then place an orange on top followed by a light gray clay then do two up left diagonals that’s one and two then do three upright diagonals one two three then do four bottom right diagonals that’s one two three four then the three upper right diagonals that’s one two Three three bottom right diagonals that’s one two three three bottom left diagonals that’s one two three orange underneath light gray clay underneath that two bottom right diagonals that’s one two three bottom left diagonals that’s one two three then two upper left diagonals one two then a seine stained glass on top go Left of it by two then go left by to the light gray place a light gray stained clay underneath then do a bottom left diagonal then going left of the second light gray wall we want to go left by one the light gray one with the white Go up by eight with the white that’s one two three four five six seven eight then go right by eight with the white wall that’s one two three four five six seven eight then go down by three of the light gray wall that’s one two three then down by five with the science Stained clay that’s one two three four and five left by one take out the white wall do white wall going all the way around the inside of the square shape that you’ve just made so go all the way around the inside of the square shape that you’ve just made And now we just want to make a nice little three by three quid suddenly developed a speech impediment mid tutorial this sometimes happens once you’ve got that little grid taken care of you want to have something which should look a little bit like this and once you do have that fourth side taken Care of we’re now going to work on the top of this thing so the top of this thing is actually quite simple it is literally the exact same thing that we’ve done a few times already except it’s on top of it so technically if you do want to get a little bit Shall we say ocd with the block i was going to say autistic but that’s moderately offensive if you want to get a little ocd with the block this thing does technically have a front side so let’s say that this is the front side of your command block where i’ve just Erected this row of orange wool well let’s say that’s the front we now want to come up to the top and looking towards the back here we kind of want to do this so it’s a little bit tricky actually no look towards the front from the back it’ll be a little Bit easier so let’s start from this front left hand light gray wool clay block well from this we want to do three bottom left diagonals so bottom left diagonals in this case is like coming towards us this way so it’d be like one two three we then from the block that we Have in the wall want to do three bottom right diagonals that’s one two three we then want to place an orange wool underneath it then place a light gray clay underneath that and then do two bottom left diagonals that’s one and two we then from the light gray clay in the Wall want to do three bottom right diagonals that’s one two and three we then from this light gray clay in the wall and we’re going to have to take this sort of view to progress we want to do two up left diagonal so coming towards us one and two We then want to place a light gravel on top of it we then want to go left by one with the light gray we then want to go left by three of the signs saying clay that’s one two three we then want to with our light gray Stain clay we want to place one underneath it and then do a bottom left diagonal which will be right here so you can see how this is shaping up and then from the light gray clay in the wall we want to do bottom left diagonals until we connect to the other light gray Clay in the wall there should be three of them then from this light grey clay the wall we want to do coming towards us it will be three bottom right diagonals so that’ll be one two three then place an orange wool on top then a light gray stain clay on top of that Then do two up left diagonals that’ll be one two then from this light gray clay in the wall we want to do a free upright diagonal so that’ll be one two three then looking this way so we can progress from the light gray clay in the wall we want to Do four bottom left diagonals that’s one two three four then from this we want to coming back on ourselves so towards this way we want to do free up left diagonals and we should connect all the way back to where we kind of first started on the top and We’ll have a shape which looks like this and i know everything looks like a bit of a mess up here but that’s because it is once you’ve reached this point right here this is what you want to do next we now want to take out a light gray wall and out Just the light gray will actually from the light grey wall that we placed earlier this left hand bottom left light to gray we want to go left a bit left of it by one the light gray then left by one with the white wall then going up That way we want to do eight white wall that’s one two three four five six seven eight we then want to go right by eight that way so that’s one two three four five six seven eight we then want to come down by three of the light gray that’s one two three We then want to come down by five the science thing clay that’s one two three four five then left by one we then want to take out the white wall and we want to do white wool all the way around the inside of the little square shape that we’ve made so do white Wool all the way around the inside of the square shape that we’ve made we then want to kind of just crisscross it we want to have our free by free grid or connect free grid as i’ve been calling it and we should end up with something that should look a little bit Like this and as you can see it’s identical to what we have on the sides except it’s not placed in the way that you would imagine like this is how it is on the sides and this is looking towards the front you think it’d be the other Way around you think you think you do it like mirrored but you don’t once you’ve got that taken care of this is what you want to do next guys so discard every single color that you have we’re only going to be needing a few you want to grab yourself some orange wool Grab that back also grab yourself some white stained glass and some light grey stained clay but then you’re going to want to grab some pink stained clay some magenta stained clay grab red stained clay grab lime green stained clay and also grab yellow stained clay i know the colors It’s crazy isn’t it once you have each one of these right here this is what you want to do next so this is the color combination that we want to place inside of each one of our little connect free grids so starting from the top going From left to right working our way down you want to do this you want to have a magenta stain clay followed by a red stained clay followed by a lime stain clay next row going from left to right is yellow then magenta then red next row red Magenta magenta so you want to have something which should look like this that’s what you want inside of each one of those grids so let’s do it a couple more times until it’s burned into brains so starting from this one going from left to right side from the top going to The bottom we want to do magenta red green then yellow magenta red red magenta magenta side number two done on this side again starting from the top like a typewriter we want to do magenta red green then yellow magenta red red magenta magenta coming on to the fourth side we want to Again ching do magenta red green yellow yellow magenta red red magenta magenta and that just leaves us with the top and on the top it’s the same thing remember that this is the top portion of the cube we want to do uh magenta red green yellow magenta red Red magenta magenta and that is all of those little bits filled in so once you have all of those center parts filled in the way that we now have to just complete the cube is this so you can see inside each one of the cross sections of the cube that we have well Inside the cross sections we want to fill it in with white stained clay that’s how the cube wants to be filled in with white stain clay inside of the cross sections inside of the light gray stained clay cross sections it gets filled in with white stain clay that makes sense right The bits closest towards the center part of the cube where you have like that little i don’t know circuit board i don’t know what that thing’s supposed to be it it’s like it lights up it bleeps and bloops it’s probably a robot fill those bits in with white stained clay Fill the rest of these sides in with orange wool on i say the rest of the sides i mean fill the rest of the area left in with orange walls so you just want to do that going all the way around we’ve just got the top to do now and This will be the first side of the cube filled in so we’re just going to have something which should look a little bit like this perfect guys so that is what you want to have not only on this side of the cube but you also want to have on the other sides Of the cubes and on the other sides of the cubes and implying that there’s more than one so once you’ve got that taken care of once i’m sure that you can probably figure out how to do that again and again and again so for the first Time in this tutorial i’m going to be back in just a second guys once i myself have filled in each one of the other four sides of this cube and i’m just doing the same thing that i’ve done once already i’m going to be placing white stained clay inside each one of the Cross sections and i’m going to be placing orange wool everywhere else in those sides it’s just that now that there’s nothing really technical left i feel as though that i can kind of like fast forward by cutting something out so i’m going to be back in just a second Guys um once all of these sides are filled in properly and we can talk about what we can do to the cube a little bit further okay so as you may be able to tell guys i have filled in at least those three slides and take my word for it the other Two on the opposite side are also filled in now this is technically the statue 100 complete this is the command block completed but if you want to make it just a little bit more interesting let me show you guys what you might want to do so something you might want to do is Remember the big giant plus shape that we have in in the center of the command block and remember the big giant like white console thing with all the bleepy bloopy buttons well if you want to make it just that little bit more interesting something that you could possibly do is Raise each one of these sides including the top out of the front of your command block and this will just give it a bit more of a 3d effect it will make it look a little bit more interesting maybe you’re not going for interesting maybe you’re going for realism in which case you Probably won’t want to do this but i i like it quite a lot i think it i think it really does improve the look of the command block but uh it’s kind of subjective plus it will take a little bit more time obviously if you do want To do this going all the way around your block but i’m going to do it to just one side and i’ll show you guys how it looks so let me just raise out these buttons before i get out the white wall because i’m also going to need a few more materials On so i’m basically going to have to grab back my i’m going to need white wool light gray and cyan stained clay which sounds like a nice little rhyme except except you know what it actually just killed me saying that because i just realized i will never be dr seuss so We’re just filling in this and let me just fill in this white wall and we can take a look at this thing can’t we we can see if this looks any good we can see if it looks any good whatsoever so this is all going to be subjective of course which means it’s You know it’s kind of just your decision as to whether you think it’s better i quite like it so imagine this on each one of the we can get a comparison we can literally get side by side um imagine this on each one of the other Sides as well do you like it do you not kind of up to you really if you do you might choose to do this on each one of the other sides i’m going to do it before i cut this tutorial and we’re going to have a bit of a roam around This thing um once i’ve actually done it so i’m going to be back in a second once i’ve done this to all the sides i’m sure that you guys can see how you would what how you would make this on each one of the other sides of your command block so As you can see i have finished extending out each one of the five sides of the command block five including the top you can see that that’s all connected together looks quite cool it definitely makes the statue flow a little bit better you can see how it’s all Connected now i mean obviously you could see that beforehand and obviously it was before but now that it’s all 3d the center part and i don’t know i think it looks a lot more interesting i think it looks a lot better although it does look like there is a big giant band-aid on The side of each one of the sides of the command block so it’s really up to you whether you want to do this or not kind of up to you but anyway whichever version you like hopefully you’re giving this video a like hopefully you give it A share feel free to comment down below what else do you want to see me make next check out the card system for loads of other videos and playlists i think you guys might really want to check out um especially my minecraft item tutorials playlist that’ll have loads of stuff in there Just like this loads of items from minecraft that i think you guys might really really be interested in so like favorite share if you wouldn’t mind guys hopefully you’ve managed to make it hopefully you like it check out the khan system comment down below what do you Want to see me make next thank you very much watching i’ll see you guys in the next video You Video Information
This video, titled ‘Minecraft Tutorial: How To Make A Command Block’, was uploaded by TSMC – Minecraft on 2016-02-19 21:00:00. It has garnered 58974 views and 807 likes. The duration of the video is 00:30:06 or 1806 seconds.
@TSMC360
If you like this giant Band Aid block give this video a like! 🙂
World Tour Playlist: https://www.youtube.com/playlist?list=PLVfyBBWTXosDwrbCixF81gSaMAzCy1D4m
Suburban House Playlist: https://www.youtube.com/playlist?list=PLVfyBBWTXosAzK1wjPMIwf9_XUm01lr1k
House Tutorial Playlist: https://www.youtube.com/playlist?list=PLVfyBBWTXosDmZ1v4dAvmSqgjUicyqKxI
Brick House Tutorial Playlist: https://www.youtube.com/playlist?list=PLVfyBBWTXosAtwlwNetjZvleLv8zxFwAf
Wooden House Playlist: https://www.youtube.com/playlist?list=PLVfyBBWTXosCMXcLZZjGSVAVlyNsV-hyj
8 – Bit Playlist: https://www.youtube.com/playlist?list=PLVfyBBWTXosBbdmNCC7Me7SIgk5lYn8sJ
Consoles And Controllers Playlist: https://www.youtube.com/playlist?list=PLVfyBBWTXosDhoxvu387C3nC10Iem_CAM
Meme Playlist: https://www.youtube.com/playlist?list=PLVfyBBWTXosCLhQzUMqLNCn2jdpaaOq6E
Emoji Playlist: https://www.youtube.com/playlist?list=PLVfyBBWTXosCJd4hFlzbw8o0GJsjGtZGB
Logo Tutorials: https://www.youtube.com/playlist?list=PLVfyBBWTXosC9YEnPjlPk9wSkomDa3Ohr
Youtuber Playlist: https://www.youtube.com/playlist?list=PLVfyBBWTXosB-t2aW0_f8pUFc3L6VBSpl
Interested in a youtube partnership? CLICK HERE : http://awe.sm/jEUXm
Want to Support the channel? 🙂 – https://www.youtube.com/channel/UCIui-Mt1PmcJYpoBATftj7g/join
Check out my merch 🙂 – http://tee.pub/lic/uCgw3hVWL6c Check out My Instagram! instagram.com/tsmcyt/