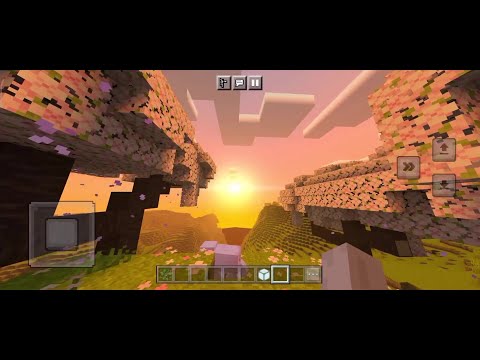
Hey what’s up youtube in this video i’ll be showing you how to make this surprisingly easy to make tree house before we begin i would like to show you a round a little bit so the way that you navigate the treehouse it’s very simple we start down here all the Way at the entrance and we can go through this door and we have a lot of survival resources surrounding us but we can come through this door here which leads us into the trunk of the tree and we can climb all the way up the trunk Which takes us on to the second level of the treehouse which allows us access to this second room and here is where we keep a bed and some more valuable items if you like this video please do remember to hit that like button i’d really appreciate that it helps me out So so much guys you’ve got no idea liking is the best way that you can help me and support the channel and that’s pretty much everything it’s quite a simple build it’s easy to make and i think we should get this thing started so before we begin i should tell you That the treehouse will only require a 21 block area by about a 14 block area that’s 21 blocks going from left to right and 14 blocks going from front to back when it comes to the height of the treehouse you can change that so i’m not Going to give you a value for that we also need all of these materials that you can see in my inventory right now we’re going to be beginning with the ones in the hotbar but we will need all of these others and maybe even some more please make sure that you have All of these pause the video if you have to you might even want to make this grid in your world to help better plan out your build and if you do all of those things once you’ve done pause the video if necessary we can begin So if you make this grid in your world i’m going to recommend you start on the very front right hand corner of your grid and you want to count inwards by two one two you then want to count left one this is where we’re going to start we’re going To begin with a row of four oak wood coming up from the ground one two three four then extend the fourth block inwards by one up one left one up one left by two one two go down one left one down one left one and connect that block downwards so we Want to have something which should very much look like this now once you have that you also want to take the very top block and place an oak wood on top of it so that it’s all pointy and such and we also want to create an entrance So the door is actually going to sit right in the middle of what we’ve made so it’ll be here which means left and right of that we want to place an oak wood plank and above the oak plank place another plank and on top of those second oak wood Planks we actually want to place an upside down spruce would stare facing inwards like this and you want to place a spruce wood slab behind this or in between them i should say and then we want to behind the spruce wood we want to place glass So all of the stairs all of the slabs glass and then where you place the glass you also want to fill in the gaps that you have left you want to fill them in using oak wood so you’ll have a pattern which should look like this But the end goal of that is to from the outside have something which should look like that now once you’ve done that we’re going to use spruce fence to fill in all of the other gaps in the front of the house so something like that i think looks pretty cool And just just to give this context like literally like a door is going to be placed here or maybe even here actually under the glass would be better just like one block inwards something like that would look absolutely fantastic so just to give context to the the glass Basically that’s where the entrance is going to be now what we also want to do is we want to build around the rest of the house we want to build up the walls and stuff so we are going to take every single one of these oak wood Blocks that we have on the right hand side the row of four and we want to place a row of seven oak planks going towards the back of the build one two three four five six seven and we want to place as many rows going backwards from the oak wood as it takes All of the rows are equal in size we then want to place a row of oak wood behind the oak wood planks like this and then take the top oak wood and extend it inwards by one and then up one right one up one right by two one two down one right one Down one right one and connect down like that perfect what we are then going to do is we are going to fill in at the back of this so you can either choose to fill in the back of this build using oak wood planks where the oak woods are Or if you want to have a bit of a bigger area on the back maybe you just want to fill in where the oak woods connect together if you want to get fancier perhaps you want to make a window of some sort maybe knock out a couple of blocks in the Middle and some glass maybe add a window sill perhaps you could even use the wooden trap doors to create a bit of an effect around the window and then what what else could you do i mean you could then use some maybe some spruce wood slabs above that just to light box Things in a bit and then you could use some spruce wood fence like this to kind of like building around the window and if you then further wanted to maybe you could add a little bit of light around the area by adding a torch i however have chose to leave this blank For the sake of the tutorial i have added a little bit extra on the back some sort of design like this would be fine another entrance a simpler window maybe even some potted plants but i’m just throwing some ideas at you guys well anyway once you have that taken Care of we want to come to the left front side of the house so we’ve made the right wall let’s make the left wall it’s a bit different so we want to take the very front bottom left hand oak wood plank block for this house and we want to place two awkward Planks coming back from this block one two then we want to place a spruce wood and we want to expand that spruce wood to the left by one then as we’re looking down at the ground place an up left diagonal One above an upper right diagonal one to the right a bottom right diagonal one coming down so now you can see where the trunk of the tree is actually kind of like built into right so knowing that we can place oak wood planks coming backwards from the rows of oak Wood and we just want to be wary not to interfere with the tree trunk if that makes sense so you can see we’re going to be building the tree trunk it’s almost as if we’ve built the house around the tree trunk but we’ve started with the house instead Of the tree you guys get the idea we then want to place upon every single spruce wood block that we have at least eight more rows of spruce so on top of every block add eight spruce one two three four five six seven eight and that is where i am going to Stop for myself and you want to do that on top of every single spruce block now you can go higher there’s abso there’s absolutely nothing to stop you going high if you wanted to make it 20 30 40 whatever it doesn’t really matter how high you go as Long as it’s not too crazy or it’ll look fine i like the idea of the house as being quite close together because that’s pretty much where it is they’re only one room but they are like full on houses so i want something which should look like that okay Now why don’t we build the roof a little bit no actually i don’t want to build the roof just yet because i want to develop the tree a little bit more first so uh once you have the tree itself the tree trunk and this is a very basic tree Trunk by the way very very basic indeed what you want to do is you want to take the top block of the tree trunk which is uh okay so let me explain this better you come all the way to the top of the trunk right and you locate these two spruce wood Blocks these two yeah on the left place oak wood planks on top of them like that you then want to extend the first oak wood plank towards you by one and then you want to place an oak wood preferably facing downwards like this on top of that oak wood you want to go Up by three one two three and then move left one up one left one up one left by two one two go down one left one down one left one down by three one two and three just like that and we also want to make it pointy at The top by the way i also noticed we didn’t make it pointy on the back of the house earlier on they both want to be pointy both of these points the points want to be pointy yeah i just said that okay now that you’ve done that i’m actually gonna Build a little bit more of the frame before we move on so behind the sides of the oak wood rows that we have so we’ve got two rows of four we want to place five rows of oak wood planks coming backwards from the oak wood so one two three four five like that And we want to have five rows of oak wood planks coming behind every single one of the long rows of oak wood so that wants to be on both sides to help build up the sides of the house like that so that’s the left and right side And then we want to place oak wood behind that so we want to place oak wood behind the oak wood planks we’ve i’d i’m feel as though that i’m going kind of fast with this but we’ve done this one time already so i do apologize so you Can see that we’ve bought the two side walls they’re five rows of oak planks and then a row of oak one and then we want to take the top blocks and we want to move them inwards using oak one and then up one And then in once and then up one then inwards and take the middle block and extend it up by one just like that now on this particular back of the house i’m going to fill in the very back of it using oak planks now the reason for this Is very simple it’s it’s just because just because uh you you elicit a little bit more room by doing this that’s pretty much pretty much the whole deal that’s why uh that’s why we have the oak planks now once you have done that kind of got to figure out where the platform Is going to go alright so the next thing we have to do is we have to add a platform to the second story of the treehouse so that we can actually like walk around in the house and so that we can access it from the tree trunk So we’re going to start at the back here and we need spruce wood slabs so we want to place a row of spruce wood slabs underneath the back left hand part of the tree house here just going like around the edge underneath it we also want to have Spruce wood slabs coming across the back like this and we also want to extend those slabs coming towards the front like that and then we want to extend these spruce wood slabs out in front of the tree house itself by i mean it’s as many rows as You like but let’s say like free okay like one two and three and then we have to extend it to the right so you can begin by extending as far right as the house itself however you will have to extend it further you see the entrance to get to the second level You’re probably going to pop out around here like let me show you so like the the door will probably be about here right and just to kind of like illustrate this better so like you’re you’re coming through the main entrance which is here what did i just place you coming through The main entrance which is here you will access the inside of the tree you’ll have a row of ladders inside of the tree coming all the way up here and you’ll also have like a floor at the top of the inside the tree so that you can actually like climb up it Which means you would like exit back onto the tree round about there which means that we want to use spruce wood slabs to create a platform to walk out onto so you can extend these spruce wood slabs at let’s say another like three like one two Three and then we want to start bringing it inwards but maybe we’ll delete that third block and then we’ll start bringing it inwards like in one right one then like in one right one and then we’ll we’ll do another right and then we’ll extend it back so we want to extend it back And we want to connect it to the back of the tree like this so just you know yours doesn’t have to look exactly like this but something like that would actually be really good and then you just want to fill the base of the uh the tree and you just you want To fill in all of the area that you’ve kind of just like made using oak wood slabs so this is going to be the interior of the platform that we are going to be walking around on this is uh where we’re going to be climbing up to we’ll be walking around On and that well i don’t know what else to tell you that’s that’s exactly what we’re making so you know something like that would uh would look fantastic and it was actually kind of like an unwise idea you know how we placed the that yeah it was kind of kind of stupid Of me you know how we placed these spruce woods well i placed oak wood on top of them oakwood planks we don’t want to cover that we we actually really don’t want to cover that at all but yeah we want to have a nice platform that should look like this And i’m also going to fill in the platform underneath we just got these two blocks and maybe more do we have more we can turn these into oak wood slabs instead yeah so that’s nice we’ve we’ve kind of got our platform kind of got a house sort of established Um we also want to place spruce fence going all the way around the edge of the platform as well we just want to place some spruce fence like this it’s going all the way around the edge of what we’ve just made like this it’s looking pretty good We also want to extend all of these spruce woods upwards as well by a number that you’re comfortable with like another eight would would be fine actually like if we place eight spruce pods on top of all of these pre-existing spruce woods we one two three four five six seven eight Nine we’ll go nine i i like the number nine i don’t know why i i like uh numbers that are like multiples of three especially for building like they they always seem to go quite nicely multiples of three you almost always want odd numbers whenever you build stuff i Why i don’t know it’s it’s just because like doorways and stuff are like one blocks thick and it just it kind of just goes together but so far we should just have something that should look like this okay you know something normal something pretty decent looking um we’ve Got our platform we’ve uh we’ve kind of got the shell of the house together let’s let’s do a couple more things before we focus ourselves on the house we’re gonna come all the way back to the base okay so we’re coming to the base of The tree trunk and the the best way that i can describe this is we messily want to add blocks of spruce to the tree trunk to look like the base of an actual tree so like you would expect like roots or something to look you kind of want to do Something like that you know you guys have seen trees in in the wild before you guys know what they look like we also want to add some treeage like to this part of the build as well so like where just kind of like built into the roof of The lower house we just want to have a few blocks of spruce something like that you know so the tree isn’t just like going straight up it’s organic it’s you know it’s got a little bit of something to it we also want to use spruce wood and this Is where we might have done a silly uh we also want to place a spruce wood branch that like comes underneath the platform right in the middle so like coming straight from the tree we kind of want to have like a spruce wood branch like this right That kind of like supports that part of the treehouse and the branch wants to be quite fixed so you know add some add some blocks to it in in a manner that you find you know works for you something like this would uh would work quite well something That looked like that would work quite nicely and we also want the spruce wood to um be underneath basically like where we’ve just placed all of the oak wood slams we also want to have the spruce wood i i probably should have placed this first but i Didn’t think about it okay i’m very sorry but uh i’m a dummy and i forgot but uh you know something like that so that the the treehouse is actually being full on supported by the branch it looks a lot better like that don’t you think Plus what we can also do we can do it now is we can use oak leaves and we can add a whole bunch of oak leaves around this particular part of uh of the branch so basically in a in an effort to try and uh make this look more realistic Um we’re just going to be adding some branches i mean if you’re making some sort like winter winter tree house then you know obviously there wouldn’t be any leaves or unless it’s like an evergreen but um something like that would look just fine like that just yeah it just looks more natural like That you might want to drink some more leaves on there or not it’s up to you i’m not gonna go too crazy in depth once you’ve done that we’re going to detail the house a little bit more so this house is almost identical to the house down below except for the fact That it isn’t as long but the entrance is in the same place so the entrance to this house is here okay so the entrance is right in the middle and one row inwards like that you want to place oak wood planks either side of the door left and right and the Awkward planks want to be two rows high like this so that is where the oak wood is and it’s just either side of the door like that we also want to place upside down spruce wood stairs facing inwards on top of the oak wood planks with a spruce wood slab connecting them Together in between and we want to use glass behind the stairs and the slab like this so we just want to have something which should look like that that’s perfect and to finish the detail there’s not that much detail we just want to add oak wood planks but Basically just covering up all of the empty space that we would otherwise see from the outside so something like that would look good and i i don’t know why i like this effect i’ve literally never done this before but i do like the effect i like What have i done what have i done we want to play spruce wood fence all the way in between all of that so i i can’t i kind of like that i don’t know why but you know you’ve got the same premise as you have like down below as well we’ve done quite A bit of detailing on the tree um the next thing we’re going to do is we are going to let me see if we have anything left on the houses themselves other than the roofs oh or if you want to you can add like you know like a Window and stuff to the back of the house i wouldn’t recommend it though because um there’s limited space inside as there is and windows kind of limit where you can place stuff on the inside which irritates me but maybe you want to add like windows and stuff to this um a Particular house anyway next thing we want to do is we want to add the roofs and the the roofs are so so simple guys they’re pretty much totally awkward stairs and the oakwood stairs start on the left-hand side of the houses like this right on the sides and they build up all The way to the top going from front to back out you guys know how roofs work right at the top you want to use oak wood slabs like this and then building down the opposite side once again you just want to have your oak wood stairs like just building down The opposite side i am there this is this is going to be very tricky i can i can tell this right now oh oh are we doing it we don’t know yes there we go perfect just like so and here as well also here and what on the back too like Here and here and look straight down there we go so there you can see very basic proof however we then want to make them overhang by one row so all of the blocks every single one of them make them overhang by one row this includes these slabs this includes all of the Stairs like that and then a place upside down spruce wood stairs underneath every single one of the blocks so coming all the way up to the top spruce wood stairs upside down the ones at the top are facing forwards like that and then you have a bit more Of a detailed roof without having to put in very much effort whatsoever and it still looks good that’s the whole point of these houses like uh this this house in particular like the treehouse it’s supposed to look quite natural it’s supposed to it’s supposed to be quite simple and i i do Think that it is quite easy to build or at least i hope it is i don’t think it’s a difficult one by any means it might be quite big but i don’t think it’s complicated you you guys will be the judge but you know we we now have Something which should look like that right is it just me that thinks that it looks a little bit stupid not having uh more leaves on this part i’m i’m sorry i i like add or something but uh i need to add a little bit more leaf edge Here just just because i it looked a bit hot yeah yeah that looks a little bit better to me anyway so that’s that’s that roof complete however we do have another one so we’re gonna work our way down again and it’s the same thing that we’ve just Done like we stack up the rows of oakwood stairs as the roof material until we get to the top in which we use a row of oakwood slides coming all the way to the back and i’m just going to build down the opposite side of the roof because the Other side is going to bug me i can almost see it now and uh then we do the same thing right so we place the rows of oakwood stairs i hope i’m not rushing this i feel as though that i’m kind of going a little Bit faster if once again if so i do apologize but we’ve done this once already and roofs are so so simple especially these ones although some some can not be simple but they all want to overhang and uh we just want to place the blocks in between oh oh another Another bad one um yikes how how about uh how about this can we where have i just placed them ah there we go at least at least i got that one what did i what have i done i’ll just leave them there i don’t know what i’ve just done i’ve just placed Them somewhere on the inside of the house i’ll go and sort that out afterwards but uh yeah we want them all to overhang the back like this as well as they will the front and then we want to place the upside down stairs like this the back of the house doesn’t look Quite good with the window i will i will admit that but uh it it does depend on whether you want to add at the window or not as i mentioned earlier a lot of the times you can add too many windows and then you can’t place stuff On the inside of the house otherwise it sticks to the glass and it looks awful so that’s that’s why sometimes i tend not to put as many windows in or give you the option to add them in yourself rather than me add them in into the builds but now we have Something that should look like that right with hang on why does that look weird it doesn’t never mind it it kind of looked like an optical illusion from here it just looked like a normal solid spruce wood plank block but uh i maybe i’m going crazy where did i place these Haha there you are here and here so now we’ve got a pretty good foundation right so we we have our two houses we have the trunk we have the way to get up to the top the next thing that we’re going to do is we are going to add The leaves at the top this is going to be one of the more depressing parts of the tutorial i’ll show you why grab your leaves and come to the top of the build you can literally start anywhere as long as you’re at the top of the tree Begin by making a okay if you start up the top side of the tree on the left you want to begin by making a shape with your oak leaves or jungle leaves jungle leaves a lot better in my opinion now the goal of this shape is to look reminiscently like a jelly bean That’s kind of the shape that we’re going for right i’m gonna make you the shape it your shape does not have to be like mine and you do not have to spend a lot of time on this however the more time you spend on it the better it’s most likely going to look You’re looking to make the shape of a jelly bean very much like what i’m doing now you kind of want to have a shape that should look like that now i did say reminiscent of a jelly bean which means not exactly like one i’m not sure that the leaves that we’ve Just placed are actually big enough either i i think that i might have maybe not done a big enough area but the idea is to have kind of like a jelly bean shape i’m going to keep using the jelly bean thing you’re going to want to have like a jelly bean shape that Looks like that right or a potato whatever the point is you want to have a shape like this at the top of your tree and maybe maybe the problem is that it doesn’t come out enough on the left-hand side right and this is what i mean when I say you can spend a while on this i do i do mean that yeah that’s a bit better right so we want the leaves to come over a bit more that’s not a bad shape so you want to make a shape kind of like that it’s kind of like an oval shape Something like this this is how you can make some decent shaped trees and we want to take the outline of what we’ve just made right so we want to take the outer blocks or most of them you don’t have to take all of them and we want to extend the blocks forward and The goal here is to end up with a shape that’s uh that we’ve we’ve just extended that forwards right and this is the shape that we’re going to be working with to uh to like build up the tree and we’re going to take the shape that we’ve just Made and we’re going to extend it forwards by another row but we also want it to look natural so what i’m going to recommend is you don’t extend every block right you don’t take every single block you just take some of them so like you don’t want to extend Every single block that you’ve placed you want you want to take some from the inside as well right so you want to take some inside blocks but you do still want to want to take some of these side blocks it i’m doing this quite fast ladies and gentlemen i i do apologize But the the reason for this is it’s going to take a long time to do but it it’s all about building layers if uh if i can like give you a bit of a word of advice so like that right you can see that we’ve taken the the shape And we’ve extended it forwards we want to have a row of leaves that is about in line with the tree before we start majorly shrinking it you see the next layer that we’re going to do is going to kind of like it’s kind of going to go around the inside again But this time it’s going to be a lot more drastic this time so we’re going around the inside and we’re extending the leaves one row towards us but we’re doing it this time a much greater magnitude basically we want it to be we want to shrink it faster Because eventually we do want to end up with a pretty cool shape like it wants to look natural above all of the things and i am not going to spend ages and ages and ages on this for this particular tree because i i’ve already made this once but can you kind of see The methodology here like you extend it extend it extend it until you’re happy pretty much i mean that that’s that’s the whole thing you just gotta be happy with it you you just have to add layers and layers and layers that’s all it is about and you just gotta keep shrinking The tree the leaves like this and just add layers and it’ll look quite natural by the end like if you do it right if you get a hang of the pattern like it will look quite natural i mean that that doesn’t look too bad i might even fill in the center of this Shape because i mean that’s that’s quite decent that doesn’t look too bad whatsoever right and that that’s how you do the leaves of the tree now i know that’s a process trust me i i’ve had to do this so many times but you know it looks quite good Like that right that’s a decent shape it doesn’t look that full though because they’re oak leaves jungle leaves are more full looking there’s just something that you got to live with with it being oak you can even fill it in on the inside if you want to I’ll show you what i mean later but now that you’ve kind of like reached this sort of point where you’ve added layers you’ve you’ve got a shape you’ve done the front pretty much we have to extend the outline backwards now and we’re gonna do it by how many rows shall we do We’re gonna do extend the outline backwards by three rows i’ll show you what i mean like one two three just like that right we want to take every single block of the outline you can just do the outline to make it easy on yourself or You can like edit it as you go along and like shrink it around mess about with the shape it will look more natural if you do this we just want to take every single block of the outline pretty much and we just want to extend it back by three rows and The reason that it’s free is because you want it to come as far back as to make it like extend out of the you want to extend it out of the back of the tree by one row that’s that’s kind of the goal like it all wants to come Back about about this far and that’s that’s what you’re looking to do and then we can apply the same technique that we did already in which we just built layers and layers and listeners and layers and until we’re eventually happy with the the shape of the leafs Which it’s kind of hard to usually it’s kind of difficult to be happy with it i i’ve found it you’ve really got to work at it too this is me maybe i’m a little bit crazy you’ve got to work at it to maintain a shape that You actually really do like you can you can see um the how how we’ve done it we’ve like extended it back by three rows i think that’s free until it’s poking out at the back of the tree and then we do the thing where we just apply layers right So it’s just layers and layers and layers over and over and over again until you have pretty much the same sort of thing that you do on the front and that’s that’s all there is to it and i don’t know how many times i can say that and repeat myself but Uh with this being oak leaves instead of jungle leaves on the original i use i use jungle leaves it doesn’t make too much sense because it’s there’s absolutely no jungle materials used in it so i i thought i’d drop the jungle release for the oakley’s because i thought it might look a little Bit more authentic however it does look worse in my opinion for the oak leaves but there is a way around it and i’ll show you um how to do it but you can see like we’re just shrinking the shape again it’s the same thing i do think it does look better With the jungle lease but as i said i mean since there was absolutely no jungle materials used to eat even in the houses not not even the trunk of the drip nothing i i decided that it’d be a good idea to swap it to oak leaves in my Infinite wisdom but uh i mean i i’m guessing you guys wouldn’t just use whatever leads you wanted to anyway but uh yeah you can make the oak leaves look more full and i i will show you how to do that basically all you do and it’s Very tedious process i did do it on my on the original version of this um all you have to do is fill in the inside of the tree using a green block doesn’t that sound crazy it is it takes forever it really does but i’ll show you the difference between it um In a bit am i getting to i’m kind of getting to the point where i quite like the shape of the tree on the back as well after just adding layers and just like talking as i do and mumbling on as i like to i’m finding that i do quite Like the shape on the back so yeah that’s that looks pretty good that’s that’s not too bad that looks quite natural but it is see-through right like i said so this is this is what we have right now okay this is we have our two homes we have the tree We’re doing quite well for ourselves right we’ve got only got a few more things to add don’t worry so we we want to add uh so we need oak fence wooden trapdoors torches stomach slabs water vines diamond shovel or any shovel diamond hoe some seeds and we will also need glowstone but We’ll do that in a bit so around the base of the tree i created a rather large pond and uh to start the pond all you have to do is you take out your stomach slabs and in front of the very base of the tree on the front place some stone slabs yeah And then you just want to create a circular shape like this just going around the base of your tree so you it again a lot of this is really like just to just do what do what comes natural you know just kind of like place the blocks as they come so You know something something circular like that around the base of the tree i so happen to have built mine around the outline uh all the way up to the side the grid like that but the goal then is to knock out all these blocks here all the blocks inside Of the the area that we’ve just made and i’m going to fill it in with water but a cool effect once i filled it in with water i’ll show you when we can swap out some glowstone is uh there we go a cool effect that you can Do with water is you can light it i’m so bad is you can light it up using some glowstone like if you just took a couple of bits of glowstone in the bottom of it oh it’ll be nice and bright and it looks quite intriguing or at least i think so anyway So i’m going to now fill in this area using water buckets now that i’ve destroyed um the base here like this and then once the water is all nice and still i’m going to get rid of the water buckets glowstone and i’m just going to chunk Out some of the blocks and i’m just going to lighten the area up with glowstone you know you don’t even need as so many of these you know three maybe even four something like that looks just fine and a way to make the pool look a bit Less boring is if you hang some vines from the branch of the tree just above maybe even that many um they will hang down and they’ll actually like infiltrate the water a little bit you can you can even do the same thing on the back if you want it to Be a bit more thick but uh yeah they’ll they’ll hopefully grow by the end of this and uh we can get a pretty cool thing going what else do we want to do i’m not i’m not probably not going to place any more vines so i’ll get rid of them and i Actually want to i need grass blocks because i i very silly used uh a very silly used uh a lot of like a lot of concrete around the base of this when i have to place a far because i think it’s kind of cool plus there’s some like grass path and stuff So i’m i’m just going to quickly get rid of all of these numbers and stuff right i mean i don’t know if you guys have done the same thing it’d make no sense for you to make the numbers but uh you might have placed the grid so if you just clear that um Uh around the base of the pond uh how far around did i go around the base of the pond mainly staying to the left right so right about here uh i a nice little wheat farm looks quite nice and it kind of just it kind of vibes Right like it’s kind of like nature it kind of just goes with the whole vibe of the thing but uh yeah if you just plant some like seeds and stuff going around the pond it’ll actually look a lot nicer and i don’t have to destroy All the grids uh actually i only have to scrub out this much of it really there we go fill all that in uh just gonna yeah it’s gonna go all the way around pretty much it’s gonna come all the way around to the back um it it doesn’t have to You know you don’t it can be a single rope can be double rope can be a huge farm it could be a small farm it could be a non-existent farm because you don’t want it it’s up to you but something like this looks quite nice and when it grows it’ll look nicer And a little bit of a path a grass path like in front of the area looks good as well so as as if it looks as though somebody’s actually been like walking around the farm and has been walking around the front of the tree house you know something like that looks quite Nice and it it also makes sense like somebody’s actually like tending to the place if you want to add more light to the trunk i’d would recommend this little maneuver place an oak fence on the trunk with a torch on top of the fence and a wooden trapdoor below it it looks quite Good i i quite like the look of it i’m in fact gonna place one just up above here as well because i i hate the thought of um of stuff like spawning and destroying stuff i mean the more light the better obviously pretty sure uh i’m pretty sure Where there’s no torches you know um stuff stuff spawns that is my very very limited knowledge of survival this is why i don’t play survival i’d be dead on night one but you know stuff stuff around the tree like that was quite good uh something else that looks good Hanging off the tree is i always put these on treehouses because i love it um if you place some oak fence hanging down from anywhere really as long as it can hang oak fence with a glowstone and then hang wooden trapdoors all the way around the glowstone it’s really cool it adds More light it looks good and you can place those everywhere i’m only going to place time placing one below the platform and i’m going to place one below like the middle of the tree on the right hand side that overhangs so right about here really and i don’t even want It to hang down that much because uh i i want the light on the platform uh i want quite a lot of light around here uh if you wanted to to light him the place up obviously what i’ve done you could just place regular torches if you don’t want To go through the uh the hassle of uh placing the uh like the holders every time but yeah we’ve done a pretty good job here i mean you can see that the height the behinds heinz beans you can see that the vines are hanging down they’re starting to Grow the uh the wheat is starting to grow the tree is pretty much done like that’s pretty much the tree uh what else could we do so the the only thing that we have left to do from here i mean here’s a little thing that i i don’t Know if you guys noticed but pretty much in almost all of my builds there’s a flower pot with a poppy at least one pretty much everywhere and that’s because it’s uh it’s one of my favorite little things to build but you know this looks pretty good this looks great um I’m gonna clean up the area but i’m gonna show you if you want the tree to look a bit better the actual leaves what you grab a green block of your choice and uh we’ll also need the leaves as well what am i doing grab a bring green block of your choice And you can actually destroy your way into the center of the tree and you can place this is tedious i would not recommend this by the way that this will take forever so i’m only going to do the front but you can place green blocks or whatever color block you want on the Inside of your tree and it will give the effect that the leaves are greener so i’ll i’ll tell you what i’m going to do i’m going to finish the effect and i’ll just show you how that looks a lot but how do i get out oh There’s the there we go so if we have a look from the outside now it’s a lot greener on the inside isn’t it you can you can see where it’s been placed you can literally tell i’m going to clean up the area a bit might even place a few More torches but this is the tree house actually done guys that’s that’s pretty much done so this ladies and gentlemen is what your tree house should look like once it’s been 100 fully completed i have to tell you i really like the effect of the lime concrete blocks Inside of the oak leaves maybe even more than jungle leaves themselves because now the leafs kind of almost look as though they’ve got like a glow to them they almost look a little bit radioactive i really really like that effect but yeah ladies and gents that is the treehouse pretty much 100 fully Completed i do hope that this didn’t pose too much trouble for you whilst i do think it was quite a long tutorial and maybe even a little bit tedious i think it was really really easy or at least i’m hoping that that’s the case if you enjoyed this tutorial please do Remember to hit that like button i’d really appreciate that it helps me out so much and it inspires me to make more stuff that you guys want to see i made this because a lot of you guys have been enjoying my treehouses which you can see A few of kind of like around in the background so i thought that i’d make you guys another one that was a bit bigger if you enjoy the content please consider subscribing to the channel and click the little bell next to the subscription button to ensure that you Get all my stuff sent directly to your sub box very very important and if you would like to make anything else by me and as you can see there is a weird variety all the way around us we’ve we’ve got a whole lot of random stuff Around us i mean yeah to check it out the best way is to go through the card system and the description below if you want to make more tree houses more modern houses survival bases weird houses if you want to make ricegum’s house you know maybe even jake Paul’s old house maybe you want to live inside of a crafting table i don’t know it’s up to you maybe you want to live in a house completely made out of chests check out the card system in the description below for all of my other stuff and that’s pretty much everything Guys i really do appreciate every single one of you for watching the videos and for subscribing to the channel and supporting the channel thank you so much for watching and i’ll see you guys in the next one good bye and this video subscriber shoutout goes to my weave was snatched ah who commented My nan’s bold and that that’s such a ridiculous thing to comment i i guess it’s kind of with the name is it kind of goes together with the name even at the time i didn’t know what to make of this i i responded i don’t know Whether you deserve a shout out for this and only until i went back to this comment today and i noticed one shout out equals one wig for my nan did i decide that you you deserve a shout out now i would highly doubt that you have any videos my weave was Snatched ah but i will i’ll link your channel down below in the description uh you it was just such a ridiculous comment i couldn’t help but actually just give you a shout out thank you thank you for commenting on my video i guess i don’t know whether you’ve commented Commented any other time but you’ve you’ve earned this thank you so much for everybody that has commented on my videos and subscribed and supported the channel and has clicked the little bell next to the subscription button i really do really do thank every single one of you That does that and does continue to support the videos this comment really did catch me off guard i’m still not sure whether the guy deserves a shout out but i i don’t want his nan to be walking around bold so thank you so much everybody for watching this video and I’ll i’ll see you in the next one where i’m hopefully a little bit less confused on who deserves a shout and doesn’t Video Information
This video, titled ‘Minecraft Tutorial: How To Make A Tree Base “Easy Tree House”‘, was uploaded by TSMC – Minecraft on 2018-04-24 15:00:09. It has garnered 345038 views and 7092 likes. The duration of the video is 00:46:45 or 2805 seconds.
In this video i show you how to make a large tree base that may look intimidating to build however it’s very simple and big enough to support a fair sized survival base 🙂 if you enjoy this build please remember to leave a like i’d really appreciate it! 🙂
More Tree Houses! – https://www.youtube.com/playlist?list=PLVfyBBWTXosAnItnu9A4quLEcvcyLqD8Q&disable_polymer=true
want to make some more survival bases? – https://www.youtube.com/playlist?list=PLVfyBBWTXosBbYwVeighHzxdmjwVNS008
twitter – @tsmc360 instagram – instagram.com/tsmcyt
Subscriber shout out goes to – My weave was snatched A! if you want to support My weave was snatched A maybe go and subscribe to show your support! https://www.youtube.com/channel/UCFQ9RxQbNVgVSDdrz6t77qg
Want to Support the channel? 🙂 – https://www.youtube.com/channel/UCIui-Mt1PmcJYpoBATftj7g/join
Check out my merch 🙂 – http://tee.pub/lic/uCgw3hVWL6c Check out My Instagram! instagram.com/tsmcyt/