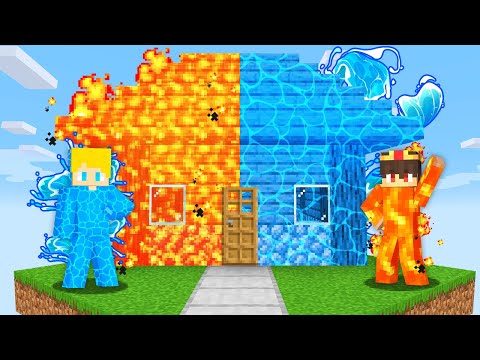
Hey what’s up youtube in this video i’ll be showing you how to make mr bean’s house from the cartoon mr bean one of my favorites if you guys enjoyed this tutorial please do remember to hit that like button i’d really really appreciate it it helps me out it helps the channel Out and it really makes me happy and on top of that guys i want to know what you guys want me to make next i want to know what cartoon house what movie house what tv series house you guys want to see next the most leave that down below in The comments section whatever gets upvoted the most will probably get made but without any further ado let me show you how to make this thing so if you want to make it here’s what you’ll need grab yourself some red terracotta some quartz stairs never break stairs quartz slabs neverex slabs Some block of quartz some blue concrete some light blue glass and some iron doors we also need all of the other materials that you might be able to see in the inventory right now so make sure you go all of those and then we can start the build so we’re going to begin This by placing a row of 14 red terracots coming directly up from the ground so that’s going to be one two three four five six seven eight nine ten eleven 12 13 14. we then want to go right by six one two three four five six and we want To connect down to the ground so we’re going to connect that all the way down to the ground and this is where the entrance is going to be by the way we then want to take this block that we connected all the way down to the ground And we want to extend it towards us by free one two three we then want to do five upper right diagonals coming across the front so that’s going to be one two three four and five we then want to do six bottom right diagonals so we want to do one two three four Five and six we want to go right of that sixth diagonal by two one two we want to connect down to the ground like this and what we also want to do and we will be coming back to that block you want to go left of this block that hit the Ground and the object is to be able to connect it to the block that we did diagonals coming up from so if you like you can connect this block that you did five upright diagonals from you can connect that down to the ground which will allow you to better see where you Will have to connect to so we want to have a shape that should look very very similar to this now continuing on with the shape of the house we do want to take this second block that we connected all the way down to the ground and we want to from this Block we want to do six upright diagonals going towards the back of the house so that’s going to be one two three four five and that’ll be six we then want to go right by four one two three four we wanna do five bottom right diagonals one two three four Five we want to connect that block all the way down to the ground and what we then want to do is we want to take that fifth diagonal that we connected down to the ground we want to extend it all the way over to the right And the goal is that we will be able to connect it to the front of the house where we kind of first started so right about here so we want to be able to extend it and connect it to the front of the house and then connect it downwards So you can see that we are actually moving on very nicely very quickly with the frame of the house then all we have to do is we have to on this left-hand side of the house so the block that we connected to the front of The house and also down we want to take this block and we want to do five upper right diagonals coming towards the front of the house so this is gonna be one diagonal two three four five we wanna go right by two one two and then we want to do bottom right Diagonals until we naturally connect to the lower portion of the house like this so you can see that that is the triangular shape that we’re trying to get at wonderful now that that is sorted out we actually have the frame of the house and it’s looking quite good and it’s going To look even better in a moment because we’re now going to add some details to it most of the details for this house come from the front of the house i haven’t been able to find out what’s on the sides of the house part of the house is actually connected To another house so there’s nothing on it and the back is a complete mystery so the front of the house is where the detail will be we are going to begin by starting at the very front bottom of where the entrance will be so this is Where the entrance is going to be right it’s going to be on the front of the house in this left-hand space and we want to connect the bottom of this together using our red terracotta in front of this red terracotta right here we want to place a block of quartz And we want to go up by four one two three four place a sideways quartz stairs on top place an upside down quartz stairs to the left place quartz slab and then you actually want an opposite facing quartz stairs coming from the slab place a quartz stairs to the left of the Upside down court stairs and you want to connect that down to the ground using block of quartz we also want to use quartz slabs on top of the actual door frame we want to place quartz does on top and we want to do this we want to Connect the bottom of the door frame together we want to use block of quartz we want to place quartz stairs in front and on top of that row of quartz like that we want to then place We want to place block of quartz left and right of those stairs and then we want to place quartz in front of and on top of those block of course to make like a nice walkway then inside of the frame we want to cover up all of the empty space inside of the Door frame using blue concrete like this so you just want to place a new enough blue concrete that it just covers everything up like that the two middle blocks however are going to be a door i’m going to use an iron door and if you ever plan on opening That door you might want to like place a button to the right of it so that’s the sort of effect that we’re looking for We then want to place red terracotta inside of the actual wall of the house and around the top of the door so like this that’s the sort of effect that we’re looking for right we then want to place two rows of terracotta on top of this that’s going to be one round And then two rows we then want to place on top the middle terracotta free glass one two and three like that we then want to place ourselves some blocker quartz next to the glass so place block of quartz left and right of the glass we then want to place red terracotta Absolutely everywhere else around the glass underneath the window we want to place um we want to place uh quartz stairs two upside down quartz there’s one here on the left and one here on the right and join them together quartz slabs in the center and then we want to Take the upper half of the window and we want to place some quartz slabs in front so that’s the sort of effect that we’re looking for it’s very nice that is the entrance and that is the window above the entrance then we’re going to fill in the space Just to the right of it it’s just a couple of rows we’re going to fill it in with red terracotta like that so just right at the door we’re going to place that red terracotta now we’re going to add some additional details to the front of the house more Windows so we want to take this very bottom left hand corner of the front of the house it’s here next to the quartz block we want to take this block and we want to go to the right of it by two one two we then want to move up by one With the red terracotta and then right by five one two three four five and then we actually you see this is kind of tricky because what we want to do is we want to place in front of the red tarot card to place quartz slabs extend the quartz slabs outwards Left and right by an additional row place an additional quartz slab underneath these slabs that you extended out and then take the quartz blocks and place quartz slabs in front of them so it’s kind of a weird effect but that’s what we’re looking for we want to have that And then you want to place a row of light blue stained glass on top of the left hand quartz block coming all the way over to the right hand block and then we want to put two more rows on top that’s going to be one row and then two rows like that Then we are going to place a frame around this so we want to place a layer of red terracotta coming all the way around the glass so like this so we kind of just want to make a frame for this window to which we then want to place a lit of Never brick slabs going all the way around the top of the window frame like this and then i think what we’re going to do is we’re just going to place a layer of never never brick slabs on top of that and i don’t know whether to make it even Pointier i don’t know whether to like add an additional slab on the left and right and then kind of make it a little bit pointier on top like this and then perhaps we could even extend it forwards a little bit like that i mean that looks kind of okay Yeah i kind of like that that’s nice so once you’ve got that sorted out we then want to come to the right hand side of the window we want to find out where the like the glass is on the right this is the glass and on top of the red terracotta we kind Of want to do a similar thing we want to go up on top of it by three that’s going to be one two and three like that and then we want to place in front of this block the terracotta we want to place a quartz slab and we want to go Left by four that’s going to be one two three four we want to extend these blocks downwards to form that fourth block downwards two four make quartz block and the first one two we want to place glass on top of this we want to place three rows of glass one two and three And we want to take the quartz blocks we want to place quartz slabs left and right of that and also a quartz slab in front of the block and then we want to use our red terracotta to place a layer of red terracotta going all the way Around the window like this just to box it in just to create a regular shape and we can even build up the area below the window using the red terracotta also just to again create that window shape and then once again we’re going to use never brick slabs to create kind of like A top of the window like this we’re going to go all the way around the top and then we’re going to do what we did down below we’re going to place a layer just above and back from that and then i think we’re going to place one Row on top that’s kind of like one row shorter and then we’ll extend that row just below it outwards to create kind of like a 3d shape like that so going right of the free glass that we have here right we want to take the three terracottas that correspond with The glass and we want to place three more terracotta so all the terracotta next to the glass we want to extend it to the right like that we then want to place a row of blocker quartz next to the terracotta so we have three of them then a row of glass Then a row of block of quartz like that we’re then going to completely fill in the front of this using red terracotta so underneath the window around the window wherever we have an empty space it might be easier to do it from the inside we want to fill this in using red Terracotta and that is going to be a majority of the detail um with the house like i said this house isn’t massively detailed because it’s very difficult to find out what else is going on but i mean where we can add it we’ve added it underneath the window we want to place An upside down quartz stairs underneath the two quartz blocks connected together with quartz slabs in the center and we want to place a layer of quartz slabs in front of the top of the window so we want to have something which should look exactly like that that’s looking pretty good Okay let’s talk about the roof so the roof’s really really simple right the edge of the roof is made out of quartz stairs we’re gonna start it here on the left okay so where the entrance is just above the entrance we want to have a row of quartz Stairs that goes all the way around the top of the roof and it starts here on the left like i said and it’s going to come to the front right front middle part of the roof and it also wants to extend out of the roof like this by one Row but the middle part of the roof however is actually going to be made out of never brick stairs the edges of the roof seem to be um like i said kind of like quartz and the top seems to be like a ready color and the very top of the Roof is going to be made out of quartz slabs like that what we are then going to do is we are going to do a similar thing here on the right so on the right here we want to have like a row of netherrick stairs coming down the right hand side The middle part of the roof but we want to have quartz stairs poking off of it so the part that overhangs wants to be quartz including the quartz slab at the top as well that wants to uh extend extend forwards too like this and what we also want to have is on the Right hand side of the roof we want to have the row of never brick stairs that are on top of the uh on top of the red terracotta blocks and then the very end part of the roof is going to be quartz stairs and the roof joins Together in a weird way on the right hand side it wants to join together using quartz slabs so we want to connect this stair to that stair using quartz slabs like that it’s the cleanest way i could figure out of doing it we also want to Have the same thing on the left hand side of the roof it wants to be never brick stairs coming up the side here with of course quartz says coming outwards like that and then same deal here on the back we just want to have a row of never break Stairs coming down with a row of quartz stairs on the very end of the roof hanging off the side of the roof by one row and we’re just going to have network stairs coming up and quartz stairs like this like that and also of course quartz stairs on the Right hand side of the roof as well so it’s it’s kind of complicated the roofs are really weird shape actually it really is and then on top of the terracottas we’re going to place quartz slabs extend them towards us one row and we also want to place upside down quartz stairs Underneath the overhanging quartz stairs like this so just gonna have the upside down quartz says underneath and then if we come to this opposite side we’re going to have the quartz slabs on top of the terracotta have those slabs coming towards us with quartz stairs underneath those as Well like this going to have the quarter stairs underneath the row of overhanging stairs and what we have to do now basically is first of all we’re going to connect the quartz slabs together so if you kind of like extend the middle part backwards and you connect the right hand side of The roof all the way over to the left like this and you kind of just want to join all of the quartz slabs together in like a t-shape i’ll show you what i mean like this i mean it it basically looks like a t-shape all kind of because like one Part of the roof is bigger and wider than the other but it’s irrecognizable from the ground so it it doesn’t really make like a difference kind of that i mean it’s kind of like a letter t sort of if like one side if two sides are Like wonky but you guys get the idea that’s the sort of shape that you’re after and have we placed we’ve placed upside down quartz stairs on this side we have to place upside down quartz stairs on this side too underneath all of this and then we just have to do it on the Right hand side i know that oh we’ve already done it here which means all we have to do now is connect all of the network stairs together so i mean it’ll be obvious which pairs of stairs go together i mean on the right hand side We’ve got like a corner of a roof that quite obviously connects together the right hand side of the middle part of the roof on the front of the house connects to the right hand side of the house and the middle part on the left-hand side of the house connects to the Left-hand part of the roof you guys will be able to see how it goes together quite easily and there really is only one way that it does go together so i’m sure that you guys will manage to uh manage to do it it’s kind of complicated A little bit it’s one of the weirder roofs that i’ve made actually because it ha it is kind of all really wonky but like i said once once you’re on the ground unless you look at it look at it from above and it still looks fine from above Too then you’re not even going to realize that it’s like out of the ordinary you’ll just have a look at it and it’s like aha normal roof anyway once we’ve filled all of this in using our never broke stairs we are going to focus on the outside of The house a little bit because we’ve almost actually completed the house and by the house i mean like the actual like living area that mr bean himself the big b not stats the big bean actually lives in as you can see that’s that’s looking good like the roof actually looks really Nice and uh we’re just going to connect the back of the roof together as well and then we’re going to fill it all in with red terracotta because i don’t know if there’s any there’s definitely no windows on the right because his house is connected to somebody else’s so it’d Be kind of weird if you had like a window peeking into somebody else’s house it doesn’t have any windows on the left of his house either which leaves the back up for grabs but i couldn’t find any information on what’s actually back there so i haven’t i haven’t added any detail I haven’t just made it up so um once the roof is complete which it is there’s no holes in that roof that’s looking lovely i really i actually looks good from above as well it doesn’t look weird uh we just have to completely fill in all sides with the Red terracotta as i’ve said and then that will be the living space complete what we’ll then have to do after this is we will simply build up the walls around mr bean’s house we will maybe build his driveway a little bit maybe add some bushes and stuff but there’s not that Much detail honestly i mean he has a gate that leads to his back garden again a bit of a mystery don’t know what’s back there um but a lot of this is is really done it’s kind of cool and i don’t know whether to show you guys how to make the car Because it’s really simple i might show you guys how to make the car at the end as well um i don’t think i’ll do a separate video on it because it’d be a little bit redundant um because it’s like the same car design that i use all the time except in uh the Mr bean colors all right i don’t know maybe i will nah i i’ll probably show you in the tutorial because it it won’t take five minutes whatsoever trust me i mean the car itself is it’s so easy to make it so simple um i’ll show you guys How to make it and we’re just going to continue filling these walls right now nothing else has really happened we’ve not added any more details yet we are just filling in usually i i would have um filled this in before the roof but the roof is really like a harder part of The tutorial so i thought that we’d build that and then we just relax a little bit before moving on to the next part because you know this part isn’t really difficult at all it’s a little bit soothing to just kind of like slowly fill in all of these spaces and uh You know i’d the roofs are my least favorite part to do and i kind of like to get them out of the way these days usually i kind of just like waited until the last possible moment in the tutorial to do them like i do absolutely everything else and then the roof but I’m realizing that sometimes you know you’ve just got to get the most horrible bit out of the way and then you can just move on that actually works with most things if you just get the horrible part out of the way then it’s it’s easier to just Move on and and do more fun things sometimes you just gotta do whatever you’ve got to do and we’ve almost filled in this particular side of the house we’ve filled this in using the red terracotta all of it and we now have something which should look very much Like that and as you can see it actually looks really good like that uh it actually looks like a very like regular um english suburban home i said english weird i don’t know why um but now let’s add some detail to this place so using our red terracotta we’re going to come To the left hand side of the build and we’re going to take this front left hand corner block this is the first block that we ever placed by the way and we’re going to move back from this by let’s say five one two three four five we’re Going to place a row of four red terracotta coming up the side of the house one two three four we’re then going to place coming back diagonally to the left a row of three blue concrete one two three and then we’re going to place two rows on top one and two And then we’re going to place a row of red terracotta coming outwards to the left of that blue to form a gate like that we then want to take this row of terracotta and we’re going to place a diagonal tarot card coming towards us directly we’re going to place one on top And then we’re going to take these two rows here and we’re going to extend them in front of the house by let’s say like 20 right so like one two three four five six seven eight nine 10 11 12 13 14 15 16 17 18 19 20. yeah That’ll do and then we’re gonna add another row on top so that that makes it two rows like this and then we’re going to place two blocks next to the gate and then we’re going to place a row of terracotta behind that and we’re going to extend it up so it’s The height of the gate so we have this sort of effect like this right and then what we’re then going to do we are going to take these four terracotta blocks and we’re going to extend them coming out of the back of the house by let’s say shall we say about Thirteen one two three four five six seven eight nine ten eleven twelve thirteen yeah thirteen we’re then going to extend this coming across the back like this and then we are going to connect it to the back corner of the house this is mostly irrelevant because this is a back Garden and there’s not much here we’re then going to make all of the other rows of terracotta as high as the one around the gate so we’ve just got to add a few rows on top but like i said the back garden is very very irrelevant all i’m Going to be doing back here probably on the back garden is i might create a bit of a path perhaps using some light gray concrete and i’m just going to add some vegetation in the form of like you know jungle leaves or maybe oakley’s probably jungle loose because i think they look Nicer and maybe in store some artificial grass because minecraft grass i don’t think goes very nicely with most cartoon builds but um there you go we’ve kind of just made the back garden here we’ll focus on that a little bit uh more on later uh so now we have A wall right so we’ve got a wall on the left hand side of the house if we come to the right hand side of the house we want to have a wall coming out the front right hand corner of the house that is the same length as that one but It only wants to be one block high so like we just want to place a row of red terracotta coming out in front of the house here matches that side and then it wants to come to the left and it actually wants to stop where the corner of the house is like Where this block is the wall wants to come as far as this and we want to extend it up by one block so we kind of want to have an effect that should look very much like this all right and what are we going to do next well It’s really simple we’re going to create a path leading from the entrance of the house which is of course here we’re going to create a path which released from here um to the street this is going to be made out of stone slabs so um all of this area this is Going to be made out of stone slabs i’m not going to do this i’m recording but i’m just going to show you what area is going to be made out of stone and we’re also going to have a path that is probably about as wide As this that leads to the back so maybe like one two three four five like this and it’s going to um this area that i’m kind of like digging out now this will be dug out and it will be made out of stone slabs um just like this and you know what i’ll Also dig out the grass as well so that you can see and this is this is something that i will be doing and i’ll show you how it looks but not whilst i’m recording i’ll like go away and i’ll do it and like i’ll fill all of this area in here we’ll Just mark it out actually we’ll just mark it out using these stone slabs like this like it will come all the way around the path leads to the front of the house and it also leads to the back of the house and then i mean um all we’re going to be Doing is we’re going to be adding some bushes and stuff i’ll show you that in a sec but uh like this part that i’ve just showed you that’ll all be filled in with stone slams and then like this part for instance like all of the grass that’s left So like all of this grass is going to be made artificial and it’s just boring old lime terracotta like this will all be filled in with lime terracotta as will the big area to the right of us this will all be filled in with lime terracotta and what i’m also Going to do is i’m going to be adding bushes around the walls especially like i’m going to be adding bushes in the form of jungle leaves because jungle is my favorite use your favorite and we just want to create like a nice bushy area just left here You know something like that will work nicely we want to place like bushes underneath the window because they exist and also heavily in this corner there’s uh there’s a lot of bush area in this corner so something like that nice corner one and then they’re kind of like Sprinkled around the front of the house like this they don’t have to be massive or even exist to be honest but you know something like that would look good and then of course we will be digging out all of the rest of the grass filling in with lime And on the this area too we’ll fill in this in with stone and on the back here i’m going to make a path just a single block path probably maybe even like a double block path i’m just going to make a little bit of a path that kind of like goes halfway Like into the back garden and um back here i’ll probably do a very similar thing to the front sorter like i’ll probably like just place some jungle leaves and stuff around here maybe even plant a tree or so just to cover up some space maybe bone meal it i’d probably Not i’ll probably just end up using um actually i mean maybe we’ll keep the maybe we’ll keep the back garden maybe we’ll keep this like actual like like actually green maybe we will like maybe what about meals the back garden a little bit so that we’ve actually got Some like plant life and stuff and maybe we’ll just like stick a tree like here because i genuinely don’t know what’s back here at all and you know the back garden that’ll do for the back garden if you know more than more than i then please do Um do it properly but i couldn’t find any information on what to do back here so um yeah something like that will look good and then uh what else can we do so i’m going to be doing those things right and then i’m also going to create a path in front Of the house right so i’m going to create a two block path in front of the house and it’s just going to be a as wide as the house apply this it’s going to be as wide as the house this two block path and i’m going to Fill it in using stone slabs like this i’m going to fill in using stone slabs and i’m also going to place a string so i’m going to place a four block one two three four a four block road coming out in front of the house and i’m going to Make it out of light gray concrete so if you can imagine the stone slabs are gonna go to the right so is the light gray i’m gonna fill that in using stone slabs and i’m gonna fill the rest of it in using lime and then i’ll show you how To make mr beans car uh that it’s optional whether you want to do this or not but that’s what i’m gonna do so i’ll go away i’ll fill all of these in i’ll knock out all these box and then i will uh show you how to make the cast so i’ll Be back in just a moment once i’ve done all of that okay so as you can see i’ve filled in the garden i’ve also filled in the path in front of the house and also i’ve added the little stream and i’ve also blacked in the windows on The inside well not black i’ve kind of blued in rather the windows so that they pop a little bit more and i’ve not touched the back garden because i kind of completed that already and this is what you’ll end up with you’ll end up with a really really cool looking mr Beans house but there’s only one little final touch that i might add to it i might add his car and his car can be made out of some slabs grey concrete lime concrete black concrete white stained glass paint buttons item frames red concrete orange concrete we need Trip wire hooks white concrete and some signs which is a lot of materials you wouldn’t expect that so somewhere on the street in front of the house i’m gonna say i’m gonna make it right about here i think just like one block next to the wall i’m going to Start off by placing a gray concrete and i’m going to place two stone slabs coming back from the gray one two then a grey concrete i’m going to place two rows of slabs inside of this one two i’m going to place gray concrete here and here at the front and back Stone slabs in between stone slabs coming out of the front of the car the back of the car buttons coming out of the tires like this to make it look like proper wheels i’m going to get rid of the stone slabs the buttons i’m going to grab signs and we’ll need Triple hooks too i’m going to place signs in front of the two front middle stone slabs and they’re coming out of the back two middle slabs those are number plates we’re going to place black concrete above the two front middle stone slabs like this and we’re going to place lime concrete Going all the way around the base of the car and if you like you can even just completely fill in the center of the car using lime concrete or alternatively black concrete might actually um give a better feel uh we’re going to then place item frames On the front two corners of the car on the sides and we’re going to place item frames on the back two corners as well like that we’re going to place a lime concrete coming up from this block right here and we’re gonna place one on top We’re going to move to the right of it by two one two down we’re going to extend the top row across to the opposite side of the car and we’ll take the background and the front row extend it down we’ll take the top front of the car and Extend it forwards by one row and we’ll place glass underneath that to create a window screen and we will place glass everywhere else to create windows we will then take out our tripwire hooks and we will place them underneath the glass to act as door handles so that you Can get in the car but you can’t and then all we need is the white concrete to go along with the red concrete and the orange will place white concrete in the front item frames at the front of the car with orange in the side those are headlights and indicators And on the back we’ll place orange concrete on the left and right hand item frames indicators and we’ll place red concrete in the back to look like brake lights and that actually really adds a nice little touch to the house itself and now when you look at the house and you see The car in front hopefully it gives an even better indication of who lives here and that ladies and gentlemen is the complete tutorial for mr bean’s house i really like this i hope that you guys have as well i hope you guys do i hope You still like it not past tense if you do enjoy the content please do remember to hit that like button i’d really appreciate it if you’ve enjoyed the house if you’ve enjoyed the tutorial even if you’ve not made it please let me know that you like it by hitting that Like button if you do want to see more stuff by me please do consider subscribing and click the little bell next to the subscription button to ensure that you go on my stuff sent directly to your sub box and comment down below let me know what you want to See next on top of that if you want to see something specific cartoon related builds are always always interesting to me i want to see what you guys want to see and as well please do check out the card system description below for all of my other cartoon related builds and not Only that if you don’t want to check out the card system description below for my cartoon builds playlist please do check out some of my other playlists making regular houses you guys will be able to find those all very easily but guys that’s pretty much everything hope you guys have enjoyed it Have a great day and i’ll see you guys in the next video you Video Information
This video, titled ‘Minecraft Tutorial: How To Make Mr Beans House “Mr. Bean (animated TV series)”‘, was uploaded by TSMC – Minecraft on 2017-10-28 13:56:15. It has garnered 2107896 views and 17850 likes. The duration of the video is 00:35:09 or 2109 seconds.
More Cartoon Houses – https://www.youtube.com/playlist?list=PLVfyBBWTXosAdWj4ZsG8EhBtlW6vWfJMN
In this tutorial i show you how to make Harold And Georges Tree House! from the movie “Captain Underpants: The First Epic Movie” hope you guys enjoy it! and please remember to leave a like :)!!!
Twitter – @TSMC360
Suburban Houses – https://www.youtube.com/playlist?list=PLVfyBBWTXosAzK1wjPMIwf9_XUm01lr1k
Modern Houses – https://www.youtube.com/playlist?list=PLVfyBBWTXosD4n0YDq85PjE9rSJ4SIbpi
Suburban House Playlist – https://www.youtube.com/playlist?list=PLVfyBBWTXosAzK1wjPMIwf9_XUm01lr1k
Real World Building Playlist – https://www.youtube.com/playlist?list=PLVfyBBWTXosAPZV9f9bufDJRHGqXgJQYx
Park Tutorial Playlist – https://www.youtube.com/playlist?list=PLVfyBBWTXosBsJS_kVzpqgMe3mvjqVCY9
Theme Park Tutorial Playlist – https://www.youtube.com/playlist?list=PLVfyBBWTXosAunsLem1FwcOWGWKH5uHHO
Classical Carnivale by Twin Musicom is licensed under a Creative Commons Attribution licence (https://creativecommons.org/licenses/by/4.0/) Artist: http://www.twinmusicom.org/
talian Afternoon by Twin Musicom is licensed under a Creative Commons Attribution licence (https://creativecommons.org/licenses/by/4.0/) Artist: http://www.twinmusicom.org/
Travel Light by Audionautix is licensed under a Creative Commons Attribution licence (https://creativecommons.org/licenses/by/4.0/) Artist: http://audionautix.com/
Gypsy Shoegazer by Kevin MacLeod is licensed under a Creative Commons Attribution licence (https://creativecommons.org/licenses/by/4.0/) Source: http://incompetech.com/music/royalty-free/index.html?isrc=USUAN1200073 Artist: http://incompetech.com/
Electrodoodle by Kevin MacLeod is licensed under a Creative Commons Attribution licence (https://creativecommons.org/licenses/by/4.0/) Source: http://incompetech.com/music/royalty-free/index.html?isrc=USUAN1200079 Artist: http://incompetech.com/
Want to Support the channel? 🙂 – https://www.youtube.com/channel/UCIui-Mt1PmcJYpoBATftj7g/join
Check out my merch 🙂 – http://tee.pub/lic/uCgw3hVWL6c Check out My Instagram! instagram.com/tsmcyt/