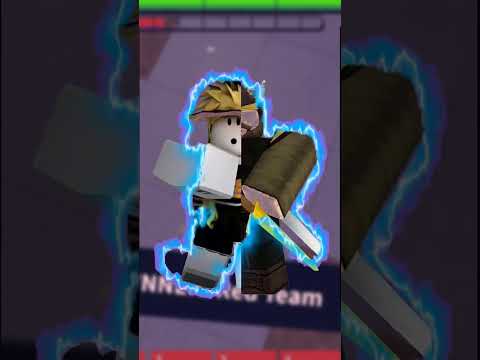
Welcome back to the Minecraft animation tutorial series using blender 4.0 this is the fourth chapter of this five part series and if you didn’t watch the previous episodes be sure to check them out here or click the link in the description if you watch those parts already well done and let’s continue in This part we’re going to be jumping into the animation aspect of blender so what we’re going to do is I want my character to swing his sword first on the right side then on the left side then I want him to step forward step back back and Then place his sword over his shoulder basically so we’re going to do that but before that we’re going to learn the basics of Animation because we cannot jump right into the character animation without learning the basic key framing so now that I have all of the collection Set up here and organize what I can do is I can left click create a new collection and I’m going to name this double click and name this animation practice and I want to show show the basics of Animation without using any of any of the world here so click on this And then drag down to make every collection disappear so that I don’t have anything left over here and what I can do is basically I can C shift C and then I can move my cursor to the origin to the world origin which is the center Over here so first let’s create a cube if you remember the way we create new objects as if you click on shift a mesh I can go and click on animation let’s choose q and now I’m going to show you the basics of Animation first we’re Going to be spending a lot of time on this timeline while creating animations so let’s go through this so right here in the first part if you remember I showed you to set your starting key Fram to zero and set this to zero as well so We have zero and 250 and if you go back to all the output properties we have 30fps and we have the same settings we have here so what this means is our animation starts at frame zero and ends at frame to 5050 if we have 30 FPS this Means that when I play my timeline it’s going to take 1 second for the cursor to come here so 1 second to go to frame 30 and 2 seconds to go to frame 60 and so on because we have 30 frames per second now if you’re bad at math like me and You don’t want to calculate all the frames and stuff what you can do for that is basically go to review and then right here you can check this show seconds and then right here you’re going to be able to see seconds instead of frames so right here you can see that Our animation lasts total of 8.10 seconds which is basically 250 frames and over here you can just click on the seconds but for now I prefer to keep it over at frames understanding 30 FPS is pretty easy and by the way you can zoom in and out on the timeline using your Scroll wheel and you can move the timeline using the middle Mouse drag button now let’s learn how to move our Cube and how to key frame our Cube we already know how to move and rotate the cube we use g r and s but let’s learn The key framing so what are key frames if you’re new to animations basically key frames are like markers which are telling the program where the object is at what point so let’s explain this by actually doing it so first let’s click on F so that I can orbit there on my Cube properly then if I want to move my Cube from this side to this side and then animate it what I can do is let’s contrl z i can press on I and this huge menu will pop up so what I can do is if I click on Location this means that I told the blender to set a key frame for the cube on this location so once I set key frame you notice that I have this diamond shape over here and these are called key frames and then we’re going to need to Know how to move and how to set the key frames properly in order to be able to animate well right now we set a key frame on frame zero for location now if I want my Cube to move from left to right in 1 second then this means I’m Going to go to frame 30 so the way you move on timeline is you can drag this 3D cursor over this black line so if I drag my cursor over here I can move around so left click and drag your cursor over at frame 30 then click on this or you can use GX and then move your Cube over here left click to release and now what I can do is click on I and set a location key frame again now we’ve just did the basic animation and we’ve animated the cube so if I go back to frame zero and I use the Play button or the shortcut is space bar so if I press space bar and then play back you can see that my Cube moves from left to right now I can continue doing this so right here we already have a key frame for location if I go to to frame 16 so On 2 seconds and I move my Cube up I can do this or I can do gz and then I can press on I and I set another key frame for location now if I play back my animation I have this movement the cube goes forward and then the cube goes up now The same goes for the rotation if I want to change the rotation I’m going to press on I and set a key frame for rotation it’s set of location so set a key frame here go to frame 30 and then what you can do is press R and then for Example y to rotate around the Y AIS and maybe I want to change the rotation this way I can press on I again and change this to rotation now if I go back my cube is going to move and rotate at the same time as you can see we get this Animation and you can can do the same for scale so I scale move to frame 30 scale this up I scale and then our Cube gets bigger as the animation goes on if I go to the last frame what I can do is basically click on alt s alt R alt G and I can press on pi and then set a key frame for location rotation and scale all at the same time and if I go back as you can see my Cube moves forward and since we did like alt G since we reseted the position the rotation and the scale as well and then We set a key frame for that our key returns to the original position now I want to quickly talk about the key frame interpolation so let’s control Z multiple times until our until we have only our Cube sliding around so right here we have our Cube Sliding from left to right and as you can see if you look closely the cube starts slow then it speeds up and then it slows down again so let’s look at it again ease in speed up and then ease out for example if you’re com from After Effects these key frames are called easy ease but in blender these key frames are called basier so we have three main interpolations in blender we have linear basier and constant so on default we should have this at basier so if we come here if we set select all the key frames And you can hover over your timeline and press a to select all the key frames if I press on T we can see that we have these key frame interpolations we have basier linear and constant by the default the cube should be left at basier which means that it has a more natural Movement for the human movements for the character movements you want to keep them at bezier and this is the baser movement but if I set this to so if I click on T and I set this to linear you can see the movement is more constant More robotic it moves on the same level so these are two animations on the screen you see here and then basically they are moving at the same time they are having the same frame amounts but they have different key frame interpolations as you can see linear Looks a lot like robotic and Bas looks more natural more human and both have their purposes and both have the use cases and use times but let’s talk about how to animate faster so moving your object clicking I setting a key frame it’s time consum don’t you agree so what We can do instead is if we go to King and click here I can basically choose for example location and rotation for Minecraft animations we’re not going to be changing the scale of the objects too often so let’s choose location and rotation and if I go forward to frame 60 And I press on I the menu doesn’t appear anymore it automatically sets the key frame frame for me so if I move my object up and then press on I again to set a key frame I can go back play this and then you can see the object moves up now another Quick thing we can do is press on this button and that’s called auto key framing so once we move our object so once we move our object to a different place on frame 90 for example GX for example I want to move it forward now you can see I don’t have to Press I any the key frame is set automatically now let’s go forward and show you another example if I move this back the key frame is set automatically so while you’re animating it’s ideal to keep go to key in changes to location rotation and then turn this Alto key Frame so that you don’t have to press I now if I go forward change the location of my Cube change the rotation my cube is going to change everything but without me telling the blender to which key frame to set that so go forward and then you can see we have the cube Animation so before we start animating Steve be sure to you have location and rotation enabled and you have AO key framing enabled as well now another thing I want to show you is how to manually change the key frame interpetation so as you saw we can click On TD and we can change it to linear or bzier and that’s useful as well but there are also manual ways to adjust the key frames also if I click on constant you might be curious what this is so if I click on constant it’s basically this it’s going to jump straight into The next position and this is used for blocking if you want to block out your scene now if I want to change the key frame interpolation manually I’m going to have to go into animation and use craft Eder but before we do that let’s delete all the key frames and let’s Click on shift a mesh and then playe let’s turn off auto key framing for now because I don’t want to ke frame the playe so click on this to turn it off now scale up the plane and then let’s move my Cube up so I’m can press Gz move it up so I’m going to show you an example of the cube falling down and bouncing up so let’s animate that let’s turn on AO key framing then press on I to set a starting key frame for the cube and then let’s move to frame 30 let’s Say our cube is falling for like 1 second press on gz move it down until it touches the plane so like somewhere over here now go forward to like frame 40 and then move this up and then go to frame 50 and move this down again now let’s switch our animation Back the cube falls down and bounces up now as you can see the bouncing up part doesn’t look realistic cuz once some object hits the ground it bounces up straight away and our cube is basically easing in and easing out so what we can do is we need to adjust this Frame right when it hits the ground and bounces up so we can adjust this Frame manually so what we can do is go to animation and then this is the dope sheet where we have all of our key frame information and in the timeline we have our key frame information as well But we have way more information here if I click on this I have all the information about location rotation and scale so in this case I don’t need the scale value so I can for example drag my mouse so what I can do is left click and Then drag my mouse which is going to do box selection and I can press on X and delete so I just deleted the scale values because I don’t need to have them in my animation so let’s continue this is a dope sheet where you can basically change the key frames delete the key Frames and so on but we need a graph editor for now so let’s click on this button right here and then go to graph editor and then we have these different curves and do not freak out because a lot of animators are pretty intimidated by the graph editor but it’s not as hard As it seems even though it might be complicated at first so what we can do is extend this menu and then we have X location and X rotation if you remember we changed the Z location because we use gz to move it up and down up and down Movements are basically linked to like Z that’s how you can remember that so we need this Z location value and if you click on that you can see we have this blue line so this line shows the cube movement basically so since we only need to animate the Z location we haven’t Moved our Cub on like X or Y location then I can click on this I icon and then hide everything else apart from Z so hide so click and then drag down and it’s going to hide everything else so what I can do is if you remember in The first part we changed the preferences so that when you click on F in the view Port we zoom in on our object we can do the same here if I click on F I can go to this full view also if I click on control and my middle Mouse I can drag this in and out so make sure you get comfortable with the graph editor like you can do this for example like you don’t want to go way too high and way too low I want to see my entire motion over here and specifically I want To see frame 30 here you have frames here so that’s how you can understand which frame you’re on so drag my cursor to frame 30 and as you can see this line is pretty like easing in and easing out this is round we want to have this line To be sharp because sharper line means when the cube hits the ground it bounces up straight away so what we can do is we can manually change these handles so we can see we have like these two handles over here which allows us to change the Rotation but first what we need to do is I want to change this side and then change this side as well so I can left click select and press R to rotate but the problem is if I rotate this side it affects this side as well if I rotate The side it affects the side as well but I want only the side to be affected manually so what I can do is if I select this handle left click and then I press V I can set this to fre and now if I select this again and I rotate it as you Can see the side is not getting effect which is exactly what we want so I can select this go to a frame 30 I can select this with left click move it up until we get this like straight diagonal line now do the same for the second Handle as well so select this R to rotate move it up until we get a straight diagram line and now on frame 30 we we have this like sharp line which means that when Cube hits the ground if you watch it closely it’s going to bounce straight out which is more Realistic there we go as you can see it looks more realistic it hits the ground it bounces straight up so the reason why I showed you this is because it’s important to know the graph editor Basics and you can adjust the key frames manually mostly you can Get away with pressing T and set it to linear or baser but there are some cases where you might to manually adjust the key Fram so as you can see we adjusted this so so this is the before and this is the after now that we know the basics of Animation the basics of key Framing and key frame interpolation we can hide our animation practice let’s minimize this and hide this and then enable everything else so left click and then drag your mouse down and then I can bring out the entire world now if you’re lost in your world What you can do is basically since we set up our camera already I can press on NAD zero or I can use this camera icon if we don’t have a num and if you don’t have a numpad again but click on this camera icon or click on zero and now middle Mouse click To exit somewhere over here so we’re back to our original View and we want to give our Steve some animation but first thing I’m going to do is I don’t like these tall grasses so another thing you can do is left click on the collection new collection and name the something like I’m going to name this like extra collection so if I don’t need this grass like I can move this grass away temporarily or permanently like I Don’t Want This Grass to be visible at all in my animation so if I select one grass you’ll notice that it selects like a Whole other grass in the entire world if I select small grass it does the same if I select the leaves it does the same and if I select the wood it’s basically the same you get the idea so I want to select Tall Grass because I don’t think It’s that necessary and the same and I’m going to press on AMP move it in the extra collection and then I can hide my extra collection and then it’s not going to appear in the final render it’s not going to appear here and it’s not going To get in our way and if you created a different world and you do and you have something you would like you can do the same like you can get rid of the tall brass you can get rid of like flowers if you want but I’m going to keep the Flowers from around because they’re not getting in the way of my S so let’s go back to the camera view so for the very first animation as I mentioned I want my character to do some sword swinging animation then move forward and move backwards and then put the sword over The shoulder so let’s begin making our animation let’s go out of our camera view because we don’t need it for now but while you’re animating I recommend to do this so if you remember if we go up here and then we right click we have the option to do vertical split so let’s Do vertical split and then left click to apply now you can go inside the camera view here so press zero zoom in and then get rid of this panel so click on T and then click on n as well to get rid of this panel if you have it enabled and Also I would recommend to turn off the overlays over here so that you only see the mesh and you see like things that are close to being like rendered also if you want to animate right now you can minimize these cuz you don’t need to use These for now and then you can move the screen over here maybe scroll out a little bit and basically the idea of splitting the screens like this is you’re going to be in the 3D view here and any changes you’re going to make are going to appear Here and you’re going to see the changes and how they’re going to look in the final render over here so this is very useful to check like two views at the same time so we’re going to be animating here and then we’re going to see how it’s going to look from the camera’s Perspective and in the final rendom so let’s begin our animation so you should remember if I left click select my character and I go into post mode by clicking control tab I go inside the pose mode first of all always go to frame zero because you might start Animating from the middle and you’re going to have to change the key frame and move the key frames back which is unnecessary so let’s go to zero frame zero drag my cursor over here left click to drag my cursor and then go to frame zero now what I would recommend is Before you start any animation you want to set a starting key frame for everything like for your character for your object press a to select your car whole character if you press a it’s going to select every bone in your character so press a and then press I And since we changed keying to location rotation and we enabled auto key framing it’s going to set the key frame for my whole character’s mesh it’s going to set location and rotation for the arms the hands the body and everything else and also for now go out of the pose mode Contrl tab select your sword and set a key frame for your sword as well so press eye now when you’re creating animations first thing you’re going to do is get the basic movements done you don’t have to make a perfect animation first get the basic movements done and Then add the in between movements and then polish your animation if you want to find out more information about that you can check out my video which is going to appear here or you can click the link in the description as well but for now we’re going to do the basic Movements then we’re going to add some in between movements and then we’re going to polish our animation so let’s create the basic pment so go to control Tab and click on pose mode and let’s select my R so my hand is going to be the main focus Point here because my Character is going to swing your sword from left to right and from right to left basically so while animating you’re going to be noticing that I’m often using the RR method so feel free to use RR method as well or you can manually follow like RX r y just use whichever Use the settings whichever you you want just use the settings and use the methods which are more comfortable for you so let’s start our animation first thing I want to do is maybe I want to have my hand up like this I want to have this hand a bit Forward uh and I’m going to select this leg click on G and then x no y to move it back and do the same for this leg gy and move it forward move the body down so gz uh actually if you want to follow along better I’m going to use these Gizmos so that it’s not going to be more confusing for you so move this down rotate this rotate the body rotate the hips as well pis torso and then move my hand basically I’m trying to get a good starting position which is going to set up my my Animation so for the basic animation this should be enough and I’m not going to go too much into the facial expressions but let’s give him an angry look since he’s like training and Swinging his sword maybe give him like a bit of angry look here and then here rotate this and then Rotate this as well a bit now what I want to do is Select my hand and what I want to do is basically go to frame 20 and then I can use RR to move my hand down to move my character’s hand down like this and another trick you can do Is you can also move the shoulder so if I press on G like if I do this too much obviously we don’t want this but if I press on G and move the hand slightly then I can move my character’s hand forward I can also do the same for The arm and since I have character swung hisor from one side to another I need to animate the body as well so RZ to rotate the body RZ here and then RZ here as well I can left click and select the head and move it Forward what I can do as well is I can animate the legs but I’m going to do that later in the polishing stage we’re just trying to get the basic movements done here so we have one swinging motion character swings the sword like this now since it was from here to here Now I want to do this on the opposite direction so let’s go to frame 40 and before you move on to the animation before you move on to frame 40 make sure you have key frames set for all the important bones you want to animate so I can manually select my arm My hand my whole body select the arm and hand on the second side select the head and select both legs these are all the main key frames you want to be animated so press on I so that make sure that every key frame is set before you move On to the next frame so now move on to the next frame which is frame 40 and then I can use R to rotate my arm this way so up and I can grab my arm and move it back but what I can do is also press alt G so if I press on alt G it’s going to go into starting position and I can move my shoulder in the starting position now I can do the same for the body if I press on alt R here alt R alt R this going set into the starting position but I can also press r r z and to move it slightly on this side and head always stays on the target so basically r z and then you want to you want to keep the head like in the center and let’s see how it looks our character swings the sword here and then Here and on the final frame on frame 40 I can move the hand forward as well now what I want my character to do as you can see on the screen here basically after the character swings the sword from one side to another the character after this is going to step forward and Then it’s going to move the sword forward so on frame 40 again make sure you select all the bones so I can do select so I can select the bone and then shift select other bones as well I can press on I to set a key frame for All of them and now go to frame 60 and now I want to move my character forward I want to make my character take a step forward so first let’s go to the body and press on alt R so that the body is facing forward do the same for the Head alt R and now what I can do is set do this do the same here as well alt R and ALT R now take the body over here and then and then move this forward you can use these arrows if you want so move it forward and then move it slightly Down now do the same for the leg since we set a key frame for all of these here on frame 40 they should be able to move so let’s move them forward click here and move it forward or use g y so move them forward and if I play back my animation I can see that my character stands here and then he takes a step forward right here so let’s play back our animation this is like the basic movements swing swing and then move forward that’s good now when the character moves forward he’s going to try to basically stab someone with a Sword during the training so what we want to do is move this hand forward so it’s going to be facing like straight to the camera so rotate it and then move this forward and I can press on G and then move the should shoulder a bit forward as well not too Much and then once the character basically stops he’s going to want to move his arm back and what we can do is also we can rotate the body forward R and then R and they do the same here and then head always focuses on target so I can put on RX and then move it up or I can just re rotate the hand head so right here I want my sword to be facing forward so what I can do is go to freay 40 go off of the pose mode of the character and then select the sword and Then set a key frame so press I anywhere here now go to frame 60 and then what I can do is rotate the sword so if I press on R and then Z I’m going to rotate my sword on a z axis and if I press G I can move it in the Characters are somewhere over here and as you can see we have our sword here and if I play back my animation you can see we have this motion first the character has sword on the side and now the sword is facing forward as if Steve is trying to like Stab somewhere and after this Movement we want to go back to the previous pose and we want Steve to basically add his sword on his shoulder like a cool anime character so what I can do is go back to pose mode so press on control Tab and then again remember to set a key frame for everything before you move on to the next frame so select both legs so I’m basically shift selecting the balls shift right left click shift left click and then select everything and then press on I and then go to frame 80 and and then again if I want to take a step back I’m going to take the body and then move it back move it up slightly and then do the same for the leg if I move my leg back and I can press on the body as well And then do alt R alt R alt R do the same here alt R and then alt R over here but I can move my hand slightly on the side and I want my character to have his hand like this so it’s going to be up Here and then I can if I want to move my shoulder back again I can press on alt G it’s going to reset the location then I can rotate this over here maybe rotate this back and then I can go out of the pose mode because I Cannot select the sword again if you want to select objects inside POS mode then you can click on edit and disable lock object mode and and you will be able to select bus here but I don’t want to do that because it gets in the way of My animating process so I’m going to enable this again and I’m going to go out of the pose mode select the sword and then rotate it like this for example so that it sits on his shoulder it actually doesn’t sit on his shoulder because it’s hard to do that with Minecraft characters but from here it gives the illusion that it basically sits on its like shoulder or the neck you know like a cool anime character so you can play around with this and now we have our basic movements down and now it’s going to be pretty easy to add like in between Movements because we have all the basic movements done and then after this the animation should not be too hard so if we play back we have this basic animation Swing Swing go forward and then put the sword back on his shoulder now what do I mean by in between Movements so right here we have frame zero and frame 20 in between movements this case would be about frame 10 so on frame 10 we want to make the movement which is going to help our animation to look more realistic so in this case if I Have my arm swinging from the side to the side what I can do is go to frame 10 move this slightly up move this slightly up as well and do the same for the body so move this up and then move this up and what this is Going to do is add an in between move like a small detail and as you can see this looks a lot more natural like the characters moving up and then moving down if we go to frame 20 and then after the frame 20 if you want to add in Between movements this should be like on frame 30 so obviously this doesn’t look natural like this doesn’t look realistic like sword goes through the character which we don’t want so we can adjust this during in between key frames so go to frame 30 in this case and what I can do is take My R and move it forward and then move it downwards and if I want my character to make this cool sword string animation like this I want my body to be following as well so go to frame 30 again press RX to rotate forward no this one RX and then RX so again we can add in between movements here and we can add in between four other body parts as well so we added with the arm and with the body but we can add in between with this arm move it slightly we can move the head down Slightly as well and the general idea is to make it make the movement more natural and we can make the swinging a lot cooler as well we can play around with different Bon so first of all when the character moves forward we can make him move Up and then we can make his make his leg move up as well so we can move the body and we can move the leg also what we can do is maybe he can rotate his body a bit back we can do the same here and as you can see this is already Looking better but another thing we can do is while he’s in the middle so on frame 50 while he’s moving up and then he has his leg up what we can do here is take the arm move it slightly back so r z and then take this arm and then rotate This like almost all the way in like this like make sure the sword doesn’t go into his shoulder cuz that looks unrealistic but maybe tilt his body like this and take his head RX and then move it forward and what this will give us is basically add like an in between Movement and and then the character is doing basically like tucking his sword and then releasing it so as you can see this is already looking better but obviously this is not a finished product so right here I don’t like the head for example so I can move this up cuz I don’t like The way it moves down so the general idea of me between W is basically getting like between the key frames and adding like extra movement and extra flare to make it more realistic and you can also fix some of the puzzles as you saw like right here His sword was moving behind his leg and then right here it’s fixed it’s not it’s not the case well it is the case a bit so what I can do is if the sword is going forward in his leg I can just just rotate this forward and now the issue should be Fixed and let’s set an e between movement for the last frame two so from frame 60 to 80 we have frame 70 in the middle so go to frame 70 and while the character is moving back again we can move his body up we can move his leg up since the character Is moving his right leg backwards I can go to frame 70 press on G and then move this up and then rfx to rotate around xaxis and then we have this cool rotation on the leg we can move it slightly up as well change the rotation Maybe and also we can move the body up so RX and basically what I didn’t what I forget to show you is we have rotations based on global and local axis so if I want to explain this better I’m going to have to rotate the character over here So let’s pause the animation for a second let’s rotate the character here so for example if I want to rotate my body on xaxis if I press on RX it’s going to it’s rotating on the global axis and the global axis is basically the world axis Which we see in the beginning like this is this is the global axis and this is the global axis as well but sometimes I don’t want to rotate my body around the global axis so if I press on RX it’s rotating around the X which is like the Default x axis but if I press on X again it’s going to rotate on the local axis so if I press on rxx it’s going to rotate on the local xaxis and same goes for Z and then Z and then Y and then y but since our character in the beginning Was facing forward we’re basically using like the world origin most of the time like the world SE so hopefully you understood that and let’s continue animating so right here I want to move this hand out like this move this out this way control tab select the Sword move it this Way and then as you can see he goes back steps up and then slows down now we can add even more in between so right here we can add in between for all the body parts so right here we have key frames for like hands and body but we can do This for pelvis and torso and the head as well can make him like move his hand forward and then backwards and we can animate the arm as well to give some extra detail we can move the hand outward and basically we’re now adjusting the in between key frames and adding even more In between key frames so right here where he swings I want him to move like forward like this so that it’s like an impactful joint then maybe rotate his head as well so let’s see boom we have like a slashing animation then add in between movements For other body parts as well rotate this rotate this forward basically we’re just adding more in between movements right now and adjusting some in between movements now I want him to go back make his head move forward rotate his hand even up move this hand forward so that’s like leading the next Action so as you can see the animation is slowly starting to look better and more realistic right here I want to add more in between Ms to make it like a more more impactful swing or stabbing animation so move the body even up rotate this move this back And then while he’s in the middle I can make his body turn this way I can move his hand forward I can even rotate this move the head forward and then boom that’s a more impactful swing and then he’s turning this way in the middle which is like too much I Think so I can just adjust it this way adjust it this way make you maybe make the leg move like here and on he once he swings in order for it to look more realistic I can go basically from left to right so I want My body to go on the right side so it looks more natural contr after this and again if I do this I need to rotate my head forward I need to rotate my arm forward as well andbe give it a slight rotation and then move forward and this is what we get so Far this already looking to looking a lot smoother if you compared to the first initial phase add more in between movements here so here I want maybe the character to step up but bend a little down so that he prepares to place the sword behind Him I can slightly move the head as well and maybe I can make him look towards the sword I can move the sword and arm and key frame the sword again so that he does this motion boom and on the Last Action when a character puts his sword over his shoulder I don’t Want him to just stop so during animations you want to keep things natural so when he stands here I want to continue the movement for a few frames so I can go to pose mode and then I can slightly rotate the bnny after the last frame do this do this and Then look forward slightly remove the hand and then we get this instead of stopping right away we get this we got like slow animation of the like obviously the body rotation is too much but maybe I can do RX twice and then like this and okay going to move his head to Make it like more natural like this yeah you get the idea now we got the main movements and we got the in between movements but the final part of the animation is basically the most timec consuming and for some animators the most annoying which I agree with but It’s necessary and it’s called polishing so polishing means basically going through every frame and checking the pose adjusting the POS adjusting the timing making sure everything is right and sometimes you want to add in between movements even in between movements so basically if I want if I have an in Between between zero and 20 which is 10 I can add in between between like zero and 10 and from 10 to 20 as well so on frame five and frame 15 I can add some extra in between movements as well and that animation process maybe it sounds Complicated and it takes time but once you make a lot of animations you’re going to get used to it as well so right now in order for this video not to drag on too long and not to be too long I’m going to time-lapse this and I’m going To come back and feel free to go through the animation and give it your own twist as well and we’re going to come back soon with the finished animation so now that we have our animation polished let me show you a few more things first you notice that when Animation stops playing the timeline still keeps going and if I want to play back my animation and watch it multiple times what I can do is basically select all of my character bones so I’m going to select one bone and I press on a to select everything and as you can see my Last character frame is at frame 115 the end frame right now is 250 so what I’m going to do is I’m going to left click here on 150 contrl C to copy this go to end and then type contrl + V and then we just type 115 as the end Frame and you notice this basically shrink down and if I play back my animation it’s going to play it in a loop without me having to replay it myself so that’s the first thing you can do and the second thing is while you’re animating some sometimes you might Notice that your animation is either too slow or too fast and you want to scale up your key frames or scale them down you don’t want to do everything manually so you don’t want to take this key frame and then move it forward or backwards uh Let me show you a faster way to speed up or slow down your animation when you’re working in blender also you want to frequently save your file so I recommend to get used to clicking contrl s every few minutes or so and let’s go into the animation tab right now so we’re going To click on animation so this is the animation Tab and what you can do is right here you want to change this to dope sheet so click on this button then come down here and then click on dope sheet now as you can see the dope sheet Is pretty small and what we need to do is we can get rid of this panel which we don’t need so we can press on n and that will get rid of this panel and right here we have this default 3D view so what we can do is press on zero NAD zero To go inside the camera view and then also we’re in a solid mode so if I click on this Arrow I can do the same thing I did previously so click on texture then disable outline and disable specular lighting as well and I can turn off the Overlays as well but for now I’m going to keep keep them on so basically here we have all of our key frames stop sheet shows all of our key frames it shows everything that is animated like if you animate one character to characters if you animate camera it shows everything But if I click on this Arrow I’m only going to see the key frames which I I’m selecting so if I select my character’s body for example I left click it’s only going to show me the bones for pelvis if I select the head it’s going to show me The key frame is for the head if I select everything it’s going to show me every key frame so right now uh I think the animation is normal it’s not too fast and not too slow but let’s say I thought it was too fast what I can do is Basically select every bone in my characters body then right here these white dots that they are basically the key frames they’re basically the same diamonds we had on the timeline so I can press on a to select every key frame and make sure my timeline cursor is at zero and what I Can do is I can basically scale the key frame so if you remember we press s for scale so if you press s you can scale out your key frames and this means that your animation is slowing down the more you scale out key frames the more the Animation will slow down so if I play back right now the animation is a lot slower and you notice that the sword is not following the character’s movement because we need to slow down the sword movement as well so let’s contrl Z and then let’s also select sword as well so What we can do right now is click on edit uncheck this lock object mode and then shift select to sword as well and now again go back again press on a to select everything and then scale out your key frames and then you’ll notice that the Animation will slow down a lot and the sword is following the movement as well and I’m going to control Z now and another way you can scale out your animations if you want to be precise you can press on S and then you can type a Value for example I can press on S and type 1.5 and as you can see all of my key frames extended by 1.5 value so so if I play back again my animation gets slow now if I think my animation is too slow I can also speed it up so what I Can do is instead of scaling out I can scale them in so if I scale my key frames in you’ll notice that the animation becomes a lot faster and again if i contrl z and if I press on S and type something like8 you can see that my key frames Scaled down and that’s another way to scale down your key frames as well but for this animation I like the previous version before we did any changes in the dope sheet so what I can do is I’m going to control Z and yeah we can keep this Moving but if you want you can scale up your key frame scale down your key frames and you can change to any speed you prefer and the last thing I want to show you is the camera animation right now our camera is static it’s not really Moving and what I want to do is I want to have a camera kept camera cut on one of the key frames like when he stands here for example and then I also want to add a quick like winging animation it’s pretty easy and I’m going to show you how to do That once he stands like this on frame 90 we can click on control Tab and set a key frame for one of the eyes so this so the way you can move the eyes is either by using this button which will allow you to move pupils this will allow you To except both eyes this is this does the same thing from the bottom but if you click if you left click on one of the eyes you can move individual eyes I can left click select the eye and then press on I to set a key frame for it on Frame 90 or frame 92 let’s go to frame 90 and set a key frame for I now if I go forward about five frames so on frame 95 what I can do is I can use these Arabs to basically shrink down the eye as if the character blinked and then I can go Forward then bring out the I again on the starting position I can basically extend this up I can use gz or I can just use alt G that’s going to place the eye in the starting position so if you play back our animation you can see that Ste is Winking and we have this cool winking animation but obviously this is not enough we want the eyebrow to move it as well we want the head to bop as well so that it looks more natural so we can set a key frame for this like this controls The rotation of the eyebrow but this outside bone controls the entire eyebrow so I can set a key frame here go forward on frame 95 move this down go frame go to frame 100 and click on alt G to move it on a starting position and also if you notice on frame 95 when the eyes moved down we have some flick accurate but it’s not really noticeable during in the material view so that shouldn’t be a problem in the final render but if you want to be precise you can rotate this and then match it to this line so that it’s not Like flickering and it’s not causing any issues and we can do this now if I play back you can see steeve is winking the eyebrow is also moving I think the ey drop is moving too much so I’m going to move it up in the frame 95 or where it comes Down also when Steve wins I want my head to B slightly as well so that it looks more natural so again go to frame 90 click I to set a key FR go to frame 95 and then I can click on RX X again and then we’ll it down and Then we’ll get on the side then go to frame 100 and again rxx to move it up and rotate as you can see we have this small winky animation but he looks too serious right now so what we can do is when he wakes we can animate the mouth so let’s set a Key frame for this mouth position controller I and then set a key frame here as well so let me show you what this does if I go to frame 105 for example I can extend the mouth and what I can do is if I rotate this this is Going to control the expressions of the mouth so if I rotate this on the left side we can get the happy Steve but obviously that’s like way too much that looks like a meme and if I rotate this down so on the right side we can see that Steve’s expression becomes like More sad but we need Steve to be like smiling so we can do this then we can open his mouth and then we can do this so if I play back you can see that Steve is smiling and opening his mouth and in the the Last section I in end the last frame I don’t want his M to move all the way down I kind of want to keep the same key frames so I’m going to rotate this and then extends again and what I can do is basically I Can click on this key frame and if I want to have the same key frame here so if I want to copy paste my key frames there are two ways one is I can go here left click to select the key frame crl C And then click on crl V now we have the same key frames and I can also left click select and I can click on shift d so shift d in blender is basically copying you can copy the key frames you can copy the objects and so on so I just copyed this Key frame and I want to change it slightly in the last frame I want to make it smile even more like this and if we play back our animation we have this like short winking animation with our Ste smiling this isn’t bad for like first animation you can play around a lot more You can do more changes if you want to but for now I think I’m going to keep it this way and also let’s animate the camera so that it’s like more cinematic and looks much cooler so go back to the solar view because everything turns dark But the way you animate the camera is basically you set a key frame so first you’re going to select the camera you’re going to left click and then you basically do the same thing you did for the character you go on starting frame you press that frame and you press I and Then you can move the camera so there are two ways I can animate the camera one is I can just use shift F and then move with W ASD or since I have two views and I want to be precise I can go out of the camera view and I can just Use these arrows and then it will show me what it’s doing basically here but let’s use the shift F method so I’m going to go inside the camera view and then go to frame zero and choose a good starting position so you can play around with the camera and place it wherever You want I’m going to click on shift f q and E and try to adjust the camera and also what I can do is I’m going to click on this auto key framing because I want to change the environment and I don’t want it to be key framed so turn off Auto key Framing and click on grass and I think the grass is way too tall and it’s a bit distracting so I can press on g z and I can use my arrows on my keyboard so basically we have up and down and sideways arrows so I can click On my down arrow multiple times I can press and hold it as well and I can move my grass down and I want to move my grass down so that it’s not distracting and it’s still decorating the environment so let’s go down somewhere over here and I think this Should be enough so once you’re happy with your position so gz and move the arrows you can press on enter to confirm the movement or you can left click as well and now we have just moved our grasses down and we have more space and Steve’s movements are more visible so I Think I like this position of the camera camera when Steve swings twice and then moves forward I can move the camera forward so until frame 70 like until he moves back I want my camera to be moving forward so I’m going to press so first Thing I did is I went to frame zero and set and clicked on I to set a starting key frame for the camera now go to frame 70 and then click on shift s and click on W and then use your mouse to rotate The camera so if I click on W I can slightly move my camera in and again I forgot to turn on the auto key framing so click on that and then click on I in this case auto key framing didn’t set a key frame because I Didn’t turn it on but if I press on I my key frame will be set so if I play back my animation as you can see my camera is moving forward with Steve and what I want to do is after frame 70 I want to add a camera cut and I want a kind of closeup shot of Steve’s face so that we see him winking so on frame 70 make sure you have set your key Fram so press on I again and then you can use your arrows you can use your left or right arrows so right arrow goes Forward with key frames and left arrow goes back to the key frames also if you use your up and down arrows you can jump between the last key Fram so if I use my down arrow I can go to frame zero if I Use my up Arrow I can go on frame 70 so down and up basically jumps between the last key frames now I want to go forward only one frame so I can use my right arrow on my keyboard and then what I want to do is click on shift F move my camera closer to Steve and place it somewhere over here and then let’s see and then once he goes back I want my camera to follow Steve’s W so first I’m going to adjust the position cuz I don’t really like it like on the camera cut I want the sword To be visible as well and when Steve goes back I can basically go to like frame 85 until he stops I can follow his movement so I can move my camera even further as you can see if if I play back my animation I have this camera cut so Steve swings the sore and then there’s a camera cut before he stops moving and what I can do is also to improve my animation first thing obviously is I want to add a slight movement to the camera as well on the last key frame so again shift F I just moved it Forward Slightly and then it sets key frame automatically if you have the turned on and also what I want to do is once he goes up before he basically puts the sword behind his head I can follow the sword’s movement so I can click on shift F and then rotate this and then let’s See yeah I think that’s a bit too much I can click on this key frame move this to frame 90 and click on this key frame move this to frame 80 and I basically slowed down the animation little bit and also I don’t want this to move all the Way up so I can click on shift F and then turn this down like this and let’s see and now the animation looks a lot better now we use the shift F method to move the camera or you can use these arrows to move the camera as well but Another method which a lot of beginners find easier is if you press on n on your keyboard let’s bring out the side panel if I click on view I have this lock option here and I can lock camera to view if I extend this this menu says lock camera to view so if I check this and I turn off this view I can move my camera just the way I’m moving around in the viewport so if I use my scroll wheel if I hold on my scroll wheel and rotate you can see that my camera is rotating if I use shift and Middle Mouse I can pan around with the camera so you can use this method as well if you find this shift F method to be tedious but I’m using the shift F method and you can use any method you want but don’t forget to turn this Camera option off if you want to go out of the camera view so for example you can go out of the camera view using numpad zero but my habit is I’m clicking the scroll wheel to go out of the camera view and once I’m clicking the scroll Wheel you can see I’m not going out of the camera view because it’s moving because and because I have this turn on so if you don’t want to use it just turn us off but if you want to use it it’s there so you click on and and click lock Camera to view right now I’m going to turn this off let’s contrl Z and I’m just going to polish this animation for now so in the first FR I want my camera to be moving more so it’s moving from here to here but I want the movement to Be more noticeable so what I can do is I can click on shift F and then press s to to make my camera go even further back so if I play back the movement is going to be more noticeable but also what you notice is camera eases in speeds up and Eases out and that’s basically the b key frame but uh right here on the first shot before the camera cut I want the movement to be linear I want my camera to move on the same level and after this I want to keep the basier movement so I Can select first key frame click on T and then select linear and now you can see the camera position changed and now the movement is going to be more constant and after this movement is going to be busier which works for this case you can also play around more with Facial expressions with body movements with the camera positioning now what we can do also is for example I want the first thing to be wide so I can go here and then if you remember we can adjust the stoc length so let’s make this wider by turning down The focal length and after the camera cut I want the focal length to be smaller because it’s more close up to the character so on frame 70 what I can do is I can go inside the camera properties and then go to focal length I Can write click and set a key frame and as you can see it turns yellow but what I can do is also I’m going to contrl Z I can hover over this and then I press on I and that also sets the key frame now If I go to frame 70 and right now we have this green instead of like yellow or white so if I left click and type something like 5050 I get a closeup shot and we animated the focal length as well so we have a camera cut and we also animated the focal Length so we have this animation right now we have a white shot and we have a closeup shot now there are other ways to move your Q frames in the dop sheet as well and previously I showed you you can press on a and select every Q frame but for now When I’m watching my animation I realize that it’s too slow so what I can do is uh after the camera cut I can keep this animation as it is but before the camera cut I think the animation and the sword swinging is way too slow so what I can Do basically is we have this summary over here and if I drag my mouse so if I box select like I can click on b or even without B I can just left click and drag my mouse and I can select the key frames and if I select all of these key frames All of my key frames below will be selected automatically so all of my key frames and my stord key frames and my camera key frames will be selected so remember to turn off this Arrow if you want to select every key frame so I want to go here before the camera cut which Is the frame 70 so I’m going to select all my key frames by using box select so let’s box select all of these key frames so if I left click and drag like left click somewhere outside or if you want to can use the B as well so so go to frame 70 then drag your mouse and then select every frame until 70 now we have selected every key frame until the camera cut basically so I can press on s.8 and now you can see the animation looks a lot faster and it makes sense because it’s like a fighting move so now Our last key frame before the camera cut is 56 and if we move we see that we have no camera we have this like slow Tarantino Zoom basically you can keep that if on because looks kind of cool but what I want to do is go after frame 57 and deselect all the key frames and if I want to select every key frame that’s on the right side of my cursor I cannot do that by pressing a what I have to do instead is I can press on control and then left click somewhere over here So control left click selects all the key frame that are on the right side of my cursor and I can do the opposite here so if I control left click on this side it’s it selects every key frame before the cursor so this time I want to select Every key frame outside of my cursor so I’m going to do control left click and then I’m going to press on G to move my key frames so I use S to scale them up and scale them down but I’m going to use G to move them here so basically I want To move them on frame 57 so after frame 56 here I want to have a camera so press on G move your qy frames here this is the first key frame you can tell by that so move my key frames over here and then if I play back my animation you Can see that I still have my camera I have a faster animation in the beginning and I still have a camera if I go back to the layout and if I go contrl Tab and select all my characters bounce you’ll notice that my last key frame is not 115 but this time It’s 101 so I can type 101 or I can just copy and paste this so left click contrl Ctrl B and then I can Loop and play back my animation again so here we are with our finished animation and even though it’s a short animation it’s a pretty good practice for like Getting started getting things right get understanding key framing timing in between movements and polishing and you can give your animation your own twist you can follow along you can do whatever you want you can repeat this and do this again or you can start with a new Animation just do whatever you want the main thing is to practice you can practice with moving around the cube and you can practice with moving around the character as well and also if you don’t understand anything about the animation then don’t worry don’t beat yourself up Because 3D is not easy to begin it’s very hard in the beginning especially the animation and especially the character animation so it’s fine if you don’t understand something feel free to leave a comment I read every single comment I can answer you or other people Can answer you as well if you want to support the channel and also get cool rewards then be sure to check out my page which will be linked in the description now click here to watch part five which will be the final part of this series so click here or click the Link in the description thank you for watching and see you next time Video Information
This video, titled ‘Minecraft Animation Tutorial (Blender 4.0): Part 4 – Animation’, was uploaded by Woodplank on 2023-12-19 13:43:34. It has garnered 500 views and 31 likes. The duration of the video is 01:06:57 or 4017 seconds.
#minecraftanimation #blender #minecraft Watch Part 3 here: https://youtu.be/Z_QVJqYzU-A
Become a member on my Patreon and get various rewards to elevate your animation skills and knowledge: https://patreon.com/woodplankmc?utm_medium=clipboard_copy&utm_source=copyLink&utm_campaign=creatorshare_creator&utm_content=join_link
🎥 Hey there, and welcome to Part 4 of our “Minecraft Animation Tutorial” series! 🌟 In this episode, we’re getting hands-on with Blender 4.0 to bring your Minecraft characters to life through some awesome animation tricks.
12 principles of animation: https://youtu.be/uDqjIdI4bF4
🔄 Let’s break down the secrets behind smooth and lively movements. From characters expressing themselves to making sure everything flows just right, we’ll guide you through the basics of creating cool animations.
⏩ Time is everything! Learn how to control the speed and rhythm of your animations to make them more exciting. We’ll make sure your Minecraft characters move in a way that fits the story you want to tell.
🎭 We’ll also dive into the world of emotions! Discover how to show feelings through your characters’ faces and body language. Make your Minecraft world more fun and immersive for your audience.
🔍 This tutorial builds on what we’ve covered before, making animation feel easy for your Minecraft projects. And don’t forget to grab the Blender Minecraft rig for a smoother workflow.
💼 Whether you’re a seasoned Blender user or just starting, this tutorial is all about making your animations look awesome and pro-level.
🎬 Ready to make your Minecraft characters dance, jump, and show off their moves? Hit play and let’s get animating! Subscribe for more tips and tricks as we explore the cool features of Blender 4.0.
Timestamps: 00:00 – Intro 00:17 – Creating a practice collection 01:20 – Explaining Animation and timeline basics 03:20 – Keyframing 06:30 – Keyframe interpolations 08:20 – Auto keyframing 12:05 – Animation panel 14:00 – Graph editor 16:40 – Going back to the Minecraft scene 17:00 – Customizing the scene and viewport 19:45 – Starting the animation 21:00 – Main movements 31:45 – In-between Movements and keyframes 36:30 – Local and Global Axis 37:00 – Adding more in-between movements 42:15 – Polishing 43:35 – Chancing the end frame 44:20 – Dope sheet and keyframe manipulation 49:00 – More keyframes and movements 53:00 – Camera animation 56:45 – Camera cut 59:00 – Camera move options 01:00:05 – Polishing the camera movements 01:02:30 – Adjusting the timing & dopesheet 01:05:45 Conclusion