Good day I’m ukis sandev and in part 34 of the series Unity for the absolute beginner We are continuing on with our second game and adding a PowerUp all righty so we are continuing on with adding some more things to our game two today we will add a PowerUp to the game uh we will do a Shield but of course after you get the idea you could make a whole bunch of different power-ups you could have double fire Increase the fire rate have a fire bomb etc etc so let’s get into it okay so I’m opening up the project from where we left off in the previous video all right well the best place to start I guess would be a new prefab that We can spawn in for the player to pick up if you have been following the Minecraft Invader series then you will already have the necessary files that you need so open up your imported folder in the project and navigate to GP VFX potions pack and then 3D 3D Prefabs and then grab the GP VFX potion C and drag it up into your hierarchy and now back down on the project inside your GP VFX potions pack navigate to the VFX and VFX prefabs and then GP VFX magic prefabs and grab the gpv FX entangle and Drag that into your potion C in the hierarchy and now rename the GP VFX potion C to potion shield and let’s give it a tag and name it PowerUp and assign it to the potion all right now let’s edit this a little so firstly let’s size it down so Lock X Y and Z in the transform and scale it to2 and now expand the entangle system and disable the glass shards and the potion C effects and now click back up on the GP VFX entangle and disable the renderer and now click on the magic Burst and lock its X Y and Z and scale it down to 0.1 and turn on looping all right and then let’s just play this real quick Yep looks good okay now we need to add some components to this so click back up on the potion shield and let’s add a Component and we’ll add a rigid body and make sure that gravity is off and let’s also add a sphere collider and enable is trigger and just double check that the collider is properly surrounding the sphere you’re probably going to have to enlarge the collider a little and now finally we need a script For it so create a new C script and name it something like powerups and drag it onto the potion Shield okay we are ready to save our prefabs so drag the potion shield into your prefabs folder and create an original prefab and now we can delete it from the Scene all righty so now we need to make it move Etc so let’s get into the the PowerUp script all right now we don’t need too much in here since the other game scripts will handle all the collisions so all we need to do in here is movement And rotation so let’s start with some declarations we will need a force to push the potion down so let’s do serialized field private float Force equals 1.5 if and we will need a boundary for the potion to destroy itself at the bottom of the screen I’m going to use the same Y value as the enemy script did so private float boundary y = – 4.2 if and then we’re going to need a rigid body to rotate the potions so private rigid body power up RB okay and now in start let’s get the rigid body with power up RB Equals get component rigid body and we’ll push the power up down the screen with power up RB do add Force Vector 2 do down times force and the Force Mode impulse just to give it a short sharp push and finally we’ll rotate it with PowerUp rb. addor 1 comma 20 comma 20 and of course you change those numbers if you wanted it to rotate faster okay and in our update method we just want to destroy the power up if it goes off the screen so let’s just do if transform do position doy is less than boundary y then destroy the game Object all right so the script is pretty much done so let’s save it all right now let’s stay in the game play seene this time and click run so you’ll notice that the game will halt because of an error uh it’s erroring because the game is looking for Our persistent data which isn’t there yet so we can actually continue running the game just by clicking the pause button and now drag one of the potion shield prefabs into the scene just to make sure it moves cool all right well the next tip be to Get this thing spawning in so the first thing to do is add this prefab to the enemy pool in each wave so click on the spawner object and drag a potion prefab into each wave that you have now this is going to credit an issue that the potion will be spawning In an awful lot uh it’s supposed to be kind of rare right uh in my first wave here it has a one and three chance of spawning which is ridiculous so I’m going to show you one solution of a whole bunch um in future tidy up video I Will show a better way of doing percentage chance spawns but it involves adding another class to our already nested class and I’m just trying to keep things simple for now so let’s just open up the spawner script all right so in here we are going to need a Boolean Declaration for our new code so let’s do private bull spawn equals true okay now if we jump down the script into our iron numerator spawn waves so in the first while loop our script is simply choosing at random an enemy from the pool so we just need to Make some changes here so firstly Rim out the two lines of code in our while loop and create a new line or two above uh this is just to save confusion because we’re going to rewrite it okay so we still need to choose a random number between zero and the count of the Enemy list so let’s do int enemy index equals random range Z comma wave and this is from wave number do enemy length oh that’s basically this snippet of code right here and now that we have a number we can assign another logo variable to select the enemy with the chosen index With game object chosen enemy equals wave wave number do enemy and the enemy index and now that we have the chosen enemy for this Loop let’s also store its name with string object name equals chosen enemy dotame all right so now we have all we need to create some conditions so let’s Put some new rules in here for if it’s the shield potion so let’s do if object name equals potion shield and just make sure you spell that right now in the curlies we first want to know if the player already has a shield active the game manager will be looking After that kind of stuff so let’s minimize this script and open up the game manager script real quick and let’s up in here in the Declarations just slap a Boolean in here public bull Shield active equals false and then just save that and let’s get back to the spawner script right so Let’s carry on in here with if game manager script do Shield active and then debug.log already have shield and spawn equals false um I just thought I’d throw a few debug statements in here so that later in the console you can follow what’s going on and now let’s do Else and in between the curries int we just call it Rand equals random. range between 0 and 10 and then if Rand equals 1 and we’ll do another debug debug.log spawning Shield spawn equals true and then else debug.log position Shield chance missed and spawn equals false so this while loop is now saying If the chosen enemy is a potion then firstly if the player already has a shield then set spawn to false and skip the rest of the code underneath and carry on then if the player doesn’t have a potion choose a random number between Z and n and if the number just happens To be a one then we’re good to spawn a potion so set spawn to true and skip the rest of the code and carry on and then otherwise if the number wasn’t a one then set spawn to false and Skip through and of course at the Top If the object Name is not a potion then just skip this all together and move on so we’ve basically just created another chance layer for the potion Shield to be spawned uh this is a one and 10 chance if you wanted to make more chance of spawning then you would Decrease the number 10 to less uh or make it more for less chance all right now continuing on to where this will all skip to next if spawn so this is if spawn is true and in between the curries instantiate chosen enemy comma random spawn location that’s that function that we made Earlier transform. rotation and then yield return new wait for seconds wave wave number do spawn rate so if spawn is true then spawn in whatever enemy or potion as we normally did before and then outside of that condition finally set spawn to true and you can either keep those two Rimmed lines there or delete them doesn’t really matter all right so let’s save this and run and if you keep an eye on the console you will see the debug outputs to see what’s going inside that code and yep just like I mentioned earlier just uh increase or decrease the random code in The script if you want to change the chances of getting the potion I think at this point I’m going to jump back into the spawner script and change the chance for a potion spawn otherwise I’ll be here all day waiting for potions to spawn I’m just going to change mine to Three all right so the potion is spawning so the next step would be picking it up uh let’s do that with the player so open the player script and now let’s navigate down to our on trigger enter right so the code that’s in here can stay but we’ll just add some new Stuff above to handle what happens if the player collides with a PowerUp so drop a few lines above the existing code and let’s put in some conditions first let’s get and store the tag name of what we’re colliding with so string tag name equals other. Tag and then let’s do if tag name equals power up that’s the tag that we gave it in the preab and in between the curries we want to destroy the PowerUp so destroy other game object and then well we might as well set up a case system in here so that Down the track you can add more powerups and they can just follow their case so first we need to know the name of the PowerUp with string PowerUp equals other dot name and now let’s set up a case system so switch power up and on the curries we’ll do our first Case so case potion Shield clone because that’s what it’s going to be called when it’s instantiated into the game it will have the Clone next to it and we’re picking this up and activating the shield so we can set that boan we made in the game manager script to True with game manager Script do Shield active equals true and now we’re going to need some kind of countdown timer because we aren’t going to have the shield forever so let’s use a co-routine for that so let’s do start co-routine Shield countdown and and then a break to end the case and of course our Shield Countdown is going to have a red line underneath it because we haven’t created it yet we will do that in a minute okay now outside our if group let’s do else if game manager script do Shield active and tag name equals enemy bullet or tag name equals Enemy and in those curries we’re just going to do the one line if tag name equals enemy bullet destroy other Dot Game object so we’re just saying here that if we collide with a bullet while The Shield is active then destroy the bullet we don’t have much else in here because The enemy script will handle that now I must be honest here if I had thought this game through before making it then this would be laid out very differently and it would be a lot easier to follow and in the future tidy video I’ll cover that all right now we just encase the Code Below in an lse statement and that should about do it so now we need to make that ion numerator to handle the countdown timer so the shield duration should probably be a variable so you can set that up in the inspector so let’s put that in the game manager script real Quick so public int Shield duration and save that and back into our player script so let’s do iron numerator Shield countdown and in the curlies for inti equals game manager script do Shield duration and while I is greater than zero and iusus and in those curlies yield return new wait for seconds One and then outside the for Loop game manager script do Shield active equals false so we’re simply looping through the shield duration until done and then setting the shield back to false all right let’s save this one and click on the game manager object and set your Shield duration I’m going to go with 60 just for now so that I can make sure this is working and with the game manager object still selected Run the game and when a PowerUp spawns in keep an eye on the shield active checkbox and once you picked up one you Should be able to collide with an enemy bullet and the enemy bullet will be destroyed of course we’re not going to collide with enemies because we have not scripted that in yet also while you have a PowerUp you should have no other PowerUp spawning and you will notice in your console Output that message already have shield and as soon as the shield is set to false again then you have a chance to get another one all right well the enemy needs to know what to do if it collides with the player when The Shield is active so let’s get into the enemy Script okay so there’s not a lot we need to do in here at all uh let’s navigate down to our on trigger enter so when we wrote the script here the only thing that could hurt the enemy was a player bullet well now a shielded player can hurt it too so let’s scrip That in so in our if compare tagline let’s add a shielded player with or other do compare tag player and game manager script. Shield active then before we increase the hit count let’s set a temporary ball if it’s a bullet or not with bull is bullet bullet equals other do compare tag player Bullet so that’ll return true if it finds that’s bullet and now let’s add to our if the enemy got hit enough times to kill it if with or game manager script do Shield active so now if an enemy hits a shielded player it will be killed instantly no matter how many hits It’s Supposed to take to kill it and now finally let’s change our destroy bullet line to if is bullet destroy are a DOT game object so if it’s a player bullet then destroy it so when the shielded player collides with the Enemy the player won’t be destroyed and that’s pretty much it so Let’s save this and run and if we pick up a shield and now while we are shielded we bang it into an enemy boom enemy destroyed cool all right so there’s two more things left to do I think uh one we need to see the countdown in the guey so that we Know how much time we have the shield for and secondly we need to have some kind of particle effect while The Shield’s enabled so we’ll do the countdown first so let’s jump into our game manager canvas and let’s create a new empty and call it powerups and we will need a counter Display so let’s just copy the score display and here and then paste it as a child object of powerups and rename it countdown and set its X and Y position to zero all right and let’s put an image in there too so you can grab this image From my GitHub Link in the description or use any image you might have so drag the image into your images folder uh again it’s been used in a GOI so we need to change it so click on it and change the texture type to Sprite 2D and UI and click Apply and now right click on power ups in the hierarchy and create a UI image and name it shield and then change its source image to the shield image that we just created and let’s also have its size width and height and then finally position it up above the counter in the Scene and then position the whole powerups container where you would like the display to be okay and now disable both the countdown and the shield objects cool so we are ready to go with some scripting now the player is going to handle the enabling and updating of These gooey items but I thought I’d just throw something a little extra in here so the player is a prefab and you will notice that all the references in it and any other object are bits and pieces from the project window uh that’s because it can’t actually reference Anything in the scene until it’s in the scene that kind of makes sense if you use the player in a different scene where the object doesn’t exist so the usual way is to find uh the scene or gy objects however once your game starts getting bigger you might start to have Way too many find this and find that lines in your code uh so what you could do is create an object in the scene that acts as a kind of a hub for all the references that you need um after we’ve done this one then you could actually Jump Around the scripts that we’ve made so far and have them all refer to the hub rather than having to find everything all the time uh it’s just another option and uh also as I’ve mentioned before that using find does eventually affect performance so in the long run it would Help right so with that said instead let’s create a hub to hold the reference for the new PowerUp guy so let’s create a new empty in the hierarchy and name it reference Hub and now create a script with the same name and drag it onto the reference subub object and open the Script all right and let’s delete the start and update methods and let’s make some declarations here so first well we’ll make this a static instance so everything can access it with public static reference Hub instance and let’s make the references uh since this is static we’ better Protect it with get and set if you need to refresh your memory on get and set then video part 18 will be the one to watch so let’s do a couple of hidden variables for the references serialized field private game object power up shield and serialize field private game object power up Countdown and then the public ones with public game object power up countdown and then we’re going to have a get and it will return the hidden one which is the underscore powerups countdown and then public game object power up shield and that will return power up shield with the Underscore so now when power up countdown or power up Shield is requested then their true hidden value will be returned okay and now let’s do an awake method so public void awake and inside that instance equals this all right that should do the trick so let’s save This and now if you click on the reference Hub and the hierarchy we can now assign those two gooey objects to the empty object Fields so shield into shield and countdown into countdown cool all right now let’s open up our player script all righty so we need a few Declarations in here firstly our references to the shield and the countdown goey items with private game object power up shield and we’ll put the power up countdown on the same line so that’s two objects there and we’ll also need a reference to the text of the countdown object so that We can change the numbers so private text mesh Pro UGI power up countdown text there do and now in start let’s retrieve these using our new reference Hub rather than having to find them each time so power up countdown equals reference Hub do instance power up countdown and then power up countdown Text equals power up countdown which we just retrieved. get component text mesh Pro ugui and then finally PowerUp Shield equals reference Hub do instance power up Shield all right and now let’s navigate down to our countdown enumerator and before the loop starts let’s enable the displays with PowerUp countdown do setactive True and PowerUp Shield do setactive true and then inside the loop we want to update the timer number so power up countdown text do set text and you can do a couple of speech marks plus I just makes it a string and then finally after the loop exits the Timers run out so we disable the two displays with PowerUp countdown do setactive false and PowerUp Shield do SED active false all righty I think we’re ready to test this out so let’s save this and run and we’ll pick up a potion and boom there is our countdown Timer letting us know how long we have the shield for and a little graphic to go with it all right so there’s one thing left to do now which is to give the pler a particle effect when The Shield is enabled uh you could use any particle Effect you like here I do have one here but it will take a fair while to go through each setting of it so I’ve packaged it up and it is available on my GitHub link so you can download it and while your project is open just double Click the package and it will install itself and you can grab the force filled folder and drag it into your imported folder and the prefab itself should now already be in your prefabs folder so double click your player prefab in the project to edit the player prefab and then Drag The Shield ring Into the player then click on the shield ring lock X Y and Z of scale and scale it up to one uh then you can jump out of edit mode drag a player prefab into the hierarchy and drop it down and click click on the shield ring and you should see the effect Cool okay now you can delete the player from the hierarchy and let’s script in the effect to play when the player has the shield active so let’s open the player script again all righty so we’re going to need a reference to that Shield ring object So we can just slot it in with the other game objects here we’ll just call it Shield ring then in start let’s grab it with Shield ring equals game object do find Shield ring that’s a pretty quick find because it’s a child object of the player and then make sure it’s not Active with Shield ring do setactive false and then if we jump back down to our countdown a numerator again and where we can activate the display plays we can add in Shield ring do setactive true and then when the shield expires we can do Shield ring do setactive False and we are done here so let’s save this and run and if we pick up a shield and boom there is our particle effect cool all right we’re done with our first PowerUp now just one thing to note uh back in our player script in our countdown enumerator we put Shield Specific stuff in there but this countdown could be used for all other powerups as well uh you would just have to move all these shields specific bits up into the case and the on trigger inter function perhaps I’ll make another power up in the future so that you can See what I mean or challenge yourself and try to figure it out as always I’m around if you have any questions now I’m not sure what the next video will be I was thinking to add some options in the menu for gameplay or maybe just start Tiding the scripts up a Little cuz they’re kind of getting a little messy so whichever it is I hope to see you in the next Video Video Information
This video, titled ‘Part-34 of Unity for Beginners – Game2 – MineCraft Invaders – Add a Powerup Shield’, was uploaded by RyukiSanDev on 2023-11-24 00:30:54. It has garnered 55 views and 9 likes. The duration of the video is 00:31:24 or 1884 seconds.
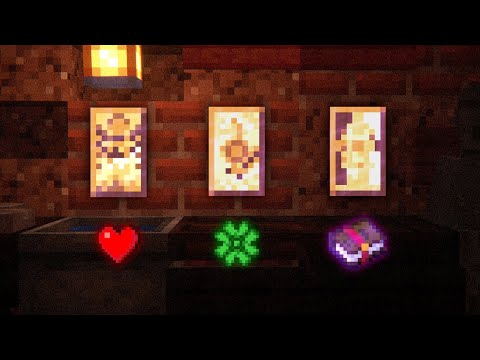
We are continuing with adding some more things to our Game 2. Today we will add a powerup to the game. We will do a shield, but of course after you get the idea then you could make a whole bunch of different powerups. Like double fire, increase fire rate, fire a bomb etc etc.
*** Just to note that there is almost always more than one way to do something in script. How I do it in this video is not the only way but for the beginner its just about right 🙂
Images and Package for this segment in my Github ———————————————— https://github.com/RyukiChan/UnityForBeginners/tree/main/Game2%20Files
As the series progresses I will post files used in my GitHub. Certain files might be missing because of copyright. When those situations arise I will mention them.
Chapters: ————— 0:00 Intro 0:47 Create and script the prefab 6:28 Add to Spawner and script a chance spawn of the powerup 12:58 Script player collision with powerup, and shield duration 18:09 Enemy collision with shielded player 20:00 Create Gui shield countdown 21:55 Extra bit (Create a reference hub) 27:46 Create Shield equipped particle effect
I will be posting other tutorials for Blender, Unity, Roblox (Lua), C#, Minecraft Code etc. So if you might find something useful be sure to subscribe for updates: https://www.youtube.com/@ryukisandev I’m also now on Discord at: https://discord.gg/vKPqTN3qr4