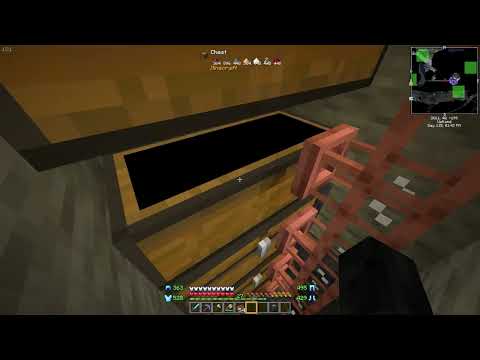
Traders is one of the most resource intensive Minecraft mods by its very nature it actually increases the strain on your computer by making the lighting and shading and Minecraft looks so much better than it does by default however does shaders have to lag Minecraft or is there actually a way to increase Performance and reduce lag at the very least while you’re using shaders well of course there is the first place to look is actually what you’re using to install and run shaders in the first place there are two primary shaders mods out there OptiFine and Iris plus sodium only Optivine which is the most popular one is actually worse performing for most shaders packs this means that if you’re okay with using Fabric and not Forge mods then I would honestly recommend using Iris and sodium together in order to install shaders and not OptiFine this Is how you’re going to be able to get the most FPS possible out of shaders and you can find links on how to install Iris sodium and OptiFine if you want in the description down below what if you’re stuck with OptiFine though because you want to use use Forge mods Or you’ve just like OptiFine more in general which I totally get well in that case you should look at the shaders pack itself and it’s actually important to do that even if you’re using Irish shaders to run your shaders because it’s going to increase FPS on both OptiFine and Iris every single shaders pack is different with how it handles lighting and shading for this reason every single shaders pack can perform differently some will have less lighting more shading and they might perform a little better or vice versa it really just depends however there are shaders packs That are specific for high performance and high FPS and you can actually find a video in the description down below that goes through a few of those specifically however for this video we’re going to be using makeup Ultra fast shaders for our examples simply because it gives you a Lot of shaders features and really good performance on most systems now Irish shaders in pretty much every other shaders pack out there actually have default profiles that you can activate in order to get either better performance or better graphics and better you know lighting and all that Out of your shaders pack now in order to add access these you’ll need to access Shader settings for OptiFine just go to your Shader settings where you normally add and select your shaders and in the bottom right you will see the shaders settings or Shader options button the Same thing goes for Iris except when you go into your shaders menu where you normally activate or change your shaders you will see it in the bottom center to be able to go to the Shader settings and get those configured once you do this most shaders packs actually have the Ability to select either a profile or a preset they all call it something a little bit different but it’s going to be like high FPS better performance you might have a high medium low with high usually being the best looking and low being the one that’s actually the best FPS or vice versa it really just depends usually you also have colors green usually means higher FPS and red usually means lower sometimes that can be flipped you just kind of have to play around with it but nevertheless you can also hover over a lot of these Shader Profile settings and be able to see exactly what each one of them does so that’s helpful as well considering they’re kind of all different depending on the shaders pack you use you can also go go through and set up a lot of these different settings yourself so if you Want to go in and manually do that you can but for me every Shader Spec’s different and understanding exactly what’s going on in there can be a little difficult and most of the time just using the default predefined preset is the way to go one thing worth noting Though is that the higher the FPS you get with shaders usually the lower the shading and the worse the lighting that the Shader pack adds in it’s because the lighting and the shading is what’s actually lagging your computer so more FPS is usually at the sacrifice of those Things it’s also why you probably should have a dedicated graphics card if you want to run shaders running shaders on an Intel graphics card that’s integrated is extraordinarily difficult and hard to do I would recommend having a dedicated graphics card if you can get one GPU prices have dropped so much that it’s Honestly great to pick up some of the older Nvidia cards like 2080 3080s for a discounted price and get a ton more performance out of your computer and thus get better performance out of shaders as well so where do we go from here what else can we do to improve FP Es with Irish shaders now if you want to improve FPS with OptiFine we do have a link in the description down below for great OptiFine settings that will give you good performance as well as make Minecraft look good and in that video we get over 100 FPS using OptiFine and Shaders however what about Iris well let’s go ahead and jump in game right now and look at the iris settings and specifically the iris plus sodium settings in game you do need sodium to get these settings and get the best performance possible but luckily iris is pretty much making sodium mandatory at This point all right so here we are in game you can go ahead and navigate to a video settings and here is all of our sodium as well as Iris Shader settings so irishaders is here you can see makeup Ultra fast shaders is already active and Then if we come back over to General this is where we’re going to start we’re gonna go through every single one of these quickly but also kind of explain them somewhat in order to increase your FPS now all these are up to you you can change these to whatever you want but I Would go ahead and actually set these up exactly how I have them and then once you’ve done that you can come back and tweak for example you can turn your render distance up if you need to to being a render distance we’re actually going to start off with eight this is a Huge thing that will actually increase your performance a ton with or without shaders so let’s go ahead and set it to eight for now 12 is where I would recommend running it for you know a better PC and great computers can run it even higher but we’re going to start With eight for now Max Shadow distance can actually not be changed for me I believe this is due to the shaders pack I have but if you can run this lower the lower the better I would probably say half or so of what your render distance Is so at eight chunks it would be four but seven is fine for us simulation distance is also something that the lower the better in order to be able to increase performance now the reason for this is as we can read simulation distance controls how far away terrain And entities will be loaded so the higher this is the farther away they’ll be loaded there’s no reason for this to be higher than your render distance so at least turn this down to eight but again I would recommend it at about half or so which in this case would be 5 5 Because that’s all the way down brightness doesn’t matter does affect performance at all and then GUI scale doesn’t perfect performance at all but you can change it to something else if you want now full screen is going to affect performance but understand if you do want to run Minecraft full screen That’s perfectly fine vsync I would recommend turning it off for now and Max frame rate is what we want so we want to change this all the way to the max to get the maximum amount of frame rate that we can and uh just blow it out of The water the rest of the stuff on this page does not affect performance from there we can move on to Quality now for Quality I understand you want to run fancy especially if you’re running shaders but let’s start off with fast for now because fast is going to give You good performance and honestly because of shaders it’s still going to look okay for clouds I would actually turn these off it’s not a huge performance boost but I like to use Shader clouds and usually that means turning default clouds off but nevertheless you can turn them to Whatever you’d like whether leave that default leaves quality we want to turn this to fast these are actually a decent performance boost because they are pretty difficult to display with their transparency particles I would run this on minimal because particles are again another boost smooth lighting we can Actually leave on we’re running shaders so we want to be able to get good lighting and as you can see it’s a low performance impact anyway biome blend is a similar thing but I would actually recommend turning this off entity distance goes back to how far away Entities can spawn away from you and be activated so we want to go ahead and turn this down I actually turned this down all the way usually because I’m not one to really care about entities but if you really want people to be able to fight enemies and things like that and Zombies coming from a distance and all that turn this up to 100 or maybe even a little higher but I turn this all the way down entity Shadows again we can leave this for using shaders so we can leave it same thing with vinay that’s up To you if you like it you can turn it on if you don’t doesn’t really matter as far as MIP maps go we want to go ahead and turn this all the way down to zero click apply in the bottom right and now it’s going to apply those settings by The way it should have also applied these back here and as we can see it did but it’s probably safe to hit that at the end of every page moving on to Performance this is where we can really get some things boosted with different kind of changes to how Minecraft’s doing Rendering luckily all this happens in the background for chunk updates we want to go ahead and turn this all the way down because we’re going for FPS here if you do see chunks loading slow you can turn this up but we want it all the way down because we want most FPS always Defer chunk loading I would recommend go ahead and turn this on because basically all this will do is potentially call some chunk holes so if you do see a bunch of holes in game where like there’s a bunch of blocks and there’s not rendering that’s usually because of That so you can turn that setting on if you want but for the max FPS we wanted to defer this all of these need to be turned on block face cutling fog occlusion entity calling particle culling and Anime only visible textures all those are FPS boosts and need to be Turned on right like so for advanced we want to go ahead and check our do our chunk memory allocation needs to be set to async use persistent mapping needs to be turned on CPU render needs to be somewhere in the middle three to five and this is going to be different Depending on how many chords you have I believe with your PC so I’m Gonna Leave This as default most likely that’s okay for you as well to believe it as it is default and allow direct memory access needs to be enabled now I didn’t mention This already but make sure you do go in here and select the basically performance setting for shaders we’re going to do the low setting here apply that and then all of our settings are now set and we can come in game now unfortunately we don’t have a persistent FPS counter But we can pull it up with three F3 and we have over 200 FPS coming in here boom look at that now one of the things I actually don’t like is the leaves I love transparent leaves that look really really good so I’m going to come in here And actually turn those on I’m gonna do the fancy at least quality I’m just going to turn on fancy Graphics click apply look the leaves look a lot better everything looks a lot better and we’re still maintaining well over 200 FPS in the top left up here consistently so That’s how you can boost your performance with shaders and now that you know how to improve your FPS with Irish shaders share the video on your screen and in the description below on optimizing FPS with OptiFine you can use those settings along with shaders on OptiFine to achieve over 200 FPS with OptiFine shaders yes you can even get 200 FPS with OptiFine shaders using those settings in the description as well as on your screen right now that video go check it out so nevertheless thanks for watching we’ll see in the next one give it a thumbs up and I’m out peace Video Information
This video, titled ‘You Don’t HAVE To Lag When Playing with Shaders!’, was uploaded by The Breakdown on 2022-12-01 03:00:11. It has garnered 93619 views and 1751 likes. The duration of the video is 00:10:20 or 620 seconds.
Shaders is one of the most resource-intensive Minecraft mods you can install. However, you don’t have to lag when you are playing shaders. This video goes over how to get the most FPS possible while you are using shaders. So, without any more delay, here is our complete guide on reducing lag while using shaders!
Get an incredible DDOS Protected Minecraft server for you and your friends with SimpleGameHosting! https://TheBreakdown.xyz/MCServers
Download Iris Shaders + Sodium: https://TheBreakdown.xyz/IrisShaders Download OptiFine: https://TheBreakdown.xyz/Optifine
High-FPS Shader Packs: https://youtu.be/Z_pJHM5I2B0
Best OptiFine Settings: https://youtu.be/-Y1X2kloDZY
The Best Shader Packs: https://TheBreakdown.xyz/ShadersPacks ——————————————— ★ Join The Premium Support Community: https://TheBreakdown.xyz/Join ► Subscribe!: https://TheBreakdown.xyz/YTSub ——————————————— How To Install BSL Shaders!: https://youtu.be/m9blal009No Do This When You Start Playing Minecraft!: https://youtu.be/mTk00AQXBsA ——————————————— **SOCIAL MEDIA** Twitter: https://Twitter.com/TheBreakdownXYZ TikTok: https://www.tiktok.com/@thebreakdownxyz ——————————————— ★ My Gear Get your C920 Webcam: https://TheBreakdown.xyz/c920 Get your Blue Snowball: https://TheBreakdown.xyz/Snowball
About this video: You don’t have to lag if you are playing Minecraft with shaders. Sure, shaders does require a decent PC to be able to get the maximum shading and light advantages out of it. However, you can do a few key things to actually increase your FPS while you are using shaders. Even if you don’t have the newest and best PC out there, you can still run shaders using these settings.
First things first though, we need to consider the mod that you are using to run shaders. There are two main shader mods out there – Optifine and Iris. Iris is newer, and when you pair with the mod Sodium actually performs better and delivers higher FPS than Optifine does when running shaders.
You can find the complete guide for getting Iris Shaders in the description above.
In addition to using Sodium over Optifine, the shader pack you use matters a lot too. We have a dedicated video on high-FPS shader packs in the description above. However, a good pack to use is MakeUp Ultra Fast Shaders. This is a great pack for those that want most of the amazing benefits of shaders without a lot of lag.
Once you have your shader pack installed, you will need to access the shader settings in order to setup the correct profile for your shader pack. This can be done in the bottom right of the shaders menu in Optifine shaders and in bottom center on Iris Shaders.
With your shader settings selected, you will most likely see the ability to select a different configuration for your shader pack. Not every pack has this, but for those that do, selecting the lowest/performance setting will give you the best FPS. A high-quality shaders profile will increase the look of shaders but provide a lot more lag.
There are some shader packs out there that provide almost no shading, but do add in the wind effects a lot of shaders have. This will give you the best overall performance possible from shaders in Minecraft. However, you don’t really get a lot of the lighting benefits.
This is because most of the lag that you get from Minecraft shaders comes from the lighting. Without this, you will get better performance.
It is also important to configure Iris Shaders with Sodium to get more FPS out of it. We cover this in-depth in the video looking at every video setting and what it should be set to for the best looks and the highest amount of FPS possible while using shaders.
Nevertheless, that’s our complete look at how to not lag while using shaders in Minecraft. If you have any questions about how to get more FPS with Minecraft shaders, let us know in the comments. We will try our best to help you out.
Otherwise, if we did help you increase performance with shaders, be sure to give this video thumbs up and subscribe to the channel if you haven’t already. It really helps us out, and it means a ton to me. Thanks in advance!
Note: Some of the above links are affiliate links. I may receive a commission at no additional cost to you if you go to these sites and make a purchase.