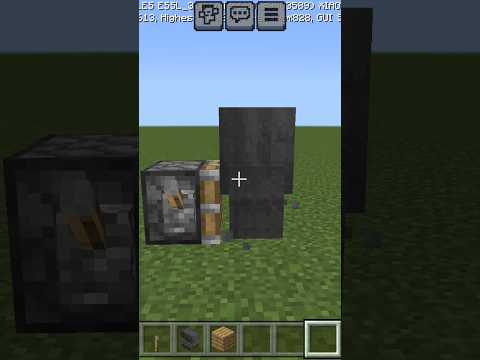
What’s up vanara talks welcome back to the channel today we’re back with another kawaii guides build tutorial and in today’s video i’m going to be showing you guys how to make starwood stables from x-life now for those of you that may not know what star wars stables is It’s basically just a really cute animal stable area that i built in the x-life series so in today’s video i’m going to be showing you how to make the larger main stable a medium-sized stable a smaller stable and a star pond that’s in the middle of everything So if you want to build the stables exactly the way i did then the area of land you’ll need is 44 by 37. okay so the first thing we’re going to start with is the star pond in the middle just because it’ll help guide us to the Placement of the other buildings so the star pond is kind of the central feature of this whole stable area and you’re going to want to find the middle of your plot so if you start by looking towards the left corner you’re going to count 21 blocks towards the middle once you find Your 21st block you can place one right next to it and do the same thing on the right so go all the way to the right corner count 21 blocks this way and the one right after that will be your middle block since this plot is 44 which is an Even number we’re gonna have these two blocks be our center and now that we know where the middle of this is we can start to count back by 11. so 1 2 3 4 5 6 7 8 9 10 11 and then this is gonna be where the star actually starts go ahead And break the block next to it as well because our center is two blocks okay so this is the middle point of our star i’m gonna go ahead and put a pattern on the screen so you can follow along just because i i don’t want to confuse you With the bajillion numbers it’s really easy and i feel like the image will help you better than me talking about it Okay so here is the outline of the star dug out now you’re just gonna go around with some white concrete and fill it in Okay and now that that’s done just dig out all the grass on the inside and add in some water now that our pond is done let’s work on the first small stable if we go to the bottom right block of the star pond we’re gonna count one two Three four and then on the fifth block we’re gonna place an acacia log so starting from this block that we placed we’re gonna go over by three so one two three and then on this side of the block we’re going to count six one two three Four five six and then from this block we’re gonna count three one two three so the shape of your building should be seven lawn by four wide now we’re just going to go ahead and bring every corner up so that it’s four blocks tall so we Have one two three four one two three four and one two three four now on the top of this building just add some temporary blocks so that you can come underneath and place these locks so that they’re facing the same direction as the side pieces again i’m just gonna add Some temporary blocks up top so i can have all these blocks facing the right way and then i’m gonna do it one more time over here and this is pretty much the small baby stable it is very simple and now all we have to do is detail it add a roof and Add some fences oh wait before i add the detail stuff i should probably just remind you guys that xlife is a modded series and all these tutorials that i do are in a vanilla world so i’m gonna use my texture pack to the best of its Ability to kind of mimic my builds that i built in x-life but x-life has this really cool mod that adds in wooden posts and with all of these builds i did add wooden posts on the corners to add in some detail but uh we we don’t we Don’t have those so instead of that i’m gonna be using diorite walls to detail the corners so taking our oak white slabs we’re just gonna go over this entire thing and we’re gonna have the slabs hang off the main wooden blocks by one so as you can see on the front this Is hanging over by one now we’re just gonna bring this roof down by two two times so place a block on the corner and bring it out by two and again place a block underneath and bring out by two now you’re gonna wanna break this and replace that so that it’s actually a Two-step and break that placeholder as well now you’re just gonna bring all of this across to the other side of the build and now that the roof is filled in we’re just gonna want to connect it all with some fences so starting from the block next to the corner we’re gonna Bring some fences straight down to the ground again look at the corner block and go in by one place some fences and then just connect these all together and now for the rest of these open areas we’re just gonna add some windows and detail it with some slabs Okay and there we have it this is the small little baby stable i went ahead and i added some gates here so you can get your animals in and out and now that this is done let’s work on the medium-sized staple okay so now for this stable we’re gonna come to the right Side of the star pond on this bottom block and we’re gonna count one two three four then on the fifth block we’re gonna place an acacia log now the size of this medium stable is seven by nine blocks so from this first block that we placed we’re gonna count a five gap so One two three four five and then place another block then moving towards the back we’re gonna count nine so here’s one two three four five six seven eight nine and the same thing over here one two three four five six seven eight nine now that we have all four corners Defined we’re gonna bring them up by four then by two and by two again but i’ll have a diagram on the screen that you can follow Okay so this is the main shape of our medium size stable and if it helps you to visualize where the window goes a little bit easier we can just fill the whole thing in so just go ahead and bring all these blocks down so starting At the top we’re gonna go down by one and break this block then we’re gonna break the five underneath it followed by three and then one on this side and one on this side and now it may look a little funny now but once we fill it up With glass it’ll make more sense so now let’s just go ahead and do the same window on the back side of the build and now that that’s done we can go ahead and fill in the rest of this so for the back side of the build just go ahead and Bring this wall all the way down to the ground then on the sides to connect the front to the back we’re gonna place logs on every other block so leave a space place a block leave a space place the black leave a space and place a block do The same thing to this side and then make them all four blocks tall okay so once you’ve added the side walls in you’ll notice that i added some fences in between all the spaces and now for the front details of this build we’re going to go ahead and use this diorite Wall on the side right here right here and on the very corners we’re going to go up by four so that’s four right there and then one two three four then in the middle of this build we can break this block place a wall and then Add two fences and a gate now that the front is done let’s go ahead and add the roof and then we can fill in the windows this roof shape is pretty simple we’re just gonna place an upside down stair on the top of this wall then we’re gonna Add one block a stair we’re gonna add one block behind the stair on top like this then place another stair on top of this block go ahead and add an upside down stair and then a right side upstair with a block in the middle once you have This shape just do the same thing to the other side and then bring it to the back Okay so now the roof is done it should look something like this and now we can go ahead and add in some windows so the front window should look like this and the back window should look pretty much the exact same just don’t forget to add some more diorite walls to the back Corners if you wanted to have the same vibe as the front alright so this is the medium-sized stable it’s one of my favorites i love the star window but now that it’s done let’s finish up this video by working on the larger stable so for this last building we’re going to Come up to the top point of the star and we’re gonna count out by five so this is the middle of the build but this stable has a four wide opening so to help us visualize let’s just add a block on either side of this so we can have four Blocks here and then on a diagonal from these end blocks we’re just gonna place some logs now just get rid of all of these placeholder blocks and this is gonna be the start of our build starting on the left side from this block we’re gonna count three one two three and on The fourth block we’re gonna place a log and we’re gonna do the same thing on the right side so from this block count one two three and then place a log now that we have these four blocks placed we’re just gonna bring them all back so Between the logs there’s gonna be a five block gap so count one two three four five place a log count one two three four five place a log one two three four five place a log and one two three four five place a log now for these middle Blocks we’re gonna raise all these up to five so we have one two three four five one two three four five one two three four five and one two three four five then we’re just gonna go across and connect them all together and you should have something that looks like this On top of this center piece we’re gonna go up by three on each corner so one two three one two three one two three and one two three then we’re just gonna go in by one on each corner and then we’re gonna go up by one and meet in the middle Now on the sides of the center piece we’re gonna go up by four so we have one two three four one two three four one two three four and one two three four now you just want to connect all these blocks along the top together and now that that’s done we Can go ahead and work on the roof this roof is pretty simple to follow along with since i’m only going to be using slabs so i’ll just let you follow along by watching the time lapse All right guys well now that this roof is done this is basically the building all these builds are relatively simple i think they’re all pretty easy but anyway to finish up this larger stable we’re just gonna go ahead and connect everything with some fences okay so this is how the fences should Look i somehow managed to capture a little sheepy babe in here so you know welcome to your new home but when you walk into this table you should have a pen on the left and a pen on the right and of course you can add a gate in the middle Then for some final details we can add some more walls to the front we can add some up here we can add some along these front two posts and then finish up by adding some slabs all right guys well these are all three of the stable buildings now if you’re Wondering why this side of the area is completely empty well if you want yours to look exactly like mine i built those two stables behind me mirrored across from each other on this side but i have the power of world edit so i’m just gonna copy and Paste them over here okay with the power of rolled edit i have duplicated my bills so this is the layout of star with stables we have two of the smaller builds in the front the media ones in the middle and the larger one in the Back and if we fly up we can see that the star pond is in the middle of everything now of course if you want to make this area look a little bit better you can add some paths connecting to all the stables you can plant some trees and You can add some bone meal All right guys so now that the landscaping is done let me give you a mini tour so this is the front where you would walk in and i just bone meals like a ton i also planted some purple spruce and blue birch trees all around to kind Of give this place some color also those are the colors of the trees that i use in x-life and my texture pack just so happens to have similar colors so it works out around the back over here i added some hay bales and then by the pond i made some little benches alright Guys well now that we’ve finished start with staples ah that’s gonna be it for today’s video let me know in the comments which stable was your favorite also let me know in the comments what build tutorials you’d like to see next if you like this one make sure to give It a thumbs up subscribe to the channel if you’re new and i’ll see you next time bye You Video Information
This video, titled ‘💙How to Build Animal Stables! X Life Minecraft Tutorial | Kawaii Guides’, was uploaded by Katherine Elizabeth on 2020-10-24 18:00:04. It has garnered 167704 views and 4719 likes. The duration of the video is 00:14:11 or 851 seconds.
💙Subscribe to be part of the Enirehtaks!: https://goo.gl/QpgBNs 💙JOIN The Discord! 🙂 https://discord.gg/Enirehtak 💙Previous video: Building YouTuber Statues! Minecraft X Life Ep.17 https://youtu.be/jHd64BdU6kE
Welcome to a new minecraft tutorial series called Kawaii Guides! In this series I show you guys how to make some of my favorite builds from the past as well as some fun new builds!
In todays video I’m going to show you how to build Starwood Stables from the X LIFE series! Starwood Stables is the name of my super cute Minecraft animal stables! This is a super EASY tutorial and I’m gonna show you how to build it:) In this video you will learn how to build a small stable, a medium sized stable, a larger stable, AND a star pond! These animal stables are perfect for all of your minecraft sheep, pigs, chickens, horses, and cows! Its the ultimate cute animal area!
Larger stable originally inspired by: https://www.youtube.com/watch?v=YnkHlFFBH9I
———————💙FOLLOW ME💙——————— TWITCH(live stream): https://www.twitch.tv/katherineelizabeth TWITTER: https://twitter.com/_K_Elizabeth