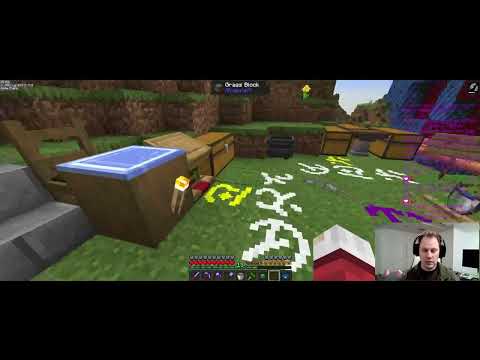
Hey what’s going on guys totally worthy here and welcome back to part two of the 1.17 forge minecraft modding tutorial uh now in this one we’re just going to be creating a very simple item and uh yeah i mean that’s pretty much it so let’s go ahead and get started So first thing we’re actually going to do is just delete these two test folders that’s not actually to do with items but they’re just useless folders we don’t need those they just clutter up our package explorer the next thing you need to go ahead and do is just create a simple package And i like to call this core and then inside of that i like to create a package called init for uh init meaning initialization and then here i’m going to create a class called item in it you can also call this mod items if you want whichever one you prefer some people Also call it like um tutorial items so like their mod id and then items so like i suppose it would actually be tutorial mod items that’s probably the best way to do it but i’m just so used to doing item in it it’s it’s just so much easier easier to say easier to To do so i’m gonna be leaving it as item in it okay and we can just make this class final and give a private constructor since we’re never going to be constructing our item in it is simply just going to be simply just going to be for static fields pretty much so What we can do is well we first need to create the objects that will that we will register our items too and for that we are going to use something called a deferred register so let’s create a public static final deferred register and this is going to be of type item Because since we are creating an item and i’m going to call this items and that will be equal to deferred register dot create now this will take in the registry that is used for items and to get the registry we just call forge registries dot items and then finally the last parameter here Is our mod id so since we created a static field for that we can just call tutorial mod dot mod id and just import item from net.minecraft.world.item.item okay and i guess we’re going to have to import tutorial mod as well there we go the next thing we’re going to want to do Is actually create our item field so the third register basically here is the the register it’s what you register your items to but you don’t register an item to it you register a registry object which contains an item to it so let’s let’s create this so this will Also be public static final or in fact we could even have this private since it’s probably not going to be accessed anywhere else but i’m just going to keep it public because we might want to use it in the future somewhere else so let’s create a registry object and obviously of type item Okay and let’s call this um example underscore item oh what did i do there oh dude how do i get rid of that uh i’m not sure what did i actually do here can i just uh can i just close this you do please let me close it Has that worked yes okay i don’t know what i did there that is that is very interesting um yeah so example item and this is going to be equal to items which is our register uh items dot register and then this is the name of your item so this needs to Be fully lower case no spaces pretty much the same sort of syntax as your mod id so uh obviously this will just be example unspot item obviously under the course underscores replacing spaces and this will be equal to a supplier of a new item and once this loads It will then ask for a properties so for this we simply just do a new item dot properties and boom we now have an item obviously it’s um slightly weirdly formatted there we go so that is an item however there are some properties we can add hence we are creating a properties object So if we put a dot there we can see all the different properties that you can add i’m going to first do the creative tab so for that it’s just dot tab and then you pass in the creative mode tab which i believe is just creative mode tab and then dot whatever tab So i’m just going to put this in misc it’s miscellaneous and obviously there’s a bunch of other ones here so you can have it like fire resistance have it so it doesn’t repair give it durability uh food so you can make it food that’s fairly simple too You can give it a max stack size there’s a bunch of different things you can do um but that’s i think all i’m going to do i guess i’ll make it fire resistant as well sure and you simply just chain these because it’s a builder sort of system So yeah that is that is that we can now close item in it since we are done with that and go back to our main class so what we need to do in our main class is actually register the register which sounds really strange but i will try to explain so First we need a bus so essentially in in forge everything works on a bus and the bus sort of um picks up all these events so imagine events being passengers and the bus will go ahead and pick up all these events and basically deliver them to the hooks which Let’s say are the stations so we need to go ahead and get a reference to this bus since there’s two buses so there’s the modbus and the forge bus and for registering stuff we need to use the modbus because the mod does it not forge So to get an access to that bus we can go ahead and create um so it is an i event bus that we are looking for and we’ll just call that bus and that is equal to fml mod loading context oh fml java mod loading context Huh okay i didn’t know they changed the name of that but yep dot get dot get mod event bus and you could probably also make this a var to be honest i think it’s fairly obvious what it is so yeah we’ll do that and then we simply just want to call it A minute dot items so this is our deferred register and we just call dot register and then that takes in bus there we go and that will register all of our items it will register our register it will register our deferred register which registers our registry objects It is a little bit confusing um but eventually you will you’ll get used to it and you’ll sort of understand it um but yeah i mean that’s pretty much it we do obviously need to go ahead and create the uh lang and also the item model and obviously the item texture so Let’s go ahead and do that so let’s go into our source main resources and in here we want to create a folder called assets assets yep i did spell that right okay and then dots and then this is your mod id so the same place in your Build.gradle in your main file and in your mods.tommall so mine was tutorial mod uh yeah and then we can create let’s do the lang first lang is the easiest dot latin here we go and in here we just create a file so that will be en underscore us dot json oh We don’t really like jason jason is not a nice guy but we do have to use jason quite a lot in modding like a lot a lot actually it’s it’s implemented a fair amount so in here we first need to put the key and for items that is item dot And then our mod id so tutorial mod dots and then the name of our item which was example underscore item and for the value that is literally just what you want it to translate to so example item and obviously this can be exactly how you want it to look pretty much Then we can just save that fairly simple then let’s create another package and this will be for the models there we go and in here we can create another package for the item models and while we’re at it i’m just going to create one for the block models so it’s Just item and block make sure it’s not plural these two everything has to be exactly as i’m showing you right here apart from the mod id of course that would be your own mod id so let’s go into here let’s create a file this file needs to be the exact same Name as your item it cannot be any different so for me that was example underscore item and then it’s a dot json again json is everywhere okay and i’m just going to write this out however i will have a template for this in the description which will probably be this exact Template i’m writing right now um so textures you can write it out if you want i mean eventually if you make enough items you’ll probably just remember it off by heart like i do um but yeah i mean that’s just that’s just how it is there we go So this is what the item uh will look like now i should mention if you want it to be uh shown in the hand like a sword or a tool or a stick for example you change this generated here to handheld and that will make it look like it’s Held in the hand like a sword or a stick or pickaxe or whatever uh but obviously for most items you just want to use generated since that’s like the the normal um display so right here would be your mod id so that’s tutorial mod and then items which Is where the texture will be and then example item is the name of our texture so let’s go ahead and save that and let’s come out of here let’s create another package which will be for the textures and in here i’m just going to create two packages one for blocks and oh And one for items so obviously those are both plural and here you will just put your texture so really quickly i haven’t made a texture i’m just going to open paint.net obviously you don’t have to use paint.net you can use you can use photoshop you can use a sprite um There’s a bunch just don’t use ms paint and don’t use paint 3d since you cannot make you cannot have transparency on those which are not great obviously 16 by 16 is the normal texture size the good texture size i don’t know i i really don’t know what i’m trying to draw here so It’s just an example item and so i’m not really worried about what i’m drawing and okay there we go fantastic this is work of art so we will just want to go ahead and save this in our mod folder so mine was on the a drive and then 1.70 Tutorial mod source main resources uh assets tutorial mod textures items and this is the exact name of your item so example underscore item and there you go if we go back into here we just can hit refresh and there we go that is our texture and We can obviously open it in here it’s a bit weird because of how eclipse displays it but it is there so that’s actually that’s it that’s it we can go ahead and run the game now okay so as you can see i am now in the game don’t mind the lag my cpu Uh pretty bad um but if we now go into the miscellaneous tab we can see our example item and uh yeah look how beautiful it is it’s amazing um so yeah that’s pretty much it uh the next tutorial i’ll just be doing blocks very simple um so yeah i will I’ll see you guys in the next tutorial so obviously if you did enjoy please do be sure to smash your face into that like button and also go ahead and subscribe as well so yeah if you have any issues with this tutorial obviously make sure you join my discord server um I’m more likely to check that well i will see it and if it’s in the discord server if it’s in the comments i might not so yeah see you guys in the next tutorial good bye Video Information
This video, titled ‘1.17/1.18 Minecraft Forge Modding Tutorial – Items’, was uploaded by TurtyWurty on 2021-10-27 11:30:11. It has garnered 6095 views and 244 likes. The duration of the video is 00:16:34 or 994 seconds.
In this video, I cover how to add a simple item to Minecraft!
Join my Discord Server, to receive support with your modding related questions: https://discord.gg/jCTnnhxc7J My CurseForge where you can find my released mods: https://www.curseforge.com/members/realturtywurty
Item Model JSON: https://pastebin.com/2Sx4aEDT