
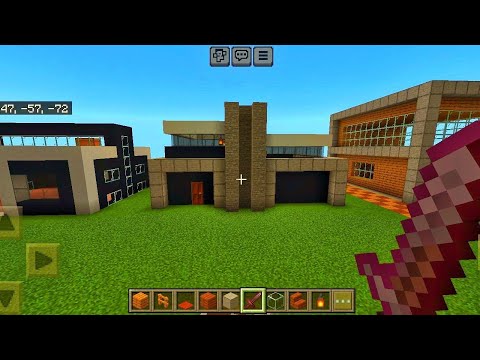
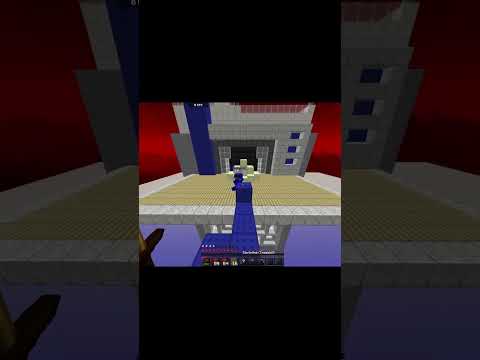
Hello everyone welcome to my newest speed build video today we are going to be looking at the process of building this arch island village it was so much fun to create i can’t wait to show you guys So to begin with our arch island we’re going to start off with some voxel cylinders i’m using voxel to create the entire shape of the island starting off with stacking cylinders to create a thicker base and then a thinner arch going over the top and then i’m going to Be smoothing that out by using the voxel erode brushes and then eventually blending it all together with the blend ball brush once i’m happy with my shape i try not to smooth it out too much to leave some nice rough corners then i go through with go paint go paint is a wonderful Plugin that allows you to easily paint the terrain if you’re interested in seeing how this works i have a tutorial i’ll link it below once my lovely colors are all in place it’s time to start thinking about structures the first thing i do is think about the structures that are going to Go on the very top of the arch they’re going to be sort of the main focus of this build meaning the centerpiece of the town i want to do two big towers these towers are going to be connected together with a bridge once i know the general shape Of my towers it’s time to work on my colors i’d end up changing the colors a lot which is easy because of the replace command but i end up settling on dark oak walls dark prismarine roof and prismarine accents with oak and spruce wood Once one tower is in i can then begin on the other the other one is going to be more of a cylinder so we have one square tower and one that is a cylinder the roof although they are both similar shapes they are completely different sizes and i think this gives a nice Variety to the structures then they are connected with a simple bridge and we’re still using that prismarine as a nice accent once that’s done i flip the sides of the bridge over and then i can begin marking out my village wireframing outhouses is something that saves you a lot of time In the building process because i already have my shapes in when i settle on my colors and the details that are gonna go on each house it’ll be super easy to get that all in place without me having to think too much about the shapes so i place each house exactly where i Want it and get the general pillars as well as the roof shape in with absolutely no detail then when i’m on the last house i begin not only wireframing but also detailing it i put in the prismarine roof first then the dark oak walls then i begin on the Details whether that is the oakwood wharf the prismarine accents or the windows and doorways i can then go through and do this on every single house whether they have a tower different shaped roofs different shaped walls it doesn’t matter it’s all going to be consistent and this is going to Make that so simple and easy for me as i go through and do each and every one although my details are super consistent there are differences in each and every house that make them look unique in their own way i really like building like this and i think it adds so so much To a build when you have those subtle consistencies next up it’s time to start detailing that final tower that we left out of the detail i decided that this would be a great place to put a windmill because of course it’s an archway in the middle of The ocean there must be lots of wind a big windmill would be the perfect place for this village to have power now that that’s in we can start on our trees trees are really something that brings a build to life i decide to do four different types of trees Two sort of oak inspired trees and then two evergreen trees all of these have different types of leaves some of them have flowers some of them have grass in them they’re all very different and i use a brush to scatter these all around my archway this really brings it to life I also add in some grass at this stage and then begin on my water i want to add some depth to my water so i have to move my whole build up and then just use some cylinders with air to add depth to that once that’s done we can just fill in the Water and then begin on the boats for the boats i’m going with a rather simple design for this one i’m only going to be building one of them and then i’m going to be pacing in the rest of the boats from other builds you’ll see the time lapse for the other boats Coming in the future consider this a little bit of a sneak peek anyways i hope you guys enjoyed watching my process of building this arch island it was so much fun i’m really happy to be able to build something like this it’s just such a peaceful scene i wish i could stay here Let me know what you think in the comments down below thanks so much for watching bye-bye You Video Information
This video, titled ‘Arch Island Village | Minecraft Build Timelapse [Speed Build]’, was uploaded by GeminiTay on 2018-08-11 14:18:52. It has garnered 68836 views and 2222 likes. The duration of the video is 00:04:45 or 285 seconds.
A beautiful island build, carved out by wind and waves, to form a fantastic arch! This village with its 2 towers, windmill power, and many ships sits precariously on the island’s cliffs.
This build was made in 3.5 hours. I used goPaint, voxelsniper and worldedit plugins to help me create it!
goPaint tutorial: https://youtu.be/RUp0mX50FIU Voxel & worldedit Island tutorial: https://youtu.be/2SJ4gEdEytQ
💚My discord server: https://discord.gg/qpPC2xN
⭐This build will be available for download on my patreon 🙂 https://www.patreon.com/GeminiTay
✨Follow me! Twitter: https://twitter.com/GeminiTayMC Insta: https://www.instagram.com/geminitay/ PMC: https://www.planetminecraft.com/membe…
🎵Music: Fresh Fallen Snow
🖌️Channel Art: Skin Renders: https://www.youtube.com/trazlynngames Channel Icon: https://twitter.com/demlyy
Recorded with Replaymod https://replaymod.com Minecraft version 1.12.2 Optifine 1.12.2 Shaders: Chocapics!


![🟢 EPIC SLIME BATTLE! "Not Giving In" - Minecraft MV [Exit From Darkness E26]](https://img.youtube.com/vi/dJ8vyNIsP_4/0.jpg)


![Arch Island Village | Minecraft Build Timelapse [Speed Build]](https://newsminecraft.com/wp-content/uploads/news/minecraft-news-top-8940.jpg)