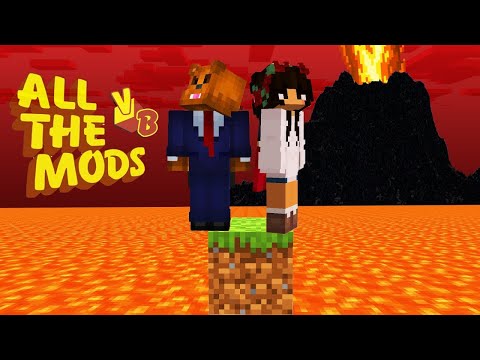
Hey everyone my name is Ash and in today’s Roblox studio devlog video we’re going to be continuing on with our Recreation of Minecraft in Roblox I’d like to thank you all for the appreciation of the first episode that came out two weeks ago and I love all The feedback and support I’ve been given now in this Roblox studio devlog video we’re going to be working on the biomes today and the character and mainly the optimization of our Minecraft terrain this video did take a lot of work to make so I would appreciate a like and a Subscribe and also comment your suggestions for what I should add next in this Roblox devlog because I’d love to hear what you’d want to see in this Minecraft game so the first thing we’re going to work on today is the optimization of our terrain I had quite A few of you commenting about the optimization of our Terrain in the last video and in our last Roblox Studio devlog we replicated the Minecraft terrain generation that was given by Henrik nyber and we’re going to be doing the same with the biomes here today however that terrain generation system That we replicated last episode definitely has its boundaries because it’s not the actual Minecraft code or source code there’s a lot of optimization problems within our Roblox Studio program now there’s a couple of methods that I researched in trying to make our Minecraft devlog world more optimal and there was a few comment Suggestions as well but first of all in this Minecraft devlog I try and replicate something called back face coloring now many of you might have heard this in different Dev Vlogs or in other optimization programs and sources to read about this will be in the description this method basically Determines whether a base can be seen by the user and if it can’t be seen it’ll be removed and not calculated graphically now we’re going to implement a very very dumbed down version but basically all we’re going to do is check whether the block is a Surface block or Not and if it’s not it will just delete the faces that we can’t see it’s also going to check if there’s a block next to it or underneath and any faces that we can remove we can remove but for this to work we need to have blocks that have Textures so what I first did in this Roblox devlog is I created a custom block which just used extras on its faces and those textures would be the block that it’s meant to be and as you can see here these are our textured blocks for a star now half of these Textures I don’t own and half of them I do and I made myself as we go through the Roblox devlog series I’m going to add more that are my own textures but for now I used a texture pack this will be linked in the description so you can Use it however as you can see the texture pack textures are really really blurry and this is because they’re not scaled properly the block that I’m using has a much higher resolution than the textures which means you get this blurry effect and I really hate it as you can See with these oars I’ve created my own custom walls in Photoshop and they do have the same color scheme as the Minecraft original textures but as you can see these textures are a lot more sharp and better to use so I’m definitely going to be swapping over Textures as I go through this series and through this episode whilst recreating Minecraft in Roblox Studio but now we have textures we can actually remove and add faces when we want now for this example I’m going to show you a small example before I put it on the actual Terrain these redstone blocks here as you can see as I move the redstone blocks they move you can see that half the faces are missing where there is a block when there isn’t a block you can actually see the fate and all I’m doing here is checking the neighbors to see if It has one and removing the face between the two on both blocks and as a result you get this nice back face culling effect which a lot of you mentioned in the comments last video now as a result of this I tried to add this to the Terrain first what I first tried to do is create the terrain and then remove the faces and you can probably tell this probably caused a world of problems I mean look at this I don’t even know what’s going on here and then I try to Add it again but if you can see by the video the frame rate is awful I mean it just made it worse actually than using the usual blocks that we used in the last Roblox devlog so as a result I was trying to think of a way that I could Add the block and then remove the faces as I add the block and it was pretty straightforward actually so every time you create a new block class I would optimize the block inside the block class as soon as it spawned rather than going back and editing them all at the End of the terrain generation and as a result as you can see as I fly into the blocks you can see that the correct bases have been removed which does optimize the terrain a little bit now in the code that I was using for this Roblox Studio terrain generation I was Checking for the surface height and creating a block underneath it until I reached that surface height however most of those locks would not be seen by the user and we only really need the surface so for our next optimization technique pretty straightforward all we’re going To do is remove the blocks that we can’t see completely so any block that’s underneath the surface won’t be seen what I did was I started by just painting on the surface of the terrain where the terrain has more than one height gap between each block there is Air and you can kind of just see onto the void it’s not something that we really wanted I just sat down for five minutes and I thought what’s a simple way that I could add any stone blocks in between to make it as if the Block’s Actually there and the way I do that is every time you add a block you check its neighbors see if the surface level of the neighbor is greater than two or greater than a certain threshold and if it is it will just go down until it reaches that surface level with stone Blocks and as you can see this is the result of that algorithm now I don’t know if anyone’s rated this somewhere else I didn’t find a source for this one I just thought of it over the top of my head but I do apologize if someone else has already created there however now None of the blocks below the surface are generated but the exposed stone that we couldn’t see before is now generating as well and at first it only worked by going upwards but then programmed into it made it go down as well as you can see this is the final result and this Does dramatically improve the performance from the last videos Roblox Studio terrain and I’m going to assume that Minecraft also used these techniques expert on a much more advanced level however we now are only generating our surface layer and in the next Minecraft Roblox Studio devlog you’ll see I’ll actually generate the Blocks underneath here when it comes to mining blocks and also placing blocks as well so now we’ve replicated Minecraft’s more optimized generation another thing I also did was added a hand and obviously in Minecraft you have a hand I am going to add the left hand side as Well but that’ll be in a future video when I do the inventory and I also added the Crosshair in the middle that Minecraft uses obviously when you highlight over blocks you’ll be able to select blocks or know where you’re mining so we need that obviously now we Need to replicate their biomes and of course biomes are a massive part of Minecraft they kind of Define the excitement in the terrain now to replicate Minecraft biome generation system we’re going to be using the work presented by Henrik nyberg or if I butcher that name who brilliantly explains Minecraft’s biome generation System and is going to help replicate their generation system in Roblox so again all credits to this guy so as Henrik States create our bios we’re going to use two more noise maps on top of his terrain generation the maps he uses are called temperature and humidity T and combining these with the erosion and continentalness Maps we’re able to determine what biome will go where in the world and as you can see by this Source you can see his table here and we are going to replicate this table in Roblox Studio depending on the erosion And continentalness value you will get a different type of BIOS as you see this can include Plateau Biomes Middle biomes Peak biome and the values of the noise maps from the last terrain generation video determine what band we’re in or index as Henrik calls it and what biome We should place at that particular point now if you want to learn more about noise generation map such as the one we’re going to use to create temperature and humidity in this Roblox Studio devlog I’ve put a source in the description that really well explains noise and how you can create your own Custom noise generation program kind of gives you a deep Insight in the maths behind it so Henrik shows us the table for the middle bio as you can see this includes deserts Lanes forests flower forests all different type of biomes that are in Minecraft and he uses the humidity and temperature value to Determine the biome that we’re in at that particular position now replicating this in Roblox Studio you can see here that I’ve changed the grass color of my texture depending on what biome we’re in and I have each biome stored in a basic table that has all the information that You could need on the bio you can see here that as we move around the world the biomes change gradually and quite realistically might I add a snowy more tundry biomes are close together whereas the sand Savannah and forest biomes are all close together as well and what you Can see on the screen is only programmed the middle biome which is the one that Henrik shows I’m also going to program the rest of them like the snowy mountains the jungle and that is the genius thing about Minecraft’s biome generation it’s almost like if you’re in A hot climate you’re near a desert at Savannah but in a cold area you’re near Tundra and snowy Plains it is quite cool now at the moment these biomes are looking a bit plain and we’re going to move away from henrik’s sauce now and we’re going to work on the surface layer Now the surface layering includes stuff like grass trees flowers everything you can think of that you’d find on the surface in a Minecraft world to start off with this section of the Minecraft devlog in Roblox Studio I use Photoshop to create some custom grass textures and some custom flower textures which you Can see here in the Roblox Studio saying now for the desert I also created a cactus here as you can see and I created a custom Cactus texture because the other one was really really grainy and I hated it and I also created a dead bush in Minecraft there’s obviously dead Bushes around the world and this is going to be our basic surface generation for now and between videos I’m gonna add the rest because it is long slow and painful to watch so for the first attempt at this I tried to add the surface generation using Randomness and Just math.random and this is all well and fine it works pretty well but there’s only about a thousand different problems with this is every time you load this on the same sea the trees grass and everything you try and place will all be in a different position now Instead of doing this I used another noise function similar to the temperature and humidity ones that we used previously with different parameters and this did spawn everything very nicely as you can see in the sand biome we have the dead bushes and in the forest biome we have the daisies the Roses or the poppies The Tall Grass the short grass in Savannah biomes we have the Savannah grass now I wanted to add trees because the most important thing in Minecraft obviously is to get wood at start of the day so in this Roblox devlord we have to add trees so all I Wanted to do was create a function that would allow you to give it a surface level and it would just spawn the tree and it was pretty straightforward I did create custom textures for the trees however the leaves I am going to change because they look horrid and I also Created a function where you could spawn a certain amount of leaves around a certain point or long so if I wanted a two by two area of leaves I could pick a log and say I want a two by two area there or I want a one by one there and This allowed me to generate these trees that you can see as I’m walking around the different biomes now they’re certainly not finished and complete or finalized and the first issue I came across with the trees it made the logs invisible because they’re translucent you’re meant to see the logs through the Leaves so I had to add a value that said okay this block is translucent so don’t remove the base of the wood behind it as you can see this did fix the issue another optimization issue I was having was with the grass as you can see as I Look around the world the grass had this awful stutter it makes you want to Blind your eyes out it’s that bad but I did fix this after tinkering around with the values inside the properties tab however we have replicated most of it now now in Roblox studio now by the time you see The next video I’m gonna have the jungle biome the oceans all the different biomes compiled together and ready to go you’ll be able to see all the different biomes in the next video so subscribe to see that furthermore in the next video we’re going to be working on chunk Loading so that we can walk around our world infinitely and also the block breaking the inventory and the hot bar however that will be in the next Roblox studio devlog video that is going to be it for today’s updates on our Roblox Studio devlog of course all sources to Everything I’ve used today will be in the description so you can create this yourself remember I am just replicating Minecraft none of the ideas are mine I have a comment of the day today is from this guy’s name is the Dank developer he said great explanation really looking Forward to this devlog as well as the Pirate game pirate game’s still coming guys I promise I promise but thanks for your comment if you want to see your comment in the next video obviously comment something down below also if you want this series to continue leave a Like on the video just so I know that you want to see another episode I do appreciate each and every one of you for watching I’ll see you in my next video hopefully again let me know your suggestions on what I should add in the next video and also any suggestions for Performance boost please do do let me know in the comments there is still a little bit of lag about the game and I would like to remove that so it’s actually a fully playable game anyways thanks for watching I’ll see you in the next Roblox studio devlog video Video Information
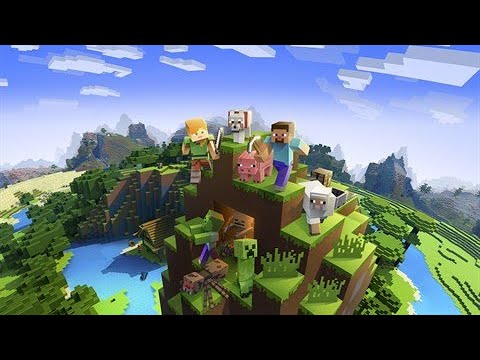
This video, titled ‘Creating MINECRAFT BIOMES in ROBLOX – Roblox Studio DEVLOG 2’, was uploaded by AshRBX on 2023-07-25 18:18:55. It has garnered 6499 views and 376 likes. The duration of the video is 00:11:09 or 669 seconds.
In this roblox studio devlog series, I will try and recreate the popular game minecraft in roblox studio and teach you the details on how minecraft works. The devlog project will span over many episodes as there are many details I want to include in this roblox studio devlog series. The devlog project will span over many areas of roblox studio including roblox studio terrain generation, roblox studio perlin noise, roblox studio cave generation, structure generation, custom characters in roblox studio and many more aspects which will come in later episodes of the roblox devlog series. Be sure to leave suggestions on what to add in the next roblox devlog episode. In this roblox studio devlog episode, we focus on recreating minecraft biomes in roblox studio and optimising the terrain generation algorithm we used in roblox studio.
JOIN THE DISCORD TO KEEP UP TO DATE WITH THE DEVLOG: https://discord.gg/dA7BykQErJ
Sources used for today’s roblox studio devlog:
The lecture by Henrik Kniberg containing the mathematics behind the biome generation: https://www.youtube.com/watch?v=ob3VwY4JyzE&t=1963s
A Source explaining back face culling in more detail which is used in todays devlog episode: https://www.bing.com/ck/a?!&&p=d11c52000a3118a5JmltdHM9MTY5MDI0MzIwMCZpZ3VpZD0wMTBlMmY2OC1jMDliLTY0NDEtMzhjMy0zYzMxYzE1ZDY1YTEmaW5zaWQ9NTIwOQ&ptn=3&hsh=3&fclid=010e2f68-c09b-6441-38c3-3c31c15d65a1&psq=back+face+cullin&u=a1aHR0cHM6Ly9lbi53aWtpcGVkaWEub3JnL3dpa2kvQmFjay1mYWNlX2N1bGxpbmc&ntb=1
The source that explains the maths behind the custom perlin noise generation used to create the roblox studio biomes: https://catlikecoding.com/unity/tutorials/pseudorandom-noise/perlin-noise/
Minecraft Texture pack used: https://www.minecrafttexturepacks.com/simplecraft/
Roblox studio devlog timestamps: 0:00 Introduction 0:13 Plan for this roblox studio devlog 0:31 Terrain optimisation in roblox studio 1:11 Back face Culling in roblox studio 1:45 Custom Minecraft Block in Roblox studio 2:38 Back Face Culling in Roblox studio 3:43 More terrain Optimisation in Roblox Studio 5:16 Adding a hand to our Roblox studio game. 5:31 Adding Biomes into our Roblox studio devlog 6:30 Custom Perlin noise generation in roblox studio 6:44 Choosing biomes in the Roblox studio code 7:43 Terrain Surface layering in Roblox studio 8:58 Adding Trees into the Roblox Studio Minecraft game 9:47 Bug fixes in our Roblox game. 10:08 In the next Roblox studio devlog 10:21 Conculsion to this Roblox Devlog