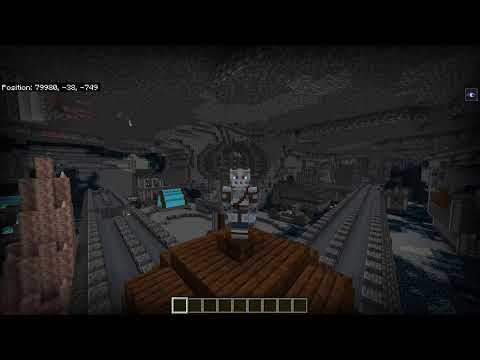
To all the geeks are nerds out there today I’d like to talk about iron farms in 1.16 there’s been some changes and I think it’s about time I went through all the details to show you exactly how iron forms work how you can control iron golem spawning and all that all the Requirements there are for the villagers alright so let’s get into this we’ve got three different designs to show you and of course I’ve got a wide range of demos set up to show you exactly how this stuff works we’ve probably start talking about how I got um spawn and how iron farms work Here is the first of three designs we’re going to talk about today this is a tower that has ten modules each module has three villagers and there’s a spawning platform for the golems to spawn we also have some zombies that cycle through the middle to scare the Villagers and create the golems all the items fall down a central chute and go into the item sorter underneath where we separate the poppies from the iron the poppy goats probably go into this composter for bone meal and all of the all of the iron ends up in these chests And this design here is going to produce just over 25 stacks of iron per hour now that is pretty good but not as good as the other two designs because this one is in fact the least efficient of the three designs we’ve got to show you Today the next one is over here here is the second design and this one is super simple there’s hardly any blocks required there’s only eight pods of villagers and this one is almost twice as efficient as the first design this one will produce just over forty six stacks of iron per Hour we have a pillager in the center bobbing up and down scaring the villagers around them and each of these villager pods have their own spawning platform the iron golems spawn in the water and then get flushed down into the killing chamber underneath and killed with lava and here is the third design This is super simple super small and this could be the most efficient iron farm in 1.16 well we’ll go over the details later to show you and see what you think but this one will produce over 50 stacks of iron per hour and there are eight pods over in the nether we’ll show You that a bit later on but before we do that we’ve got a whole bunch of stuff set up over here to explain exactly how iron farms work exactly what controls the iron golem spawning and all the things you need to know to build your very own iron farm A bit later in the video we will return to our own farms and explain exactly how they work but for that to make sense I want to go through a few details about how iron phones work how we can spawn some golems and what the rules are and Yeah basically what you need to do so if there start off with the basics so what do we need well we need three villagers and they don’t need to have a work station or a profession but they do need to have slept in the last 20 minutes on Top of that they need to be scared by some mob in this case we’ve got our friend Bob Bob the mob he’s gonna scare these villagers so if we let them see each other they will get scared they will wonder what to do and they will talk to each other and then shortly Afterwards they will spawn a friend to defend themself there is and you can see that he is pretty cross with Bob Bob is not very popular and that is what we need to do to spawn a golem now when we talk about our villagers they need to be Within a certain range to count as being buddies and that range is this this this big square which is 10 blocks away from the from the villager that wants to spawn the golem so as long as all of those conditions are met then then the iron golem will spawn of course we need To take off the platform and kill him but that is the basics and quite how it how it works but there is a few more details than that so let’s get on with the next bit the Sun is going down and that means that villagers want to sleep Now the important thing here with I farms is you can’t constantly scare villagers because if you do they will not sleep and that means that eventually the Gaian golems will no longer spawn so what we’ve got here it’s got a couple of setup so you can do to break the line of Sight between the mob that scares the villager and the village of themself and that means that they will be able to hop into bed and that will just count as sleeping so as you can see these villagers here they trying to sleep they jump in and that counts that’s all we Need to do that’s good enough they don’t need to stay in bed for very long and likewise over here but now let’s set up with a zombie in some water and we got these villages that are jumping in and out of bed that again counts so over Here with this world we’ve got we’ve got our friend Bob again the bobbing up and down in the water and to do this we just have to copper walls some water source here flowing this way and then with a mob inside this tube and they would jump Up and down breaking them on the site on their own no complicated redstone or rails required and that’s it yeah that works so here we go we can see the columns that are spawning on top so that’s the important thing to know is to make sure you’re not constantly scaring Your villagers and you need to break the line of sight to allow them to sleep next up let’s talk about this gruesome lot these are the mobs that can scare a villager and force them to spawn and they have some some different notes and different characteristics so first Of all these three here the zombie the husk and the Drowned they have a skill range of eight blocks so if you’re going to use one of these mobs then there needs to be pretty close to the villages for them to be scared obviously they’ve Got their own pros and cons you need to make sure that your zombie doesn’t burn up and die and of course every sin waltz or too long it will turn into a drowned husks I won’t work won’t burn in the Sun and obviously drowns have some different mechanics when they’re into inside water Sometimes they float sometimes they seek depending on the time of day so some different options there but make sure you take care of the scale range that is very important then the next book over here is the Vindicator this one has a bigger scale range of 10 blocks but this one of Course is a little harder to get in survival so that’s something to consider over here we have the ravager and the Avoca they have a 12-block range again pretty difficult to get in survival not impossible of course but yeah definitely more interested in that should we say And over here we have probably the most interesting one actually that I like to use this is a pillager and it has the longest range the longest scale range of 15 blocks so you can put this this put this guy in the center and have your villagers quite spread out Around him which might make sense for the ranges we’ll talk about shortly now one of the things about a pillager is that it when it spawns in survival it comes with a crossbow and that of course is a range weapon and if you’re not careful it will shoot your villagers and Kill them but you can in fact pacify a pillager I’ll show you how to do that a bit later on but so there is a way to do that and that means this mob can be super useful indeed next up I’m running two experiments to work out how far away Golems spawn from the villagers so over here we have a big spawning platform above some villagers and a zombie they are just underneath and also we have some command blocks and what they are doing is they are detected whenever a golem spawns they’ll delete in the Golem And place in the goal block on the floor so we can see exactly how far away the golem spawned from the villagers now I’m currently speeding up the game using Copic mod so that will give us some results a bit quicker and over here we have a very similar setup but instead of A flat plain we have all of these different platforms of different levels so hopefully from this we can work out how high above and below goal and spawn in relation to the villagers the experiment have been running for quite some time and I think we’ve got some Results now as you can see from the shape it is a square so gone as will spawn in a square around the villagers but it’s a lopsided square if we look above we can see here the ceilings and that’s where the villagers are directly under that Look but that is not in the center and I’ve actually counted out the blocks and put down these signs so if we are facing north so look in that way which is north is eight blocks away so the villagers are here and then we can count out one Two three four five six seven eight but on the south direction I go the opposite way it’s only seven so one two three four five six seven and that is the same for the Western east so West is eight and the East is seven and in terms of The height the golems will spawn six blocks above and six blocks below the villages so here we have our villagers and they are standing on the seat Lantern let’s call that block zero and if we count up we can go one two three four five six but none above so the Sixth block above that is gold so yeah golems are spawning their six box above and also if we count downwards so obviously we’ve got block zero here and then we’ve got one two three four five and six back there so six blocks below yes so that is the size that Golems will spawn so what you could do now is if we take our measurements from the from the x and z plane and also the y plane you can draw this box so Gunners will spawn anywhere inside this inside this box including on top right here so Here is our villager that’s going to spawn the golem he’s right here and we’ve counted up six blocks of both and counted six blocks below so guns will be able to spawn on this block right here and of course anywhere inside this square and if we look up from the Buff you can see we have our lopsided a lopsided square so this is where you need to have your spawning platform for your golem anywhere inside this area now for forgot mr. spoon you don’t need a platform that big if you have a 5×5 area anywhere inside here that’s probably Good enough because that will capture 95% of the spawns because there are ten spawn attempts when this happens and that’s enough those 25 blocks are enough to capture most of the spawns so there we go that is where got a spawn in relation to a villager but what about if We run a block golems from spawning sometimes we have our ions inside buildings or or with some terrain nearby so I’ve been doing some testing with a whole bunch of blocks here and been using this platform we’ve had before to see what stops golems from spawning so Over here I’ve added some some blocks underneath so if a block has got green underneath it the green concrete that means that golems can spawn on that block so all of these blocks burns so glass slabs and obviously redstone components as well if you’ve got a slab here the Top-level slab that will allow the spawns all of these block the spawns including a torch on a block Collins would not spawn on top of that things like water would allow we’ve already seen that already larva or not and over here was interesting and these flowers stopped spoon so Gunners were not spoon On top of those blocks like was nether portals and they will however spawn on top of the trapdoors so watch out for that if you’re using that in your farm or so honey blocks block spawns which is good and the slime blocks would allow spawns in fact carpets are another block That is useful for blocking the spawns and I guess these other ones are pretty straightforward so it looks like you have to have a solid flat surface to allow golems to spawn and over here and one thing to mention is that things like portals and also these flowers golems Won’t spawn on this particular block but they will spawn in between even though their hitbox will Inc will encroach on the blocks next door so you could do this kind of thing you’ll see I’ve got a spawn in between them likewise here if you’ve got portals they won’t spawn on The net on the on the Obsidian but they will spawn here on the white concrete all right so there we go that is how you can block spawns for the golems in your world next up let’s talk about how close a golem has to be to your villagers for Them to not spawn any more golems and it is this area right here and this is the area you need to get your golems away from your villages as quickly as possible to get an efficient farm so over here we have this spawning platform and we’ve got this golem that spawns Let’s get rid of him for a moment and around it we’ve got all of these these golems and they are one block away from there from the range so if any of these columns move one block closer to the villagers then that will stop golems from spawning and the range is 16 blocks In all directions so let’s have a look so over here we have our villagers they are standing right there now if we count out this direction for 16 blocks we’ve got 1 2 3 all the way out to 16 so if the Golem was standing on this block Right here that would stop Morgana’s from spawning because this guy would be too close to the villagers they think they’re protected and so they won’t spawn anymore but it’s having him on the 17th block that means that he’s far enough away and they they want more more Friends there we go they’ve got another one spawns already so that is that is the the range but something interesting to take note because I tested this just to make sure everything was correct and you need to make sure you pay attention to where your villagers are going to be During the night because we’ve got this scenario here where they if a golem is on the 60 block that will stop more columns from spawning but if I put you on this seventeenth block at nighttime no golems were spawning and the reason for that is because during The day the the the villagers are on the central block but when they sleep one of them will go into this bed and his class has been inside the pillow end of the bed here this one that’s closest and so there that is where he would be and so Cause because that’s one block over that means we need to extend our range by one block as well and that is true for all direction so you can see over here at the scenario over that side and also over there because that is the directions where the were the beds that Beds were also above sixteen blocks so the golem on this block up here the seventeenth block he is safe that was in my testing and also underneath we need to make sure that the golems hitbox is outside of the range so if he was one block higher than this then he would he With that interfere and stop ganas was born and so he needs to be on the 20th block and that he’s counting down from the the block where the villagers feet is so the first block is the block they stand on the last thing to talk about Before we go back to our farms is how are we going to kill the golems because they are very difficult to kill at least quickly so the most common way is to use lava that is the quickest way to kill a golem you just drop him in and just make Sure you’ve got two gaps here because when the items come out of the golem when he when he really burns to death and you want to make sure they don’t get burnt in the lava so making sure you’ve got an air block then some signs and Then lover on top that makes sure your items are safe golems will not will not drown so don’t try to drown them in water that will not work they also do not suffer up fault damage so up there I’ve got a golem and if I press this button he’s gonna come crashing down Just to prove he won’t take any full damage at so but there are some ways okay he’s getting powered by this drowned we get onto that in a moment but one way you can kill them is through suffocation so that will take quite a long time but it will in fact kill them Eventually also with the Roses they’ll take damage from those you can kill them with rid of rope with the roses of course that will take a long time as well you can use mobs to kill them so here we’ve got some ranged mobs so let Me spawn in a golem over here let’s see so all of these guys will now hit this target it’s gone up and give him a hard time one thing to worry about here is that when he is red he’s actually invulnerable so if once one guy hits Them some of these other projectiles are going to bounce off of him because he’s invulnerable for that moment while he’s red now what could happen there is that those projectiles can bounce back and in fact hit these mobs so you need to be careful where you place them and also these are These these kind of arrows and stuff they have more entities in the world this can create like if you have too many of them so something to be aware of but so those mobs will kill will kill the columns you can also use an invoker As well so if I spawn a golem over here he gets these vexes it gets the vectors in the dirty work also the fangs will come out and kill the Golem that’s also a cool way to do it cuz that’s a range weapon but also won’t create other Entities apart from the effects of cause death the whether you go easy he’s taking damage already and another way another cool way is to use of ravager so that’s quite actually quite easy I mean you need to get a you need to capture a Ravager in survival But you basically to have him if I show or show some hitboxes you can see that the ravager is right up against that glass block there and then they say then there’s a an iron bar there so a block and a half the ravager can reach a block And a half and the the iron golem and this I can’t reach him back and so that is a cool way to kill golems as well we’re about to take a closer look our farms but before we do that let’s talk about efficiency and what we’re going to Do to compare the farms to work out which one is more efficient so basically the key thing here is to get the golems away from the villagers as quick as possible so they can spawn more golems because if they’re inside the detection range as we saw earlier they will not Spawn any golems so the longer they hang around the more the delay there is for the next golem so basically what happens here is that the villagers can spawn a golem every 30 seconds from the last time they’ve seen one inside their detection range and then it seems from our testing that There was in a five-second delay before the golem actually spawns and so what we can do now is knowing this knowing that golems can spawn a maximum of every 35 seconds we can do some calculations so there are 3,600 seconds in an hour so if we divide that by 35 that tells us How many columns can spawn maximum per hour and that is roughly 100 and 3 golems per hour now on average a golem will drop 4 iron ingots that’s because they drop anywhere between 3 & 5 so that means that there is a theoretical maximum of 411 iron per hour per pod of 3 villages so that is the that is the magic number 411 that we’ll be comparing so this is how you can compare any form design that you see so don’t just look at the high level numbers of how many drops you get out of the farm compare it To how many pods there are as well pods of villagers so and you could do this calculation so take the total number of fine that the farm produces divide it by the number of pods there are villages and that will give you this number and then that’s a good a good benchmark to Compare your farms so let’s take a look at these farms in a bit more detail and discuss their pros and cons because there’s always trade-offs with these things so it’s important to understand what they are now there will be up well download in the description so you can download this world for yourself You can try it all the testing and you can also get all the measurements and the build for all of these designs if you want to build them for yourself now you may well notice that there are some extra information above each of these villagers this is a feature of carpet Mod that I have enabled and again there’ll be a link in the description to that if you want to try it for yourself but basically our three parts there is a moon shape here if that is green that means the villager has slept in the last 20 minutes so meets that requirement This other symbol next to it if that is green it means the villager is scared they are in panic mode and the number next to it this is the number this is a countdown for when they can next spawn a golem based on the last time they have seen one so if it’s Rate that means they they can’t the cop spawn of golem just yet but when it gets down to zero it will turn green and that means they are ready to spawn the next column let’s review the numbers for this farm so we can compare it with the others so this this Farm will produce 1635 iron per hour on average which is 25 and a half stacks and that’s it that gives us an efficiency because there are 10 pods if we divide that number by 10 that gives us one hundred and sixty three point five iron per hour per pod now if you Remember from before our theoretical maximum is 411 per hour now that is a big difference so that tells you this farm is not so efficient but why is that well it basically comes down to how compact this farm is and how close the villagers are to the spawning pads so as You can see here the zombies just falling down here and looked at these villagers they have scared they’ve been scared and have spawned two golems above them on these pads and as you can see now their countdown clock starts to go down and it’s in fact he went back up Again so that is one inefficiency because the guns are staying here for a very long time and the countdown started but there had to restart again because the Gunners was still here still within range but their course those numbers are going down but what’s gonna happen now Is as you can see the golem the zombie shall I say has fallen down here spawn the next lot of golems now that is now in range again of these villages so their countdown has started again so again that is delaying the time that they can spawn a golem so that is the Main reason in that’s here having these that having these pads close together is one thing but also the golems hanging around on these platforms for a long time means that villagers can’t spawn golems quick enough I mean said that though you can see here that these villages their countdown is Almost at zero so fast approaching zero and very soon a zombie will fall down there he is so it’s pretty well timed but the zombie is there and he will look at them and very shortly they’ll spawn the golem and just above them any second now there you go two golems Are spawned directly there so in terms of efficiency and this kind of style we’ve got at times as probably as good as we can do but the whole point of this farm is not to be efficient and that’s something to think about is that the efficiency of a farm is not necessarily The be-all and end-all everything this still produces over 25 stacks of iron that is quite a lot so I’m probably enough for most players but what I wanted to do here was like a little bit different and show that you don’t have to do the standard design that everyone does you can be Inventive and trying to sound different especially with the zombies that go round in a in in a circle and kind of first cycle round to scare the villagers now how that works is we have we basically have a water column at the top here there we go he says I’ll be well Timed he comes on comes on here he’s pushed along and he falls down a glass tube lands in a cobweb that will hold him here for some time there is a gap here of two blocks so there’s plenty of time as he sinks down to see the Villages and scare them and we’ve put some trapdoors here that don’t have to be iron but trapdoors here just in case he tries to walk out but there’s not enough not enough gap for him to walk through so that is pretty cool now every go down to the very bottom so you just Replicate those layers all the way down all the way down to as many of those as you like and when you get to the bottom we have this kind of setup so we have two copper walls here with with a water source here flowing this way that’s when The when the when the zombie falls down he’ll be pushed this way and because because of copper wall is basically one and a half blocks he’s already at this height and then that will push him up onto the sole sound right here well then have a gap over here because what’s Happening here is we have a water source here that then flows this way that then pulls him into the water flow that goes up into the bubble column we’ve got some some gates here just to hold the water back they don’t have a hitbox so that Won’t stop him and in fact here comes another zombie this is well times so hopefully we could just see this happen he’ll go down here get pushed along no chance of getting stuck and he’s up again all the way to the top ready for the next round and in terms of item Collection here we have two golems burning there’s a piece of lava in the corner and there’s water flow that pushes the golems in there and as you can see here just underneath we’ve got some water flows as well so what’s the once the golems burn up they will drop Their drops in the water and they get pushed over into this central central conic column that goes down now there is a copper over here as well that is there to stop the sideways momentum so once that once the iron comes through here and drops it will Just drop straight down and that means we don’t have to build a full tube here now you could get away with not having cobwebs and just building a tube if you like but again I just wanted to do something a little bit different a little bit more interesting and that Cobweb is directly above this hopper right here that will take it into the sorting system where we can just this is a standard silty system to sort out the poppies and goes into the composter with the iron that’s trapped over here and now let’s take a look at Number two as you can see this is totally different or the all of the items here are spread out all the components are spread out and we have in the center we have a pillager jumping up and down on some water like we’ve seen before but first of all let’s talk about The pillager and how you getting pacified because when these guys spawn in survival they have a crossbow and they’re very dangerous they will shoot your villager so let’s talk about how you pacify them it’s very straightforward in fact what you need to do is get a villager over here this is The target villager get yourself a pillager and again opposite the the villager with a block and a slab on top and he will continually shoot the target but his arrows won’t make it they will get stuck in the slab and yeah eventually his crossbow will break and Then he’ll just be pacified he’ll still have you still have the 15 block scare range make sure you name him so it doesn’t despawn but yeah once he’s at once these crossbows broken we can then use me in a farm to scare off villages and spawn those golems before I show you How to build this farm let’s talk about some numbers so this farm will produce on average around two thousand nine hundred and eighty three iron per hour and that is four eight pods we’ve got full on this bottom layer and in four above as well so eight in total so if we Do our efficiency check it will give us approximately a three hundred and seventy two iron per hour per pod if we divide the the iron number there by eight that gives us that efficiency which if you remember from our previous maximum efficiency kind of calculation that’s pretty close to the 411 that’s Pretty good going and that is a total of forty six point six stacks of iron per hour so very good indeed and actually if you look at this thing it’s really simple there’s hardly any blocks here to put together it’s basically the the pillager in the center he’s standing on Two copper walls there’s a water source they’re flowing this way that means he Bob’s up and down and above who but just got some blocks here we’ve optionally got some Pistons so if you want to turn the farm off you just flip this lever and it brings down the glass breaking The line of sight and so no more golems will spawn at all so this is pretty simple and in fact just looking at this you can see we’ve got four pods around to the central pillager and then the spawning pads over here this is where the iron golems spawn get washed away Over to the side and down into the clinic area which is some water leading into some lava so pretty straightforward stuff now the downside of this of this farm the efficiency why is it lacking some efficiency well two things really first of all the golems here they spawn on this pad here They take quite some time to get off the pad so they they of the water pushes in this way so they get to here then they fall down so they are staying inside the range of these villages for a long time and so that their last scene countdown Clock is delayed because of that also the the the village is here on the second level they’ve got a secondary problem and that is the golems for the top four down here and actually pass through their detection range that we saw earlier again that could reset their Timers so that will also affects how often golems can spawn and I guess one other thing is if you look closely at the second second simple here it’s flashing between being scared and not and that is because obviously the the pillager here is jumping up and down we Need that because we need these guys to sleep but we’ve got a very simple mechanism here so there’s probably some improvements you could make to that as well to kind of kind of a sharpen up these numbers but what we do next is I’m going to lay down some blocks here to Show you exactly how far away all of these things are from each other so you can build this for yourself I’ve laid down some colored glass blocks so we can easily count the space in between all of these components and hopefully make it easy to build of Course there is the world download in the description you can get this for yourself and check it out in more detail but basically speaking we have the the pillager let’s start off with that where to place him first so you’ve seen how to build that already but how far off the Ground we need to be we only need to make sure we’re far enough away from the golems that are being killed so they don’t interfere with the with the farm and basically if you take the level where the golems are and count up 18 blocks so I’ve got it there 18 blocks All the way up to here and then your cup of walls here go on top of that so there’ll be the 19th block and that’s where the pillager goes in the centre and then we’ve got the four the four pods of villages around the outside they’re in a square or equal and the Pillager is dead in the center and these beds should be a total of 11 blocks apart so there’s 11 glass blocks here between the beds and also the pillager just to make sure it should be six blocks away so these coloured glass here there’s six of those between the Pillager and this block here that lines up with the pillow of the the bed over there so next up where do you put the sprawling platforms well they are they are a five by five insult of solid blocks with water on top fences around the outside and then some fence gates Underneath and on the side here to hold the water up and that should be a total of five blocks down here and then three blocks away from the beds just there so that’s where you position those pretty straightforward stuff and then to do the layer above you build the Whole thing again so the pillager the beds the for the for the for the villages and also the spawning platforms exactly the same the only thing you need to know is how far up to you to do it because you don’t want these villages detecting the golems that spawn here and That is if you put a block up here and put it on top of the the spawning platform and count upwards that is a total of 20 blocks all the way up to here and then you can put the plug the block here where the villagers stand and Then obviously this is where you build your next level now one interesting thing just to kind of just as a double check if you like is to make sure that the villagers in the in the in the corners don’t see the golems that spawn on the opposite corners over there and Over there and that’s to make sure we have to make sure that we’re out of range remember our range is 16 blocks and we have to account from the feet of the bed because the villager can’t occupy the pillo end so if we count these blocks right here All the way along they are 16 blocks which is the detection range up to here and if you look up here we’re right at the edge here just outside of the spawning pad of this so the villagers shouldn’t be able to see golems that are going to interfere with the numbers Let’s talk about design number three and this one is something kind of special so I’ve tried my best to make this as efficient as I could and interestingly we did the calculation over there but earlier about the max efficiency now I did that before I’ve done the Fine-tuning on this to try and get it as good as I could and it actually works out pretty well now I’ve been using carpet mod to track all of the all of the the numbers here so for all of the testing I’ve been doing I’ve been run Into Copic mod you can speed up the game using a tick warp command and I’ve been running this for just over seven hours and here are the numbers so I’ve written down on some signs but there is the the kind of evidence if you like that I’ve Been testing this stuff for real and not just leaving it for five minutes though so seven hours worth of testing and this this this version of the farm will produce 3281 iron per hour and there are eight pods over in the nether we’ll go and check out in a minute so that’s 50 1.3 stacks and in terms of efficiency check this out we’re only 0.9 of a inger away from max efficiency well as providing all our calculations there were were kind of right so look at this 410 point one iron per hour per pod so this is pretty efficient there’s Problems you can see that as probably a little bit ‘space there I’ve got an idea of what that might be but yeah let’s head on over to the – over to the nether and see how this thing works is this the most efficient iron farm in 1.16 it could be maybe I don’t know I think it’s pretty cool if it isn’t so yeah let’s take a look at this thing so as you can see it’s pretty straightforward it’s actually there’s not a lot of blocks here to worry about it’s pretty actually straightforward if We took this through so in the center we have a pillager as we’ve used before we don’t have water in the nether so we can’t use the bobbing up and down trick but we using some redstone instead but we’ll talk about that in a second we Have our usual four pods of villager all around all the way around the outside being scared by the pillager and above them their spawning platform again doesn’t have water but instead we have we have these portals and the golems could spawn on the on the white concrete And then as soon as they spawn they intersect with the portal and get teleported to the overworld immediately we also have these these spawning platforms all spread out by exactly the right amount of blocks so even if a golem spawns over there as close as possible to us there and this villager Over here checks for golems in the same tick it won’t see them because they’re too far away so we try to make this as optimized as possible so this is one layer here and of course we’ve got another layer down there if you want to create more iron you need more iron than Then these eight will produce then you just have to create more and more of these layers and yet to produce more iron so before we get into more detail about how to build this I wanted to have a quick talk about the efficiency okay okay so we did earlier you can see here These villages countdown started at 600 ticks and it’s going down to zero that would be 30 seconds and when it gets to zero it continues and it goes down to minus 100 which is an extra five seconds an extra 100 ticks and that’s when it Spawns of golems you saw it tick back up there and that was yeah that was a guns for noon so that’s where we’ve got the 35 seconds from and that’s what I used in our max calculation and that’s why why I’ve used it because I’ve seen it Here with these it happens with all of them all the villages all the pods they all go to minus 100 before they spawn the next column and so to build this what are the measurements you need well let’s start off with the pillager in the center we’ll talk about the Redstone Again in a second but he’s here in this little tube and if we count out for the blocks outside of this so these color blocks have laid down here we’ve got seven blocks of this at this color glass right here up to here and that lines up The seventh block there lines up with the pillow of the villagers over there now we’ve got our four villagers outside all the way around they’re all equally spaced around and they are they are thirteen blocks away from each other so that’s the glass blocks here I’m counting as 13 blocks in Between those and that’s the same all the way around so once you’ve got your beds in place and your village is in place let’s talk about the spawning platform so here we have we have five portals one two three four five and there are concrete blocks in between Them all and there is an extra level of concrete over this side but not on the inside if we had one there it would be too close to that village at those villages over there and so these portals are three blocks high and in terms of Width so the coloured glass here is 10 blocks why it’s a 10 block wide for your for your platforms so that gives us enough spawning platform and I’ve spawning spaces for the goddess to spawn and in terms of where it starts from the villages so they are here in this Position and you can see the the portals there that’s that that’s how you line them up with the villager so that should give you all of the correct spaces for the villagers and all the portals and if you want to build more layers so I’ve got another layer down here so we’ve got Our portals there’s a layer of glass above just to stop any spawns but if you do this and count these coloured glass blocks all the way up here there is in fact 20 of those the 20 spaces and that makes sure that any any golems are spawned down there and I think the Villages up here don’t see them so make sure everything is out of range so I think that I think that’s all of the all of the measurements you need now of course as I said before there’s a wealth download so you can definitely get this Down and have a look at it in more detail now the last thing to do is to talk about this redstone how we set it up and yet how it controls his pillager next up let’s talk about the pillager and this system underneath that it’s going to lower him which is going to Happen there it is pretty soon so he drops down and you can see all of the villagers sleep and he said he only drops down for a brief moment but that’s long enough for all of the villagers to sleep if it is nighttime and that still Works even if you’re in the nether so let’s see how this thing is built so we have to hoppers point it in to each other this is a classic copper clock and one of these hoppers is filled up with five stacks of items any items that Smoke what they are but five stacks in one hopper and then each of these hoppers on both sides is symmetrical so you have a comparator coming out of each of the hoppers that goes into a solid block with redstone dust on the top same on this side as well then we have two Pistons here next to the dust they are sticky pistons and then we have a don’t block just here so that is the hopper clock so that will fire roughly a little bit over every four minutes and then on top of that we have a pit we have an observer facing downwards Looking at this block right here and so when this moves that so that lights up this redstone dust which on top of the observer then we go into this into this repeater which is on the second-to-last setting just like that that goes into some redstone dust which is then into This de clay this de clay decay clock which will which requires that gradually decay down and so this is what um turns a touch off just that brief moment and then Rio nabel’s it again just for the right amount of time so hopefully that is enough to build the Clock underneath and don’t forget this piece of copper here that’s there to make sure that nothing spawns on top of that piston nothing else here is spawn a ball and of course you have to do that if you’re doing multiple layers you have to do for this this pillager here and Also this one down here but it’s not too complicated I think that’s pretty straightforward now looking at this it’s not actually that’s bad I don’t think so obviously if you need more iron then you need to create more of these more of these layers either on top of each other Or next to each other but let’s head on over to the overworld talk about the killing mechanism and also what we need to think about in terms of chunk loading here we are back in the sunny overworld and we can see our golems coming through the portal now the important thing is First of all is to make sure this portal is going to link up with all of the portals over in the nether so find the center point of all of the portals in in the nether depending on how many you make and then you need to make to do the Calculation and to get the position over here and to do that you need to do two times whatever the coordinates are in the nether with with eight and that will give you the x and z coordinates over here the what the y value you keep the same and that should give you some Coordinates and then you build this over here now the how this works is we have some water so you can see we’ve got water flowing this way and also water flowing this way now as you can see here most of the time what happens is the Golems will teleport in and spawn on the on the obsidian and because they’re they’re bigger than a single block the water over here intersects with the hitbox and they’re dragged out over here and then they drop down into the into the lava there again as before there’s The two gaps there’s a two gap here and so they’re their head is in the lava they die there’s some water underneath flowing this way into the center and this way into the center and then there’s some hoppers underneath gathering all of the items now behind The behind the portal we also have some more water here because sometimes and got an spawn and they’re slightly on this side so this water pushes them through there we saw one there and that pushes them that way and make sure they go all the way across And we also have to make sure that we have water just on this side here on this on this pillar because sometimes like that guy and they spawn inside this block and so we want to make sure we pull them out of the block and so they Don’t die of suffocation which is also possible so this is how the portal looks on this side you can see there that guy got pushed over here and then yeah we just pushed him back that way and he won’t go back through the portal because they have a cool-down for that kind of Thing so that is how that looks and that is how that works pretty straightforward the important thing now is though is to think about having things loaded so we’ve built that over in the nether and the idea there is that because it’s 1:16 we’re likely to spend a lot of time in The nether and so you may well have a nether base or sand some kind of nether operations let’s say so it’s probably but you know it’s definitely possible you could build that over in the nether the important thing now is to make sure that this is loaded over here so the way I’ve build it here this is actually in the spawn chunks of this world so this is constantly loaded all the time and that will yeah that will constantly kill the golem so this is definitely needs to be aware of because the golems may not come through here often enough to keep This area loaded there are all ways to do chunk loading through portals by spitting items through a portal often enough to keep it loaded but that’s outside the scope of this video there’s a there’s a few videos online go check out her ill man go he’s got a whole Bunch of videos about how to do that so that’s the important thing you could reverse it you could build the iron farm on the in the overworld and have the golems go through into the nether and same issue though you’re gonna have to make sure you load the nether side to Make sure they get killed and of course you don’t have water so you have to solve some of these problems in a different way but I felt this was probably the easiest alright so there we go three iron farms all working in slightly different ways or with different levels of efficiency and Trade-offs and I think one thing I’d like to say is don’t make efficiency the be-all and end-all of everything just because I’ve got some examples here I’ve got one example here that’s not very efficient I kind of pretty efficient for and pretty good for most players and Then I spend a lot of time optimizing this one to make it as efficient as possible but in the long run you know most players don’t need that much iron really so ya ever think about how much iron you actually need and they may be Creative I thought to issue a Oh issue a challenge so try and think up your own design I’ve given you all the information you need to understand how our iron golems work how iron farms work all of the data you need to know and don’t just optimize for efficiency Optimize for fun and some enjoyment and see if you can create something unique see if you can kill them maybe with some mobs we saw a whole bunch of different ways of killing golems over there so try experiment of how you’re going to kill the golems experiment with how your How your iron farm is going to look see if you can design up a whole bunch of it you know make it look really good but also make it work efficiently so there’s some extra challenges there so there we go before we finish up don’t forget there Is a well download in a description for you to try all this stuff out for yourself and yeah I’ll be super interested to see what you do and if you do create your own iron farm then send me a tweet send me a picture of what you’ve been up to I’ll be super Interested to see how that goes so I hope you found the video useful and I hope you liked it and if you did then please hit the like button and if you’re new then feel free to subscribe and for any comments or suggestions then get in that comment section or my geeks until Next time I will see you later Video Information
This video, titled ‘How To Build an Efficient Iron Farm Tutorial | Minecraft Java 1.16 (The Nether Update)’, was uploaded by LogicalGeekBoy on 2020-07-01 14:30:00. It has garnered 965649 views and 22609 likes. The duration of the video is 00:37:43 or 2263 seconds.
Iron farms in Minecraft 1.16 – The Nether Update (Java Edition) have changed. In this tutorial I show you 3 different iron farm designs, each with their own pros and cons. We also walk through all the details of how iron farms work so you can create your very own design. One of these iron farms could be the most efficient iron farm possible in 1.16. If you want a simple design that’s good enough for most players or would like to push the boundaries, I have the information and designs for you. Why not try to design your own iron farm and be as inventive as you can?
🚨 1.16.2 Update: 🚨
Iron Farm Update in 1.16.2: The designs shown in the tutorial still work fine in 1.16.2 but you may find that when the villagers wake up they just stand on their beds rather than going back to the normal block they all stand on. I’ve just tested it and it seems the easiest fix is to add a glass block above the pillow end of each bed leaving an air block between the bed and the glass. That makes that spot invalid for villagers when they wake up. The method I used was to block the line of sight of the mob that is scaring the villagers so they can sleep at night time. When they are all in their beds, add the blocks and when they wake up they all go to the normal spot. I’m also seeing reports of golems not going through the portals in 1.16.2. It seems there were some changes to portals and how they link in this version. I need to do some testing to see what the best fix for this is. Hope that helps. There are various bug reports about portal linking in 1.16.2 and so for now I’d advise not making the portal based farm.
★ World Download: https://bit.ly/logic-iron-farms ★ Carpet Mod: https://github.com/gnembon/fabric-carpet ★ Legacy SMP Playlist: https://www.youtube.com/playlist?list=PLcSOIxw2nIE23SBkrX29GnLqU1uNpero0 ★ Bedrock edition iron farms by @silentwisperer: https://youtu.be/wlJLOHOsy5E
Timestamps: Introduction: 0:00 Designs overview: 0:23 Golem spawning explanation: 2:10 Mobs that scare villagers: 4:12 Golems spawn range: 5:40 Blocks golems can spawn on: 8:21 Limit of spawning golems: 9:50 How to kill golems: 11:53 Iron farm efficiency calculations: 14:16 First design in detail: 15:49 Second design in detail: 20:55 Best design in detail: 26:28 Killing mechanism and chunk loading: 33:08
Thank you to @Agustín for the timestamps
If you enjoyed the video then please hit the like button and subscribe if you aren’t already! Welcome to the home of the geeks!
You can also find me on:
★ Website: https://logicalgeekboy.com ★ Patreon: https://patreon.com/logicalgeekboy ★ Discord: https://discord.io/logicalgeekboy ★ Twitch: https://twitch.tv/logicalgeekboy ★ Twitter: https://twitter.com/logicalgeekboy ★ Merch: https://teespring.com/logicalgeekboy ★ Search YT for #LegacySMP
Looking for awesome Minecraft server hosting? I’ve partnered with CubedHost to give you a special offer:
★ Affiliate link: https://www.cubedhost.com/logicalgeekboy ★ If you use the promotional code LOGICALGEEKBOY, you’ll get 25% off your first 3 months of service (first payment and first two renewals)!
Thanks
Logic
Music:
★ Stranger Danger by Francis Preve (via YouTube Audio Library)