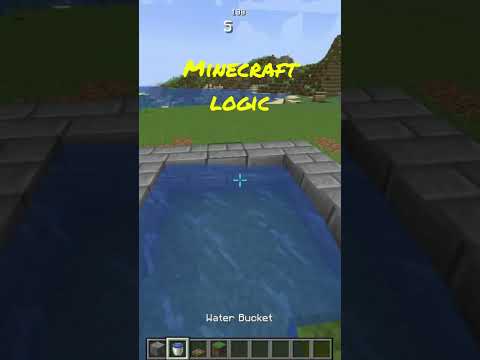
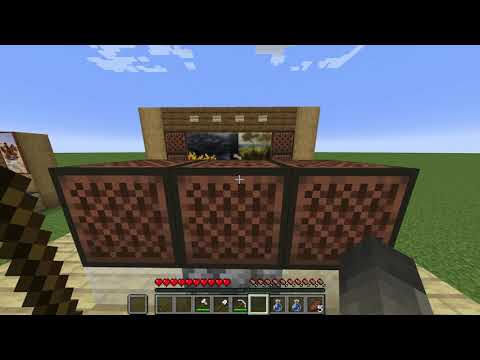
G’day everyone and welcome to my biggest tutorial yet the ultimate castle survival base let’s just compare the sheer size of this base to my previous biggest tutorial the ultimate survival base and as you can see this thing is absolutely massive if you decide to create this for yourself you’ll Be in for the long haul as there is over 8 000 blocks most of that being stolen stone bricks so without wasting any more time as this video is definitely long enough let’s start off the tour so you know exactly what you’re getting yourself into now before we get started looking at the Exterior i will just quickly say that even though this build is entirely in the water you can build this on land and the base that we will be making in the tutorial is made on land all that you need To worry about is that this front dock area is supposed to be in water so now let’s officially start off the tour by taking a look around the exterior just to see what the towers and the Walls look like and as you can see the walls on the exterior have these really nice pillars that extend all the way up from the bottom all the way up to the top of the walls here and we Have a pretty simplistic design across the entire exterior of the base there’s not too many details put into the towers and the walls themselves so you don’t really have to worry about doing that too much and as you can see the two front towers are the smallest they’re both identical on either Side and then as we go to the back right over here we have the exact same tower as the front two except it is extended up a little bit taller and then finally on the back left here we have The biggest tower with our bedroom enchanting area and all the stuff like that so that’s pretty much everything for the exterior of the base now let’s head inside to the inside exterior of the base i Don’t really know what to call it so arriving down at the dock you can of course head in here and you can turn left or you can turn right turning to the right will take us up at the front right tower and Heading to the left will take us up to the main base and the front left tower i will also just note we have some nice decorations down here as well you don’t actually have to use these As storage it just adds a little bit of life to the dock itself so let’s head up the stairs on the left side and before we get into the main base let’s just have a quick look inside the towers for The sake of the tutorial i decided to leave these towers all empty they are pretty small so they are kind of hard to fill up with stuff but feel free to put in anything that you like and then Up the top here we just have some random little decorations just to keep it looking nice above here now this tower over here and this one as well are both exactly the same so i won’t bother you With showing the interior of both of those so now let’s head back down and take a look at the main exterior area of the base so let’s turn around and heading in here we have a big fountain right in The center and we also have some farms surrounding it in these nice kind of intricate little shapes now in these farms i’ve got wheat and also some carrots you can of course put in whatever the hell You want we also have some extra farms over here as well just a little bit of melons and pumpkins then heading around this way we have a small little brewing station and beside that a little Netherwart farm now on the back wall the tallest section we have a bunch of storage in this section here beside that we have our main little crafting station beside that we have our ladder up to the Top of this wall here and then beside that in these last two sections here we have a bunch of furnaces and also a bunch of blast furnaces and smokers now turning to the left again to the Leftmost wall starting off we have our entrance to our big main tower and we’ll get to this tower in just a minute in this first section we have our toggleable nether portal i didn’t have a Lot of room to work with so we have just a pretty simple toggleable nether portal flicking the left side lever will ignite the portal and then flicking the right side will disable the portal by placing in some water now to the left of this we just have a little nice decorative section And then heading across the stairs here we have another storage area this one is kind of meant for all of the farm storage and then beside that we have a couple of composters again for the farm Next let’s go ahead and head up these stairs and just take a look at the top of the walls here as you can see this links up to another entrance into our big main tower and also another entrance in This tower over on the side we have the same thing we have an entrance there and also an entrance here and then if you were to head up this ladder as well you would lead up to the top of this wall Which has another entrance into the big main tower and another entrance into the taller little tower over here so let’s actually head back down here and we’ll start off at the very bottom of the big main tower heading through the front door on the first floor we have a little bit of storage We’ve got our furnace wall as well and also a little bit of crafting in here heading downstairs we don’t actually fill this in in the tutorial but down here is a basement that you can add in whatever the hell you want heading up past the floor we were just on let’s go Up again and this floor is our main storage area with a little bit of extra crafting as well and some nice decorations on this floor it also leads out to the top wall over here and also this wall As well now let’s head up the ladder once again to this floor and this is our bedroom floor up here we have a little bit of personal storage just for some cool items that you want to keep In here we also have this nice grand bed with three beds in total and some nice decorations with some armor stands as well now let’s head up to the next floor this one being the final floor and our enchanting area now this enchanting table of course reaches a full level 30. i Don’t want to see any damn comments about it not reaching level 30. on the left and right side here we have some convenient barrels for any lapis or any other items you want to store for enchanting and then over here we have a little bit of decoration with some leaves and some lectins And then heading up again brings us to the very top of the tower and so that pretty much concludes the tour now if you decide to go ahead and create this thing for yourself just know it Is going to take quite a lot of time and a lot of resources you have been warned and so if you want to continue with building this stick around and we’ll get started on the tutorial right now of course you’re gonna have to find a pretty big flat open area with some Water in front of it or you can build this in the ocean let’s start off by creating the outline for the front left tower be sure to place this as close as you can to the water next let’s create the outline for the staircase and also all of the pillars for the dock Also all of the gaps in between these pillars here are three blocks in total next up it’s time to create the outline for the front right tower and this is also exactly the same as the first front left tower that we made Next it’s only creating the outline for the front left wall this is 21 blocks long in total and we’re also going to be adding in some polished undecided pillars in front of them also i’m not sure why there’s so many sheep in this area and why i didn’t get rid of them So i’m sorry about that also all of the gaps between these pillars are of course one block now it’s on to the outline for the back right tower this one again being exactly the same as the other two that we’ve created Next is under creating the back wall design this one being exactly the same as the wall we just created except a little bit shorter coming in at 19 blocks in total next it’s on to the big boy the back left tower which is also the main tower of the entire base Now the shape for this is very similar to the other ones except it is just bigger next to santo finishing up the outline by creating a wall in between this big tower outline we just created and the first tower Next is on to actually creating a tower out of the front left outline and to do that we’re going to be first extending up the stone bricks and the polished andesite blocks now to create the final corner of the tower we’re going to create a little small area of The main platform of the base this is on the third block up from the ground so just create a little square out of stone that allows us to place in the final corner outline for the tower and now it’s time to extend the tower up to its full height which is 15 blocks tall in total including the blocks that we’ve already placed and then once you’ve extended up all of the stone and polished andesite go ahead and extend up the stripped spruce wood as well now it’s time to add in the window design in between all of the stripped spruce wood Blocks and this is really easy to do it is just a repeating pattern of spruce stairs a spruce fence and then some more spruce stairs and then once we reach the top here just add in two more stripped Spruce blocks and then go ahead and repeat this exact same thing on the other out facing side then for the side that’s facing towards the dock we’re gonna add in a door first and above that an upside down spruce stair block and then we’re just going to continue repeating that same window Design until we reach the top now with all of that done it’s time to start working on the top part of the tower and to start off we’re going to place two stone brick blocks here in between those are stone slab and then some lanterns underneath each of the stone bricks Next let’s add in some polished andesite blocks on each corner of the top of the tower these are all going to be two blocks tall in total and extend one block past the top of the tower next we’re going to connect up each corner with a Repeating pattern of slabs and also polished underside stairs also go ahead and add in the stone bricks as well just to fix up the design and then go ahead and repeat that exact same design in between each of the corners uh Next go ahead and fill up this inner ring with some more stripped spruce wood blocks be sure to fill in the corners as well then go ahead and cover up the entirety of the middle section except for the back Right corner and in this spot here we’re going to place a trapdoor this is where our ladder is going to lead up to of course next go ahead and randomly place in some barrels chests composters and lanterns just for a little bit of decoration up here And with that the front left tower is all done now it’s time to do pretty much the exact same thing on the other side uh do next it is time to once again repeat the exact same tower on the back right side Except this time this one is extended up to 21 blocks tall do next this onto the big back left tower this one is only a little bit taller than the one we just created coming in at 23 blocks tall now this one is pretty Much exactly the same as the other towers except it’s just a bigger version there’s a little bit of difference with the windows as well so be sure to pay attention to that so so Now the top for this one is also different from the other ones in that it is just a little bit bigger so instead of extending the corners up by two we’re going to extend them up by three and then go ahead and connect them all up by Using some polished andesite blocks right down the middle and then add in a similar repeating pattern of slabs and stairs and now on the inside and the top we’re going to place some stone bricks in each corner and then we’re going to connect them up with some stone slabs Then go ahead and cover in the giant hole with some spruce slabs and also leave in a little gap one block away from the left side wall and this is of course going to be for the ladder Next it’s on to the walls we’re going to be raising up all of the stone here to seven blocks high in total along with the front pillars as well and then in between each of these pillars we’re going to place in two stone slabs Next on top of all of the main pillars we’re going to add in a repeating pattern of polished underside stairs and polished underside blocks and then go ahead and extend the top of the wall inwards towards the base by two blocks so that we have a three block wide pathway on top Next it’s time to repeat this exact same thing on the right side wall next it’s time to do the exact same thing for the back wall except this one’s going to be nine blocks high also with this one go ahead and extend the front pillars one block past the top of the wall And then for this one for the pathway we’re going to extend it out by four blocks towards the base to create a five block wide pathway next it’s time to fill in the main platform for the base with some stone Also the front of the platform is in line with the stone bricks on the front two towers all right so now that’s all of the main big kind of things all done for the build now the next thing you want to do after you’ve built this platform is go underneath and quickly Place in some torches before mobs start spawning so let’s just go ahead and place in a bunch of torches around the place and you’ll probably want to be keeping these here forever unless if you’re Planning on using the space down here which we don’t use in this build alright so what we can go ahead and build next is the staircase up seeing as we can’t really get back up to the main platform At the moment so what we’re going to do is find this little pillar outline that we created here and we’re going to build this up by an additional three blocks just so it’s sticking one above the Main platform and then if your platform sticks out here like it does with mine then you’re all good but if it doesn’t you’re just going to want to kind of extend it two blocks away from the edge of This area right here bring it out two blocks like this and i’m gonna place three stone brick stairs like this and we’re also going to place a stone block here this is also one block to the right or To the back of this pillar that we just created as well and now let’s just extend the staircase all the way down to the ground now on the other side of the staircase we’re going to make another Polished andesite pillar just like this in the exact same place just on the opposite side now let’s head back down and on this area right here we’re going to fill this all in with stone and then we’re going to place some stone brick stairs just like this across this area right Here and then let’s go back up again i’m going to place a spruce fence in the center and then some spruce fence gates on either side now let’s do this same thing over here and we’re going to Repeat it all the way down to the end so let’s place in some more polished andesite pillars these are all going to be spaced three blocks apart so let’s just go ahead and place all of the outlining blocks like this and it should line up perfectly like that if it doesn’t then I’m sorry and now let’s go ahead and extend these all up so they’re one block past the platform here and next let’s add in the stone brick stairs these are all going to be on the same level as the platform And now the last thing to do is add in our fence design that we just made over here and there we go that’s it for the railing here except we do have to fill in this little area to Do that we’re just going to place in some stone on the layer to the back of these like pillars here and then for this center one we’re going to actually push it one block back as we’re going To have some blocks in here just to keep it looking kind of cool and then to the right of this we’re gonna bring it back to the normal kind of layer that it was at now with that done We can go ahead and add in the actual rest of the dock design and to do that what we’re gonna do is go to this pillar here and i’m going to go one across and then in this section right here is Where we’re going to be extending it out and to do that what we’re going to do is extend it out by two pillars in total and these are all going to be spaced apart by three so one two three place Another strip like this and then one two three and place another one and then one two three place another one and then we’re going to place another one right here next what we’re going to Do is replace all of the ground connecting these stairs to this door and also out to this way with some spruce slabs so let’s go ahead and remove all the grass connecting these two areas right here and then next let’s place in all of our slabs we’ll also be replacing these blocks in Here as well with some spruce slab sorry i kind of forgot about these okay and with that done now let’s extend these slabs all the way out to the end over here and then it’s up to you if you want to leave it flat across here you can if you want to extend It out by a few blocks and make it look kind of staggered or something like that you can looks kind of cool like this actually that might be a little bit too long yeah just leave it like That it looks kind of cool yeah okay and next what we’re going to do is decorate the tops of all of these and to start them off we’re going to place some lanterns on these ones over here and then every other one is going to have a slab and then lanterns and Then a slab hopefully that made sense if not just place them in this orientation alright and with that done now let’s go ahead and connect up all of the pillars with some spruce fence gates all right and the dock is almost done now we’re just going to add in some decorative blocks In these little areas under here so to start off we’re going to head over to this side the staircase side and to the right of the staircase let’s place a barrel on top of that a chest and then over on this side we can place another barrel don’t worry too much about following This exactly you can just place these however you want it’s not too like you don’t have to be too specific about it but in this one here let’s place a barrel and then a chest then in This section let’s place a facing up barrel then a facing outwards barrel a chest then we’re gonna place an extinguished campfire like this and then beside it let’s place a couple of candles and ignite them with a flint and steel then into the next section let’s place another chest And to the right of that a composter and then in the last section let’s place in a bunch of barrels two facing up and then one above facing outwards and now that’s it for the entire dock area feel Free to add in any other decorations that you would like something that i actually do want to do is extend these pillars down like this it just kind of makes it look a bit nicer and also feel Free to extend these into the water if you have like the water kind of like how i do feel free to extend these down into the water it will make them look a little bit nicer or will just quickly Do that now just to show you how it looks yeah it just makes it look kind of more like that it’s actually built into the area and not just kind of hovering on top of the dirt i guess but it is Of course optional okay so before we move back on to the main platform let’s go ahead and actually take our attention to these three smaller towers not the big back one yet and what we’re going to Be doing is actually placing in all of the floors i’m not going to be decorating these towers just for the sake of the video but feel free to add in whatever you like in here it is pretty small So it is kind of hard to add things in here so starting off with the front right tower let’s go ahead and place the floor in we’re going to place in some stone blocks on the bottom like this And then we’re going to find where we added our trap door in this one is on the back right side so what we’re going to do is place in a ladder extending all the way up to the top All right now with that done let’s head back down to the bottom and we’re going to place in all of our floors and to do this it’s pretty much going to always be on this block here so we’re going to go one block above the fence and then on the Top half of this block above the fence if that makes sense and then let’s place in all of these slabs like this and then we’re pretty much just gonna repeat this going all the way up there we go once you reach the top you should have another final floor like this without any Windows and then you’ll be reaching the top of the tower here now we can do a pretty sick 360 jump into the water and head over to the other tower on the opposite side all right so because This one has a area that extends down here what we can do is extend these stone blocks down do the same on this side as well of course and then let’s replace the ground again with stone And now we’re going to find where our ladder is extend our ladder all the way up to the trapdoor then let’s head back down and add in all of our floor layers so we’re gonna do the same Thing like we did in the other tower place them on the top half of this block above the fence and then once again once you reach the top you should have this area like this and then it leads Back up to the top of the tower now we can jump off do another suite 360 and let’s just take a shortcut through this offense gate and head over to this tower over here all right so heading under Here we’re actually going to add in our little secret entrance down here just because we can’t really get up to this wall at the moment unless if we go through this tower but screw that so Let’s add in our secret area and to do that let’s extend these stone bricks out to the right by one and then we’re also going to fill in this area here with some stone as well and now what we’re Going to do is just place in our door right here and then let’s extend these strip spruce wood blocks all the way down to the door and then let’s also add in some more stone bricks like this Now heading through the door let’s do once again the same thing but this time we do have a gap here so let’s quickly fill that in and now yeah let’s just do the same thing we did with that Tower over there let’s extend the stone blocks down to the ground replace the ground with stone and then find where the ladder goes right here extend this all the way up let’s head back down and add in all of our floors all right and once again you should have this section right here And then it leads straight back up to the top this one is a bit taller so you have to add i think one or two extra floors in but yeah and unfortunately we can’t do a sweet 360 dive into the water here Unless if you decided to build this castle in the water so let’s just head back down the uncool way all right moving on let’s create the inside of all of the walls here and we’re going to start off on The left side the side that connects the front left tower to the big tower on the back left so let’s head over and let’s first add in our pillars these are kind of going to mirror the pillars on These sides over here and to do that we’re going to do is use our same rule that we did for the dock we’re going to space them all apart by three so let’s line ourselves up with this stone brick Pillar going up here and we’re going to place the first one three blocks faced apart like this and then we’re going to go another three place another one another three place another and so on and so forth until you reach this area here where it’s actually four blocks like this and then instead Of placing another one here we’re going to go to the right space to pop by three so one two three and instead of placing it on this block here we’re actually going to go one block in towards the big Tower and place it here all right and now let’s go ahead and extend all of these pillars up one block past the top of the walkway here except for this pillar here we’ll get to that at the end All right now that we’ve extended these up let’s go ahead and mirror this kind of design on this side here so we’re going to go stone brick slab polished and aside stairs and then stone brick slab and now when we’ve done two we’re actually going to skip this one because We’re going to have our staircase here and then let’s repeat it just in this last section here next let’s go ahead and hop on top of this final pillar right here and we’re going to extend the same design out so stone brick slab a polished outer side stairs stone brick slab and then Let’s place another polished endocyte block right here and instead of placing this same thing here we’re going to actually go like this so we’re going to place another polished inside block diagonally like this and then we’re going to connect it up to the end like this we’re going To place another polished underside block and then in between those a stone brick slab now we can go ahead and extend the pathway all the way out to the edges here and now let’s jump down we’re gonna connect this pillar up to the top by using some stone brick walls like this then Underneath these two blocks here we’re going to place some polished underside stairs now in this area here let’s place in two spruce fence gates and then in this section we’re going to place two more spruce fan skates on either side and in the center a spruce fence with a lantern on it and Now we’re going to repeat this exact same design here across these three other sections as well all right next let’s go ahead and extend the pillars down towards the edge of this wall here and we’re going to be using stone Bricks to do that in this section here we’re just going to do the same thing like this and now let’s keep doing this in each of these sections of all of the pillars all right and now with that done let’s go ahead and move on to the stairs here so to start the Staircase off it’s pretty easy we’re going to go three blocks down and on the third block here we’re going to start the first layer of the stairs like this and then we’re just going to keep extending the stairs down kind of using these placeholder blocks here that allows us to Actually place in the stairs until we reach the ground like this and there we go there’s our staircase in let’s also fill in this area here with some stone just to kind of make it look nice and then heading up the stairs up here let’s remove these blocks here we’re going To extend this out like this and then on this section here we’re going to cover these up with some more stone stairs and then we’re also going to destroy these three blocks like this and place In some more stone stairs here and then that’s it for the staircase all right so now we’re actually done with the left side wool for now we will get back to it later and now let’s turn around And take our attention to the right side wall so to start off let’s head over to this position right here we’re going to line ourselves up with this strip of stone bricks here and then we’re going to go three blocks away from that one two three and then on the Fourth block so a three block gap and we’re going to place a polished endocyte block like this then another three block space and another one and i’m going to keep doing this all the way down until here and you’ll notice we have a one block gap here that’s due to this sticking out A little bit more than this tower here and this is my solution for this i guess we have like a little secret entrance in here all right so next let’s go ahead and raise all of these pillars up Like we did over on that side we’re gonna raise them all up just one block above the pathway here next let’s go ahead and add in our stone brick slabs on either side and then in the center some Polished underside stairs we’re going to do this in this next section here as well and then we’re going to skip this one because this is going to be another staircase and then we’re going to repeat this design again another two times over here and then in this section here we’re Just going to put another stone brick slab then let’s jump down we’re going to place two stone brick blocks like this and then finally some stone brick stairs here next let’s go ahead and add in the same design that we did over here this like fence gate fence fence gate design so Two fence gates on either side a fence in the middle with a lantern below the fence and now with that done let’s go ahead and extend this little section here back with stone bricks and then we’re going to do the same across all of these pillars like we did over there Next let’s go ahead and add in our staircase and this is again exactly like this one over here we’re going to go three blocks down from the top and start in the first layer of the stairs like This then we’re just going to add some placeholder blocks on the sides here that will allow us to place these extra blocks and then finally i’m going to connect it up with the ground like this then let’s head up the stairs we’re going to remove these blocks here place some stone Stairs like this then we’re going to remove three more blocks like this on either side and replace those with more stone stairs and then to finish up the pathway up here we’re going to add a stone slab here to allow us to smoothly walk in through this door and then we’re just going To repeat this exact same thing on the opposite side as well almost forgot down here we’re going to cover in these blocks here just to kind of make the staircase feel a little bit more solid i guess All right and now we’re done with the right side wall for now so let’s turn around and create the back wall design so once again we’re going to do a pretty similar thing like we did down here We’re going to go three blocks away from the side here just make sure you’re correctly in line here so we’re gonna go one two three place end of sight and we’re just gonna repeat this all the way down Now let’s go ahead and extend these up one block past the pathway just like this now while we’re up here let’s do this same design except instead of the polished underside stairs we’re going to do polished endocyte blocks let’s place a slab on either Side and then polished endocyte in the center and let’s repeat this across the rest of them all right and with that done let’s go ahead and jump down and down here we’re going to add in the Same design that we have done across the other walls over here fence gate fence with a lantern and also like the other walls as well we’re going to extend these stone bricks across and we’re also going to do the same across all of these pillars Alright and with that done now let’s head to the center one and we’re going to add a ladder all the way at the back here and let’s just extend this up destroy this stone block and Replace it with a ladder all right now that we’re up here we’re going to go ahead and add in the big roof design that covers the whole top of this pathway along here so to start that off let’s go ahead and place a stone brick wall on this block here And then above that a spruce fence and finally a stone brick wall just like that and we’re going to repeat this design across each one of these blocks all the way along here all right and with those done i’m going to go ahead and fly for this part or else it’s Just going to take way too long for the video it’s probably already long enough but next what we’re going to do is place some dark oak stairs above all of these just in a strip along here and we’re going to do the same on the other side as well Okay and now with that done what we’re gonna do on this side over here let’s add in another stair block above it just here then we’re gonna add a slab and finally another slab just like This in this shape and now we’re going to mirror this on the opposite side as well and let’s also do this on the other side too so a stair slab slab slab and stair next what we’re going to do Is connect up these top slabs to either side with just a strip like this down the middle and then we’re going to extend this shape of these two blocks here and on the other side as well and we’re just going to extend those with some spruce stairs and also spruce slabs Now with the main part of the roof all done we can hop back down in here and what we’re going to do next is go ahead and place in some dark oak trap doors in all of these gaps between these little pillar thingies With that done it’s now time to add in the lanterns the final part of the roof and to do that what we’re going to do is grab out some spruce fences we’re gonna place two in line with these pillars here and then we’re gonna do the same thing For each pillar except we’re gonna space them apart by like one so we’re gonna go skip this one then we’re gonna place another two skip this one place another two so on and so forth and if you lined it up properly then the final one should be in line with The final pillars as well now above each of these fences we’re going to place in a dark oak spruce slab kind of extending these slabs down towards the fences and then we’re gonna connect up the first fence across all of them with some Spruce fence gates to make this easy you can just right click on the dark oak slabs up here now with that done all that’s left to do is add our lanterns on at the very end of all of these Little fences now with the roof all finished up let’s quickly add in a little trap door to our ladder here and to do that we’re just going to place a stone slab in front of the ladder here and Then in front of the stone slab place on a spruce trap door now you might notice we have an entrance on this side but not on this side so what we’re gonna do is pretty much copy this exact entrance Design and we’re gonna do it over here so firstly let’s remove some blocks we’re gonna remove two here and then we’re gonna go one two above then to the left we’re going to remove three and then the Same on the other side like this now up here in this very top middle block we’re going to place a stone brick slab just like that and then heading inside here we’re going to replace these three blocks with some stone blocks just to kind of keep the path consistent then on this block Here we’re going to place in a spruce slab then let’s also beside this place in some strip spruce wood like this and then we’re going to extend this all the way up along here then in between these at The top let’s place in some upside down spruce stairs and then we’re going to have to place a block here and just place our stripped spruce wood block oh my god why is this so difficult Why can’t i place there we go jesus christ alright and then just so we can place our door in let’s place another spruce slab here and then we’re going to add outdoor just like that now we’re All done with up here so let’s head back down the ladder and now let’s add in the central fountain design so to get the placement right for the fountain what we’re going to do is align ourselves Up with the center of these pillars along here and to do that we’re just going to count one two three across from the side and now this is the center here now to align ourselves up on This axis we’re going to have to stand in line with the very middle of all of the staircases on either side like this you just use this trick kind of like look at the ground to make sure you’re Right in the center and then look over this way and there we go we’re in the center so this block right here is the center and we’re just going to take one step back and place a stone brick Wall right there now the reason why i’m explaining this is because it’s kind of crucial to line up with the rest of the stuff in all of the base so next what we’re gonna go ahead and do is grab out Some scaffolding we’re just gonna place maybe like three and we’re gonna be extending this up so there’s five blocks high in total so that’s one two three four and five now i lied we’re gonna Have to place one more scaffolding just so we can get up here and place a lantern on top now we can hop down and add in the polished underside stairs and the placement for these is a little Bit tricky so make sure to follow along precisely so to try and make things easier what we’re going to do is go ahead and place one polished endocyte stair block spaced one block away from the center Like this and we’re going to do the same thing on either side all across like this then let’s just pick one side to start with we’re going to place a stair block beside it then we’re going To place one to the right like this and then we’re going to curve it back around this way now we’re just going to repeat this same thing across the rest of the sides like this so we’re Going to place stair another stair like this and then another stair like that and we’re just gonna yeah keep doing this until we finish up and if you get this kind of problem where they’re not Wanting to link up you might just have to remove a couple until it all links up just like that next let’s chuck in the little details so we’re going to place a spruce trap door on the outside in the Center of each of these sides all along here so let’s just go ahead and add all of these in like this and then to the right and left of each of these we’re going to place a spruce sign Now all that’s left to do is add in the water for the fountain now i must say please go slow at this part because misplacing some of the water can mean you’ll have to redo all of these stairs And i’ve had to do it a few times now because i’ve just been placing it too quickly so to start off what we’re going to do is place some water inside of this bottom wall just like this And then we’re going to do the same thing above and just keep repeating this until we get up to the very top here now down here let’s place in some water in all of these stairs just be sure To go slow at this part as you can see it starts filling up the next stairs kind of randomly so yeah just go slow and there we go that’s it for all of the water and the fountain is now done All right next let’s add in our first little farm patch it doesn’t matter which side you start off with i’m just going to start off with the one on this side so to line this up properly we’re going To do is stand right here right in next to the fountain and then we’re going to take one step outwards diagonally and then on this block here we’re going to place a polished endocyte slab And we’re going to do the same on this block here as well and then if that was a bit confusing this is how it should look next what we’re going to do is add in some more blocks kind of sticking Outwards to the left of this block here and then to the right of this block here and that will just give us this diagonal kind of shape like this next let’s go ahead and we’re going to stand Back here just to try and make things as easy as possible so on this block here we’re going to add an additional two slabs just like this we’re going to do the same on this side as well and then we’re Pretty much going to mirror this shape on the other half so what we’re going to do is come up to this area here we’re going to go diagonally one block across like this and then we’re gonna go And add on two more blocks just like this place another two diagonally kind of in line with these ones and then add in another three like this the shape is kind of weird so hopefully that wasn’t too confusing here’s like an overhead view if you can’t really get it right now what We’re going to do is just repeat this exact same process on each corner of all of the fountains and there we go that’s all four of the outlines of all the farms done next let’s go ahead and replace all of the stone blocks inside of the outlines with some dirt We’re going to be leaving the center block out so just destroy that block and then just continue replacing all of the blocks with dirt and then let’s just repeat this in each section now these Gaps are where we’re going to be adding water in for the farms and that means the water is going to drop down and probably remove a bunch of torches let’s just go ahead and stand underneath here and we’re going to destroy the block directly underneath just so the water flows into here And doesn’t destroy the torches just go around to each section and destroy the grass block that’s directly below the holes and now i hope you brought a bucket of water with you because we’re going to place one up here and that’s just how we’re going to climb out of here Now with this water block placed let’s add in a polished andesite slab here and then on top of it a stone brick wall with a lantern and now we’re just going to repeat this exact same thing in each section water bucket polished inside slab stone brick wall with a lantern Now we can hoe all of the dirt and add in our crops of choice i’m going with carrot in the opposite sides and then wheat in these two opposite sides now that’s it for all of the farms Next let’s go ahead and add in all of the little sections and all of the gaps in the walls here so all of these sections actually have the same barrel design along the top and we’re Gonna go ahead and add all of those in now just to make things a little bit easier so the design is really easy to do what we’re gonna do is place three barrels along the top here this is one block Behind the lantern here and directly below the stone along the top now below these we’re going to add in two spruce slabs on either side and then in the center a spruce trap door and that’s it it’s that easy let’s go ahead and add it to all of the rest of these sections Now we’re going to skip these two sections here as these ones are actually different so let’s head to the back wall and this one is exactly the same it’s just a little bit higher up you might have to Jump in order to get these barrels facing outwards or you can just use a piece of scaffolding just like this to make things easier all right and there we go that’s all of the barrels added in Now let’s head back over to the left wall and in the leftmost section so this first one’s pretty easy it’s going to be a little composting station for the farm so directly below the shelves here Let’s add in three composters and then to fill in this gap here we’re going to add in some stripped spruce wood just like that and that’s it for our first section now moving on to the section just To the right of this one we’re going to be adding in a bunch of chests so let’s head inside here and directly underneath the shelf again we’re going to add in a chest and then to the right of it We’re going to add another chest just to create a double chest now we’re going to extend this up here and we’re also going to extend it all the way across to the edge here but before we do let’s add In some single chests up here now let’s go ahead and add in our extra double chest in here and now it might be kind of tricky to add these blocks in so we’re gonna have to destroy part of the wall Here just to allow us to add in the final double chests and then we can go ahead and just quickly replace these blocks just like that now we’re gonna go across the stairs into the next section Over here now this one doesn’t have any barrels in it but we’re going to be adding in the same shelf design just on the top like this so we’re going to place in the spruce slab on either side and then A spruce trap door in the center next we’re going to add in some stripped spruce wood blocks we’re going to place some along the top here and then we’re going to extend it down but we’re not going To fill in the bottom strip here because these are going to be covered up anyway so on the left and right side we’re going to place a composter and in between those some upside down spruce stairs Above each of the composters we’re going to add in two oak leaves just like this and then on this central little table thing here we’re going to add a large amethyst bud or you can add in any decoration of your choice and that’s it for this little decorative section heading into the next Section the final section for the left side wall we’re going to be adding in a toggleable nether portal so firstly what we’re gonna do is destroy these three stone brick blocks here and we’re gonna replace them with obsidian now along the top let’s add in three more obsidian like this And then opposite this side wall let’s add in three more obsidian and then finally another three in the floor like this next let’s fix up this side wall we’re gonna place in just a bunch of Stone bricks like this until we reach this little gap here just be sure to leave this open we’ll be adding a door in here later now in front of the top strip of obsidian here let’s place a stone Block in either corner and then in the center some upside down stone stairs now let’s head inside the actual nether portal here and in here we’re going to place a dispenser underneath each of these stone blocks that we just placed make sure they are facing outwards in towards the portal Then we’re gonna head back outside underneath these dispensers let’s place in two stone brick walls on either side and then in the center a spruce fence gate now on the back of each of these dispensers let’s place a lever in the left one place a flint and steel and in the right one Place a water bucket now when we flick the lever on the left side it’s going to ignite the portal and then when we flick the lever on the other side it’s going to disable the portal but in order to collect the water backup we’re going to have to flick the lever three more Times just to suck the water back up into the bucket feel free to replace these levers with buttons as well it’s entirely up to you now while we’re here we may as well add in the bottom entrance to the big tower here and to do that what we’re going to do is remove These three stone brick blocks here we’re going to place one in this area right here and then right at the top in the middle let’s add in a stone brick slab let’s remove these three stripped spruce wood blocks like this and then we’re going to add some more on the sides Let’s replace this stripped wood block with a slab and we’re also going to add another slab in just so we can place the door and we may as well just add that on right now and then finally To finish up the entrance let’s add some spruce stairs above the door now let’s head on to all of the back sections this first section is gonna be really easy along with the one to the right of it As well so one block behind the shelves here let’s add in some furnaces and then we’re just going to extend these furnaces all the way down to the ground and that’s it for this section let’s head To the right and we’re going to do pretty much the same thing except for this left side here is going to be all blast furnaces and then this right side is going to be just a strip of smokers Next let’s head to the right this section is where the ladder is and this one is really easy as well all we’re going to do is place some spruce stairs on the bottom corners and also some more spruce Stairs on the top corners and then we’re going to cover up all of these exposed stone blocks with some spruce trap doors just like that heading to the right once again let’s first start off this Section by adding in a little strip of stripped spruce wood like this then below this strip on the left and right side let’s add in some spruce slabs and now let’s go ahead and add in some more strip Spruce wood behind this once again and we’re going to extend this all the way down to the floor now in between each of these slabs here let’s place a grindstone directly below the grindstone on the Bottom here let’s place an anvil then to the left we’re going to place this smithing table to the right a crafting table on top of the anvil let’s place a lantern and then on top of the smithing Table and the crafting table place a pot and then add in your plants of choice i’m going with azalea and also flowering azalea now onto the final section for the back wall here we’re just going To add in a bunch of double chests kind of like how we did over there so we’re going to start off the first chest by going one block to the right of the shelf under here and then we’re going to Extend it again to make a double chest now we’re going to extend this four double chests up to the top make sure you don’t add one here because you can’t really access it and it’s going to be Blocked by the pathway above as well now in front of all these double chests let’s add in some more and then like over there we’re going to have to destroy part of the wall to allow us to place The rest of the double chests and then of course go ahead and replace all of these blocks back in and now that’s all of the back wall sections done let’s go ahead and finish up with the right side Walls so this first section is going to be our little netherwart farm for the upcoming brewing section just to the right of it and to start this one off we’re going to extend this little shelf design back so we’re just going to repeat with the slabs here and then another trapdoor like that Then let’s place in six soul sand blocks directly underneath these shelves here and then let’s also place in some netherwart on top of all of these and then to finish up we’re just going to cover up The exposed soul sand blocks here with some spruce trap doors now onto the next section let’s first add in a wall of strip spruce wood back here this can be a little bit tricky to place as you can see There we go now in front of this let’s place in two more strip spruce wood in each corner and then in between these we’re gonna place a spruce trap door like this then to the left and Right let’s place in a spruce fence and in this gap here let’s place a water bucket and then to finish up we’re going to place two brewing stands on top of those two strip spruce blocks Now heading on to the final two sections each of these are going to be exactly the same one’s going to be a melon farm and one is going to be a pumpkin farm so in each section let’s first Extend the spruce slabs to the back kind of like how we did back over there and then instead of extending the trapdoor here we’re going to place a stone block like this and then a lantern on and Now let’s quickly repeat this on the other side while we’re at it next we’re going to add the water in and to block it off just so it doesn’t go everywhere we’re going to place two dirt blocks Like this we’re also going to remove this one this is where the water is going to be placed and then let’s do the same on the other side with these two dirt blocks now let’s place our Water in right here and then we’re going to place a stone brick slab on this half of the block like this and that’s just so there isn’t like a tiny little gap here you don’t really have to do this If you don’t want to now let’s fill in the rest of the dirt just extend it to the sides like this and then we can go ahead and tilt all of the dirt like this also forgot you want to place a dirt block in These areas as well be sure to till those as well now for this section here let’s place some melon seeds all along the back and then on this side some pumpkin seeds all along the back as well And then finally to finish up these we’re going to cover up the exposed dirt blocks with some spruce trap doors and now that’s it for all of the little wall sections in the base which also means that We’re now done with everything on the exterior of the base and now all that’s left to do is the interior for the big back left tower so let’s head up the stairs and we’re going to start off with The door so let’s actually head inside a little bit and we’re just going to extend this floor in a tiny bit just to give us some room so that we can place some spruce trap doors all around this Door here so just hold shift and place a couple of trapdoors like this close them up we’re also gonna have to place a block temporarily so that we can place one on top of the door as well and now if You go outside your door should look like this and we’re all done with the door so let’s head back inside and now we’re just going to fill up this entire floor with some more spruce slabs All right now with that done let’s go ahead and fix up this area over here so what we’re going to do is remove this slab and we’re going to place another slab in its place right here then Let’s replace these two strip spruce wood blocks with ones that are actually pointing the right way so we’re just going to do this we’ll probably have to remove those ones down there as well In just a second now let’s place a few temporary blocks just so we can get up here or you can use scaffolding and we’re just going to place some more blocks just like that next let’s go ahead And add in the ladder so to do that we’re going to remove this block here which is in the front left of the entire tower itself if you’re looking from out here the front left so we’re going to remove This block right beside the doorway and we’re going to add in our ladder this is going to extend all the way up to the top trap door and it’s also going to extend all the way down to the bottom Now with that ladder all done let’s go ahead and fill in the ceiling for this floor and to do that we’re going to go and look at this very top most block that we’ve added in right here And then we’re just going to do the same that we did for the floor down here we’re just going to add in a bunch of spruce slabs and with that done now let’s head up again and we’re going to add in Another ceiling so for this one we’re going to go one block above the stair block that’s here and then on the top half of this block here is where we’re going to start adding in all of the ceiling Just like we did just before and now that’s it for the floors up here as you can see this one is the ceiling for the next floor and then now we’re going to head down below to the very bottom and Add in the ceiling on this floor here and so to line up the ceiling for this floor it is of course really easy as we have the door right here meaning that the floor is going to be on this layer we’re Also going to remove this stone here if you’ve placed this because we don’t really need it anymore and let’s just replace it with some more spruce slabs now while i’m adding these in i will explain that this bottom basement kind of floor isn’t used in the tutorial but feel free to expand This downwards if you want you can of course keep going down as much as you want you could add in more indoor farms or anything like that now that’s it for the ceiling let’s head back up one floor Onto this floor right here which is the same layer as the rest of the base and we’re going to add in everything for this floor so the first thing we’re gonna do on this floor is add in some lights just Because it’s a little bit dark so let’s align ourselves with the center of the room here and then one block away from the edge we’re going to add an additional spruce slab and chuck on A lantern now on the opposite side of this we’re going to go two blocks away from the edge so one two and then here add an additional slab and place on a lantern now we’re gonna fix up this area here So remove these two blocks and replace all of these with some more slabs now this wall here is gonna be our furnace wall so let’s add in a bunch of furnaces on the bottom we’re gonna place one in The middle and then to the left two and then to the right and additional two now we’re going to go two blocks above and on the top of the second block here let’s add a spruce slab and then coming Away from it we’re gonna place two spruce trap doors and do the same on the other side as well just like that now on the top left side let’s add in three blast furnaces and then on the right two Smokers now let’s add some decorations on top of these furnaces on the very left let’s add a flower pot with an azalea or your plant of choice in the very center let’s place a lantern and then one Block to the right of that let’s place a campfire and extinguish it with your shovel of choice now to the right of this and this little nook in here let’s add in four single chests just like this and While we’re at it we’re gonna fix up this little area over here we’re gonna place a stripped spruce block here we’re also gonna place another one right here and then add in a another spruce slab right there next in this section here we’re gonna remove these spruce blocks as we don’t need them Anymore we’re gonna place a spruce stair block here and then we’re gonna place another one to the right of it just make sure to stand like that so that it kind of ends it off like that now we’re Going to remove this strip as well and we’re going to replace it with another spruce stair block like this then let’s actually remove this one as well we don’t need that let’s replace that with another spruce stair block and we’re going to cover up these obsidian blocks with some spruce trap doors Don’t know why i said it like that but uh yeah now to the right of this we’re gonna do the exact same thing replace this block here with a spruce stair block and also on the bottom And then cover up these exposed stone brick blocks with some spruce trap doors next let’s go back over here we’re gonna place in two armor stands and above those let’s extend these slabs down by an additional slab and now on these armor stands you can put in whatever armor of your choice i’m Gonna go with the more expensive option with some netherright and also some diamond armor now with that done let’s turn around and in this section over here we’re going to add in some more chests this time some double chests we’re going to add four in total like that now let’s add a Little island thing in here just to take up some floor space so align yourself up with the middle of the room and we’re going to count two blocks away so one two and then on the third block here Let’s place a barrel and then one block away from that let’s place another barrel in between those place an anvil and then we’re going to cover every exposed face here with a spruce sign Now on top of the anvil place a flower pot and add in your plant of choice i’m going with an azure blue it now let’s turn to the final empty corner of the room and what we’re going to do Is add in some more spruce slabs just like this all the way along on the left side let’s place an upside down spruce stair and repeat this on this side as well and now right in the corner we’re Going to add in some barrels so add in two like this and then another two here make sure they’re all facing up or down now in the left gap here let’s place a smithing table and on top of that A stone cutter and in the right side let’s place a crafting table with a grindstone and now that’s it we’re all done for this floor let’s head up and create everything on the next floor so once Again the first thing we’re going to do is add in our lanterns so let’s line ourselves up with the middle of the room one block away from this edge let’s add in a slab with a lantern and then We’re going to do the same on the other side one block away place a slab and a lantern now this floor is going to be our main storage room for the entire tower so we’re going to repeat The same design in each corner and that design is going to be four barrels like this in the corner we’re also going to connect the top barrel up with the ceiling with a spruce slab and Then in the gaps here we’re going to place four single chests and then on the bigger side four double chests and now let’s just quickly repeat this in the other three corners of course this corner being just single chests as we can’t fit any double chests in now all that’s Left to do in this room is adding a small little crafting station and some extra chests up here so to do that what we’re going to do is in between these two windows here right in the middle let’s Place a crafting table and beside that two barrels facing outwards on either side of these barrels let’s cap it off with a spruce trap door then on top of the crafting table let’s add a lantern On the left barrel let’s place our flower pot with your plant of choice i’m going with an azalea and then on the right side barrel let’s place a campfire and extinguish it now we’re gonna Go two blocks above this so one two and on the top half of the second block we’re gonna place a spruce slab on the left and right side let’s extend it out by using some spruce trap doors and Then on top of this we’re gonna place a double chest and then a single chest and now before we head up to the next floor let’s actually add in some spruce stairs here and replace this slab With some more spruce stairs and then add in some spruce trap doors now with that done let’s head up and create the next floor so once again let’s add in our lanterns so one block away from this Side here place a spruce slab with a lantern and then on this side we’re gonna go two blocks away from the side so one two place a slab and then atlantan now this floor is going to be our bedroom So to start this off let’s go into each corner and add in our signature barrel design that we’ve done on every floor so far repeat this on the opposite corner as well now don’t worry we won’t be doing This in this corner so don’t worry about that now on the left and right side of each of these two corners here let’s place in some spruce slabs just like this repeat this on the opposite side As well and now in between these two slabs here we’re going to place a bunch of stripped spruce wood blocks just like that on top of these let’s place in some oak leaves just all across like that And then in front of the left most strips wrist block here let’s place in a spruce stair block like this and then we’re going to extend it out again with a spruce slab we’re going to repeat This on the other side as well now one block above the leaves here let’s add in a spruce slab block on the left and right side let’s extend it out with some spruce trap doors on top of this shelf We’re going gonna add in three barrels and then in this gap here we’re of course going to add in our three beds now on each of these shelves here we’re gonna add in some armor stands And then again add in your armor of choice on this first one here i’m going with some leather and then on the one to the right i’m going to add in some chain mail then on this side i’m going To add in some iron armor on this one and then on the one to the right of that some gold armor next let’s go ahead and add a rug in front of the bed so one block space away from the bed let’s start Adding in our carpets this is going to be a three by three square in total lined up with the bed and we’re gonna extend it this way just like this to create a square shape now all that’s left to do in This room is fill in this corner and we’re gonna do that by placing in some upside down spruce stairs like this to create a little shelf on the middle one let’s place our flower pot with an Azalea beside that a lantern and then on the right side let’s place a large amethyst bud now before we move on to the next floor we’re of course going to add in this exact same design that we’ve done On every single floor so far place in some upside down and normal spruce stairs and then cover up these blocks here with some spruce trap doors now let’s fill in the final floor so once again it is Pretty dark in here so we’re going to add in our lanterns first so one block space away from this side we’re going to place a spruce slab with a lantern then on this side two blocks away we’re Going to place another slab and another lantern and now this is going to be our enchanting floor so let’s first add in our bookshelves so heading over right into the center of the room let’s place Our first bookshelf and then we’re going to create an o shape out of this so let’s extend it to the left and right by one extend it all the way up and then across to create an o shape like this Now on the left and right side we’re going to repeat this exact same o shape we don’t need to fill in the corners for this enchanting area as this will reach a full level 30. so let’s create Another o shape out of some bookshelves just like this and then repeat this again on this side now let’s fill in all of the gaps with some spruce slabs just all the way along like this Now in each of these gaps here let’s add in an upside down spruce stair block in this first one here let’s place a large amethyst bud in the middle one let’s place a couple of purple candles And ignite them with a flint and steel and then in this final one let’s place our flower pot with a corn flour now behind these let’s add in some more stripped spruce wood just so it looks a little bit Nicer behind there and then next let’s add in our enchanting table right in the center then on the left side let’s place in four barrels all the way up to the ceiling like this we’re going to do the Same on the other side as well then let’s connect these with the ceiling with an additional spruce slab block and we’re going to do the same across here i don’t know why this block is like that so We’re going to place that one normally and then let’s do the same thing on the other side as well connect these up with the ceiling with some spruce slabs now for this floor we’re actually going to Extend these stripped spruce blocks all the way into the corners so we’re just going to fill up these two sides like this all the way up to the ceiling and then we’re also going to connect these Up with the ceiling with some more spruce slabs now in this corner over here let’s place in a composter and above that two oak leaves and then above that let’s place a spruce fence and then connect that up with the ceiling with another spruce slab block now on the left and right of This let’s place a lectern and then chuck a book in one of them just to keep it looking kind of randomized next we’re going to cap off the sides of these lectins with some spruce trap doors Now we’re gonna finish up this floor with a purple carpet so we’re gonna start it right here and it’s going to be six in total to create a rectangular shape just like that and now my apologies i did Just lie we’re not quite done with the floor yet we of course have to add in this design once again add in your trapdoors and your upside down and regular spruce stairs and now with that We’re actually completely done with the entirety of the base now i really want to know if you made it this far or if you ended up actually making this whole base for yourself so be sure to leave A comment letting me know also if you enjoyed this tutorial and the build itself be sure to leave a like on this video as this build took me a really long time to create probably over two weeks In total of recording and editing also be sure to subscribe if you enjoyed this tutorial and want to see future ones just like this cheers for watching everyone and i will see you in the next video Video Information
This video, titled ‘Minecraft: Ultimate Castle Survival Base Tutorial (how to build)’, was uploaded by disruptive builds on 2022-02-10 07:29:41. It has garnered 240190 views and 7506 likes. The duration of the video is 01:05:17 or 3917 seconds.
In this Minecraft tutorial video I show you how to build the Ultimate Castle Survival Base! This medieval style base has many features including enchanting, a toggleable nether portal, 4 separate farms and more.
This is my new longest & biggest tutorial yet and also took over 2 weeks to make, so be sure to hit the like button for me!
— s o c i a l s —
🏰Want to download this build? Check out my Patreon for build downloads & more benefits! ❤️Patreon: https://www.patreon.com/disruptivebuilds 📸Instagram: https://www.instagram.com/disruptive_builds/ 🔷Discord: https://discord.gg/QbDhscExU7 🔴Second Channel: https://www.youtube.com/channel/UCLu3lbamoD8-w1stjIpd8Kw
🌲Texturepack: Vanilla 🌞Shaders: BSL
— m u s i c —
Music by: itsokaylove Spotify: https://open.spotify.com/artist/2sVmps13nPFt0iG10BtWzV
— t i m e s t a m p s —
Intro: 0:00 Tour: 0:27 Block List: 5:26 Layout: 5:30 Front-Left Tower: 7:28 Front-Right Tower: 11:10 Back-Right Tower: 12:33 Back-Left Tower: 13:45 Walls: 17:18 Platform : 18:59 Dock : 19:19 Small Tower Interiors : 25:21 Inner Wall Details : 28:12 Fountain & Farms : 39:25 Inner Wall Sections : 44:26 Big Tower Interior : 52:48 Outro: 1:04:45
#Minecraft #MinecraftTutorial #HowToBuild