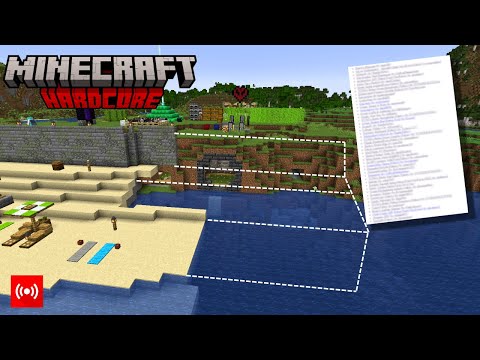
Thank you [Applause] Thank you Foreign Foreign hey what’s up YouTube in this video I’ll be showing you how to make a medieval torture chamber with all sorts of fun stuff to go in it fun might not be the right word exactly I mean let’s ask this guy if he’s having fun Ah I think the answer is yes here are all of the materials that we will need throughout the build please do make sure that you have access to all of these by the way this is how much space the actual chamber will take up so if you plan on building this underground these Numbers might be helpful Begin by placing a cyan terracotta on the ground and extend it to the right one two three extend behind it one block and then to the right one two three four five six then extend behind the block one two three four we then want to do two things Number one we want to extend left and join back onto ourselves like this however we also want to continue by extending right one two three we then want to extend backwards one two three four five six seven eight and then left one two three four five and then backwards one two three and Then left one two three four and then forwards one two three and then left one two three four five six seven and then forwards one two three four five six seven eight and then right one two three four and then forwards all the way to connect back to The front of the build that should give us this rather simple layout with the floor plan of the chamber worked out we can now make the walls the floors and the ceiling this is incredibly simple on top of the cyan terracotta we want to place a row of four stone breaks one two Three four these stone bricks want to be placed on every single cyan terracotta around the build foreign we then want to dig out the entire floor and replace it with stone and then we want to place a cyan terracotta once again above and inside all of the empty space above the walls To create a ceiling nice and simple with that complete we can now start adding some detail first of all we’ve got to break back into the chamber so this is all the way at the start and we have actually got a little hallway which takes us into the actual chamber itself You’re going to note that it’s actually really really dark in here so just for the duration of the build we might have to fix that there we go that’s a bit better I’m also going to place a couple of lamps in the ceiling so in the center Of the chamber you want to find the middle row which is here it should have three blocks either side the middle row and you want to leave a gap of four in the ceiling so one two three four working your way towards the center and place a redstone lamp and then one two Three four and then destroy this next block and we’ll place a redstone lamp and that should almost evenly give us a nice placement of two lumps right in the middle of the ceiling but that actually leads us on to this next bit you see this area here to the left we want to Add another row of cyan terracotta onto just leading up to the right side we want a row of four sign terracotta leaving a gap of free between that and the wall and then we just want to build up this wall a little bit like this so It kind of just adds a little bit of an Alcove to the right which allows us to add a little bit more detail so beyond that we also have to dig out this wall a little bit so this is the wall directly left as we come into the chamber we want To starting from the right side dig one two three rows like this we actually want to dig a three by three block area in the ground we’re just going to replace this using Stone but we want to add another row of cyan terracotta here just behind this empty space and a Couple of rows of stone breaks and this gives us a nice little starting point for the chamber we do have to make some more structural Chambers but we change us to the chamber but we will sort that out in a bit we also want to pop outside on top of The chamber and stick a couple of blocks of redstone on top of the lamps to light them up and with first decoration is going to be a simple set of shackles changed to the wall with unfortunately their victim still in there so this is going to be a Chain suspended from the corners of this Alcove here with a trip by hook underneath each chain skeleton School in the middle and as you can see unfortunately the porn person that was suspended from these chains has uh well perished so we’re going to place a couple of item frames underneath with Bones in the item frames and I think that that kind of gives us a nice little story of what may have happened here it’s also worth mentioning that you can of course use a player head or a zombie head or whatever head you may prefer to put there as well the second decoration Is a little bit more complicated so in the corner over these two walls here we want to move to the right by one and place a campfire in the ground Above This campfire is going to be a suspended villager who unfortunately is about to get a bit toasty so from on the ceiling We are going to place a chain one should do and then below the chain on the left and right we want to place a lever so we now need to utilize barrier blocks this is relatively simple you can slash give your own name and then if you just type in Barry and Just autofill it to Minecraft colon barrier that will give you the barrier block necessary so we have to place a barrier underneath each one of the levers we then have to place a barrier underneath the middle of the two suspended barriers and then we have to place a barrier in Front of and in between these two barriers as well so I’ll place a solid block here place a barrier that will do just nicely and then if we grab ourselves a villager spornik we should just be able to drop and then just from the chain and as you can see it seems as Though that an important fortunate friend is hung via chain Shackled to the wall using the two levers and is about to get toasty and if we were feeling particularly nasty which we are because unfortunately the Villager doesn’t make a little bit too much noise we’re about To make some more we’ll crack that down and they will I’m gonna be honest this is taking a lot longer than I thought starting to feel bad now villager oh there we go perfect so you can see how that works perfectly and of course we can just drop that barrier back in there And then that is ready to go whenever we want it again the next thing that we are going to make is a good old-fashioned rack so if we start in the corner of this wall and leave a gap of one two three on this fourth block we want to Place a s Spruce slab extending from the wall Spruce stair in front then another slab and then built up next to this we want to have a plank block and we want to place a grindstone specifically facing this way like sideways a lever on The side of it and then we want to have tripwire hooks attached to the wall above the left and right side of the end of the rack we want to have Oak trap doors flipped down next to the spruce stair blocks we then want an item frame On the wall in between the tripwire hooks a player head and then we want to grab the cyan carpet blue carpet gray carpet and we want to place them pretty much in that order extending from the wall and this looks just kind of like an old-fashioned medieval rack so we can Even attach a chain in between the shackle and the grindstone like this and that will give us a nice good old-fashioned rack I’m sure that I don’t have to explain what this is to you guys but a rack was quite simply this you were attached to a table your arms were Shackled to one end your feet were Shackled to the other end and you were slowly pulled apart via a pulley system like a wheel the grindstone and the chains and um while you were stretched until until you look like Stretch Armstrong but you you didn’t bounce back As a matter of fact I believe that that’s how the original SlenderMan was created next up in the opposite side of the chamber we are keeping it simple from the corner of this wall we want to move along one and then place a spruce plank on the ground we then want to Place two more extending outwards with a stone cutter on the end specific typically faced this way like this on the wall a couple of tripwire hooks again to act like shackles and we want to have a player head faced inwards towards the wall just next to the stone Cutter with a cyan carpet on the top and then a blue carpet on the end and I think you guys can see where this is going yeah unfortunately it doesn’t it doesn’t end well for poor Steve next up we want to build an iron maiden no not The band so next to our poor unfortunate Steve who is about to get split in half we want to in the corner of the same side of the room leave a gap of one destroy this cyan terracotta and the one above it and replace these with dark oak Planks we then want to place a dark oak trap doors on either side of the dark oak planks and then one above it as well and flip these up just like this so it creates kind of like a closed off kind of almost looks like a wardrobe we want To destroy the stone block below it and place a stone cutter in here and we can just replace this white concrete with something else maybe a stone and then Place end rods like this extending outwards from the dark oak planks we now have to give it a little door which is Very simple this is just another couple of dark oak trapdoors if you wanted to you could actually use a door all itself that might actually be a bit of a better effect we’ll just have to place it backwards like this the only unfortunate part is that it won’t close this way so I guess if we were to get up on top of it like this that would actually work a little bit better that’s perfect so I’m sure that I don’t have to tell you guys this again but the iron maiden’s quite simple there’s spikes in what is essentially a Large coffin you get stuck in there and the door shut the end next up we are going to make a really fun skeleton jump scare so the first thing that we have to do is come to this Alcove just in the back middle of the chamber and we are Going to dig out all of the stone bricks and the cyan terracotta and we are going to swap them out for something a little bit more fitting so this is actually going to be a mixture of black concrete and black concrete powder just to kind of give like a little bit more Mystique To these sound because the idea with this is that we don’t see the skeleton until we activate the actual Redstone to make him pop up out of the water and the and we will also include a little light flickering into the chamber so we want It to feel like really nice and dark in here and we can even replace the ceiling with black concrete as well to kind of just Elevate this effect don’t try it with concrete powder I’ve made that mistake before but it it just helps to kind of like set the scene a Little bit and we also want to have a redstone lamp just in the back middle of the ceiling as well that will get activated a little bit later on so to make this the skeleton is going to be in the back center of the chamber so we Have to dig two rows down place a soul sand in the hole and we also have to okay so we have to excavate behind the soul sound and we want to place a sticky piston one row away from the Soul Sand that will be able to grip onto it so we Can cover up the rest of this with a mixture of black concrete and also the concrete powder just like so and we want to place water inside of this home we also want to place tripwire hooks leaving a gap of one from the ground on the left and right sides above the water And we want to have chains that come down and attach to the tripwire hook so all the way from the ceiling just like this that is absolutely perfect and that helps to set the scene a little bit so in the ground we can dig a couple of Rosso just left and right like this and we can add some iron bars to give the appearance of kind of like an individual prison cell and you can kind of leave it open like this or you can extend it all the way down or you could leave it Completely locked away like these are all options that you kind of have to figure out for yourself really and so on the wall here just next to Steve next to this tripwire hook we’re going to dig out this block and replace it with a chiseld stone brick dig all the way up To the top of the ceiling and we’re just going to place some Cobblestone wall with a leather in front of the chiseled Brick we’re now going to work our way outside and we are going to install a little bit of Red Sun this is rarely simple so we just need the Redstone Dust Repeater comparator and we just need a block to play stuff on so the cyan terracotta will work nicely so directly behind the uh cyan terracotta just below the Chisel brick we want to place a well a cyan terracotta we then want to run Redstone Dust all the way down and along The back of this little chamber to connect to the back of the Piston here then next to the cyan terracotta we want to place another terracotta and then we want to build what is essentially a staircase leading all the way up to the top of the chamber like this and we Might even have to place some more blocks just surrounding the uh just surrounding the lamp just like so so we then want to split the dust off up on top of this on top of the chamber like so we then have to make ourselves a little device that will make the Redstone lamp flicker which is a redstone comparator placed outwards from the Redstone activator redstone repeater in front of it redstone repeater to the side facing the opposite way Redstone does to join them all together in a square Redstone Dust on the ends of the repeaters and then you can actually Extend the dust outwards and connect it to the lamp now if we come back into the chamber itself we can activate this leather and it will do two things number one it will activate the piston and number two it will activate this lamp so the Piston is now gripped onto the Soul Sand and if we deactivate it the length will go off and the water will actually stop bubbling as well so all we have to do now is drop an armor stand into the water add a skull chain mail completely cut it out because that is what skeletons like to wear chainmail and Then if we add a couple of item frames with some bones in them inside of the cell that looks pretty good and you will find that if you activate this leather the skeleton will start jumping the light will start flickering and it’s just kind of like a nice spooky Unexpected thing so we just close off and then everything goes back to normal so the last device that we are going to make is an electric chair and this is on the wall opposite the skeleton jump scare so starting from the end of this walk hallway here the entrance hallway We want to leave a gap of one going left and then destroy this signed terracotta and the block above it we’ll place an iron door in its place with a11 next to it so that we can actually get in and out and above the door we’ll have an item Frame block of redstone and in front of this we just want to write danger so just like this above the actual redstone block itself so we then want to leave a gap of one between the door and then we want to place one two three we want to Knock out three blocks in the wall and then another row of three above and then Place White stained glass paint inside of the empty space so we have a nice little viewing window then we want to come inside of the chamber and we want to take the center Of the window leave a gap of one and place a spruce slab on the ground so we then want to build up Spruce trap doors left and right of the slab like this perfect and then we want to place a spruce at two Spruce trap doors flipped Up behind the spruce slant like so then Spruce fence gates open in front of the exposed top Spruce trap door and then extending down from the ceiling we want to grab ourselves we need a lightning rod and we need a skeleton skull and we Could even like if we want it to be a little bit lower I mean we could have just like a couple of lightning rods or maybe we could use like a chain or an iron bar to like connect down so like an iron an iron bar lightning rod below and Then a backwards placed skeleton skull underneath the rod looks so the iron bars and the lightning rod act as the power source and then the skeleton skull is the helmet that one would actually put on if they wanted to uh well get cooked so we then now that we have made The actual chair itself I have to make the Redstone associated with it we want to make kind of a flickering light because it’s I think that it’s just kind of like a cool effect so in the wall here we are going to need the chiseled Stone um bricks again leather Redstone Dust Redstone comparator and redstone repeater and we also need the redstone lamp unless we’ve placed one already we haven’t so the lamp is going to get placed in the ceiling above the iron bar like this so that’s where we want to place the length and then on this wall Here we’ll just leave a gap of one from the end just knock out the stone brick place a chiseled stone brick then in the wall we want to place a bunch of iron bars and we’ll just Place something behind this in a second and then a lever In front of the Chisel brick and then if we work our way outside and we have to make a little staircase for the Redstone Dust to get up onto here so that will actually work perfectly it might be better if we actually so thinking about It we we do have to kind of like seal up just Behind These Bars here so we’ll start off with that and then as I said we have to make a little staircase I’m pretty sure that this will be just fine so it’ll lead from here we’ll have a Little staircase come all the way up to here on the top and this gives us enough room to actually make the device itself so we want to run dust from behind the chiseled brick we’ll lead the dust all the way up to the top here and then if We just extend inwards like this will this give us enough room to actually make the device I mean we could there’s no reason that we can’t just add another row here so we can just add a comparator in front of the Dust activate it press Zone repeater in front opposite one Placed next to it Redstone just in the corner Red Zone just in front of the repeaters lead it out to the actual lamp itself and then if we drop back into the chamber then we can activate this and we have a pretty cool called flickering light directly above the chair and from The outside it’s just a really really cool effect I really like that at this point ladies and gentlemen we have pretty much completed the entire chamber however there are a couple more lot bits of detail that you may want to add as well so for instance in the Middle of the chamber you may want to stick say a crafting table and a couple of cyan terracottas next to it and you may want to Kit out this little stretch of table with different implements that one might use to you know interrogate the people or rather ask Questions so that’s a nice way of putting it ask questions of the people that are kind of like in the chamber in the first place let’s see what they know you know all nice implements that one might use to guns like entice people you know swords axes how is that sort of Thing we can also install like little shelves on the wall and we can have like a couple of spruce trap doors maybe like a smithing table and like an item frame with iron swords and stuff kind of just placed in here and you can kind of like Put these wherever you uh wherever you feel as though that they might kind of like fit in you know it’s it’s kind of like an ambiguous sort of design but you you can kind of like have these wherever and it kind of just adds a little bit More Intrigue to the chamber with all of the activity in the chamber one might expect a little bit of mess you can achieve this effect by placing some Redstone and some Redstone all in the ground specifically around the devices that would warrant it so the Iron Maiden And maybe the saw device and that just adds a cool of blood splatter and it just kind of adds to the atmosphere in adding to the atmosphere you can also use glow lycon on the walls with a mixture of cobwebs as well perhaps in the corners of the rooms and the alcoves And the areas plus you can also exchange some of these Stone breaks for some cracked stone bricks as well you can even add Cobblestone to the floor and the odd stair block but at a certain point you do have to chill out a little Bit because it does get to be a bit more and there you go your very own torture chamber what you always wanted thank you so much for watching everybody I hope that you’ve enjoyed this build if you’re happy please do remember to like the video subscribe to the channel click The little bell next to the subscription button that’ll ensure that you get all my videos sent directly to your sub box thank you so much for watching and that’s it thank you so much for watching please like the video subscribe to the channel click the little bell next to The subscription button thank you so much and I hope to see you in the next one Video Information
This video, titled ‘Minecraft Tutorial: Scary Horror Medieval Torture Chamber’, was uploaded by TSMC – Minecraft on 2022-10-19 14:00:01. It has garnered 19378 views and 474 likes. The duration of the video is 00:24:43 or 1483 seconds.
1:30 Items And Grid 2:03 Walls Floor And Ceiling 6:50 Prisoner Wall Shackled 7:32 Prisoner Suspended From Ceiling 9:22 Rack 10:56 Saw Table 11:33 Iron Maiden 13:05 Skeleton Prisoner Jump Scare 18:12 Electric Chair 22:25 The Rest
How To Make a CIty Playlist – https://www.youtube.com/playlist?list=PLVfyBBWTXosBc2X7FdAzrdKffZoY1ZzZG
If you want to download the world (Java Edition) you can become a channel member here! https://www.youtube.com/channel/UCIui-Mt1PmcJYpoBATftj7g/join
Check out my merch 🙂 – http://tee.pub/lic/uCgw3hVWL6c
#tsmc #tsmctutorial #citytutorial