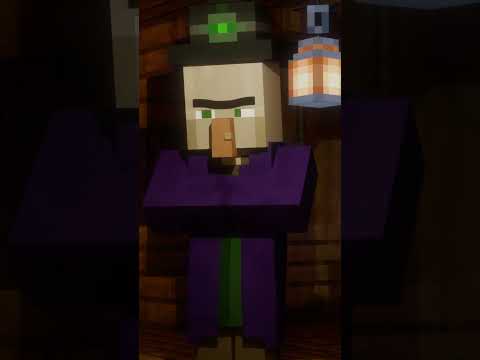
Hey everyone welcome to kick punch I’m going to do a tutorial in zrush on how to model this fun character here this is a uh a character I believe it’s from my kids tell me from the the Minecraft game a fun game where you just uh you just Mind so much and uh this particular character is supposed to be a snowman which I guess has a pumpkin head and you can control them or do whatever I don’t know what you can do in the game with them but I thought it was kind of a fun Concept and I wanted to start with something simple we could do in one zbrush session so I’m going to do this in a one quick like 45 minute long session and teach you uh the basics of UI of navigation brushes and things like that things that you need um in your Toolkit to be able to make this character so with that being said please like comment and subscribe get involved in in the discussion a little bit and we will jump right in so this is zbrush when you first boot it up and this is just zebras trying to give you something To start with here so we are actually going to start let’s say let start with this Cube here this cube. zpr so we’ll double click that guy and this gives us this fun little Cube and this is already getting kind of close in the shape that We want but I definitely want my um you know things to be a little different edges to be softer smoother and um first things first though let’s talk about the navigation so if you want to be able to rotate around all you have to do is right click on the screen anywhere on The screen you can right click and it’ll rotate around in order to pan you alt right click so right click rotates alt alt right click will pan and then if you want to zoom you can alt right click and as you’re panning let go of alt so again that’s alt right click as You’re panning let go of alt and continue to move your mouse in your cursor in and out and you’ll zoom and that’s a little bit wonky at first but you’ll get used to it just take a few minutes here and just kind of practice rotating around alt Ro uh uh alt right Click panning and then alt right click let go of all and continue to drag your mouse cursor and it’ll zoom in and out and let’s say something it’s you know clear out of place over there you want to be able to get that over and you Don’t want to have to just manually pan it over you can come over here to frame or you can just hit F on your keyboard f is in Frank okay so that’s the basics of navigation there’s kind of two different uh views you can do you can do Orthographic view if you hit p on your keyboard it’ll switch to the or orthographic view which is really handy if you’re working on symmetrical sides um that’s good to be in but if you want to see it in perspective mode just hit P again and it’ll switch to perspect Perspective mode and then um let’s see what else so your brush right here if you want to you see that have two cursors over here so this is this has symmetry on if you want to turn symmetry off just hit X as an x-ray on your keyboard and it’ll turn that other one Off so you uh so you aren’t sculpting in symmetrical mode so um there’s that and then if you want to adjust your draw size your brush size you can hit s on your keyboard it’ll bring up this little slider and you can drag that left to right to adjust your your slider and Then up here is where a place where you can adjust your actual intensity of your brush so if we were to try to left click and just sculpt on this brush right now using this standard brush this is what it’s going to do if I undo that and crank that Intensity it’s going to really push it out okay and now if I want to go inward all I do is hold alt left click to go inward and that does the inverse operation of whatever brush you have active so that’s the navigation and the basic uh uh brush workflow um you can Also paint with poly paint if you turn RGB on and choose like a fun color you can poly paint and that just applies colors to the vertices of your mesh I’m going to undo that and turn back on my Z add and so and then the Z sub this is just like Okay if you want the default to be in then if you hold alt it’ll come out but I usually just leave that at Z add and then your focal shift you can change the actual uh influence within the brush radius and so this is this just makes it A much smaller radius if you want that little kind of carved you know needle kind of vibe so anyway um so that’s the standard brush if you click over here you have access to all of these amazing brushes okay some of my favorite favorites are like the snake hook brush The move topological brush um I really like the uh polish and that there’s an H polish brush my favorite for detailing is the dam standard the Damian standard brush um and then one thing that’s important to know too is as you’re sculpting if you just do this here A Common workflow is to push things really intensely and then to smooth things back and the way you smooth is by holding shift on your keyboard and your cursor will turn blue so that’s kind of like your backup brush and you can set anything you want to be that but I Prefer you know to smoothing is a very common workflow so I usually just leave it at that and so it’s you know you push your details to a little bit far A little bit too far until they look weird and then you just smooth it back and so That’s That’s a classic zbrush workflow another way to navigate over here too if you wanted to just grab this guy’s head you can snap it to the different uh orthographic views or while you’re rotating you can hold shift on your keyboard and it’ll snap to the next nearest orthographical View so once one thing you will also see is that as I do this as I click on this guy you’ll see I create little ticks up here little uh little rectangles and that’s actually history that you’re making on your on your character so you Can come up here and you can click and drag all the way back like this you can drag all the way to the right um and so that’s a way to kind of go through your through your actual history or you can just hit undo on your keyboard and it’ll Just undo just contrl z contrl z on your keyboard okay so um that’s the basics for now I think we’re just going to dive into this and start sculpting this character so I want this to be a Minecraft snowman so it’s going to be very kind of Cub if you will but we Don’t want it to be so sharp on the edges so what I’m going to do do is I’m going to hold shift on my keyboard and turn down my my Z intensity we going to go down to like 36 and then just start smoothing this cube out a little Bit and this is kind of the handsy approach this is the less precise way to do it there’s other ways you can do this too and maybe I’ll show you that real quick if we undo what we just did come over here to deformation right here and This is your uh tool you’re going to be using a lot of these so just uh start to get familiar with that but one thing you can do in the deformation drop down is you can actually just run like a an inflate for example you can just inflate Things out and it’ll kind of round those edges for us automatically and then if I hit controll D on my keyboard cuz right now we’re seeing these polygons right we’re starting to see these edges and let’s say we want to smooth those out by adding subdivision levels it looks like This particular Cube already has several subdivision levels but we can add one more by hitting contrl D on our keyboard and hitting contrl D again we’ll add a seventh subdivision level and you can always slide up and down these over here in the geometry uh subdivision slider or You can hit shift d on your keyboard to go down and then just hit D on the keyboard to go up those subdivision levels and then remember contrl d actually creates a new subdivision level to work on okay so for right now I’m happy with this Cube I’m going to delete My lower subdivision levels and this is uh a clean topology right now we’re not super concerned with that because I’m I’m more interested in the 3D print workflow so we don’t have to worry about rigging or animation or any of that Shenanigans so okay what we’re going to Do now is create the next tiers of this snowman what I’m going to do is I’m going to convert this character to something called dynames if in your G geometry uh menu you can come down to dynamis just click that button and if you hit shift F you’ll see that it Switched the topology to a different topology and what this is doing is giving us more polygons to work with that are kind of just averaged across the surface of our geometry so we have uh polygons to work with no matter where they are so for example if I were to Switch over to my come over here into my brushes you can also hit B on your keyboard to access your brushes and then I find the snake hook brush which is something I have set to my hot Keys you can click and drag this guy out and as We do that we see that we start to see these weird polygons U but we can red dynames this by holding control and then left clicking and dragging a square outside of our geometry and let go and you’ll see that it reallocated polygons to where all that stretching was so now We can resculpt and resculpt and remove things as we wish so uh there’s another way you can use um this particular workflow uh with sculptur Pro which actually creates polygons as you pull them out which is super awesome um it works really really well with the snake Hook brush so that’s that’s one of the uh things that it suggests when you start using the snake hook brush it’ll throw an error uh but for now let’s keep going with this character so let’s take a look at our concept real quick to see Where we got to go let’s give him some legs we’ll start there and uh you can you can make legs in multiple ways which is pretty classic zebras you can do things multiple ways there’s no wrong or right way per se but for now I think What I’m going to do is I’m going to I’m going to hit uh X on my keyboard and turn off symmetry I’m going to hold control and I’m going to switch to my transform Gizmo if you click these buttons up here it’ll pop up this transform Gizmo we can hold control and click this green arrow right here okay and then drag down okay so we just duplicated that sphere and moved it down and now I’m going to scale it down this way and then I’m going to scale it up this way And so that the yellow Square scales all of the trans all of the translates in the same uh uniformly and then this just scales it in that green in that y direction and this scales in that uh X Direction okay so come over here and move this leg kind Of into place and you’re thinking well now he’s he’s only got the one leg and that is not not to worry we’re going to figure that out here in just a second so okay we’ve got the one leg over there now um one thing that you’ll notice is That uh when I’ve done that it makes this dark and this light and that’s because it’s Mass to this area like if I was to try to sculpt on this I wouldn’t be able to but I could sculpt on this guy turn off sculptur Pro um and that’s Because when you duplicate your mesh out of that same mesh it automatically masks that for you in order to clear that mask we hold control and then left click and drag it’s kind of like running a dam mesh same thing um but we want to mirror This over so he’s got two legs so I’m going to come over to geometry and then modify topology and then whoops let’s do this I started on the wrong side of the AIS axis so we’re going to mirror this over on X and deformation mirror that on X and then come back to geometry and then do a mirror and weld on X and then it’s going to create another leg but it pro it actually stuck those legs together too closely so what we’re going to do is going to go back go down one of my undue histories And then I’m going to control shift left click on that square okay actually looks like they’re the same poly group you can see they’re both red if I hit shift F to show the polyframe it’s showing my poly groups and so what we’re going to do is come Over here and do an autog group and you’ll see now it’s made those two separate colors so now if I hit control shift left click um we can now isolate those poly groups because they they don’t have topological continuity they’re separate topology okay so we’re going to MK this by holding control and Then left clicking a BX a box around that Cube and then I’m going to left click control shift left click outside of that geometry and then I’m going to control left or control tap on the screen and then I’m going to click on move and in order to reset this pivot I Can click on this guy right here here and I’m going to scooch that guy over okay so I’m going to clear my mask again clearing the mask is control uh control uh left click drag and um if you if your mask was was on and then we’re Going to come back up here to geometry and do a mirror and weld okay great that was a lot of work but we got there all right so the next things we’re missing let’s take a look at our concept again we have one more cube right here For the Torso and then another Cube for the heads so we’re going to just uh quickly bang those guys out right now so I’m going to control shift uh left click on the blue the blue cube and then I’m going to drag a mask around that guy and Then I’m going to uh come over here to my transform gizmos oops I need to invert my mask by control tapping control left click and then I need to reset my Pivot and come up here and grab this Green Arrow and pull that torso into place okay so now we’ve got a Corel That’s great scoot that back a little bit uh actually I’m in the wrong so remember to use this head over here for your orientation to know which way this is actually facing in 3D space his nose is pointing this direction and so this is forward okay so now let’s create a head And I believe his head was you know a good bit bigger than his torso and kind of just jutted forward just a little bit but let’s switch back and see how things are looking okay so it’s torso um should be probably a good amount smaller so we’re going to go back here To poly groups and run an auto group to isolate those poly groups so we can grab those guys I’m going to control shift left click on that torso and then I’m going to mask it and then invert my mask by control left clicking and I’m going To apologize if I’m going a little bit fast this is something you might want to slow down the video a little bit which you can do in your YouTube settings um just trying to get this thing done within within you know a half an hour 45 Minutes or so so okay so now um we’ve got the basics of the body working and I think they’re probably fairly close his belly might be you know a good amount bigger so maybe I’ll mask this guy and kind of scale his belly uh a little bit Bigger okay and then maybe I’ll scale his legs too M those guys and scal those this way as well okay so now that I’ve got his legs unmasked let’s make his arms out of his legs just something that I say all the time for some reason let’s just make the Arms out of the legs okay so let’s grab the uh this white Arrow here on the outside of the transformed Gizmo and pull these arms up and out and make those a little bit longer and then rotate those in okay try and line those up with the Torso sco those back a little bit here let’s see real quick here it looks like those arms were kind of tapered intoo uh at towards the top so they’re not like a perfect Cube so let’s try to let’s try to get that somehow what I’m going to Do you know what I’m going to do I’m going to undo that okay and then we’re just going to come over here to sub tool and you’ll notice that everything we have now is in this one sub tool we can add as many sub tools as we like so we Can come down here and go to append and make a cube okay and then that cube is kind of on the inside of our belly right now so it’s hard to see but if we turn on this little button right here this will make everything else be hidden except for the Active sub tool which is the scatter right here so it’ll be uh in Solo mode is what it’s called and you’ll use that quite frequently um inside zbrush so what we’re going to do now and just remember all this stuff is still here if you click up to this other sub tool it’s Still available to you right there I’m going to scale this uh cube in y direction and then I’m going to do something fancy pants down here in deformation I’m going to come down here in a taper turn off the X and the Z and Turn on the Y and just run a taper and just drag to the right a little bit so we’re going to get that interesting kind of taper and then from there I’m going to run a uh an inflate actually you know what if we hit shift F we don’t have Enough polygons to work with here so first things first come up to geometry and run a dynamesh let’s turn down our resolution just a little bit to yeah 48 is great and then we’ll come to deformation and then run an inflate on there to round those edges up and then re damesh by Control left clicking and dragging a square and it’ll it’ll fix those kind of stretchy polygons and now I’m coming across this with a smooth a broad smooth again at a 36 intensity and now we’ve got a super fun looking Christmas tree thing here uh but What we can do now is come up to our move tool and just scale this arm and get that arm into place I think I had some kind of like a little bit of a curve a subtle curve to it so I’m not scared of that let’s do it So uh with the snake hook brush we’re going to scale up our uh size a good amount and then just kind of start to add this curve in there okay just running a smooth again turning off my um poly paint and then I switch this little Swatch Here uh to White so that we can um so that it’s we don’t have an an odd red color on there so um I’m just using the transform Gizmo to kind of place that arm a little bit better and then from there I’m going to continue to smooth and then run a dyam Mesh again and continue to smooth that guy and that’s looking better so we’ll come back to geometry and we’ll use a modified topology o sorry in Geometry yeah modifi topology and then we’ll do a mirror and well to get the other arm to pop up there and and then I think for This one square this uh I think it might be kind of fun to run a taper on all of these guys so we’ll make sure that nothing is Mas make sure your masks are cleared by doing that and what you’ll notice is when you do run that Dynam Mesh it’ll Stitch these these meshes together and we don’t want that right now so one way to get around that is to contrl Z undo that and you’ll see it’s back to being a separate mesh and then we can come over here to geometry dynamesh and turn on the groups button And then if you redyes it’ll keep your group separately okay okay awesome so let’s do that let’s do a little bit uh of a taper but I don’t think I want to taper the head I just want to taper the Torso so I’m control shift left clicking on the Torso Inverting my selection by control shift left clicking and dragging and then I’m going to send this to the other side as well and send this to the other side the other side and um then I’m going to invert my selection by control shift left left clicking and draging and I’m Just going to run a broad taper by turning off x and z and I’m going to turn on Okay so uh we’re just going to run the taper now I’m just going to drag that guy and I’m I’m liking what I’m seeing so uh I think I might scale this I might scale the Torso out in the in the X Direction real quickly Center my Pivot here and then unhide everything and that’s looking better already and then uh make sure that we save that’s very important just run a save here and I’m going to make A what I like to do is make a z directory and then save version 01 with a W whoops Okay so we’ve got that saved now the next thing I’m going to do is let’s make a pumpkin out of this head so I want to I want to isolate this head and Make it its own sub tool so what I’m going to do is control shift left click on that on the head and then I’m going to come over here to split and go split hidden okay so now you’ll notice it popped the body down to its own sub tool And if you’d like to you can rename these guys to whatever you’d like okay and so I’m good with this for now and what we’re going to do is a little bit of painting uh mask hitting p on my keyboard and making sure that my symmetry is on by hitting X make sure That little dot is on over there and I’m going to start painting with a Mas pen I’m going to paint everything except for like the little area where the face is going to be okay so I’m just dragging these bits here and then right here I’m going to start just left clicking and Dragging and painting so these are the eyes and then we got the mouth and I’m not like concerned about making sure that everything is a perfect Cube you know I’d like to kind of mix it up a little bit and I think I’m going to add some Teeth here so I’m turning off symmetry now and I’m just going to paint in some teeth because I don’t want those to be perfectly symmetrical okay all right cool cool cool cool and if I want to sharpen that mask cuz it’s getting a little bit blurry Around the edges I can hold Control Alt left click and I can sharpen just tap just continue to tap and then it’s going to sharpen those out for me there’s not a lot of polygons to be working with right now so that’s why you’re seeing some kind of like polygonal looking Stuff and I want to excuse me I would like to extract this mask into its own Geo and so what I’m going to do is come down to the bottom of the uh geometry or subtool palette I’m going to go to extract and I’m going to hit Extract and then I’m going to hit accept and now we have an actual shelled pumpkin head okay and one thing I think I’m going to do is what’s awesome about that is it when it extracts it makes a second sub tool with the extraction so I’m going to delete this guy and try This again but I’m going to give it more thickness okay so let’s crank the thickness to like 6 and hit extract that’s probably a little bit too much much we’ll go to like. 3 just a little bit more and hit accept perfect okay so Now I can come over here up to that top one and just hit delete and click okay and then it’s gone for good so now we’ve got this head here which is interesting and um if I turn on solo mode or off solo mode you see we now got this this Head and hit P to show the perspective and let’s say we want to add kind of you know some pumpkin details so uh what I’ll probably do is come over here with my symmetry turned on I’m going to draw these interesting lines okay like so in the head and then Um so now we’ve got those guys turn on solo mode just to get everything out of the way I’m going to invert my selection by control left clicking and tapping and then I’m going to blur this by holding control and tapping on the geometry just blur those masks and then I’m going to Come down here to deformation and do like a subtle inflate see what that does you know what it might be better to do the inverse let’s let’s invert our selection and then try and inflate go out the other way yeah it’s okay it’s kind of cool I Guess so let’s um let’s come back and run a dynamesh on this guy so we’re and just just just to show you exactly what’s going on here so we got this these these edges that are kind of streaking across here we want to have polygons there to work with so I’m going To hit dynamesh okay so now it added those polygons you can crank your resolution up to like 220 and now we got uh we got some resolution to work with so I’m just going to use the snake hook brush now and you can see um that it kind of just Moves stuffs it moves things around really easily um it’s kind of a more intense kind of a move brush which I love I love the snake cook brush just going to add some sharper edges to these teeth okay cool now I’m going to do a broad smooth I think and just kind of Smooth things out turn on so off solo mode so we can see what’s going on here awesome and let’s take a look at our concept and see how we’re doing so got to add this little stem to the top here and a fun scarf so let’s go with Those now for now and and um I think what I’m going to do is just come over here to brushes and do an insert primitive brush so in this this one here you have all these shapes so it pops up all these shapes and if you click and Drag you can rotate uh through these different brushes I’m going to select the Q Cube and then I’m just going to click and drag anywhere on make sure that your head is your active sub tool and then you can click and drag and as you as you drag different directions It’ll kind of squash and scale and it’ll do what we want and then let’s make a taper on the top of that in the deformation the same way we know how we’ll come over here to taper turn off x and z and turn on Y and then just like because it’s not Perfectly centered on the grid it’s going to be a little bit wonky but it’ll still work so what I’m going to do is control shift left click and tap on that guy and then I’m going to split that by coming over here to do a split hidden and add It to its own sub tool and then I’m going to come over here and run it a dyam mesh and kind of add it add those nice smooth edges that we have on all of our other objects okay make sure symmetry is turned on it’s not I don’t think it’s centered Perfectly so symmetry is probably not going to help that much actually so we’ll just we just kind of fin angle this thing into place fagle it’s a fun word something my mom would say finagle all right cool so now let’s try to let’s come up here and let’s merge This guy back down into the head h control if you hit control W it’ll change it’ll create its own poly group and then right here our head is still masked so let’s control left click and drag and unmask that and then we will just merge this stem down into that Other sub tool it’s going to merge right down to the next one down so now it’s all one sub tool and I want to do that because I want to move all of these up a little bit more easily and scale them up to kind of make that a little bit more Interesting all right cool so now for the scarf let’s do this let’s start with a cylinder we’ll come over here to append and then we’ll come over here and click on cylinder 3D and again that’s right in our belly it’s like we’ve eaten it so let’s move that up and out of Place let’s squash it this direction and then we’ll kind of start to just position this by using these different circles the red you know and the and the blue to rotate that guy into place make it a little bit offset okay so um I’m going to do a taper on This guy too man I just love that taper so much you guys you can totally tell look at that it just kind of gets it right into place sometimes sometimes this just works and I’m using the snake cook brush to kind of just push this guy uh into Place you know like a scarf would be smoothing by holding shift and just smoothing things out a little bit here so we’re getting this guy into place all right and then I’m going to go back to the standard brush just quick find your brushes go standard and if you Know the name of your brushes you can hit B anywhere in your viewport to bring up your brushes and then if it’s the standard brush for example you can hit s on your keyboard and every brush that starts with s and then U is up here in The left corner so if you hit U you will land right on your standard brush but for me I have it set as a hot key so be sure to do that it’ll speed up your workflow so I’m going to drop my intensity down it’s pretty hot and then I’m going to go along the center of this and just kind of make that uh scarf look more like a scarf have these these uh uh upper and lower edges kind of taper out just a bit more and then yeah I think that’s looking pretty Good and let’s say we want to add our little strands that come out saying you know assuming that this scarf is like kind of tapered let’s come over here to our brushes and there’s a fun brush that we can give it we can give a go here um Let’s go to the curve strap snap brush and see what that does for us so with your scarf as the active sub tool right we’re going to click and drag off of that scarf and that didn’t work very well because is trying to snap to the Other Geo beneath so let’s find a Geo that’s kind of more like kind of the direction that we want to go and that worked a little bit better we still have control over this guy we can grab this little dot at the very top here or undo that or we can Grab this guy at the bottom here but for now what I’m going to do is I’m just going to left click anywhere and that’ll get rid of that little temporary rig line so now we have control over this and we can just move it however we want Okay so I just want to kind of just get this guy just muscle this thing into place now so let’s do that let’s just use our Snak hook brush scale up our JW size and then we’ll just we’ll just force this guy into submission WWF style if that’s still a thing Sorry that was the sun was needing some some wisdom from the old man okay so I’ve got this guy in a pretty good spot and I want to have another one come out so I’m going to come up here to my move tool and that’s going to give me this Little transform Gizmo I’m going to reset to the center of the unmasked Center and then I’m going to grab this little white Arrow Arrow up here in the top and then just rotate this guy into place where I want and just remember everything else Is mass so you can kind of just go to town okay and let’s say I want these to be like more you know kind of like have more thickness to them and more inflated out and so one thing I can do is I and come over here to the deformation drop Down again and there’s a little inflate slider so we can kind of inflate these things and just inflating everything that’s the active sub tool at that point and one thing that I I forgot to mention is I’m using the move topological brush and that’s really really powerful Because um if the topologies vary then it’s not going to even though my brush size is scaled way up it’s only going to move the topology that I’m moused over which is uh awesome I use this all the time and so right now obviously this topology is different than this topology And this top you know they’re not they’re not connected by any verts or edges or anything so it’s it’s going to just work okay so that’s good we got this guy and he’s coming out the front and then this guy’s coming out the side a little beautiful okay let’s take a look At our concept and see how we’re doing I’m going to all tab over all right awesome there’s a little bit of a knot there too okay so let’s uh save real quick and then uh I’m going to version up my file I’m a big fan of securing the state of Things okay so we got a little ways to go we’re just going to um let’s make the knot we’ll make the little buttons here next let’s do that and I’m going to uh alt left click is a way to quickly switch between sub tools within your Viewport by the way you can just alt tap on any of the separate sub tools and you’ll easily switch through those or you can just come over here and just kind of Click through your list uh which I find to be a little bit less effective Uh I really like to just kind of do that all in the viewport so I kind of want some roundness here so I’m just kind of moving I don’t want everything to be a perfect you know absolute perfect Cube I want it to kind Of be my own thing so it’s okay that the legs may have have this kind of goofy little Bend and um just turn on solo mode and get everything else out of the way and hit p and switch to our orthographic View and then I’m going to hold control And do a mask pen here okay and make sure that P is on so I’m going to select I’m going to I’m just basically just making my buttons so I’m going to click and in order to invert your mask so you can do control and then Hold alt and it’ll switch to White and it’ll invert your mask okay I’m I’m just testing doing these uh quick tutorials things that I can do really quickly and zbrush is a hard thing to do quickly um for everybody just so you know um but we’re going to we’re giving it a Go so all right so now I want to turn these into buttons so we’ll come down here to extract and do an a mesh extract and let’s do a little bit thicker so we’ll increase to like 8.8 and hit accept I’m going to clear my mask come Over here to geometry and jump right into dynames just hit dynames button and make sure that that’s active Okay so now I’m going to do a quick uh in inflate just inflate those out just a little bit round those out a little bit turn on so off solo and then Let’s push those guys back in to the body just a little bit and then I think one thing I’ve been neglecting I’m going to alt left click tap on the body and then I’m going to control shift left click tap on the Torso mask that torso And then invert that mask and I’m going to scale this thing this direction whoops we had other things unmasked still so that was the issue there so make sure everything’s unmasked and then remask your torso and then scale that guy how you like and get that guy into Place and let’s say that you accidentally didn’t have symmetry on for whatever reason you did some work over here and you’re like oh crap I want this work over there you can come over or I ruin this you know you did it on the other dire other side that’ll be easier To demonstrate so over there and then modify topology and do a mirror and Weld and it’ll just apply everything to the other side that you had already done so that’s very convenient if you’ve gotten that if you’ve gone that direction so um ideally you just make sure that you have Your symmetry on and off but there’s always ways around that in zbrush it’s a very non-destructive kind of software so all right so now where are we at Let’s uh let’s do a save real quick you can do save and you can do save next that’ll automatically save another Version sometimes this breaks if you’re using uh some Z plugins and and like transpose Master things like that so just be aware of that um his arms might be a little bit too big he’s got kind of gorilla arm so let’s maybe scale these guys in turn it make sure your symmetry Is on and then scale those guys deformation going to inflate those just a smidge and hit P let’s see how things look awesome so let’s start with adding the knot now on this guy and Just for kicks let’s hit control D and see what happens so it looks like These guys don’t hold very well so let’s do a um let’s do a dynamesh and for now we’ll keep groups on and then just run a dynamesh real quick turn down the resolution I’m going to do a poly group actually and do an auto group and that’s going to give us everything that’s Separate goo will be in his own group and then I’m going to run groups and then dynamesh so now we have a bunch of fun polygons to work with Okay let’s kind of pinch this guy off a little bit just make this kind of pinch and Then we will control left click and draw a mask for the knot for the rough shape of our knot and then we’ll do an extract here you you can wrap it all the way around if you’d like and then come to sub tool go down to extract and then Crank this to like 08 and do an extract that’s too much let’s keep it at 04 uh extract and hit accept okay so now we’ve got a knot in there let’s clean that up by smoothing it a little okay fun times hit control W to make it all one Poly group and then we’ll merge it into our scarf subtool okay so now they’re all combined and we can just do our work here I want to add some interesting kind of little wrinkles in this uh in this scarf it goes around and I’m going to use my Favorite brush to do so and that’s the Damian standard brush so go to B and then hit D on your keyboard and Damian will be the S and so uh let’s use that guy so if I turn shift F turn my polyframe off you can see how awesome This brush is it just carves those interesting little details in there really nicely and don’t forget that you have both an out and an in option so you can just left click and drag or you can alt left click and pop that stuff out so Be sure to do both I think it’s very important that while sculpting we remember to have additive and subtractive detailing in our in our work so so let’s just kind of make that look like it’s kind of pinching into a knot type shape maybe even add a little bit Of a dimple here like a tie kind of dimple awesome okay so we’re at about 40 minutes now so we’re doing good on time cuz we just need to do basically just the base and we’re pretty much ready to go and so right now I’m going to I’m Going to append another shape for the base and we’re going to of course because it’s Minecraft we’ll do a cube and we we’ll uh move to our transpose tool or yeah our transformation tool and then get that guy down into place scale it in y and create a nice fun little base Okay and remember if you hit shift F it’s in a clean topology we want it to be in dynamesh so we’ll come back to geometry and turn down a resolution to like 64 or so and hit dynamesh okay and make sure that X is on your symmetry is On and then we can just actually come over here to deformation and run an inflate so we’ll round those edges out again okay I’m fairly certain there’s some kind of very easy hot key to like rounding inflating things and I think it has something to do with the the trans Transform Gizmo but I can’t remember what it is off hand so if anyone knows let me know in the comments yeah if there’s any if there’s any tips that you can think of that will simplify this workflow please share sharing is caring sorry I said that okay so I’m just again I’m just like pinching in those details and just remember when you print this these characters at scale so if you print this guy like 6 Ines or whatever just keep in mind that you’re detailing may need to be accentuated just a little bit to the point where it looks kind of Ugly to be able to show up once it’s printed really tiny I’m not sure if I like how my uh little scarf tails are looking like they’re like glowing in the wind so I’m going to try to bring those in a little bit more one thing you’ll notice too is Um the size of your draw size your brush size kind of has like a limit so if you click this little Dynamic button It’ll like it’ll be like all bets off man you can go as big or as small as you need to and I wish that that was the default but I mean that would just be lovely how this guy kind of fall like in front of his tummy his little tummy and again I’m using the move topological brush that’s how I get around this Wizardry of not having to move everything okay awesome cool uh I think I want this head To be a little bit wider so I’m going to alt left click on that sub tool and go over to my uh transform Gizmo and scale that guy make make him just a tiny bit smaller set him down into that guy just a little bit more so Awesome okay so maybe what I’ll do um because we’re already at 43 minutes uh let’s just uh let’s go for it so what we’re going to do is we’re going to get this thing prepped for print right now and I’m going to hit save and I’m going To version up because this is going to drastically adjust your sub tools and all of your history and everything so make sure you version up your file when you’re moving into print phase it’s always helpful so okay what we’re going to do now is we’re going to combine all Of these sub tools down so I’m going to come up here to the top sub tool and I’m going to go to merge and then merge down merge down and I think if you have a ton you can always hit merge visible but I’m I’m going to be a crusty old man and do it my way all right so now if we hit shift F we can see we still have all these other uh poly groups which is great so we can still kind of modify as needed um but for now What I actually want to do is combine this all into one topology okay so I’m going to hit contrl W outside I’m sorry I’m going to hit control left click outside of my mesh and just red dynamesh but the problem is that’s not going to work I guess because dynamesh is not on So we got to come back here into geometry and turn on our dynamesh and it might take a little bit because this is going to get pretty dense okay so I don’t need it that dense so I’m going to undo that and go to like 100 and then redam mesh Awesome okay so now what I want to actually do with this character is shell the character okay cuz if we’re printing this character in resin for example that’s going to be a really expensive character to print because that’s going to it’s going to use all your resin and We don’t want to do that so um one thing I was just doing actually I should actually explain is I’m just inflating these little gaps in here and just kind of trying to make this a little more watertight um so uh okay but before we’re going to Shell let’s do a quick Refining pass just with our Damian standard carve in those Det details carving you’re seeing I’m getting fixated on this little area but that’s Fine cool and I mean if you wanted to you could go and add little like kind of roughness little snow detailing around um uh like one way to one way that you could possibly do that is come up here to switch to your standard brush and then you can actually adjust the stroke To these little sprays and and then change your Alpha to something that’s much smaller this is one thing I haven’t really covered much is the alpha most brush all brushes come with a default Alpha and you can always adjust those but I would switch to Alpha 40 and then If you came in here and switched over to zuub and started just left clicking you would add these interesting little like kind of granular looking like it looks more like snow or sand in this case it looks kind of like more like sand but it’s just something it’s an option you Could add if you wanted to add that kind of interesting texture to your character um so just a thought there I’m probably going to undo this and and maybe take a little bit more time with that later on but I was kind of I was kind of Liking that so now because I um I I made a brush stroke on it you know it wants me to undo that that history but I’m just going to hit okay and that’s fine that’s going to be the new that’s going to be the new state of things So let’s see Damian standard here here I’m going to rush maybe go this way with this Guy I’m not going to push it too hard not going to push the details too hard this is kind of just like you know a fun gift that you could make for somebody um you know a Minecraft fan or I got to say I’ve started playing Minecraft and I actually um my Generation’s going to crucify me for this but I actually kind of enjoy it I think it’s interesting even though it doesn’t look very good doesn’t look pretty um it’s got some interesting stuff in it it’s got a lot of lure it’s got a lot of depth behind It that you don’t don’t see so now I’m just adding some detailing to the stem I feel like it deserved it and maybe we’ll clean up his mouth just a a little bit I’m going to turn on X with symmetry because we’re still kind of symmetrical at this Point turning off symmetry to fix that tooth and I think I’m going to uh change the eyze just a little make him look a little more more cheery a little more happy less nefarious okay all right so that’s our character um I think we nailed it think He’s he’s going to be great so um I’m going to save this and then um come over here to your brushes this is kind of a really weird way to Shell the model it’s uh it’s very zbrush esque in that it’s not super intuitive but um I don’t know of a different way So I’m going to click on brushes come over here to my insert mesh Prim Primitives and you’ll notice that all the brushes that you’ve used with that current zbrush session will pop up to the top at the Quick Pick uh menu up here and so that insert mesh perimeters Is the one that you want so we’re going to come up here to insert cylinder in this case and I’m going to as I’m going to I’m going to snap to the bottom View and I’m going to hold alt and then left click and drag a cylinder into that uh Bottom and you’ll notice that it kind of popped out the top there too so I’m going to use the move tool I’m going to drag that guy down and I’m going to imagine that it’s intersecting that square a good 2 or three you know 3 Or 4 mm in okay and then I’m going to control left click and drag out to clear my mask and then from here I’m going to come over to um first thing I’m going to do is save because this this has a tendency to take some time and it can crash your Machine so uh actually one thing we have to do is undo what we just did control left click and drag and I think saving actually turned off our dynamesh button which was super lame thank you zbrush um but we we’ll click on this number four four right here and then Turn it to let’s do like 22 and then we will click create shell and I may skip ahead in the video cuz this can take a good depending on on the resolution of your character it can take a good amount of time so um I might have To just skip this skip ahead a little bit okay so this is the result and that’s not what I wanted so I think what I have to do is drop my thick this down so I’m going to contrl Z and go back to where I was and then switch this to Maybe let’s try like 16 whoops or two 16 there we go and then hit create shell okay so this is the result again zebra is embarrassing me I’m getting embarrassed zbrush why why can’t you just work I think what we might have to do is um maybe scoot our cylinder up and In a little bit more like let’s let’s go like 3 or 4 inches or so I know it’s really it’s like a huge guessing game but this is kind of the way it is uh control left click and drag to clear our mask leave the thickness at 16 and let’s Let’s hit it again and see what happens there we go Okay cool so now what we’re seeing is an interesting kind of little smiley face you can see that now there’s an inner shell that goes all the way up throughout our character okay so now When we print this if I were to control shift left click and drag anywhere you can see better that there’s it’s kind of hard to see let’s go to display properties and go to double and now we can actually see that inner shell it’s kind of going all the way through out so Now we’re not going to break the bank and uh everything’s going to be great so um I might just continue to do a little bit of refining on the character I think I actually was liking that little snow kind of like pattern we were getting That texture so I think I’m going to add that through it um but I’m going to give us more resolution to work with so I’m going to crank this to 192 and sometimes you have to make a change on the surface to get that resolution to adjust it’s kind of a Bug turn down my intensity but just again remember when you print at scale these details may not come through unless you kind of crank them so it would be pretty cool if they showed up so let’s see if we can get that to work I don’t have symmetry on because I Don’t want to get in the way of the stuff that’s not symmetrical so I don’t have the scarf on and this is only going to take a few seconds anyway we also don’t want a symmetrical line going up the center of our character with these details So you could get really crazy with it and add you know you know fabcy kind of texture to the to the scarf and have that all really flushed up nicely but um we’re just going to keep this simple okay sweet yeah and you know the base is probably Going to be snow too right so let’s just make that snow as well and this time I have symmetry on because I’m getting lazier symmetry is kind of It’s a lazy man’s game tell you that full judgments here awesome cool and what else do we got here let’s continue to use the Damian Standard I’m going to continue to plus this little Stam and push those so that they’ll show up for us do a little swirly deal there okay smooth those guys out oh one thing that I I would like to do too is run an inflate I love the inflate brush I use This one all the time too um and it really helps to kind of crease details where you’d like them to be creased just gives you another option there for further interesting detailing okay and then uh H polish is a great one too that I suggested earlier I recommend Uh giving that one a go and just kind of coming in here you can give an interesting kind of carved feel too it can help give you some sharper edges on things and if you want that kind of carved look too that’s really cool as well Damien standard Again okay awesome and that is uh we’re going to call it it’s 55 minutes so that’s an hour um and uh that’s how you made make a 3D print ready Snowman in zbrush so maybe in the next video I’ll show you more like how to optimize that Um I might upload another video for this I’m not quite sure yet um and show you how to take it all the way through chid box and do like supports and all that stuff but for now I think I’m pretty happy with this guy this guy kind of appear to wrap Around a little bit better this is me getting a little bit obsessed as you can see all right okay let’s hit save and we’ll call this one good let’s do a little quick render so you can see it with shadows and that’s what we’re looking at so this Is how you make a very simple snowman in under an hour in zbrush obviously I was blowing through a lot of details so it’s pretty quick to get through but I want to see how quickly we can uh we can just learn the basic interface and make a semide decent kind Of fun character inside zbrush so um if you like what you saw please like comment and subscribe let me know what I can do better as a teacher and um I’m also a learner so I’d love to learn new things if there’s anything that you saw In my workflow that could be adjusted or needed work uh feel free to share but um yeah hit the notification Bell for when I upload new videos I’m trying to upload two to three a week and we’ll see you in the next one Video Information
This video, titled ‘Learn Zbrush the Easy Way | Modeling a Simple Minecraft Snowman Character – Part 1’, was uploaded by kickpunched on 2023-12-27 17:00:08. It has garnered 236 views and 16 likes. The duration of the video is 00:57:25 or 3445 seconds.
Welcome back to another Zbrush tutorial!
In this tutorial we’ll be modeling a minecraft snowman in just two short videos! This series is definitely more suited for absolute beginners and I’ll take you all the way through the zbrush modeling process and we’ll end up having an awesome mindecraft snowman character that is ready to be sent off to a 3d printer!
Download the concept art here:
https://drive.google.com/drive/folders/1kQ6fJUW3OllDiLujMx-dVRzUy39JL1fx?usp=drive_link
Download the scale cubes here:
https://drive.google.com/drive/folders/1HwPZwRA6wDjeqU8by7qCS2pPEKgAX5W6?usp=sharing
Please remember to like, comment and subscribe!
You can find my instagram here:
https://www.instagram.com/kickpunched/
You can download 3d printable files here:
www.kickpunched.com
All background music performed by C418
Track list:
Key Door Subwoofer Lullaby Death Living Mice Moog City Minecraft Mice On Venus Aria Math

