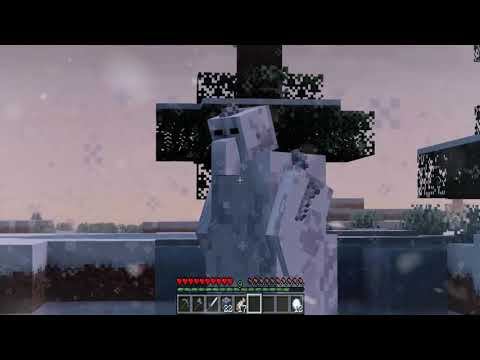
But after doing a poll I’ve decided to do a Minecraft thumbnail tutorial so whether you’re an experienced thumbnail Creator or just starting I’ll show you how to make eye-catching thumbnails so boost your Minecraft content let’s get started there’s a few things you’re gonna need for this tutorial NPC mod and Forge which will both have links down in the description and paint.net paint.net is a free software and I’ll leave a link to download it and it’s fairly easy to use but has a lot of great tools I’ll also leave a link to the plugin I use All you do is run the exe file and it installs pretty easy make sure you have paid.net installed before you installed the plugin though otherwise you’ve screwed up anyway let’s get started what I would first recommend doing is downloading one of these high pixel bedwars Maps if you’re making a bed Wallet video it depends on what you’re doing make sure not to get a virus high quality tips right there what I would usually do is just find like a nice little spot for our NPC to kind of a you know jam and I think a diamond generator To look nice on this one so I like to sell this basic for my thumbnails so what I would do open up my inventory and if you’ve installed the mod you should have this little arrow here going to custom NPC tools and get both the wand And the mob cloner pretty cool I’d also recommend getting a slab right now you’ll see why in a moment now first things first I’m gonna turn off the sky so we can get a nice clean background when we edit it in paint.net now I need To find a nice spot for our NPC to be you know jogging along so first off turn the render distance right down so you can get rid of any background stuff that we do not need I think I like my NPC right here so how we do it is we get the Mob cloner place it down choose poses and choose whichever one you want I’m gonna go for running one pretty nice we’ve got a little running guy going on now we get the MPC wand and we right click first off you’re going to go to where it says texture here click on Texture so it says player and just type in whichever username you want press X and look it’s me now I would like to give my player a diamond sword so what I’m going to do is right click go into inventory and drag a diamond sword into There now I wouldn’t fine tune this just yet because what we’re going to do right first off find a little spot to where you want your slab is place it down set your FLV to I’d say just I’m a 50 or 30 depending on where you are just see how That looks but it’s going to be very hard to cut the character out so I have a little plan in mind so what I’m going to do is set my Apple feedback it looks disgusting find the block that the MPC is on first of all Get rid of him and what I’m going to do is grab my barrier blocks shoots quite tight in the sky find out where my slab is in comparison two diagonal I don’t know why my barrier blocks are not showing up they would do for you so one two three four so If you don’t know how to get a barrier block by the way oh you do a slash give your username and then barrier enter you should get a barrier now I’m going to actually place my NPC here now I know the correct angles to use Now we need to place our slab and I was stupid enough to just do a barrier not do slabs coming off it I’m just gonna replace it with this lap we need to take two screenshots now the Island’s only just inbounds I’m just gonna get rid of It you know you know Chop Shop goodbye yeah cheeky angle up the camera turn down the fob so I’d say 50. if I press F1 gets rid of all the UI before taking the screenshot then just do the same thing up here okay now that we have our Screenshots it’s time to go straight into 8.net whoa six transition so now I’ve opened up paint.net this is why it should help but it looked like for you so you know you’ve got the plugin correctly if you go into effects and you have this plug-in errors tab That appears just up here so now the first thing I’m going to do is import a custom Sky PNG you can just find these all over Google and do this by doing file then open and then choosing the file here we are this is Sky I like to Use for my thumbnails now first things first I’m going to go to the image tab then canvas size and make sure to set the width and height to 1920 by 1080. as this is quite a high resolution so the thumbnail will look good quality and it usually matches the screenshot so press OK and it should stretch out if it was already 1920×1080 fine if not then you are gonna have to resize the sky but that’s just easy just select it with this tool and just resize it now this is our background so we want to import the two screenshots from earlier and how we Do that is go to layers import from file and then just choose the files so starting off with the background this is what it should look like now with this layer selected I’m going to go into the magic wand tool and then click this Sky now as you can see it’s slightly Clipping into the stairs and going in here so I’m just going to drag down the tolerance until it’s only selecting the sky then press the delete key now I’m also going to do all these little areas as well just to make sure it covers everything I would recommend choosing Backgrounds that don’t have lots of fiddly areas to cut the sky out just makes it a lot easier the reason the sky is on a separate layer is because now we are going to select that layer it’s our background layer effects blurs gaussian blur or question I don’t know then just Set the radius just turn it up a bit until it’s slightly fuzzy but not fully like smudged I’d say about 30 normally is nice press okay and it should look a bit blurred now now I’m going to import the layer with our player on do this in The same way as we did before here we are now as my player’s shoes are ever so slightly near the sky I’m going to fill in the sky green as it’s a very unnatural color through the tolerance as best as I can without it clipping in Anywhere as you can see if I turn it up my shoe starts to disappear if your characters are completely your natural color you’d have to do this and make sure to deselect and now I’m going to use the magic wand tool again so select it turn the tolerance up as high as Possible before it starts to seep in which is there now press delete and I’ll play us on a separate level just notice it’s got a bit of armpit here get rid of that now here our player is on a completely separate level and is fully cut out there’s no edges around either Which is really nice that’s why I did the green so I’m going to click the move select so I can move our player around and I’m just going to scale him up a bit about there you want him to be in nearly the height of the thumbnail now this is Already starting to look really nice but there’s too much focus on the background so what I’m going to do is select the background layer effects blurs and I’m going to choose motion blur for this one now make sure the angle is kind of in the direction the player is moving or Just perfectly horizontal now turn up the distance a bit ever so slightly just to blur it out you don’t want it really blurred like this even here it’s too bad you only want it an Ever So slight amount there’s more focus on the player speaking of the player I’m gonna select The layer adjustments and go on to Hue and saturation and I’m just going to boost the saturation a bit and give it a bit of lightness now the player looks really vibrant and looks really nice now I got a little trick here from Sammy green and that is to duplicate the Player layer that sounded so stupid now select the bottom one I’m going to choose motion blur again now this time angle it in the direction the player is moving some player is kind of going up ever so slightly it’s at the distance to be a bit higher like this and now you Can see we’ve got this nice little blur effect around the player which makes it look like they’re moving and just looks really clean now as we put the player in a place that is not actually on the ground we’re going to need to make a Shadow but this is really simple make a Layer by pressing the add new layer button and just make sure it’s dragged under these two players in fact you can select the top player and press this merge layer down just to make it all in one now on this new layer I’m going to select the shape tool where it says Rectangle here I’m going to choose ellipse from the drop down and also just click this button to make it solid Now set the color to Black down here and just make like a noble I make it pretty big so it’s a high resolution then just put it under the player now Here we can resize it how we want using all these little Lobby bits I think that is actually perfect now with it selected press F4 and you should get this opacity drag that down a bit but quite a lot I’ve set it to 125 ish and I’ll go into Effects plus golden blur again just to fuzz it a bit maybe it’s at the radius pretty high and there we’ve just made a shadow for the player now it’s time for the text of the thumbnail so I’m going to put a layer make sure it’s underneath The player in the shadow either way you cannot merge the player with the shadow as it Alters the players opacity as well and makes it a bit ghostly now on this new blank player we’re gonna put the text select the text tool and this is Where if you want a custom font you can just download it off websites like dafont and just install it you may have to restart paint.net so make sure you save the project by pressing Ctrl s now you can go to this font drop down font I Like to use is I have use lemon milk bolt or question I’m gonna use question for this video now select it click on the screen and just scale up the font to what you think could be reasonable set the color over here if you want to make Your own colors and don’t like really like the wheel press more and you get all these options so I’m going to set this to red and I’m going to type the word how but I’m going to put how to as my words if you’re doing more than one Word unless it’s in a straight line I would definitely recommend making them on separate layers now that I’ve typed that I can deselect it get the move select and just scale it up a bit by a bit I mean quite a lot I’m gonna go with something like this and make sure this Layers behind the player as well so the play can kind of go in front and it looks awesome now I’m gonna make another layer do the same thing except I want this word to be white and I’m going to put the word two I think that looks Beautiful now you have two options here whichever suits you select one of the text layers go to effects object and you get all these options with the plugin you can select outline object click on it I’d recommend saying it to Black just up the width of it I’ll do it simple if You do it’s above just press this repeat outline object now if you want something different you can go to effects objects once again and select drop shadow now here are cersei’s Ultra FPS 3am settings for your drop shadow if you like that clickbait title so opacity full radius Minimum distance 15. now as the text is so big I might actually make the distance a tiny bit more like 25 it just depends on how big the text is depending on how much distance you should put on so now that is a really good thumbnail So what I’m going to do is file save as type whatever you want I’m going to put thumbnail tutorial I’d do a paint.net file just in case you notice you’ve made a bad edit save it then do save as again and this time select PNG from the drop Down press OK It’ll ask you to flatten that just pretty much means all the layers get squished into one just like this now as this still looks a bit dull on this PNG that’s now saved as you can see it’s all in one layer I’m just going To go to adjustments use saturation and just bump up the saturation so this is what you should end up with make sure to do Ctrl s to finish off just to save it and there’s your finished thumbnail now I know there was a lot of information There but I really hope this helped you out if you did enjoy the video then please make sure to give me a thumbs up and subscribe to the channel and comment what else you’d like to see whether it be tips challenges whatever you want so yeah bye happens Video Information
This video, titled ‘How To Make INSANE Minecraft Thumbnails (FREE)’, was uploaded by Zercee on 2023-09-24 21:00:24. It has garnered 342 views and 31 likes. The duration of the video is 00:11:05 or 665 seconds.
In this minecraft thumbnail tutorial I will show you how to make inviting thumbnails for your minecraft videos FOR FREE! I am using Minecraft and paint.net to make these thumbnails. If you do enjoy then please subscribe and like the video for more bedwars/minecraft content and to help me grow. This video has lots of detail and information so don’t be afraid to pause the video at any point. Anyways, enjoy the video and I hope this helps!
➽ Don’t forget to join the discord for updates, announcements and more!: discord.gg/nt2hNmZdPV
➽Follow my twitch for weekly bedwars streams where I play with you!: twitch.tv/zerceelive
➽ My OBS Settings: https://youtu.be/m5RdP1ipNo8
➽Downloads Paint.net: https://www.dotpdn.com/downloads/pdn.html NPC Mod: https://www.curseforge.com/minecraft/mc-mods/custom-npcs/files Plugin for Paint.net: https://forums.getpaint.net/topic/113220-boltbaits-plugin-pack-for-pdn-v4212-and-beyond-updated-july-16-2020/
➽ 00:00 Intro
➽ 00:11 What you need
➽ 00:39 Screenshots
➽ 03:36 Editing
➽ 10:47 Outro
➽ SEO Hello, I’m a Minecraft YouTuber that makes Minecraft videos! I primarily play bedwars on 1.8.9. I play PvP game modes on Hypixel and Minemen Club. My favourite Minecraft launcher is definitely Lunar Client as I can get an amazing FPS boost and have cosmetics and lots of mods and settings. I am decent at PvP so can do some combos and techniques but still need some practice. I can butterfly click which is my primary clicking method which helps with bridging and combos. I sometimes make texture pack videos like making the worst texture pack, or showcasing some FPS boost texture packs. I try and make weekly uploads but will sometimes do 2 shorts a week, rather than 1 video a week. I want to have a channel as big as SammyGreen, BedlessNoob, Wallibear, Fiizy, NotNico or SpecularPotato, whilst also doing challenges like MrBeast or Purpled.
➽ Hashtags #Minecraft #Hypixel #Bedwars #Montage #Commentary #Gameplay #zercee #tutorial #howto #thumbnail #photoshop #7minutes #5minute