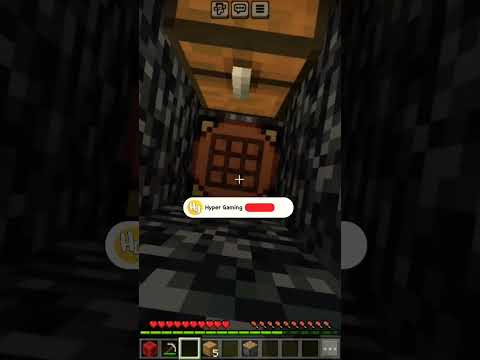
Thank you this video is a detailed tutorial on how to use Python and opengl to create a reasonably fast voxel engine that looks a lot like Minecraft we will be creating a fairly large procedural 3D World consisting of millions of voxels where we can build And remove them and to create it we will consider and apply effective techniques and methods for the formation of a polygonal mesh it’s texturing and Lighting and this video is also kind of a tutorial on opengl and how to effectively use Python to develop 3D applications and what’s more we’ll start our big Voxel Adventure from scratch so for our work we need to install a number of modules this can be done using the command presented on the screen thus we will use the pygame library with the help of which we will create an opengl context as well as handle events and load textures The modern GL module will allow us to efficiently and Incredibly easily work with the opengl context with the help of the numpy library we will be able to work with arrays of various data types and form mesh vertex data and along with this the glm library will allow you to quickly and easily Perform mathematical operations related to matrices and vectors and in order to bring Python’s performance to the level of compiled languages we will make some methods and functions compiled using the just-in-time number compiler and we will start with the fact that in the project we will have four folders For assets meshes shaders and World objects and there are also two files Main and settings in the settings file we will import the most commonly used modules that we will need in almost every class and Define the value of the window resolution then in the main file we import these Settings and also import the modern glpi game and sys modules and here we will create our voxel engine class in which along with the class Constructor there will be update methods for updating the state of objects also a method for rendering them and methods for handling events and calling the main Application loop after creating an instance of this class and calling the run method let’s move on to writing its Constructor here we need to initialize the pi game sub modules and set some opengl attributes the first is the version of opengl we will use modern opengl and its Appearance is accepted since version 3.3 we also prohibit the use of deprecated functions and set the value of 24 bits for the depth buffer Now using the pygame set mode method we set the window resolution and create the opengl context itself and while calling the create context method of the modern GL module we get access to this context let’s activate fragment depth testing culling of invisible faces in color blending and thanks to the modern GL module we will enable automatic garbage collection of unused opengl objects so that they are not manually deleted we also need objects and variables to Keep track of time and a flag to check if our application is running in the update method we will update the time Delta value in the time itself and to monitor performance we will display information about the current frame rate value in the window title in the render method we need to clear The frame and depth buffers and to display a new frame we need to call the flip method in the event handling method we will watch events for closing the window or pressing the Escape key in which case the running flag will be set to false and in the run method depending on the Value of the running flag we will implement the main Loop where we will call the above methods or otherwise the application will close well let’s run our application and as you can see we got an opengl window of the set resolution and in the title of which the current frame rate is displayed We can also Define some color in the settings file and use it to clear the frame buffer and this way we can set the desired color of our background so now we know how to create an opengl window and let’s move on to more interesting things So let’s at this stage make the initial setup of our engine and for this we will create and render a quad mesh as an example then we need two files in the meshes folder named base and quad also create vertex and fragment Shader files for the Quad and files for the scene and Shader program foreign ER program file we will write a class of the same name which will have a pointer to our opengl context and a method for loading shaders here we will load them using the context manager and this method will return an instance of The Shader program and let’s use this method to create a Shader program for our quad in addition two more methods will come in handy later a method for setting uniforms in a method for updating them and let the shaders themselves so far contain only the version in the empty main function Then we can import the Shader program class in the main file and let’s create an instance of it in the on init method and also call the update method on it by running the program we can make sure that the Shader program object is created without errors and let’s move on To deal with the mesh first of all in order not to duplicate the code further I would like to define the base mesh class from which all other meshes will be inherited here we will Define the attributes necessary for the formation of the vertex array object for the formation of Which we always need to determine the format of the vertex buffer data type and in accordance with the format of the names of the attributes that are input to the Shader program that is there will be methods for forming an array of vertex data the method of creating a Vertex array object Itself for which we need a Vertex buffer object a Shader program in the specified data format with attribute names and of course we will write its render method now we can define a quad mesh class in which we inherit from base mesh and Define pointers to the context in the corresponding Shader program And let’s define the vertex data for the quad that is according to opengl we need to specify two triangles with counterclockwise vertex traversal let’s give the vertices some colors and join these lists into one numpy array with data type float32 now we can Define the data format it will be three floats per Vertex coordinates and three floats per color and it remains to define the attribute names accordingly and thus at the input of the vertex Shader we receive the specified attributes with the corresponding data for each vertex and here we just send them further down the opengl pipeline to the rasterization stage And in the fragment Shader we Define an output variable that will be equal to the interpolated color value from the vertex Shader and for convenience we will do all the rendering in the scene class so we will create an instance of the Quad mesh here and call the render method Well it remains for us to import the scene class create an instance of it in the on init method and call the appropriate methods on it Having launched the program we can see our quad but it does not look like an equilateral one since we do not take into account the aspect ratio and it is simply in the clipping space and therefore we need to start implementing the camera class so create two more files in our project Camera and player in the settings file we will Define the basic parameters for the camera aspect ratio vertical and horizontal field of view as well as the near and far planes of view frustum and also set the basic parameters for the player his movement and rotation speed initial position and mouse sensitivity And then we can write a camera class whose attributes will be its position yaw and Pitch values necessary vectors for its orientation as well as projection and view matrices here we need a vector update method where we will recalculate the forward Vector for the camera Direction based on The yaw and Pitch values and using the cross product we will calculate the write and up vectors with the vectors updated we use the look at function to calculate the view Matrix for the current camera position in orientation and we can call these methods through one update method And here we can also Define methods to control the camera we will change the position and values of yaw and Pitch based on some values passed as input to the camera control methods As for the player class we can inherit from the camera class and it will be convenient for us to use methods to control it having received information about the state of the keys and taking into account the value of delta time we calculate the velocity by the value of Which we change our position according to the set control keys for the mouse we can get the relative changes in coordinates from the previous frame and similarly call methods to set the value of yaw and pitch and we should call these control methods before calling the inherited update method Having imported this class in the main file we will similarly create an instance of it and call the appropriate method now when accessing the player instance in the Shader program we will pass the projection Matrix to the Shader and for the full picture we will also pass the identity model Matrix And when updating we will pass the view Matrix and thus in the Shader we have access to all matrices in order to get all the necessary transformations and as you can see we got the opportunity to move around our 3D World but in order for the mouse pointer not To go outside the window you can lock it inside the window borders using the following lines of code and thus we have fulfilled the minimum necessary opengl to work with meshes in our engine it can be said that it was a routine part and if this stage seemed Not clear enough to you then there is a video on the channel where the opengl pipeline is considered in detail in our engine the space representation unit is a voxel but we will render the whole world using the so-called chunks this is a cube-shaped space filled with Voxels and at this stage we will implement the rendering of a chunk with a side of 32 voxels and at the moment with regards to the implementation of rendering a chunk we should create the following files presented on the screen and let’s set the settings for the chunk Define its side size half side as well as its face area and volume and you can slightly change the initial position of the player so we need to create a chunk class in which its contents will define an array of voxels using the build voxels method Initially it will be an array of Type U and 8 filled with zeros that is the voxel itself is a number from 0 to 255 where zero means empty space and all the rest are different types of voxels and note that instead of 3D arrays for performance purposes we will use One-dimensional arrays and we will receive array indices according to the formula presented on the slide and thus iterating over the chunk let’s say we will give all voxels a value of one next we create a chunk mesh class that has a pointer to its own instance of the chunk And we can build a chunk mesh only based on an array of voxels so we will create a mesh with a separate method and Define its render method in this class and at the same time let’s render our Chunk in the scene class instead of the quad And by the way to work with the mesh class we also need to create a Shader program for the chunk and again just replace the quad with a chunk so now we have access to the Shader program but to create the vertex data we will use a function called build chunk Mesh and which will be in a separate file this will be a rather large and fundamental function for our engine which at this stage takes a pointer to an array of Chunk voxels is input the main idea of this function is that we need to form a chunk mesh only from The voxel faces that are visible to us which in turn will provide good performance for our engine to render many chunks and first of all let’s create an empty array and a variable to index it and the size of this array is determined based on the following considerations For voxels we will only render their visible faces the maximum possible number of visible faces is three but each face in turn is built from two triangles with three vertices each so the maximum possible number of visible vertices for each voxel will be 18 and also on at this point each vertex will Have five attributes namely three attributes for position and we will also need voxel and face identifiers and we assume that the data type of vertex attributes will be unsigned 8-bit integers that is each vertex attribute will take one byte in GPU memory and let’s iterate over the chunk and we Will only be interested in voxels that are not empty space and since we will only render the visible edges of the voxel now we need to implement a function with which we will Define them in general the idea is quite simple and is that for the top Face we check what is above the voxel if there is empty space then we render this face and accordingly we will perform similar checks for the remaining faces of the voxel and for this we will write a function called as void the input of which is the coordinates of the voxel being checked And an array of Chunk voxels here first of all we check whether the coordinates go beyond the boundaries of the chunk and then we check whether the voxel is empty then let’s start dealing with the top face that is check what is above it and if there is emptiness above this face Then we will form attributes for the four vertices of this face for the current voxel and before forming face triangles we need a method to add vertex attributes to the vertex data array here we also increment the index variable it points to the number of the next position in this array And now using this method we can make two triangles from the formed vertex vertices and in this way we will create our top face and for the remaining five faces we do a similar job to form their vertex attributes and the Order of the vertices themselves in the triangles of the face And here it is worth noting that we should take the part of the array that contains only our vertex data let’s go back to the chunk mesh class and then fill in the format of the attributes and their names passed to the Shader and here it was a good idea to Parse this format of data types to get its size we will use the format size value in our mesh function to ensure that an empty array of vertex data is created with the correct size each time the format is changed and now let’s deal with the shaders of the chunk So let’s write the bare minimum code first in the vertex Shader we take our vertex attributes the MVP Matrix and then form the GL position variable and in the fragment Shader we simply Define an output variable for color and assign it a value of white let’s run the program and finally we can See the rendering of our chunk but right now it looks like a huge voxel so let’s come up with something interesting with color and for example we can take any hash function that based on a number gives us a three component Vector as a color then let’s Define a variable for the Voxel color and get that color using a hash function in the voxel ID and accordingly we use this color as an input variable in the fragment Shader and also in the chunk class when forming an array of voxels set their ID as the sum of the current coordinates So with this coloring now we can say for sure that our chunk consists of voxels but to make sure that invisible voxel faces are not rendered with the co-face flag turned off we can fly into this chunk and say with confidence that our function for getting the mesh is working Properly and to improve our result a little more let’s touch on the implementation of voxel texturing this texture is located in the assets folder and now we will talk about applying a single texture but later on we will move on to using an array of textures So in the textures file let’s create a class of the same name with access to our opengl context there will be one method for loading textures and we will load them using the pygame library and by the way we should flip them horizontally and next we Create a texture object on the GPU side while we can specify the anisotropic filtering value build Meep maps and specify the minification and magnification filter for the texture and having loaded the texture we need we determine the number of the texture unit to work with it and when assigning a texture uniform in The Shader program we also specify this texture unit and do not forget to create an instance of the texture class itself in the on init method of the voxel engine class and so we have access to the texture in the Shader but there are no UV coordinates to get the color for the Corresponding fragment from it but we can do the following it is clear that the output variable of the vertex Shader will be the UV vector we can also create an array with the standard four texture coordinates and then we will do some trick create an array of 12 numbers that correspond to The indices from the array of texture coordinates while the first six indices correspond to the order of the vertices for even faces and the rest for the vertices of odd faces and this is where our face ID value comes in handy so we can calculate the desired texture Coordinates for each vertex using the following approach each face has two triangles with three vertices and taking the remainder of dividing GL vertex ID from 6 we will always get the ordinal number of the vertex and by checking whether the face ID is even or not we get the necessary index Position for vertex in this array of indices and having calculated the index we get the texture coordinates we need and thus in the fragment Shader we have the opportunity to get the appropriate color from the texture and as you can see this approach to texture coordinates made it possible to Make full-fledged voxel texturing and by the way the face ID attribute will come in handy for lighting later on and now for the texture let’s use a simple black frame the inside of which is painted white having loaded this texture let’s multiply it by the color of the voxel But here it is worth remembering one nuance all actions with texture should be carried out in linear color space so we need to make a gamma color correction and as you can see we continue to style and prepare our chunk since it will be a structural element of a much larger World and now we can try to give it a more interesting shape and for this let’s use the Simplex function for 3D noise when forming voxels well our chunk has changed a lot and as you can see 3D noise is well suited for the formation of all kinds of caves but We will return to terrain generation later and so we have considered the main points associated with chunk and voxels and it’s time to figure out how to use them to create a much larger world and at this stage we need to figure out how to create many chunks and how we can Merge them into one continuous world and for this in our project let’s create a file called world and let’s determine the size of our world that is how many chunks it will be in width depth and height while in our world the width and depth will be the Same we also determine its Center and place the player in the center and at the height of this world so we will import the settings in the chunk class and the world class itself will have access to the application instance and also contain methods for creating chunks in their mesh and here There will be update and render methods for the chunks attribute let’s create a list whose length will be equal to the number of chunks in our world and pay attention for performance purposes all the voxels of our world divided into chunks will be stored in a separate 2D Numpy array and structurally they will correspond to the list of chunks that is the chunk instance itself will only have a pointer to the corresponding voxels from this array in the build chunks method we iterate over the size of the world and create an instance of the Chunk class but to initialize the Chunk we now pass a pointer to the world itself and also specify the coordinates of the Chunk in order to build its model Matrix and then according to these past parameters we will make the appropriate changes in the chunk class and based on the position we can Calculate the index in the chunks array and put a pointer to our chunk there and according to the same index we will put the result of the build voxels function for the current chunk into the voxels array and then we get a pointer in this array for the voxels of this chunk But then we should remove the call to the build voxels method from the chunk class from The Constructor of the world class we will sequentially call the build chunks method in the method for building the chunk mesh when we have all the chunks created we call the method to create their meshes And similarly Define the method to render them and in order to place the chunks in our world we need to write a method to get the model Matrix of the chunk based on the coordinates of its position in the world we also need a method to set this Matrix As a uniform in the Shader and we will pass the model Matrix immediately before rendering the chunk Let’s then import and create an instance of world in the scene class and call the render and update methods foreign and if we run the program we will see that we can fill our world with chunks but these chunks are all the same so we Need to work a little with the shape of our world and let’s make these chunks be part of a continuous world let’s Implement a simple terrain generation in the build voxels method for this we will determine the world coordinates of the chunk relative to all voxels using them We will find the world coordinates of the current voxel and in turn based on Simplex noise we will generate the height of the terrain at this point having determined the local height for the current Chunk we iterate over this value and assign the worldwide coordinate as the voxel ID And as you can see we now have a simple procedural terrain generation albeit on a small scale but before we increase the size of our world there is one worthwhile optimization to make here in order not to cause empty chunks to be drawn we will Define the appropriate Flag each chunk will initially be marked as empty and after the formation of its voxels we will check for the presence of at least one voxel if there is one we will render this chunk and let’s increase our world several times and look at the result well our world is slowly starting to Grow in size and more or less acquires the features of a realistic terrain but we will deal with creating more interesting terrain later and everything seems to be quite acceptable but we have a very significant drawback if we dive into the depths of our world We will see that we have a lot of rendering of invisible geometry on the boundaries of the chunk which will affect the performance of our engine quite a lot and so let’s fix this problem and here the reason is simple we do not take into account neighboring chunks When creating a mesh so we now need information about the position of the Chunk in all voxels in general we need to rewrite these void function but for this we now need the world positions of the voxels being checked so to check each face we will Pass these positions in an array of all world voxels to the input of the void check function And let’s go back to the void test function and redefine the initial parameters so first of all we need to determine the index of its chunk by the world coordinates of the voxel and in a separate function we will find the position of the chunk by dividing the Voxel coordinates by the size of the chunk and if the value of the coordinates of the chunk goes beyond the boundaries of our world then we return -1 otherwise we return the calculated chunk index if the chunk index is not equal to -1 then we access its voxels And it remains for us to calculate its index but taking into account the use of the Modelo operator since some coordinates will be negative or larger than the chunk size and then we check the voxel ID this way we can again check our world for rendering unnecessary geometry And let’s dive inside our world again and as we can see the applied approach works perfectly and there are no problems but you probably noticed that our level takes quite a long time to load so in order to significantly reduce the mesh’s creation time we will make all meshes Related functions compilable with the just in time number compiler and for this it is enough for us to apply the indeed decorator to each function but when we run the program we see an error referring to the fact that we form and pass a tuple of a different data Type and to eliminate this error it is easiest for us to import the data type that we use for vertex data and write and apply a function to convert the data type for our attributes And thus all the functions associated with the creation of the mesh are performed at the speed of the level of compiled languages and if we look ahead then later this approach will provide us with the ability to interact with voxels that is rebuild the entire chunk mesh With almost no frame rate drop and so using the number compiler will also be a fundamental part of our engine foreign so due to the fact that we use a texture that has borders marked and gives it different colors we are quite tolerable to perceive individual voxels in the depth of our world But what happens if we color all the voxels with the same color let’s say white and in this case it’s generally hard for us to say what we are creating at all everything has become one solid white color and we can only see the outline of The relief on the horizon and so let’s get down to implementing the lighting of our world or rather let’s call it shading and let the output of the vertex Shader be this variable and here we can define an array of six values that will correspond to the shading of one of the Voxel faces and then using the face ID attribute we can easily determine the shading value of the face we need and in the fragment Shader let’s multiply the resulting color by this value and in this way our world looks much better so to speak we simulated diffuse Lighting but this approach is good if you have a stationary light source otherwise you will have to calculate shading according to Lambert’s law in fact such shading is not enough and you can see areas where everything again merges into one solid color and then let’s do something like what was done in Minecraft which implemented a shading model called ambient occlusion an ambient occlusion is a visual effect that adds depth to voxels by making the intersections between voxels darker mimicking how light interacts with Corners in the real world although there are different algorithms for creating such a shading model as far As voxels are concerned there is a fairly simple way to calculate ambient occlusion the general idea is to calculate ambient occlusion for each vertex using only information from adjacent voxels and for each vertex depending on these voxels there are only four possible variants of ambient occlusion which are presented on the screen And let’s create a function in the chunk mesh Builder file with the help of it we will get the ambient occlusion values for the vertices of the faces that we render and for example let’s say we need to calculate the ambient occlusion value for the top face then first we need to Determine the presence of eight voxels located in the same plane as our face and for this we will use the plane flag and the further code will be valid for the top and bottom faces since they belong to the Y plane and to determine the presence of voxels We will use RS void function so let’s check all eight voxels that surround our face and then we can calculate the ambient occlusion values as the sum corresponding to the presence of three voxels for each of the vertices which are in the same order when we form the face triangles And in the same way we calculate these values for the vertices of the remaining faces where the right and left faces correspond to the X-Plane and the front and back faces correspond to the Z plane and let’s get the ambient occlusion values for each vertex in our mesh construction function but rather call Them identifiers because they still need to be interpreted and here it is worth noting that the order of these identifier values coincides with the order of formation of vertices for each face foreign So do not forget to make changes to the conversion function to our data type and in the chunk mesh class we will make changes to the new vertex attribute the identifier ambient occlusion having received this attribute in the vertex Shader then we can set an array Of four values these are the values of the desired shading for each ambient occlusion identifier and let’s multiply our shading variable by the resulting ambient occlusion value and look at the result and as we can see the resulting image has become much more interesting and such a shading model now allows us to Distinguish any voxel in our world but at the moment there are some inaccuracies in this implementation of shading for this pay attention to the asymmetrical shading of the upper group of voxels and since each face consists of two triangles the interpolation of non-linear values along the face leads To such an undesirable effect which is called anisotropy to fix this let’s go back to our mesh build function and here we just need to choose a consistent orientation for the faces this can be done by comparing the ambient occlusion terms for each face and selecting an appropriate orientation That is when this condition is met we flip the order of triangle vertices for each face foreign And let’s fly over to that place again and compare the result and as you can see now we have implemented the correct ambient occlusion model and this shading looks very decent and from public sources you can understand that about the same approach is used for Minecraft only it’s called Smooth lighting there So everything seems to work fine but now let’s try to use our test texture so with texture enabled again let’s take a closer look at how things are now with voxel texturing and here another problem pops up as you can see in some places our textures have changed orientation due to flipped faces And if we want to continue using textures then we should eliminate this drawback and for this we need one more vertex attribute flip id this is necessary to know that we are working with a flipped Vertex or not and having cast a flip id to our Unsigned 8-bit data type we again in the chunk mesh class must appropriately change the attribute format and assign a name and after receiving this attribute we will expand our array of indexes to texture coordinates by another 12 values these values will respectively determine the order of texture coordinates for Flipped vertices of even in odd faces and with the flip id value we can now calculate the correct texture coordinate index and let’s check the result of the work done and fly up to the same voxels well as we can see the texturing is done correctly which allows us to do further Work on the engine with different textures so let’s bring back our frame texture and activate the previous coloring and thus due to the implemented shading we gave our image a better and more pleasant look as for the approach to texturing in the use of flags like flip Id there is probably a better way and it will be interesting to hear your ideas in the comments thank you at this stage we will optimize the vertex data which will greatly reduce the consumption of GPU memory and significantly increase the frame rate for integrated gpus for which a part of RAM is allocated as video memory in our engine we use seven attributes for each vertex and for an unsigned 8-bit data type each attribute occupies eight bits or one byte in memory respectively and as a result it turns out that 56 bits are allocated in the GPU memory for each vertex but let’s Figure out how many bits are actually needed for each attribute for vertex coordinates we need 6 bits since for a chunk of 32 voxels for all vertices we need a minimum of 33 values for the voxel ID we have specified to use all eight bits but far fewer bits Are needed to define the face ambient occlusion and vertex flip identifiers and as you can see in the aggregate we need only 32 bits for all our attributes which is much less than 56 bits and in fact we can easily pack our attributes into 32 bits using bitwise operations And let’s see how this is done in the following example let’s say we have two numbers five and nineteen the number a in binary form takes three bits the number B5 bits and this is how the packing of these numbers will look like first we do a bitwise left shift of the Number a by the number of bits B that is the first five bits of the number became zeros and with the help of the second bitwise or operation with the number B we form our pack number and as you can see we got a number in which the values Of the bits of the number A and B follow one after the other so let’s say we passed this packing number and on the receiving side it needs to be unpacked to do this we must know the bit depth of the number B According to which we will calculate the So-called mask it will be just a number all bits of which are equal to one and to get the number a we simply do a bitwise shift to the right by the number of bits B and using the operation of The Logical conjunction of the packed number And the mask of the number B we will get the number B itself thus we can pack the numbers for the selected data type and thus reduce the amount of memory used and now we can create a function pack data instead of a function to cast the data type Here we will make a note of how many bits each attribute has and for convenience we will denote all attributes by letters of the alphabet and since here it is necessary to pack more than two numbers for each attribute it is necessary to calculate the length Of the bits by which the bitwise shift must be done and then we do the appropriate bitwise shifts to the left and apply logical disjunction operations And let’s make changes to the function for adding vertex data we now have only one value instead of attributes and also do not forget to change the data type of the vertex array to match the bitness of the pack data And accordingly instead of calling the function of casting to the data type we use the pack data function and the chunk mesh class will also be affected by the changes we will have an unsigned 32-bit data type for each vertex with the attribute name Pac data And in the vertex Shader we will work with only this one attribute which needs to be unpacked and get all the other vertex attributes from it and for this we will write the corresponding unpack function in which we will hard code the number of bits and mask values for each attribute Here it is worth paying attention that we are working with an unsigned data type therefore we put the suffix U for these numbers and the whole unpacking comes down to the appropriate bitwise shifts to the right and the application of the conjunction operation with the attribute mask Well all we have to do is apply this function put the vertex coordinates into the position vector and run the program and Visually of course nothing has changed but the amount of memory consumed by the vertex buffer has now been reduced by almost two times and this optimization not only significantly Reduces the amount of memory used but for those who do not use discrete gpus the increase in frame rate for integrated Graphics will be several times more foreign and at this stage for our world we Implement interaction with voxels and the main idea is that we emit Ray from The camera at a given distance and if a voxel is found along the path of Ray then we can remove it or add a new one and with each such action we have to rebuild the entire chunk mesh and we will implement this functionality in the voxel Handler class which will Have access to the world instance here we will Define a number of attributes that will be directly related to the results of the voxel Ray casting function but for the raycasting algorithm we will take an algorithm based on the article about fast traversal of voxels this Algorithm is a special case of the DDA algorithm but only in relation to voxels and to simplify our task we will borrow the implementation of this algorithm from the stack Overflow site and since this implementation is made for the Cuda C language it is not difficult to rewrite it in Python using The glm module and as you can see we got a fairly compact form of this implementation and let’s adapt it for our needs and so this function became part of our class here we do not go into the details of its work we just know with the help Of it fast casting of Rey is performed at the required distance and in the direction we need and let’s define the maximum distance measured in voxels at which we will cast array from the camera so in this function we need to determine the coordinates of the start of Ray in Its end position which we calculate using the forward vector and the value of the max distance in general each race step will be the position of the current voxel determined by the corresponding variable and also we Define the values of attributes and variables to determine the voxel ID and to calculate its normal In this function at each iteration of the loop along the ray a new position of the voxel is calculated and our task is to find out what this voxel is empty space or not and for this we will write a function to get the voxel ID from its World position Here we will first determine the coordinates of the chunk and make sure it is within our world and then you can calculate the index of the chunk by which we get the chunk itself next we calculate the local coordinates of the voxel with the help of which we Find its index and finally get its ID and this function in addition to the voxel ID will return its index local position and its chunk and on each iteration of the ray casting Loop we will check the voxel ID and if the voxel is not empty space then we Will update the values of all attributes defined to obtain the result of the raycasting for the current voxel and to calculate the normal to the voxel we will use the direction of the step as an identifier and with these values we can determine the normal to the current Voxel this normal will be needed to correctly implement the choice of position for setting new voxels when they are added and let’s use the update method to perform this Ray casting create an instance of the voxel Handler class in the world class and call this method And now we need an attribute that will determine the mode of interaction with voxels that is we need a method for switching between modes and in accordance with this value we will add or remove a voxel but we must somehow manage these actions and therefore let’s create a method in The player class to handle single events and let’s say that when the left Mouse button is clicked we add or remove a voxel and on the right click we change the interaction mode and in turn we will call this method from the event handling method in the main file And it is obvious that in order to remove the voxel its ID should now be equal to zero but this action is not enough since we must rebuild the chunk mesh at the same time and for this let’s define the rebuild method in the chunk mesh class And it remains to call this method and check what we got then let’s get closer to the ray casting distance and try to delete voxels with the left Mouse click and as we can see now we can remove any voxel from our world and here it should Become clear why we made the chunk system this is so that when interacting with the world not to rebuild its entire mesh but only the affected chunks and to add a voxel we’ll Define an attribute with a non-zero ID value and in the method itself we again use The method to determine the voxel ID for the position along the normal we need to check if this place is empty or not and if it is empty then we add a voxel and rebuild the chunk mesh and by the way here you should pay attention to Whether the chunk was empty otherwise it will not be rendered and let’s check how this method works and thus in our world now you can not only remove voxels but also add new ones of course now we can have fun with changing the world but in fact there is One invisible problem hidden here for now and which can be revealed when removing voxels and in order for us to notice it let’s do the following and let’s use a random number generator to give each chunk its own color having launched the program it is now Easy for us to navigate and how the chunks are located and now we are interested in what is happening on their borders and if we start removing voxels then holes begin to form along these boundaries this is because we don’t rebuild adjacent chunks when deleting voxels on the border of the current one So we need a method to rebuild an adjacent chunk defined by the position of the adjacent voxel in relation to our voxel being removed for which we have six adjacent voxels then in a more General method by the value of the local voxel coordinates for each of the axes we will determine Whether the voxel is on the border of the current chunk which in turn we can determine for which adjacent voxel we need to rebuild the chunk mesh and having removed the voxel after rebuilding the current Chunk we will use this method and let’s get to the chunk boundaries Again and see how this method works by removing the voxels on the chunk boundaries we can say with confidence that this approach works great and so now we have a way to change this world at our discretion without any problems but now some visual tool is clearly Missing in order to select the voxel with which we are going to interact and for these purposes using a regular Cube mesh the object presented in front of you is implemented to highlight the voxel in the project this is called the voxel marker and it uses the same frame Texture as all voxels and as you can see this is quite informative when changing the mode we can see which voxel we can remove or at which position we can put a new one and since you can get the source code for each step of this tutorial from The link in the description we will only consider the implementation features of such an object and we will start with the cube mesh class here we form a Vertex buffer for a regular Cube that is we Define the vertex positions for 12 triangles that form six faces of the cube and Indicating the corresponding texture coordinates this mesh is used to create a voxel marker class which features an update method where we determine its position from an instance of the voxel Handler class based on the interaction mode attribute and before each render we pass the value of the current mode in the Model Matrix to its Shader program in the Shader program class we load the vertex and fragment shaders and set the same uniforms as for the chunk in the vertex Shader based on the moded value we choose a color for the marker frame and also slightly increase the Size of the cube so that there is no so-called Z fighting and in the fragment Shader we apply this color and make the inner white part of the frame invisible but later we will do otherwise and finally in the scene class we create an instance of voxel marker with calls To the update and render methods and thus according to the mode of interaction with the world the voxel we need is informatively indicated but about how you would do to highlight voxels leave in the comments So at this stage we will Implement a technique called frustum culling for our engine this optimization is about reducing chunk drop calls meaning we’ll only render those chunks that are inside the player’s View frustum and here’s what we’ll do the most efficient way is for our chunk to create A bounding volume in the form of a sphere and a sphere is great for this because our chunks are in the shape of a cube and our task is to determine whether this sphere is inside the view frustum or not and for this we will create a frustum Class that will have access to the camera instance and there will be one method for determining whether the chunk is on view frustum and let’s create an instance of this class in the Constructor of the camera class and as for the Chunk we need to determine the position of its Center and Also for convenience we will get access to that method of the frustum class and accordingly we will use this method immediately before rendering the chunk and in the settings we Define the radius of the sphere described around our chunk and besides let’s increase the size of Our world several times and look at the current frame rate and since due to the screen capture program the current frame rate does not display the actual readings then by taking a screenshot from another device I can say that on my Hardware the frame Rate is now in the region of 200 FPS and let’s remember this value so we need to determine the position of the sphere with respect to the six planes that make up our view frustum and let’s start with the near and far planes this is the simplest case where it is Enough for us to check the position of the sphere taking into account its radius relative to these planes but for this we need to find the vector from the camera to the center of the sphere and using dot the product of this vector and the forward Vector we can Find its projection value on the z-axis and then let’s calculate this Vector to the sphere find the value of its projection on the z-axis and compare it with the boundaries of the planes taking into account the radius of the sphere okay and let’s take the case of the top and bottom planes And on the example of the top plane let’s define the condition when the sphere is outside of it we are interested in the distance from the center of the sphere to the z-axis which is the sum of two segments D and H we also build a vector to the center of The sphere but this time We additionally need the value of its projection on the y-axis and if the value of this projection is greater than the distance from the center of the sphere to the z-axis our sphere will always be outside the top plane it remains to find the values of The segments D and H and here we pay attention to the fact that the value of the angle between the radius and the segment D is equal to half the angle of the vertical field of view and thus using the cosine of this angle we find the value of D and using The tangent we calculate the value of H So let’s define the pre-computed cosine and tangent values in the attributes both for the values of the vertical angle of the field of view and for the horizontal and it remains to formalize the theory voiced above into code in which the variable dist is the sum of segments D And H from our slide and as for the left and right planes everything is done in a similar way there we are interested in the value of the projection of the sphere Vector on the x-axis and the angle for the horizontal field of view is taken into account If we run the program then everything will remain the same for us in terms of the image but if we pay attention to the frame rate then its value will greatly please Us in this case when the player is in the middle of the map the performance of the engine has more than Doubled but you need to understand that the frame rate will change depending on the number of chunks that fall into the view frustum and here you can pay one more point with regards to the size of the chunk in fact thanks to the number module we have a fairly fast chunk mesh creation Function this allows us to increase the chunk size by 50 without any impact on the frame rate and increasing the chunk size allows us to reduce draw calls while maintaining the same world size and in this case we get an even greater performance boost and here it turns out That we increase the size of the chunk and proportionally reduce the number of chunks which ultimately gave an increase of about 20 FPS while our world remained the same size and it remains to make sure that when rebuilding a chunk of this size it does not cause a performance drop and as part Of this tutorial this was one of the last significant optimizations but you can look towards techniques such as occlusion culling and the use of appropriate data structures for efficient organization and rendering of chunks foreign in this step we’ll look at what a texture array is and how we can use it To texture voxels we will make more advanced texturing that is we will use not only one texture for all faces of the voxel but we will make it possible to texture the faces of the voxel with different textures something similar is done in Minecraft a texture array is a separate type of Opengl texture it is a kind of large texture that contains other textures of the same size and as you can see they are located one above the other each such texture is accessed by its layer number and in our case we will use the voxel identifier as an access And the simplest thing you can think of is that each such texture will consist of three parts the first part will apply to the bottom face texturing the middle part will apply to the sides of the voxel and the last part for the top face And then let’s add the ability to load a texture array in the textures class we will use the same load method but depending on the flag set we will either load an array of textures or a regular texture and here we need to determine the number of layers in this array given That we have three parts of the texture for faces per layer and we also specify the size only for the layer texture next I will use the following image for the texture array where the topmost layer is empty and denotes a voxel ID of zero and let’s use this method to load our Texture array and assign a texture unit to it and accordingly we set the uniform variable pointing to the same texture unit and in the glsl language to work with a texture array we need to choose the appropriate data type but in order to get access to the Desired part of the texture it is best for us to pass face and voxel identifiers from the vertex Shader to the fragment and since they are integer we need to apply the flat qualifier and now we need to remember that when loading we flip our texture along the X-axis so for texture coordinates it is also directed to the left but this is all solvable and you can formalize obtaining the desired coordinates using the following formula taking into account that all face ID values starting from 2 refer to the sides of the voxel and to access the Desired texture layer we use our voxel ID value and let’s just as a test all voxel will match the grass texture from our texture array and by running the program we can make sure that texturing works correctly and now more than ever our engine has become Like Minecraft and it seemed to me quite convenient to use texture arrays for these purposes so our engine core has been replenished with another important tool thanks to which we can create a very diverse world and this is what we are going to do now Thank you so we are at the final stage of this tutorial where we will take the basic aspects of procedural World Generation and diversify our world with the creation of clouds and water and at the heart of any terrain generation are various noise functions and in our case Simplex noise is still Good for us to generate the whole world as with mesh creation our world generation methods will also be compilable and therefore using the noise function from the glm module is not suitable for us since the number compiler can only work with code written in pure Python and numpy And in this case we will use the open Simplex module which is just written using Python and which has the noise functions we need so install this module using the command presented on the screen and just like in Minecraft we will have some seed value which will determine how Our generated world will look like and let’s import this seed and end Jeep decorator and from the open Simplex module we import functions for 2D and 3D noise and an initialization function according to the seed value the necessary variables for the noise function are initialized we will redefine these functions and make them Compilable this approach was chosen to directly use the noise functions and not create an instance of the open Simplex class and in a separate file we will have all the functions related to the terrain generation and for now we will leave here one empty function for getting the height map And now we need to prepare the chunk class to work with these functions and first of all all iteration over each chunk will be carried out in a static compiled method and which will allow us to use the terrain generation functions and the use of compiled functions allows Several times faster to generate the world and thus greatly reduce the time of the entire load and in general as far as noise functions are concerned usually 2D noise is used to create a Terrain height map but 3D noise can be used to create a Cave System we will also use both types of noise and let’s start by creating a height map and let’s set some values for the amplitude and frequency and apply them to the 2D noise function to calculate the height if we look at the result then firstly we notice that the loading has accelerated Several times and secondly we observe some terrain generated it looks good but far from realistic reliefs and rather boring for our world and then we can do something like fractional Brownian motion for this we calculate the amplitudes and frequencies in such a way that when using the noise Functions we get the so-called octaves and with this approach the generated terrain already looks more believable and it is already quite suitable for our world but we can make one more Improvement here and we can use the same noise function to create some kind of erosion effect And by running the program we can say that our world is ready but we should pay attention to one more thing if we look at our world from afar then its rectangular outlines are rather ugly and create a feeling of incompleteness of the world but even here we can make one Improvement And in this function we can create a so-called Island mask using the following expression and if we separately visualize this mask we will see it as a kind of stump or the base of a volcano with the size of our world and let’s multiply our world height by This mask and look at the result and thus our world has turned into a huge island and of course it is perceived as already something more complete and for a full-fledged result let’s give the voxels the appropriate textures foreign we’ll create a function to set the voxel ID that takes an array of Chunk voxels the voxel’s local and World coordinates and the world height computed by the get height function the and having applied this function in the chunk class we go to the settings here we will Define the voxel ID values for the corresponding textures as well As determine the height levels to which this or that texture will be and also make our sky blue and by the way here it will be convenient to use the getting function of the index in our array of voxels So let everything that is under the first voxel in height always be a stone and for a natural image let’s add some Randomness to the current height and using the given height levels for the textures we will determine the appropriate voxel ID and then add it to the array And using such a fairly straightforward approach our world has changed a lot which has become much more interesting to explore and it has become really similar to something in Minecraft Style but let’s continue to improve our world for now we have only used 2D noise and Let’s see what can be done with the 3D noise function so we will use 3D noise to create the caves themselves but here we should also specify the height limits within which our caves will be located inside the world and let us now temporarily become speleologists and digging and diving Into our world we will go in search of these caves and as you can see we did find them this kind of caves look realistic enough and of course there is a lack of specific lighting but despite this the 3D noise allowed us to create an interesting and branching system of caves But if we go back to the surface it’s a bit poor in terms of vegetation and let’s create and place something like trees on it then in the settings let’s define the parameters regarding trees their probability of occurrence as well as their size and width and height And let’s use a function to place trees below a certain level and we will place trees only on voxels with grass and with a given probability while we also need to check that our tree does not go beyond the chunk and then under the tree instead of grass There will be a voxel with a dirt texture next we will place the leaves and you can do it any way you like with different Randomness elements so that all the trees seem different from each other and here it remains to make a tree trunk and you can add something to its top And let’s look at our world and so we now have some sort of tree-like plants here the texture of the Sakura is deliberately chosen for the leaves to give more contrast and in general use your creativity to create and diversify the world with various objects in this way To be honest we have covered most of the basic aspects in order to create such voxel worlds and further we will consider in a more concise form what improvements can still be made here one effect that gives the world a sense of depth as fog the fog effect is easy To implement in the fragment Shader by calculating the approximate depth of the fragment using the frag cord variable and using this distance exponentially in the mix function for our Sky color in a very simple way in our world we can create a water surface for this we use One quad but enlarge to the size of our world that is all water has two polygons with a tiled water texture in a translucent color in addition to water we can Implement an underwater effect for this we need to know the world position of the fragment which we will calculate in the vertex Shader and in the fragment Shader we will compare its y component with the value of the water line and change the color of the fragment with the watercolor and for the full picture we can create clouds for our world but as it turned out not everything is so simple here To create them we form an array of zeros and ones using 2D Simplex noise for some Criterion and then we create a polygonal mesh based on it but with a naive approach when creating this mesh we will get so to speak inefficient clouds with a huge number of polygons which can Cause a drop in the performance of our engine and so we have to come up with an algorithm to optimize this mesh it will turn out to be a kind of greedy mesh algorithm where we minimize the number of polygons in this mesh by merging them And in this way it allows you to reduce the number of polygons many times over so that such clouds have almost no effect on the frame rate of the engine and by the way some voxel engines are created entirely based on greedy mesh algorithms but perhaps this is the topic Of another video and this tutorial is more focused on using classical approaches but nevertheless we got a fairly fast voxel Graphics engine despite the use of a language like python and if this tutorial turned out to be interesting and useful for you then as a feedback and further motivation to create such Videos I would be interested to read your comments foreign Video Information
This video, titled ‘Creating a Voxel Engine (like Minecraft) from Scratch in Python’, was uploaded by Coder Space on 2023-06-26 06:04:32. It has garnered 248877 views and 9947 likes. The duration of the video is 01:06:39 or 3999 seconds.
OpenGL Tutorial for creating a Voxel 3D Engine like Minecraft using Python. Libraries and modules used: Pygame, ModernGL, Numpy, PyGLM, Numba, OpenSimplex
Code for each stage: https://drive.google.com/file/d/1zb-UgWbZJw9HhAnhIIxcuJKBGf2RNTTj/view?usp=sharing
Source Code: https://github.com/StanislavPetrovV/Minecraft
00:00:00 Intro 00:00:55 OpenGL Window 00:04:33 Initial Setup 00:10:56 Chunk 00:21:13 World of Chunks 00:28:15 Shading 00:36:15 Packed Data 00:40:38 Interaction with Voxels 00:49:28 Frustum Culling 00:54:27 Texture Array 00:57:23 Terrain Generation
#coderspace #minecraft #python