Okay so the first thing we’re going to start with is by taking our blue Honda claim we’re going to go to these smaller rooftops and we’re going to go two blocks gone and then push them back so they’re 2 blocks behind then 2 across then 1 2 3 push them so they’re behind Like so take our light blue hardened clay do a line of light blue clay we get then go down the other side and we’re going to go 3 across again then below it and then 2 across with 2 behind like so and we’re going to do the same pattern For this rooftop with child will mark with the light green wolf so this rooftop here this rooftop here and finally this rooftop here now I’m going to quickly go out and finish off those other three rooftops you did the same and I’ll be right back to you you’ve got those smaller rooftops curved What you don’t want to do is go to the side rooftops next to the two towers and we’re going to take our blocks again we’re going to go to the bottom starting from the edge we’re going to go 1 2 remove 2 and push them back then go up In line and go 1 2 3 push them back up again one two three four push them back up again 1 2 3 4 5 push them back then on the very top we’re gonna go 1 2 3 drop down a level with 4 blocks then 1 2 3 3 across like So and then we do the same down the other side going up so 2 3 oops my exercise another block my mind for and then finally for five like so so we have the roof curve down like so and then what you want to do is do this same Pattern to the other rooftop now I’m going to quickly go and do that you do the same and I’ll be right back to you okay so once you’ve got those two side roof tops in what you then want to do is start with the main bulk of the back Roof top so what we’re going to do is get the bottom of the roof top closest to one of the towers we’re going to go one two three across from the edge we’re going to go one two three push it back then above it we’re going to go one two three four five Push it back then one two three four five six seven push it back then above that we’re going to go one two three four five six push it back then on the top we’re going to go one two three drop it down a level one two three and Drop it down another level and place in four like so bring it up again and we’re going to go two oops three finish off three their place one in the center then going to the side we’re going to go one two three drop it down so we’re four blocks then Two across there like so then back down to the bottom we’re going to be placing in so we’re going to go to across then one place a block to place two blocks on to three place three blocks top here two three four place four blocks like so so We have this curve going up as you can see this looks a bit so if wait at the moment because it doesn’t seem to quite go in line with the rest so we’re gonna go to drop it down by two oops so we have that and then go one two Three four five six and one two so we have that sort of curve going on placing the blocks underneath to fill in the curve like so and that should look right it does look right from over there a second see and then going down the other side we’re gonna do the same so We’ll start from the bottom again so we go one two three one two three place the blocks one two three one two three four five place the blocks then do seven place the blocks oops this next row goes to down so we have two there and two three four five six Then two and then should be two again or three in this case going here into the corner like so and then finally on the other side we’re going to be placing on this in a bit of the corner so we first off have one just like we have before then two then three Then four and then that should make up the inner part of this rooftop here so what you don’t want to do once you’ve done all of that is copy the exact same design over to the other set of roof parts now I’m going to quickly go and Finish off them you do the same and I’ll be right back to you the rooftop stuff done what we can then do is start working on the way to as you get into the structure so what we’re gonna do is take our wooden logs we’re gonna go to The bottom of the foundation so where we have this little L shape corner or the inner corner and right here we can see we’ve got the sort of main pillar so we’re going to go one two three place a pillar one two three place a pillar turn The corner one two three place a pillar one two three place a pillar turn the corner one two three place a pillar on 2 3 place pillar turn again three place a pillar then one two three should match up to there what we’re then going to do Is we’re just gonna basically go around and start removing all the sort of detail oops up to the cobblestone wall so this is this is the point where you kind of need to level off your detail too so we’re just basically just going to make it a Flat wall in all of this section as you don’t have to do this if you don’t want because it can easily be covered up by the other foundation we’re going to be added in so we just take away all of this we don’t need it anymore probably If you’re doing this in survival then all your all of the resources that you can collect here can be reused now this wasn’t a mistake that we made we didn’t accidentally add in this foundation this is actually part of the original design and but as the design developed during The let’s build series it didn’t mean that a couple of changes were made so we now have this nice clean looking area what we can then do is bring up each of these pillars up by three with a chisel stone on top now I’m going to go around and just do All of these pillars you did the same and I’ll be right back to you now that we have those pillars in what we can then do is add the quick pillow detailing so what we don’t want to do is add detail into each of these pillows by Going one two three and then upside down stair and a cobblestone wall then a brick then a right way around stair with a slab on top and then in front of them I’m going to place two blocks a slab and then a stone brick stair now I’m just Going to take a marker so I’ll just take my like lime wool and we want to be doing this same pattern to each of the faces which I’m now marking going around the corners for each of them and then I’m going to quickly go around and do All of them you do the same and I’ll be our back to you okay so once we’ve got all the teller detail in what we can then do is go to the back of the pillars and we’re gonna place in three blocks here three blocks here three blocks here Here here not across here and here so we can as you can see like to block areas blank like so and then what we’re gonna do is bring them up by another level place a line of red with one in the center and a block a block then what We’re gonna do is place a row of blocks on top a row brick sorry then we’re going to be placing in a wraparound upside down stair upside down stair either side with a slab in the center like so block below block below stair stair two blocks two blocks two blocks Fences in front of each of the red clay then we’re going to place make sure there’s sort of stone bricks lining here so for an example you want to make sure the stone brick is lining here and here as well so going inwards all the way around the structure And then you want to be placing three leaves on top of them with three stone breaks on top of them stare stare either side of the pillow like so so we have the same pattern that we have for the rest of these foundation layers and then Of course in the corner what you want to make sure is that you do the exact same design apart from how the corner actually comes together in the center so we’re going to be connecting these uglies exactly the same as we’ve had before we’re just making it more Suitable for this area so you’re gonna be placing two two two two two two then oak leaves with stone bricks on top fences blocks then I’ll stare I will stare and then if I remember collect correctly we leave that area blank when placing our bra blocks upside down Stairs and slab so what you don’t want to do is replicate our foundation design to the rest of the areas where we’ve placed in our three cobble cobble stone line so I’m going to quickly go around and finish them off you do the same and I’ll be our back to you once you’ve got all of those bits of foundation in what you can then do is take your stone brick stairs and where we usually have the stone bricks their face in that way we’re going to play stone brick stairs facing outwards towards I guess that Building and then we’re just going to slowly go up with blocks until they reach the top like so we go across of course and back down oops like so we then take cobblestone stairs line the center like so and then we want to be doing the same on The other side of course so we’re just going to quickly place in our other set of stairs going up and across of course and then down and then placing in our cobblestone stairs as well like so we’re then going to take our stone bricks and in the two corners we’re going to place In four stone bricks with cobblestone leaves in the center then stairs either side with a stone brick slab on top we do the same to the other side of course like so we can then take our stone brick stairs oops I went a bit too far then And we’re going to line around our faint foundation layer and probably break a lot of it in the process going around each and every little bit so we have a nice stem brick outline placing the box in here as well in the little corner going around oops until We are level with the rest of the outline that we’ve placed in before like so now once you’ve done that for each of these sections of between the two bits of I guess the column decoration we’re going to be placing in so what we can actually do here is remove this remove This remove that and we’re gonna place in I had some on me some stairs so we’re gonna place in a stair a stair with a slab in the center and then we’re gonna take out stone slabs and place stone slabs on top and then behind each of the Decoration we’re going to place two blocks like so so that was a fairly bad example but a good example of what to do on the edge but on the actual other sides we want to be placing in I was there I was there our slab without slabs On top now I’m going to quickly go round and finish off the rest of these bits of decoration on each of these little areas now you should go around and do the same and I’ll be right back to you so once we’ve got all of that in what we can Then do is start having in the floor well before we do that we’re going to be going to the bottom of each of these little areas and when we’ve got this upside down stair pointing towards self the outer part of the building we’re going to replace with a stone brick Going around like so we’re then going to take our stone bricks again we’re going to go across then up but we’re also going to place in two slabs on the in front of the stone brick we’re just we have just placed losing my words and then we’re going to take our bricks Again we’re going to go up then go around down and finish but then we’ve also got this slab which is going to make the flooring look a bit wet so we’re going to remove the slab that’s probably do it to this one as well like So and also place in a stone brick here and here as well as here to sort of give the sort of rounding a bit more of a depth to it so we can also go and place in a blonde here bring them up again cross Down and to the end block a block a block so three blocks then go up again and then across until it fills in that area there then in here what we’re actually gonna do place in three going across three up three just gonna fly up so you can actually see and three there Remove this label replace with a brunette break remove this library place with a brick and place in the cobblestone on that center point there then I’m gonna have to find a way to get out cuz now stop so we’ll quickly just break our way out then once again going round again with The same pattern and down again onto three then go up then go round again oops there we go and fill in about there that there remove the block placing the block like so so now we’ve got this gap going round and we also need to place in It going around the edge of the actual sort balcony banister as you can see we’ve got this very clear distinct area where we can see gaps and where we’ve got those gaps we’re going to take cobblestone and fill in these gaps with cobblestone oops Don’t jump on it like so and as you can see there’s also a gap here switch quickly place in a stone brick to fill in that gap and another stone break to fill in this one like so and as you think you might be done there is still One more thing to add all sort of two more things because sort of a dual opportunity we’re going to place in some doors so what we want to do is I would take this area and this area and I would turn them into doors so remove the two Blocks there remove the center filling of glass place and an iron bar on the top with a spruce wood stair underneath upside down then we’re going to take spruce door place it in and then same for this other area but you can really place the doors wherever you want just Make sure those sort of on you offer balcony so you can kind of get to them like so so we’ve got the two doors all of the balcony and that’s pretty much don’t so that’s all that you need to do for this tutorial so thanks for watching Guys home enjoy limbs and leave like subscribe and leave a comment and also tune in next time where we working only building see you guys next time bye you Video Information
This video, titled ‘Minecraft Fantasy Builds – Large House Tutorial – Part 6 – How to Build a Fantasy Large House’, was uploaded by Farrahs on 2016-07-25 21:45:20. It has garnered 4980 views and 93 likes. The duration of the video is 00:19:39 or 1179 seconds.
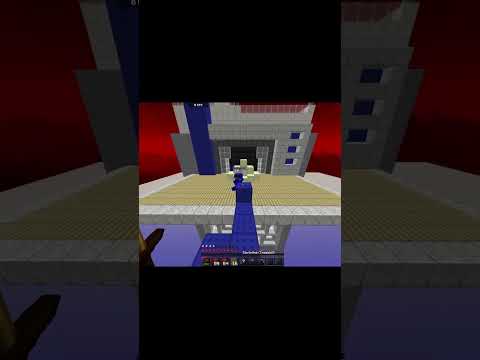
As seen in my Fantasy Let’s Build Series, this is one of a pair of identical houses which can be combined to form one whole house. In this set of tutorials I will be showing you have to shape, create and decorate this house for your own personal usage.
===================================================
Previous Tutorial – Large House Part 5 – https://youtu.be/dyqyQJMxhVg Next Tutorial – Fantasy Wall – https://youtu.be/0Ez6SsQ6sFk
Remember to leave a LIKE, COMMENT and SUBSCRIBE if you enjoyed my work and want to see more of it.
================================================
Twitter: https://twitter.com/Farrahs_MC
================================================
Merchandise: http://farrahstore.spreadshirt.co.uk/
================================================
Help Expand Farrahs’ World: https://www.patreon.com/FarrahsMC
================================================