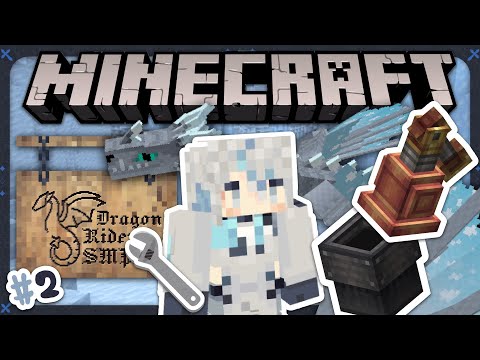
Hello everyone my name is pixel riffs and welcome back to the minecraft survival guy and hello over there sir he trying to get passed it’s okay the iron golems love to patrol this area so welcome back to the trading exchange as I’ve been calling it where I have now Got my first row of librarians in place and this is taking a little while but I have been scrubbing through their trades to make sure we have a variety of trades represented here and before we start this let me tell you that I’ve gotten myself some duplicates here and there And I may be seeing what we can do about that may be moving them elsewhere retiring them whatever if we can maybe pare down the amount of villages we have in here it’s going to be for the better but first of all we have a bunch of Master librarians some of whom have a pretty decent trades we’ve got this guy with number 18 3 and efficiency 4 in the same villager even though he already had an unbreaking 3 guy is it this one yes I’m breaking 3 there we go his trade Has now come back up to 3 emeralds but it was at one emerald again at one point so there is a little bit of fluctuation happening here depending on how much I trade with them once again we could always zombify them and cure them again If we wanted to get those trades all the way down to the lowest possible price but here we have a few really really exceptional villagers we’ve got one that trades silk touch and Riptide 3 that’s also pretty cool we’ve got this guy with the efficiency and unbreaking we have Several who trade things like infinity and channeling we’ve got folks like a multi shot and fire protection for for one emerald that is very very good and around here we have I think 13 villagers I’ve added in a little bit more space for a few more just so we can get at Least 15 maybe 20 per side and that will definitely cover us for the amount of villages we need to get every single enchantment at the highest possible tier from these guys we’re not going for like you know impaling three when we could get impaling five from a trade or Anything like that but we are definitely on our way to getting a lot of the librarian trades over and done with so I’m doing a lot of that stuff off camera or on live streams but the main thing I really want to focus on today is this This whole area because right now we are looking at a the rank barrier which I’ve been just hopping in and out of to get in and out of the trading hall here mainly as a protection from anything that might wander in from the outside from pillagers from zombies that kind of Thing I really want to make sure they don’t end up inside the trading hall and it’s probably time to formalize what I actually want to have in the front here a door we want to have a three by three piston door we could go bigger we could Go smaller but I think three by three is pretty good for a first real piston door project and I need to preface this video really by saying I am NOT a redstone expert I’m not a door building guy but I think I’ve come up with a sort of decent Design for somebody who is not really trying to follow the most efficient tutorials out there I’m not trying to copy anybody else’s work I really wanted to have a go at this myself and see what I could do if I came up with a door design on my own and ultimately I’ve Come up with one that I really quite like I’m going to share with you guys today so that you can build it in your own worlds if you want to and if you’re interested in more piston door designs if you’re interested to see exactly how compact you can make something how Efficient you can make something or quite how crazy piston doors can become then of course there are a ton of talented piston door makers out there on YouTube obviously there are a few that are more well known like mumbo jumbo but just do a little bit of research for Yourself and find some door designs you like if you like the one that I’m going to show you today but without further ado we’re gonna step out of the Survival Guide world for a second and we are going to go into my creative test world because if there’s one piece of advice I Have for you it’s to test your redstone in a creative world first because it’s so much easier to troubleshoot redstone and figure out solutions to problems you’re having in your survival world if you get the opportunity to fly around and and test stuff out and just work With trial and error it’ll all happen a lot faster if you can just break and replace blocks instantly there’s so much cool stuff you can do in creative mode which you can then copy over to your survival world once you have the blueprint for it and I find this process A lot easier if I can just do a little bit of stuff in creative first I think it’s important to take down some of the parameters of the project first of course like exactly how much space you have available for your redstone design to take up or if you just have free rein You can make this as big or as small as you want to in this case I have a one block wide piston door here which i think is actually pretty great for my first effort at least like I said there are gonna be people who are much better at this than I am But I think this is not bad for a first try all you need to do is walk up here tap this note block and all of the blocks around the outside will retract leaving just the bare minimum of this glass pane in the middle here and then Close it like so from the other side and each of these no blocks performs the same open opening and closing action you can hit them as many times as you like to open or close it from either side and it works pretty well this design is Called an ether door by the way or a kind of adaptation of one I suppose ether back in the day used to make doors which didn’t have a central block here because it wasn’t really possible for mobs to get through zel zombies and skeletons and stuff would not be able to Get through this middle block here and it meant that if you had all of the blocks around here retracts of like so you didn’t have to worry about filling in this central block using say a piston double extender which used to be a lot more complicated to build it is much More easy to make them now we have stuff like observers in the game but even so I think this is probably a good start and having a glass pane in there means that stuff like baby zombies can’t walk in for example and the cool thing about the Glass pane of course is that once all of the blocks disappear from the outside it detaches itself from anything else and the hitbox here is actually really thin it doesn’t really look like anything is there except for the top and bottom textures of the glass pane meaning you Can just kind of ignore it as you walk through the door and then close it on the opposite side and this becomes a solid structure that nothing can pass through you can of course do the same thing with stuff like iron bars you can do the same thing with any of the walls That are present in the game and you don’t need to use iron blocks for the surround here oh all of these blocks are basically here for decorations we can make this entire thing out of dark oak wood with a dark oak fence in the middle If we wanted to just for I don’t know the sleekness of it all but I actually like the way it looks if you have something that stands out a little bit more for the blocks here in the door and yeah it can pair together with these materials quite well so without further Ado I’m going to show you how to build this here in creative mode first actually I figured it would probably be a good idea to show you it in creative mode just so you get an idea of the materials required for this door and exactly how it gets put together but We’re going to go back into the Survival Guide world we’re going to build it as part of the trading exchange we’re going to have that at both of the two main entrances and you’ll get to see it in the context of the survival build we’ve been working on for the last little while So in my hope I right now we actually have all of the materials required to build this door which is really not very much you need eight note blocks eight sticky pistons eleven observers two redstone repeaters six redstone dust or alternatively two redstone dust and four powered rails which is what we’re going To be using for this you can skip the powered rails if you just want to use redstone dust and then we just need some blocks to build up the door itself and build up the frame around the outside of the door but the door design here is actually pretty simple and relies on Redstone mechanics that we have used in the past but first of all I figure we may as well go over a couple of things so observers of course can be used to trigger things with a single redstone pulse occasionally that is not quite what we want we want to extend the Signal a little bit and so we need redstone repeaters for that the dust and powered rail can be used to conduct redstone power and then the node blocks and Pistons are going to kind of take care of themselves at that point so let’s start off by establishing a floor Level it’s gonna be around here it’s gonna be a little bit off the ground just so we have a bit of room to place some redstone down here we want the entry no block here this is the one that we’re going to be punching in order to Open the door in the first place behind that here we want to have a piston facing upwards like that with a block on top of it like so underneath the note block we’re going to be placing an observer facing upwards into the note block so it’s detecting when the note Block gets tapped and we gonna have a redstone dust underneath that and we’re gonna have a building block underneath there of any kind now when we tap that that’s going to push this block up into place and when we tap it again it’s going to retract it using the sticky Piston with this block in place here one block above the sticky piston I’m gonna draw out the rest of the blocks that are going to be part of the door of course we’ll leave a gap here we can always fill that with a class pane later but For now we’re going to leave it that way so that you can see exactly where each block of the door is going to end up and right now we’re going to have two observers one facing this way like so and the other one facing that way like So facing in towards where that block is going to end up because each time we tap this note block and the block gets slid into place by this sticky piston it’s going to pulse this observer and the reason it’s going to pulse twice there is because it’s first registering the fact that the Sticky piston moved in front of it and then it’s registering the fact that this block moved down in front of it so the reason we have a redstone repeater here is so we can actually lengthen the signal a little bit on each side we’re going to build two blocks out here and Then one block downwards at a diagonal like so we’ll do the same on this side here like that and on these we’re going to be placing a redstone repeater set to two ticks and then we can either put two redstone dust or in the case of this one I’m going to put two powered rail we’ll do exactly the same on the opposite side here set that to two ticks and have two powered rail there this is basically a symmetrical design except one side doesn’t have to wrap around to the top but the other side does from here what We want to do is have an observer facing downwards into that rail here and we want to build up a Tower of alternating observers and note blocks like so attached to that we’re going to be placing the three sticky pistons they’re gonna be retracting this block that Block and that blocks so we want one there one there and one there the mistake I always make when I’m building stuff like this is to place the sticky pistons against the blocks that they’re supposed to be pulling outwards like I always start with the sticky pistons there so You want to make sure that they have an air block gap there so that they can retract these blocks in a minute now to carry the signal around to this top block so that can be retracted as well we need another note block on top of here we want an observer note block Observer and then finally a sticky piston facing downwards into that block there so that’s also going to be retracted slightly after some of these blocks on the site here let’s give that a quick test it’s slightly out of order right now because I’ve got this block in Place let’s see if we can do something about that now we’re going to do exactly the same thing on the opposite side an observer facing down into this powered rail and note block another observer another note block and then attach the three sticky pistons to the side of Those top three blocks like that now when I thump this no block it retract all of the blocks in sequence like so both sides kind of activate at the same time thanks to the symmetrical circuit we have going on here and finally that top block gets taken out as well Now all we need to do is add in the glass pane into the center here which I can do once the door is closed like so and now we can just seal the whole thing up with dark oak planks around the outside making sure the mechanism is concealed Here to make sure that we can activate the door from the other side we just need another note block there another observer facing upwards into that note block and another piece of redstone dust on the opposite side there and now the mechanism can be activated from both Sites and it should be simple enough to dress up the rest of this entrance so that the redstone components here are concealed and we don’t have to worry about seeing them from the outside one small thing is that when we open the door we do see two gaps up here which we Can always fill in with blocks like that because that’s not going to be pushed around by any of these components or interfere with the redstone signal to those components by this so that’s going to make sure the door looks completely sealed and flush with the woodwork Around it when we go through it and you’re not going to be able to see up into the mechanism there of course now this is in place and the Redstone mechanism is out of the way we can always add a couple more details and finishing touches to this to make the Doorway look like a bit more of an arch using slabs or stairs or something like that but overall I think this is quite a neat design it’s relatively compact not the most compact door design you’ve ever seen but still only one wide and pretty easy to build in survival should have a Relatively short equipment list so all we need to do now is head back to the survival guide’ world and make it for ourselves hey folks welcome back so here we are at the entrance to the trading hall and this right here is where we’re going to be placing our 3×3 door I think What I’m gonna do is make the surrounding out of stone bricks like I have for the rest of the trading hall but the central door here is gonna be made out of dark oak wood I think it’s a nice contrast and it’s there we go we Can take that one out there and this is the setup for the door we have two blocks over this top there just to make it look like that is completely flush with the outside when all of the blocks get retracted that’s going to be the center of our door and I think hopefully This should be nice and easy to build right here in survival so we’ll take out the rest of the nether rack on either side like so and we need to start digging into the ground right here we want the note block to be there and we Want another one on this side as well that’s gonna blend in quite well with the wood floor I think and I’ve got double the ingredients that I had in creative mode simply because I’m building this twice so I’m going to be building it on the opposite side over there On the opposite side of the tree as well let’s have a note block there no block there and the first of our blocks is going to go there but we’ll need to dig down here take a couple of blocks out and place the sticky piston down here Like so the dark oak plank is going to go on top of that we’ll take out these two blocks either side and we’ll have an observer facing that way and that way need to dig down underneath these so that we can place the observers facing upwards into these note blocks we’ve of Course got a block underneath the sticky piston there already so we’ll just need one redstone dust there and one on the opposite site place the observer underneath there place the redstone dust right there and that’s everything for this part of the door good to go if we Punch that yet there we go it slides up into place perfectly great stuff got to place that observer again because that was at a weird angle no worries so from here of course we need to have our powered rails going down into the floor we need the repeater over the top of it Set to two ticks like so and we’ll do the same on the opposite side here there we go that’s the next stage let’s give that a punch yep powered rail lights up perfectly that’s very good now each of the pillars either side here need to be made up of observers and note blocks Alternating like so we’ll need to peel her up a little bit to take care of this next one observer there no block there and then this can come over like so this is actually gonna fit perfectly in the door frame I have here which is very very good alternating those around the Outside until we get to the sticky piston facing downwards here with a block on top of that now let’s see if that works yep okay perfect and now we need to add the sticky pistons on the sides here here and here which are going to be retracting these three blocks of The door like so take care of that one there we go perfect okay that’s working great now we just need to build up the observer and note block tower on the opposite side sticky piston there there and there make sure the blocks of the door are in place And there it is perfect great stuff that’s gone really really well let’s grab a glass pane to put in the center around the outside we can just do a quick bit of decoration there we go that’s it’s not looking the best but we can work on that a little bit more now It has an entrance at least and I think that looks pretty darn good if you ask me yet we need to do the same on the opposite side here as well just kind of working a little bit of stone brick detail so that we can have this concealed from the Inside and that actually looks pretty good from the inside as well all the Redstone mechanism is concealed except for these two observers but that’s really not too much for a problem and there we go the whole thing it closes up on the inside here as well that’s filled That in fill that in probably a line across the top here as well it’s always best to test these things when they are open and close just to check that there’s no visible redstone components if you don’t want them you might be one of those people who likes to have the Redstone out there though so that other people can see exactly how your work is done but personally I love these designs where everything can be flush with the wall and it all seems a little bit like magic right I am really really happy with that I think that’s super great Let’s go ahead and build one on the opposite site and the last door is in place the iron golems have turned up to inspect it and I need to take care of that piece of gravel right there and let’s see if that works perfect okay great let’s throw in the glass pane There as well everything about this door seems to be working great and let’s go ahead and conceal it with the stone brick once again but this this door is actually something I’m really really proud of like I said I don’t do this stuff all that often I really don’t Build doors and at redstone contraptions from scratch all that much and while this is clearly something that is child’s play to some of the technical youtubers out there it is super fun for me to come up with something that I’m actually really really proud of this Time for the sake of pointing this out because it’s not always super clear whether I’m left clicking or right clicking on these note blocks if you left click on them it won’t actually do anything because because it is right clicking on these which Tunes the note block and changes its block state which Is what allows it to be detected by those observers so whenever I’m opening and closing this door I am right clicking on the note block and you may notice that the bass drum pitch kind of goes up slightly because it’s gonna produce a bass drum sound if it’s Resting on top of an observer block but it shouldn’t really affect things too much it’s actually not the worst noise in the world like it would be noticeably obvious if it was like rising in pitch on a piano or a banjo or a glockenspiel kind of sound effect but the fact that It’s a bass drum gives it that nice percussive sound and allows it to kind of fit in with the mechanism of the door a little bit better so I’m super happy with those I really like the fact that we’ve got a decent door for this now and I’m super happy we were able to get a piston door into the Survival Guide somewhere because as I said not all that used to building these things but hopefully there might be a few more design designs like this coming up in future thank you so much for watching This episode of the Minecraft Survival Guide my name is Ben Pixar ifs don’t forget to leave a like on this episode if you enjoyed it subscribe if you want to see more and I’ll see you guys soon take care bye for now You Video Information
This video, titled ‘Our First 3×3 Piston Door! ▫ The Minecraft Survival Guide (Tutorial Let’s Play) [Part 233]’, was uploaded by Pixlriffs on 2019-10-04 10:00:00. It has garnered 153077 views and 4888 likes. The duration of the video is 00:18:54 or 1134 seconds.
The Minecraft Survival Guide continues! This tutorial will show you how to create a simple 1-wide 3×3 piston door.
The series will teach you how to master Survival Mode, and will also be my Single Player Let’s Play series!
Catch up with the Minecraft Survival Guide using the playlist: https://www.youtube.com/playlist?list=PLgENJ0iY3XBiJ0jZ53HT8v9Qa3cch7YEV
World Seed (Java Edition): 7574084833700264939
—- Support me on Patreon for access to my private vanilla Minecraft server, plus other awesome rewards! https://www.patreon.com/Pixlriffs
Watch my streams live every Tuesday, Thursday, and Sunday around 3pm BST! http://twitch.tv/pixlriffs
Follow Pix on Twitter for video updates, screenshots, and other fun stuff! http://www.twitter.com/pixlriffs
#Minecraft #Survival #Tutorial #SurvivalGuide #PistonDoor