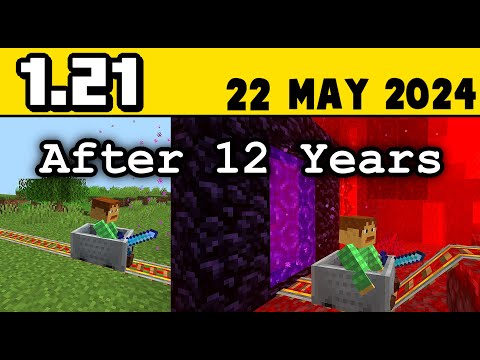
Welcome back guys we’re back in another tutorial this time we’re going to be going over tab x and how to use that to monetize your minecraft servers and i do believe that it was called by craft before however it is now called tabex obviously does cover different servers as well like arc Servers and stuff like that one thing i will add as well is that you will need lucky perms or you know some sort of permission plug-in like that if you do want to set up any sort of ranks or anything like that that you want to give On your web store perhaps you might want to sell a vip rank and if you’re not sure how to do that or you haven’t done it already we do have another very helpful video on the seeker host website or of course my channel which explains really easily how to set up lucky perms Uh give people their groups and give them different permissions however today we’re going to be going over tedx so for this you search tedx in your google it’s a server.tebx.io and it’s going to bring you up once you have of course signed in to create your web Store and there are different plans on tedx of course you can just go for the free plan if you do pay that’s usually you know once you start getting some income in you can pay for a larger plan which will give you more options but free plan is perfectly good to start off With so with that we’re going to hit create so like i’ve said earlier this is why it’s called tablex because it’s not only minecraft now it’s got plenty of other options however we are going to be going for minecraft and we’re going to be going for minecraft Java here where it prompts you for the name of your server you can just put the name of your server of your server of course i’m just going to put test server and here you can choose your currency i’m just going to use it um as us dollars because it’s just a Test and with that we’re going to hit continue on the next page it’s going to prompt you to download the actual plugin to run it um we’re using bucket on this server so i’m going to select the spigot bucket plug-in here of course if you are running multiple servers you can of course Choose bungee cord plug-in um forged for modded servers you can do bucket the pre uh 1.13 version and sponge plug-in so that we’re going to hit the button here it’s going to redirect us and we’re going to start downloading the file on the bottom left and we’re going to keep that file Once it’s done i’m just going to uh click three dots there showing folder and i’m just going to cut it from the downloads and go straight back if i close this go on to my desktop and i’m just going to paste it there just so i have it there Available of course if you do have a folder i would suggest making a plugins folder that you can just add that into second on the instruction here is of course place it in your plugin file if you do rent a server you’re going to do It for your ftp file access you can do it through filezilla again we do have a very handy video um if you want to see how to do that there and for this instance we are using our seeker host multi craft control panel here on our awesome server and what we’re going to Do is we’re going to come down to files we’re going to go to ftp file access we’re going to head on over to the plugins folder and we’re just gonna go to upload right once we’re brought onto here we’re gonna go choose our file So if we come on to our desktop um or it was on notes on the actual desktop itself and we can see there we got by craft x so we can double click that i’m going to hit submit and that is now going to load this onto Our server of course like i said before you can use filezilla to do this so that’s all done going to hit submit and that has now downloaded our plugin if we come back to test and then we’re going to hit restart to restart our server so whilst the server Is restarting what we’re going to do is we’re going to come over here for the third step and we’re going to copy the command because we’ve actually got to put this into our console so startup done now what we’re going to do is we’re just going to paste that into Our console there and press send and now as you can see this server is now registered with the server test server for the web store test server broadcraft x fetching all the players and of course there are found because we’ve not got any on the actual server Now i’ve come back to this page it says type by craft in-game if no errors are displayed you have successfully linked the web store to your server so with that we’re going to head in game so we’re back in game now and we’ve got to do forward slash Um by craft press enter and there we go it’s all set up and ready awesome so we’ve now got it set up like we just said it’s all ready to go and we’re going to continue here and now it’s going to take you to your sort of Setup page this is where you can actually create your store for people to come and buy the packages and you can also change the packages so they get certain items or certain ranks depending on what they buy first things first we want to obviously continue the Setup and just finish off all of this to get this 100 so we’re going to start with the logo if you do want to add one of course you can skip all these steps so when you click that it’s going to bring you through and you’ve got some More options here you can you know change your template um theme logo etc so if we go to theme here we’re just going to change different theme i mean to be honest you probably don’t really need to change it but if you would like to you can change it and here are the Different colors um so let’s do a preview of red see what red’s going to look like and that is what our store would look like with the red theme so i think i actually do like the red theme and we’re going to stick with that so i’m going to click activate there And we’re going to click activate again logo you can of course upload your own logo here just by clicking and then going through and finding the logo that you want um i do believe we have one here in pictures and i’ve just uploaded my little jdog Logo there so we’re gonna keep that on there and so on i won’t go too much into the editing of the actual web page itself because there is lots of things you can do however we are going to go mostly through the setup so now we’ve done that i’ve hit continue Set up and our next one up is to actually create a package so let’s hit the button here and let’s complete this item so once we press that button we’re going to be brought through to here which is our packages this is the name of it so i’m just going to Change this to packages and i’m just going to put as a description select your packages and of course you do have a lot more options here that you can go and check out visibility cumulative and advanced and check out all the options there check or uncheck them depending on what You want but on the most part i’m pretty happy with that i’m going to hit update now we’ve got our category name which is packages and we actually want to add a package here so we start off with the example package with zero dollars and we’re going to Change this to a vip package we’re just going to put a vip here or whatever package you actually want to name it and here you can put the description of the package i’m going to put cool flying rank because i’ve added the vip group on my server to be able to get Essentials fly so we’re going to change the price of this let’s say we change it to five dollars and you have got the option here of pay what you want and which allows customers to pay more than the specified price so eg if they actually want to pay ten Dollars towards this they can pay ten dollars so you can check that if you want and you can also upload a neat little image there which will come up next to the package i’m just gonna upload a little diamond thing there just to show that they’re gonna get A package and they’ve got a little image next to it so so far we have our package name we have it in the category of packages and we’ve got a description for it how much it is and an icon as well and this is where you can come configure it a Little bit more if we come down to general um you’ve got the options here only charge the customer once charge a reoccurring subscription or allow one-off charge and reoccurring subscription um allowing a one-off charge and a reoccurring subscriptions means they’ll pay the five dollars but they can also add a subscription as well Um or you can just change it so it’s a five dollar recurring subscription or of course just keep it as just five dollars per transaction you can configure whether you want it to be removed from the customer afterwards so let’s say you set it for a month Um a time so they get the rank but they only get it for a month you can configure this um so they do remove the package afterwards once i click on that button you’ll see that it’ll give you a time slot you can put it after a month Three months um you know and you can just change it like that you can change it for minutes hours days weeks months or years now if we head over to limits here um you’re going to be asked whether you do not impose a global limit on this Package so you can change this to one purchase every one month or change this accordingly to how much you want of course you might want to limit it or you do have a user limit here which if you click that you use the limit you can set to you know one purchase Every one month or you can of course just uh not do that and leave it unchecked and then it will not impose any limits so people can just buy as many packages as they want so required packages um this is something that they will require to be able to Purchase this so let’s say you can’t get the vip rank unless you’ve got the gold rank first this is how you’d set that up allowed payment gateways allow this package to be purchased via all payment gateways um you may as well just leave that open because it will only be the payment gateways That you’ve set up anyway like paypal or what have you so i’ll just leave that allow this package to be purchased via all payment gateways and finally on here you go do not allow the customer to increase the quantity of this package when purchasing um if you do check that that’s going to Be true if you don’t it’s going to be false visibility publish on web store from you can choose a time and date i’m just going to leave this on always show so it’s always going to be on the web store you can of course remove this package after a certain Amount of time so remove from web store after and then you can again choose time and date on here underneath you can choose um whether you want to show this package to customers who haven’t logged into the web store or you can actually not display the package off the web Store and disable it entirely if you do check this box here for gifting you can choose whether you want to be able to use gift cards to purchase the packages and just tick here and it’ll make it the same marked price as it is already um here you can check Whether you want to allow this package to be purchased using gift cards or why it says don’t do not allow this package to be purchased using gift cards so if you don’t want it to you would check it if you do want to allow gift cards you Just leave it alone and then underneath we’ve got do not allow this package to be gifted to other players um if you don’t want it to be gifted you’re going to tick that if you don’t then just leave it alone sits on no at the moment variables i’m not 100 sure about that Myself i’m assuming it’s going to be more complicated ways so you know you can’t get this package until this has been met um but we won’t go into that now and then finally goal lets your cust your customers work towards community wide reward by creating a goal So this is a pretty cool feature you might want to say that you know um if you hit 50 we’re gonna get this awesome new feature put into the server um and then people can actually in the community can all donate um and then try and reach the goal once The goal goal’s been hit then everybody or whoever you specified on here is actually going to get the rewards not going to go too much into this is quite similar to actually setting up the web store um and we’re here primarily to show you how to actually set up the web store and Get it connected however this is very neat and you can go through all of this again add images and then create it once it’s all done now that’s all the hard bit over you’ve made your package um you’ve set all the settings for it how you want it to run And now you can actually add the commands which will be um you know what will happen once they do actually purchase the package here we have some options so when the purchase is packaged we have when the per uh when the package is removed when the package is refunded when the Package is charge-backed uh when the subscription package renews so you can choose lots of different commands when this stuff’s going to happen so now we want to actually set up what we give them once they do purchase it um we do have the helpful help button Here which will give you a list of different things that you can actually put in there um if we scroll down a little bit here you can change it so you can see name will include the name um you know the ui uuid and stuff like that you can add uh What currency so you can actually put the message on the server saying you know player has you know got this package and it will come up on the actual server once they do um buy it so before we start typing out our command we’ve checked with the help button here what we’re Supposed to or what we want to add to it however we want to add the actual permission for this if you head over to the wiki for the lucky perms it will show you right here and the one that we’re going to use is the lp um sorry where is it now the Lp user parent set because we’re going to be setting their rank so if we head back over to here and we actually type that out so lp user and then we’re gonna do the funny brackets um and we’re gonna do name and parent then set and then we’re actually gonna Put the rank so we’re gonna put vip one thing that you do wanna make sure is that you actually spell it correctly as well as you can see here if i put lp um if i put group and then check it i’ve got default and i’ve got vip So i actually have to put vip in lowercase and that would have not done the right command so if i exit out of here and i’ll just change that to vip in lowercase that will now give the right command to actually set them to vip once they bought the package Of course you can add other commands here um once the package is purchased we’re just going to give a diamond as well so we’re going to do give the funny brackets name close the funny brackets and then we’re going to put diamond one so now once they have bought this and It’s executed they should get the vip rank and they’ll get one diamond as well once we’ve done all of that just gonna hit update so we’ve successfully created our package now one thing to note is that if you don’t have the upgraded version it won’t allow You to use the gift carding as well so you might just have to go back and switch that off depending uh what you have got going on your tab x here so now we actually want to test out that works and you can do that by coming over to payments Uh payments again and then create a manual payment here this will be making like an almost pretend payment and just to make sure they actually work so you won’t actually need to pay anything for this to start off with you’re just going to put your username so i’ve got jdog13131 And we’re going to do the price of five dollars i don’t need to make a note and here we go on packages and we’re going to select vip quantity of one and we’re going to create as you can see here we’ve got the amount completed as it would pop up if Somebody had just bought this package and we can head on over to view here and it’s basically gone through like a normal payment so you can actually go in game and check it now um it does take up to about 15 minutes anywhere between 10-15 minutes to actually go through once you’ve brought It to the server so we’ll load up minecraft now and just wait for that to show up so as you can see on here um from the by craft it’s fetched two commands for the player jw131 um one of them is to set the parent vip group Um and the other one is to dispatch the command one diamond so we’ve received our one diamond and we’ve now been put into the vip group and if we log in we can actually see that we have also purchased our diamonds of course you can add as many commands as you want there And you can also you know do it for items and stuff it could have been a sword or what have you double check i’ve headed over to my lucky perms editor and i’ve gone over to my name jdog and i can see here that i’ve got a group vip Added so we’ve now set up our store or at least we’ve set up one thing that you can sell on there so you can now sell the rank of vip and you’re going to receive a diamond as well when you do so you can do this anything from Items to you know effects any command you can type into that bar as long as it’s worded correctly and you can put that in as a package so with that let’s continue set up and actually get this finished we’re about 33 at the moment and the next one is to set Up a payment gateway so let’s go to this complete this item and of course here you do have many options and it is of course up to you what you choose um you can just go paypal standalone paypal express checkout i usually have paypal but we’ve also got the option Here now which is the tabex checkout except over 60 payment methods with no integration required the payment platform is designed for game servers so that’s super awesome and that’s actually new since i’ve last been on so anyway i’m not actually going to set the payment gateway because this is a test server And obviously you’ll have sensitive information but you know you can set that all up for yourself um and i usually would recommend paypal however this new tedx checkout does look really cool so adding a team member here this is uh to add a team member to help Manage your web store you can complete this item by clicking on here and from here you just uh get your you know the moderator admin or whoever it is you get their email and type that in here you add the permissions that you want to Them to use of course you can um have them viewing so let’s say if you want them to be able to view the billing you’ll tick there if you wanted them to actually create an edit you would tick there um or if you want them to be able to Delete or you can of course check multiple boxes here and then once you have done all of that you come down here and then hit create so with that all done we’re going to go and view our web store so click the button complete this item and we’re going to get brought through To our brand new web store here we’ve obviously got our logo that we set up earlier home packages and about if we go on to the packages here we can now see our vip package is right here we can view it so here we’ll bring you up to your package Uh my claw of course uh check the you decide how much you want to pay but if you’ve just set an amount on there it will be you know five dollars or however much it is you can click add to basket and then continue on by using your Actual in-game username and then paying for the rank once you do put in your username it will um ask you how much you want to pay because i’ve put five dollars is the price however they’re allowed to pay more if they want they can of course Pay more there however it does say that it’s got to be greater than five us dollars and then you continue so we’re going to hit continue it’s going to take us through to the actual checkout and that is exactly what or how your customers are going to see and be Able to pay for your services so here you can choose whether you actually want to set up a custom domain kind of of course change your sub domain here this is for free and i’m just going to put this to jdog test site so what do uh jdogtestsite.tebx.io I’m going to hit save there so now successfully updated your sub domain however we are just going to leave it with the subdomain for now so we’ve got jdogtestsite.tebx.io you can of course share this so people can actually use it however you can actually buy in games so if they do Forward slash by craft um they’re going to be prompted to work where the packages are and then they can choose what package they like from in-game you’ll then provide them a neat little link which they can just click on and then go through to actually buying the package And the last two options are just if you want to follow them on twitter to receive the latest updates freebies and other game server related news and the other ones just to join them on uh server on the discord server sorry that’s completely up to you so once you Do forward slash buy it’s going to bring you up with this menu here you’re going to hit packages you’ve got vip price five pound and you can tap that and it’ll give you a neat little link which take you straight through to the web store site awesome so that’s all Set up now and you’re going to want to actually change up your web store and of course i’m not going to go too in detail about this because this could take ages and it probably already is a super long video and you can you know if you come down to pages you Can check out what pages you have you got design here so you can change anything from your appearance your preferences your home page sidebar you know even the payment complete page what they see once they actually do uh complete the payment and your terms and conditions as well so you can always uh If i click on there you can add your own terms and conditions to your packages other options here is a player look up and you can check band players white listed players and lots of other stuff of course if you do want to upgrade you really like the service And then you know you’re getting more and more players in um i would of course go for the upgrade here and then you know you can upgrade to a larger package first when you start is free but it is limited with the choices that you get Of course after that you know you can go 12 pound 49 a month and then you get a load more choices so on and so on and with the enterprise plan right at the end which is a 49.99 however um you know you’ve got everything from chargeback Prevention you can use gift cards on it uh web source statistics etc you know vpn blockers and all that sort of stuff if you go into engagements here you can check you know your sales gift cards community goals uh player referrals super cool feature here is the statistics you can actually Check out your sales how many players or packages or what the top players or packages are so with that i think we’ve gone through most of the main points on here so you will now be able to um add the plugin to your server set up your packages Actually link the commands so it does the right command for the right package once the player has actually purchased the package and then you can go and change the appearance of your web store and you’re all good to go now so i hope you found that helpful for your Minecraft servers and you can get yourselves monetized and earning some money for your hard work with that thanks for watching and we’ll see you next time bye you Video Information
This video, titled ‘How to Monetize your Minecraft Server using Tebex Buycraft | SeekaHost Minecraft Server Tutorial’, was uploaded by SeekaHost on 2021-02-03 10:50:29. It has garnered 1508 views and 19 likes. The duration of the video is 00:19:40 or 1180 seconds.
In this Minecraft server tutorial, you see how to Monetize your Minecraft Server using Tebex Buycraft.
Covered below questions: how to use tebex how to use tebex with minecraft how to connect tebex with my minercaft buycraft, how to use buycraft how to monetize my server how to make money from my server how to make money from minecraft how to use the tebex plugin how to set up a minecraft webstore how to set up a server shop how to make money from my server
#seekahost #minecraft #javaturorial