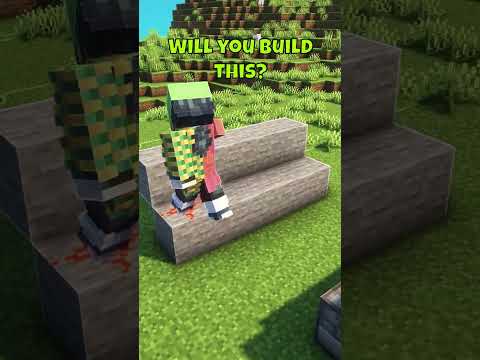
Hello wonderful people it’s wild here today I’m going to be showing you how to build this ice Spike wizard Tower this stunning build is super spacious and feels right at home within a wintry biome like this one this showstopper of a build with its towering spires would make for an epic base or as a showcase piece for your world so follow along for a tutorial a check Out below for well downloads for this and all my other builds the materials you’ll need for this build are on your screen now keep in mind that these are the materials you’ll need for the finished build I always recommend for a large build like this one that you have A few extra of each supply on hand that’ll really help you building here is the outline for today’s build you can see we’ve got quite a complex shape here so let’s break it down marked in there with the lighter color concrete is our main tower and it Is basically a circle then in the darker color concrete pwder we have the extra details in the smaller Tower marked in I recommend starting in one corner of this outline and placing in a guideline like this one to help you build if we come down to ground level here you can see That the center of the side of the largest tower is two blocks away from the center of the side of this smallest tower we’re going to start this build by working on the base of this tower now we’re going to be having some ice veins kind of coming up from where we have These spikes marked around but I’m going to build it all out of the stone brick first and then I can go back in and add in those once we’ve got the shape I’m also going to mix in a little bit of cracked stone brick and stone as we go Here but you can always come back in and randomize your texture afterwards so I’m going to start by creating a shape like this one for the front and I’m leaving out a two Gap hole for the door I’m going to create the same shape on the Other three sides but I’m going to fill in that Gap where the door Is and I’m aiming to use mostly stone brick here with just a bit of the other two materials mixed in so you can see we go one then two and then One and over here for the last part of this design there we go okay next I’m going to come back around to the front and you can see we’ve got these two wide sections marked out on either side we’re going to create the same design from Each working our way up to the center so the first layer is going to be two like this then we’ll go up two high for the next layer like that we’ll go up to high for the layer on top of here like this and then we’ve got to connect up to The other side so let’s add the same design over here so one and we’ve got our layer of two next two got another layer of two coming in here two now we can connect this up in the center like that and we’re going to add three across And then one in the center so 1 2 3 and one to finish off that layer so it looks like that I’m going to create the same shape on the other sides now and they’ll end up tuching in the corner like That So here’s what we have so far we have these three sides and we need to fill in the corners so I’m going to come in and build up three High here in each corner and we’ll continue filling in the walls from That okay from here we’re going to come to either side and I recommend grabbing out a temporary block wool works great for this but you could use dirt too and I’m going to just build up three high from either diagonal side so 1 2 3 like This and then over here we’re going to do the same thing 1 2 3 so let’s go around and do that it really helps when building complicated shapes like these in the tower to break them into simple parts so we’ve created each face and now we need to fill in the Gaps and onto the final Gap and then we can work up from here okay now we need to fill in the gaps in between here so we’re going to build up three high again one 2 3 and then two in 1 2 1 2 3 1 1 two and then we need to fill in the Gap in between just with a block like That We just need to fill in these Corners now so I’m going to grab a temporary block and then build up three High 1 2 3 and I’ll come one to either side of that let’s do that in each of these Corners 1 2 3 And the last corner and then we’re just going to fill in these three blocks along Here so we’re going to end up with a smaller circle at the top we’re going to be fading towards some snow for the rest of the Tower and I’m just going to go on with the snow and we can add that transition in afterwards I’m going to Start by adding snow blocks on top of this outline leaving out these Corners like that then I’m going to place one on each side and then I’ll have two coming off of these two blocks to fill in the rest of the circle So you’ll end up with a snow Circle that looks like that for the next layer we’re going to take snow blocks and go all the way across here so that’s five Blocks in the center of each face I’m going to build up five Hive with light blue stained glass panes 1 2 3 4 5 I’ll then take snow blocks and build up on either side of the window and then to fill in these Corners we’re going to use a temporary block and just place in snow here So here’s what we’ve got we’re next going to start flaring out the walls of this Tower so I’m going to come on top of these windows and build across Five Then to on top of this I’m going to place a temporary block in the center of each wall with a snow block on that can remove those now and I’m going to have two blocks coming to either side of that so we’re expanding out the circle here you can see it gradually getting Bigger on top of this we’re going to have three blocks on each of these one Blocks just like that and then we’re going to have a little corner space like this then we’re going to extend this to one block either side so we’ve got a total of Five and of course we need to fill in each of these corners and we’re going to create the exact same layer for the next Layer like that but the final layer here we’re going to use a couple temporary blocks and I’ll be placing three along each side I can remove those now and I’m going to have two more blocks coming out from here just to connect up the rest of the Circle so here’s the circle we should finish with and if we take a step back you can see the nice shape we’ve created now we need to blend this transition between the two blocks so what I’m going to do is I’m going to come down here and add in a few snow blocks And move some of the stone brick up so let’s see let’s put some in here we’ll come around this side and add in a few more it’s up to you how many you add in you just want to look for a texture you’re happy with and don’t forget you can always Take a step back check you like the look and then come back in and change things if you would like let’s add one more of those here I think and we’ll maybe have that one come down a bit lower let’s go around the whole build I’m thinking this is looking Nice and yes I’m happy with that while we’re working on this texturizing we’re going to go in with some packed ice and blue ice and create some Icy Veins going up the side of the tower here so let’s start I might actually start over over On this side and I’m going to have this one coming up that way I’m going to start by going in with just the packed ice and then I’ll mix in a little bit of the blue ice once I’ve got the shape laid out and the great thing about this is Every Tower is going to be unique here so you can work out a texture of an ice vein that you like I think that’s a pretty nice shape and it doesn’t have to be exactly the same as mine so there’s the first one let’s come Around here I’d like to have one on the back let’s have this one going off to this Side and I’m kind of zigzagging back and forth a little bit here there’s the next one let’s actually have this come one more over we’ll go with our blue eyes next there’s that one let’s add a couple more I think I’ll come come around to the front and we’re going to have one Coming across this Way see if we like the shape of that I do but I’m just going to add a couple more blocks in maybe like this and I might have this one come across here and let’s have this come up a little bit higher I think that looks good let’s go in with our blue Ice and for the last one let’s have it come across this way I think I’ll start I think I’ll start on this side for this One the important thing here is just to keep the shape of the tower the same so you can see I’m only replacing blocks I’m not adding anything in here Okay let’s have a look I think that’s good let’s add in some blue ice again this just breaks up the texture and makes it look a little bit more magical and with those all in I’m going to do a similar sort of texture at the Top but these are going to be a little bit shorter so once again I’ll go in with my packed ice first and one can kind of finish off here I think let’s have one over this Side and then we’ll add in our blue ice as Well all right let’s take a step back and have a look at the tower now for the next step we’re going to add a platform on top of here but first I’m going to come down to the base and add in a couple torches that way I don’t Have mob spawning I’m also going to be adding in the rest of my floors and my ladder afterwards but you can add that in now if you’d like so I’m just going to start by coming on top of all of these blocks with some Stone and then I’m going to be placing Blocks all the way around the outline of here so it should just stick out one block all the way Around of course I also need to fill in the floor in Here and then we’re going to take some Stone stairs and these are being placed upside down all the way around this Outline so you can see I’m just following along the shape here and I’ll show you how the finish Circle shall look after we’ve done This if you’re enjoying today’s video I’d really appreciate it if you consider liking and subscribing and if you’d like to access some benefits like world downloads for all of my builds as well as access to a multi- patreon server where I design all of my builds as well Check out my patreon I’d love to have you join the community all right there we go we’re all the way around now from below it looks like this and then let’s head up to the top and our Circle should look like this from above for the next set of walls I’m Going to start by finding the center of here so I’m going to line myself up with the center of each side and here and I’ll just place in a block to remind me where that is and then going to count three blocks out 1 2 3 and on the fourth Block I’m going to Mark in a gap here for my door so this should be on the front of the build to either side of this I’m going to build up too high with some snow and then I’ll build two high across all of here with some Snow then I’m going to Mark in my window so I’m going to be placing in a frame of packed ice two blocks on either side and my white stained glass panes in the center and now that I’ve got my blocks to render in we can see what we’ve got Here so we’ve got two packed dice two glass two packed dice on top of here I’m also going to add one more pack Dice and I’ll fill in the rest of this wall with snow so it should look like this next we’re going to add in a corner Window so we’re going to add a blue ice at the bottom and we’ve got white stained glass blocks coming up to one below the top of this wall and I’m adding a packed ice at the top and I’ll do this off to the other side as Well 1 2 3 4 five high and then I’ll pack to ice we have a few more walls to add in now so for this next wall I’m going to place in two snow blocks leave a gap and then add in two more I’ll place in a blue ice and then build up Three high on either side then we’re going to have two pack Dice and I’ll fill in this Gap with some white stained glass panes I’ll top it off with a packed ice and fill in the rest of this wall with snow so it’s going to end up looking Like this and this is the same window design we’re going to create on the other two sides filling in the corners with our corner window like we have before And on to the very last Wo And there we go our walls for this story of the Builder complete now that we’ve got a good base for this large Tower let’s move down and work on this smaller Tower we’re going to start by using some packed ice and I’ll be mixing in some of The blue ice once we’ve got our shape so I’m going to start here building up our platform like this I’m going for quite a natural shape here so if yours doesn’t end up looking the exact same as mine that’s totally fine we’re just trying to work our way Up so let’s add in another four blocks here 1 2 3 4 and a block coming along this way like that okay let’s come across here we’re going to go two up three here and then let’s have three coming back this way 1 2 3 and then Another three here 1 2 3 so our first chunk is looking like that I’ve come a bit further around towards the back of the build and we’re going to start filling in here okay let’s see I’m going to start by coming up three high on this Block and then I’m going to come to the side and come up four high like this all right I’m going to come two up behind here so it’s level with the top there then from here I’m going to add two blocks and then two blocks to there okay for the next section I’m Going to create a little L shape and let’s see I’m going to place in two blocks coming around like this and two blocks coming up like this so we have two more of these sort of L shapes I’ll build up two high in these two spots and Then add two more on top of here and one coming towards the back so our next chunk looks like that all right let’s rotate round a bit further let’s come to these three blocks here I’ll Place one 3 2 so we have this sort of shape Then I’m going to come to here and build up three High 1 2 3 and I’ll place just one in here going to add two coming over to this side and another two coming up and let’s go around to this side I’m going to add three here 1 2 3 and let’s See here I’m going to come up let’s add in four blocks 1 2 3 4 like this going to add two more coming up towards the back like that and I’m going to use a temporary block to place in one diagonally here sitting like this and I Think I might also place in one coming back from here to fill in that Gap let’s go all the way around to the front now to fill in this last section I think I’m going to add one block here then we’ll come up two high and two high Again coming in I’ll place two more here and let’s bring that block one more back here now towards this side let’s add in one and I’m going to use a temporary block to have two coming towards this direction to fill in that Gap I’m going To build up four high here 1 2 3 4 and I can have these two blocks fill in that side and two blocks fill in here all right where are we at let’s add a couple more let’s add one more in here and I think that we’ve got a pretty good Foundation while we’re at it let’s add in a few ice spikes around the base so we’re going to have this come along like this going to add an extra block here and let’s have have this come up so it sticks two blocks up and we’re going to Add in one on this side as well I think that’s a pretty good height finally we’ve got one more ice Spike on the back filling in these three blocks of our outline we’re going to have this three High here five high and two high now that we’ve got all of those in let’s Add in a little bit of blue ice I finished adding in that blue ice texture and we’re going to go in with the stone brick layer now I’m going to build up three High here with stone brick starting on this block and I want to build all of it up to that same level Mixing in a little little bit of my cracked and stone as I Go so you’ll see here it dips down a little bit so I’m going to add in an extra block so in this section it’s going to look like a four high Wool now you might prefer to do it this way like I am placing in all the stone and then going in and adding in your texture it’s up to you how you do This all right coming around Here and adding in my Texture okay I’m pretty happy with that and now we can see the shape we’re aiming for so if your B here made out of ice looks a bit different to mine that’s totally okay but you need to aim for a shape like this so we have four sides All three long and you can see that it is level with this layer of the build here so that is one block below the point of this ice now that we’ve got that in place we’re going to switch to snow so for this snow layer I’m going to come in With one layer of snow blocks first then I’m going to Mark in my door it’s too high and centered on this wall and I’m going to add in another layer then on these three sides I’m going to build up five high with blue Stained glass panes 1 2 3 4 5 so now you can see that we’ve got our window marked in let’s do it on the other two walls 1 2 3 4 5 and the last one 1 2 3 4 five I’m also going to take two snow Blocks placing them on top of the door and then add in a two high window above that now I can go ahead with my snow blocks and just fill into the height of these Windows I can also go ahead and blend this transition by bringing a few snow blocks down and a few of the stone brick Up to finish off the base walls for this Tower we’re just going to add in some more snow at top these windows okay let’s take a step back and have a look at how we’re getting there with our Towers we need to add in some details now as well well as our spiring Roofs the first step to decorating is going to be adding the window decorations to these windows and those windows we’re going to start by placing a quartz pillar at the bottom then a chisel quartz block at the top then we’ve got some smooth quart stairs two On either side of here two on either side of here and then two facing downwards so we’ve got an archway and then a base we’re going to add in four diorite walls Follow by some end rods next so our window decoration is going to look like this and I’m going to Repeat that on all of the windows at this Layer now that all of the windows on this layer are decorated we’re going to create a bridge between the two turrets and add in this window decoration we’re going to start with some smooth quartz slabs coming across like this and I’ve got a quartz pillar at the top with a Button then we have some stairs and I’m going to add in a couple of walls as well as two end rods so there’s that window decoration moving on to the doorway and Bridge for the bridge I’m going to start by placing in three smooth quartz slabs like this then we’re Going to have two coming out you can use a temporary block to come in and place two below that then we’re going to add in another layer this time we’re going down one and then we have a layer of three coming across like this so that’s how our bridge should be Shaped next we’re going to go in with the door decorations so we’re going to be placing diorite walls on either side of here like this with an End Rod on top of that while I’m down here I’m going to break these two blocks this is where this door’s going and I’m going to Replace it with a warped door and I’ll put a warped door in up here then we’re going to create a quartz Archway so we’ve got our two stairs and a slab just like that and we’re going to create some railing connecting this up so we’re using some light blue stained Glass panes placing two in either side of here then I’m going to place one on top of that and come along this way I’m going to place in two more I’ll add in two more at the top and there we go our railing is in I’m going to create this same doorway Decoration down here so I’m going to add in my walked door then we’ve got our di walls and end rods and we’ll create an archway now that that’s all done let’s move up to this next part of the build let’s start on these Corner windows for This I’m going to be using some stairs placing two like that then two at the top then we’ve got some direct walls at the top and the bottom and I’ll connect these up with some light blue stained glass panes so we’ve got this decoration to repeat on the other Sides And the last one in the corner there we go now onto these side windows I’m going to start by placing a blue ice at the bottom with two stairs on either side then at the top we’re going to be placing in eight chiseled quartz blocks with some stairs on other The side of that and some stairs coming down then we’ve got a few diorite walls I’ll connect these up with some light blue stained glass panes and then we’re going to go in with some end rods so I’m stacking two on top of each other here then two coming down and I’ll Place One more in the center that way we end up with these two bars in the stack of end rods being evenly spaced so again we’ll come around this side and we’ll create the same thing on this side as well as the Back you’ll notice that if I st stack these end rods straight on top of each other we’re going to have those spaces spaced out differently so we’ve got a place two at the top and at the bottom and then the center one in last I’m also going to be Adding a stone button to each of these chiseled quartz blocks and now we need to add some decoration to the door and window here for this we’re going to create the same design we have going on down here except I’m going to place my chisel block at The top and we’ve got our stairs going in and we need to create a base for this window and some end rods all right down here to the door creating our small Archway and I’m going to use a warped door I’m also going to add a stone Button onto here to tie in with the decoration on those other windows next we’re going to add in some railing I’ve got some quartz here and we’re going to make our railing out of that I’m starting by placing a chisel quartz Block in each of these kind of Corners So it’s where we have two on either side then I’m going to place a temporary block in front of each of the blue eyes and in front of the door and from that I can place in a quartz pillar then I’m going to go in with a Few more temporary blocks on either side of the chiseled that way I can place some upside down smooth stairs and I’m also going to have these coming out from these quartz pillars to connect up this railing we’re going to place in two slabs making sure we’re following the outline of the stone below And I can go ahead and remove these temporary Blocks next we’re going to bring in some end rods and diate walls I’ll be placing the diate walls on top of each of the different quartz blocks so that’s on the pillars and the Chisel blocks on top of that I’m going to add an end Rod and I’ll add end rods all the way around the rest of the balcony as Well so let’s take a look at that to tie in some more of this stone brick from the base and to add a little bit more detail up top here we’re going to add some nice swooshy curves so I’m going to start by placing placing a Stone brick upside down in the center of this five wide section so that’s below that quartz pillar then we’re going to have one coming towards the back like this I’ll place a chisl stone brick below that and a couple more Stairs so it looks like this I’m going to place another stair this way and an up so down stair here so this is the shape we’re going to end up with and I’m going to place these in these three locations as well so one on each side of the build So let’s add those all of those are in place now so I’m going to go in with some stone brick walls and I’ll Place one in each of these kind of corner joints like that we’re going to start working on the roof now so I’ve come up To the top of the build here I’m going to start by placing in three stone at top each of these windows then I’m going to come to either side of these with two packed Ice now to fill in this Gap I’m going to be placing Stone behind here and then a packed ice in the center I’ll be placing three packed ice in front So what we’re going to do from here is make the base of our turret because we’re going to be using some ice and if we don’t have something behind the ice it’s seethrough whereas if we have something behind it you can see a slight difference in the Color okay let’s work with packed ice first so we’re going to come all the way around this border like this so we’ve got three then two then two then three just following the interior of this Circle so there is our first layer up then we’re going to be needing a lot of temporary blocks here so make sure you have those on hand I’m going to be placing a little Tetris block shape like this or kind of like an upside down tea and that’s going on each Side now I need to fill in these Corners so I’m going to start by placing in a little corner shape like this and that’ll fill in that layer’s corner then I’m going to go up two on either Side just like that and then I’m going to go over the top and add one in the center so it should look like this here’s where we’re going to really start building up the height of this turret so I’m going to come to the very corner and that’s Here and build up five high 1 2 3 4 5 now we need to fill in the faces so we’re going to build up to the same height all the way around and I’ll add two on top of These so it’s looking like this then we’re going to fill in this Center Gap finishing one above these blocks Now we’re going to start transitioning into some blue ice first we’re going to fill in the corners with some blue ice building up three High then we’ll fill in these gaps and add two in each face finally to finish off this T I’m going to build up a total of four high 1 2 3 4 Okay so we’ve got the top of the turret and the base for the lower half So let’s add in those blocks we’re going to start with some ice and we’re going to place a layer going all the way around the bottom just placing them directly onto the outline blocks I’m going to do the same thing for another two layers Here then I’m going to take some more ice and I’m going to place one on top of this ice just in the center like that I’m going to switch back to my pack ice now and I’m just going to follow the triangle outline behind Here so it should look like this then we need to blend these two sections so we’re going to build up two high in each corner with packed Ice and then we’re going to create a point above here so we’re going to build up three on either side like that then another three and another three in the center so each face is going to look like this All right now that we’ve got our shape blocked out and we’ve got most of the colors blocked out so we’ve got our ice at the bottom then our packed ice and our blue ice I just want to make the transition between these a little bit smoother by randomizing a few of the Blocks so I’m going to bring some of the ice up some of the packed ice down just to add a bit of a fade and at the top of brings for the blue ice down and some of the packed ice up so let’s work on That all right I think that’s good for the ice so let’s move on to the blue ice at the top All right let’s take a step back I think that looks pretty good next let’s move down and work on this smaller roof so I’ve going to start with the packed ice building five across like this and I’m going to fill in these Corners just like that I’m going to Create a little point on each face and I’m starting right in with the pack ice and we’re fading straight to the blue here this is a smaller roof so we’re not going to be using the ice here I’m also going to fill in these corners while I’m at It and then we’re going to fill up two on either side of here so I’ll place in a temporary block and then build up two High just like that I’m going to be adding two blocks to fill in this Gap next this is where we’re going to switch over to our blue ice to finish off this roof so I’ll grab that out and my purple place holder blocks and I’m going to Place a place holder block on each side and build up two high with my blue Ice then we’re going to join these up and build two high on top of each so it’s looking like this then to finish off the top we’re going to add in three more blue eyes 1 2 3 and like on the other roof we’re going to tie this In just by randomizing the texture here a little Bit And there we have the second roof we have a few more details to add to both of these roofs but for before we do that let’s come down to the base and add in some more ice spikes as we have all of our ice plays out I’m going to start Creating these out of packed ice and then go in with some blue ice and the way you create these is entirely up to you each one can be unique all right I like that one let’s add in a few bits of blue ice here and there and there’s our first ice bike Let’s add one over there on this Side and our blue ice now you might choose to have a few extra ice bikes than I have it is entirely up to you how many you have of these too you can make it look extra Frozen if you’d Like we have two more to add I like to make sure that I have them all different heights so this one’s a bit taller that that one’s a little bit smaller let’s have this one as let me think how about this one’s particularly Tall and in that case let’s make this one a bit smaller Oh and in fact we have one more to go over Here there we go all of our ice spikes are in now back to adding details I’m going to grab a few Stone buttons and we’re coming back up to this layer I’m just going to add them onto the snow blocks while I’m under here I’m going to place Iron trap doors onto every ice block so this is just going around the outline of the roof and then going to take some smooth quartz slabs and we’re adding an edge to the roof just alternate going up and down like this all the way Around I’m then going to place a DI wall on either one of these either side of the center and then I’m going to place an End Rod on everything Else I like the way the end rods with the diorite kind of play into that ice Spike feel so let’s step back and have a look at that it really does look great and we’re going to create a similar design down Here on this roof we’re going to start with it lower down in the center then we’ll go up down up down all the way Around there we are I’m going to be placing a DI wall on each of these Corners and then like before we’re going in with some end Rods I’m also going to take some stone brick walls and place one in each of the corners below and then to both roofs I’m going to add a diorite wall with an endrod on the very Top and here we go our finished Ice Wizard Tower so I’ve put it into an icy landscape and since this build is inspired by the ice bikes I had to go with an ice bike biome although this would look great in any cold biome you want to make sure you’re in a cool Climate because we do have ice in the roof if not you might have some melting ice if you’re going to be building this outside of an icy biome like this one I recommend that you switch this ice out for some of the packed ice so it doesn’t Melt as for the rest of my Landscaping I’ve kept it fairly simple this is such a grand build that it really doesn’t need a lot of decorating around it so I’ve created some little snow drifts on either side here as well as on the terrain and I’ve planted some trees just To frame it and separate the ice spikes in the build from the ice spikes in the biome surrounding to tie in with the magical look of this build I’ve also gone with these Soul lanterns to light up my pathway and those are the lighting I Have used within my build as well I hope you enjoyed today’s tutorial if you did please give it a like And subscribe it really helps me out and join my Discord to share some pictures on your build I’ll see you in another Video Video Information
This video, titled ‘Minecraft Wizard Ice Tower | Fantasy Ice Tower Build Tutorial’, was uploaded by Jax and Wild on 2023-12-03 16:00:31. It has garnered 253 views and 34 likes. The duration of the video is 00:51:38 or 3098 seconds.
How to build a stunning Wizard Fantasy Ice Tower This Minecraft build tutorial takes you step by step through building this wizard tower with lots of space to create a eye catching base It looks incredible in an icy biome You can follow along with my step by step build tutorial or customise the build as you want
❤️Play on our Patreon Multi World Server Check out our Patreon : https://www.patreon.com/jjaaxxthelegend Get tutorial world downloads or play on The IceCave patron server, a multi world whitelisted server
🔔 Hit that subscribe button to be notified of our latest videos
💻 Join The Ice Cave Discord and chat with other fans: https://discord.gg/D2QcemP
Follow: Wild_One Twitter: @ima_wild_one Jjaaxx Twitter: https://twitter.com/jjaaxxthelegend/ Instagram: https://www.instagram.com/jjaaxxthelegend_ Patreon: https://www.patreon.com/jjaaxxthelegend
A minecraft build tutorial video from #jjaaxxthelegend