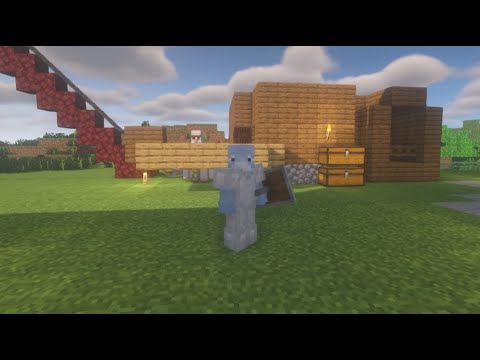
Replay mod may be difficult or tricky to use at first but with this guide you’re going to be able to understand the basics to using replay mod and making good cinematic shots so assuming that your Minecraft is already working and you’ve already got what you’re playing mod installed this is where we’re going From so you should be able to go into your mods folder and see that you have where is it replay mod installed but pretty much used to be able to see that right now you have the replay mod we’ll save the replay file that this should Appear in the top right hand corner this shows you the files that have been saved so if you accidentally have a file that you don’t want you can delete it but however once you click this x button you will not be able to find the file again You have to make sure that the record button in the top right hand corner is on this is how you can tell that your replay mod is working so click the x button that’s how you know it works the same for multiplayer servers as long as you click that it’ll start recording Replay mod so as you saw before there is a big red button the recording sign in your left hand corner that shows you that replay mod is in fact recording you can see that’s running right now and you can see that it’ll be recording everything within a view distance of my Minecraft world you can see everything up until what I can see at this current time and I’m just going to be showing you the basics of it how you can use it to get some good cinematic shots and just other General things that might be useful to know about replay mod and I’m Gonna go ahead and set up a little scene of myself walking through this area alright so now that I’ve recorded my entire replay mod you didn’t get to see it all but click the done button once you’re done you can rename it as well I’m going to rename this to replay mod Test now that you’ve gone ahead and you’ve saved your file whatever name you want to be go ahead and go to your replay viewer for now we’re just going to use the replay mod test replay mod has you can see at the top it has two bars first one is your timeline Button and the second one is the timeline for your camera path but on the second little time line area you can see that it’s got a little bar right now we’re just going to be sticking to little short clips but if you’re gonna be using longer things that might be Helpful zoom in or zoom out so every night now we’re just going to keep it pretty basic you have a rendered camera path which we’ll talk about in a second and you have your keyframes which you’re going to need so position keyframe is going to be for your camera which Direction and where it’s going to be positioned then the time keyframe is at what time in the actual actual timeline where it’ll be recorded there is a small button in the bottom left-hand Corner this will show you all of the tools and things that you can use like keyframe Presets and quick mode and all that such but we’re not going to be using that for this video we’re just going to be going over the basic things that you can do in replay mod so with this open you can go ahead and take you know thumbnail add Event markers and stuff like that event markers will appear up here which you can see and they’ll just show you like qualities let’s say if you found something interesting at this point I decided to go ahead and run around the village and that’s just going to be my Simple replay shot we’re just going to go ahead and go 28 seconds right here let’s play again and then this is about where I’m gonna start so I’m going to find a good camera angle so I’d say around here looks good or maybe this is Nice all right so you want to find a good camera angle now another thing is your field of view this is important as because this is sort of a film-ish style you’re going to want to have your fov turned down I usually have mine turned Down to either 40 or 30 depending on the scene and when you’re ready to add a keyframe go ahead and add both keyframes right here which will be for the time and also for the position of the camera go ahead and let it unpause and let it Play out then I’m going to add another keyframe right here to be able to render a camera path you have to have at least two key frames of each so I’m going to go ahead and go back to the beginning and play camera path now I personally Don’t like where it ends so I’m gonna let it play out just a little bit longer so you can see I’m walking around going through the village so now I’m gonna go ahead and move just a little bit to this direction you can mess around with this And this is just the most basic way of using replay mod obviously you could probably make a lot better shots if you put more time into it now let’s say you have your you have your render player overview if you see by pressing B on your keyboard you can open up the player Overview or if you go down to this right here you can see that the player overview is right here so once you click on it you’ll see It’ll show all the visible players you can go you can spectate the player by clicking here as seen or you can go ahead and toggle Them to be visible or invisible now that I have my keyframes positioned and I have all that set up you’re going to go ahead and press the render path only press this once you’ve actually gone through your camera path to see that it looks good in the way replay mod works Is that it renders a path and it renders it based off of your current settings so if your fov is set to 40 as it currently is it will set it to 40 when it’s rendering the path any resource packs you might have downloaded will also be Put on so for this we’re going to go ahead and put on some shaders so that it actually looks a little bit nicer so now that we have our shaders in you can see it looks pretty good I’m not going to look at my player because it is a little Bit buggy for me but um yeah so as you can see oh you can go ahead and see all of this okay so it looks good to me I’m going to click the render camera path now note on this part if you do not have if this little render button is in Gray And you can’t click on it I suggest you watch a video on the FFM Peg which allows you to just see the this area and allows you to be able to render past now you might see this and be a little bit overwhelmed by the amount of things you Can see you don’t really need to change anything unless you want to change the MP4 or coding stuff if you know how to do that but for now I just keep all the settings the same so once you’ve done this click on the render and this will be your rendering screen So you can show a preview it does lag a little bit more but just for the video we’re gonna go ahead and have it on usually I would turn it on just for a second to make sure that it looks the way you want it to All right so my render is done you can see you heard that little sound and it shows you and then it’ll show you this little folder here you open your video folder or upload it directly to YouTube it’s not even close it out so now that You’ve closed it out and you’ve got your camera path rendered that’s pretty much it you can go ahead and reset your frame or reset all your keyframes by clicking clear all keyframes do be noted only clear all of your keyframes if you’re done with your replay shot and only Clear your keyframes if you’re going to move on to a different shot in the same recording all right that’s pretty much it replay modern nutshell it’s not too difficult to understand and once you really get going it becomes a lot of fun to start making your own replay shots And making your own cinematic moments if you enjoyed this uh baby subscribe please I might enjoy it anyways see you later Video Information
This video, titled ‘A Tutorial To Replay Mod!’, was uploaded by LootFoxy on 2024-01-06 00:21:03. It has garnered 121 views and 6 likes. The duration of the video is 00:06:47 or 407 seconds.
Discord (for when I stream and upload): https://discord.gg/nZPTHVjxFQ
#minecraft #replaymod #smp